Epson Panamorph Anamorphic Lens Kit User manual
- Category
- Projector accessories
- Type
- User manual
This manual is also suitable for
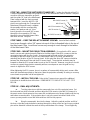
Epson Panamorph Anamorphic Lens Kit: This kit is a customized version of the Panamorph AKPro attachment kit specifically intended for use with the Epson PowerLite Pro Cinema 7500UB projector. It allows you to project a wider image onto your screen, giving you a more immersive cinematic experience. The kit includes an attachment plate, a motorized transport, and a lens. The attachment plate is designed so that the projector and lens system form an average center of mass (gravity) approximately located at the center of the ceiling mount pipe. The motorized transport allows you to adjust the position and tilt of the lens so that the projector beam is passing through the center of the lens and any residual pincushion distortion is about the same at the top and bottom of the image. The lens is a high-quality anamorphic lens that will give you a sharp, clear image.
Epson Panamorph Anamorphic Lens Kit: This kit is a customized version of the Panamorph AKPro attachment kit specifically intended for use with the Epson PowerLite Pro Cinema 7500UB projector. It allows you to project a wider image onto your screen, giving you a more immersive cinematic experience. The kit includes an attachment plate, a motorized transport, and a lens. The attachment plate is designed so that the projector and lens system form an average center of mass (gravity) approximately located at the center of the ceiling mount pipe. The motorized transport allows you to adjust the position and tilt of the lens so that the projector beam is passing through the center of the lens and any residual pincushion distortion is about the same at the top and bottom of the image. The lens is a high-quality anamorphic lens that will give you a sharp, clear image.


-
 1
1
-
 2
2
-
 3
3
-
 4
4
-
 5
5


Epson Panamorph Anamorphic Lens Kit User manual
- Category
- Projector accessories
- Type
- User manual
- This manual is also suitable for
Epson Panamorph Anamorphic Lens Kit: This kit is a customized version of the Panamorph AKPro attachment kit specifically intended for use with the Epson PowerLite Pro Cinema 7500UB projector. It allows you to project a wider image onto your screen, giving you a more immersive cinematic experience. The kit includes an attachment plate, a motorized transport, and a lens. The attachment plate is designed so that the projector and lens system form an average center of mass (gravity) approximately located at the center of the ceiling mount pipe. The motorized transport allows you to adjust the position and tilt of the lens so that the projector beam is passing through the center of the lens and any residual pincushion distortion is about the same at the top and bottom of the image. The lens is a high-quality anamorphic lens that will give you a sharp, clear image.
Ask a question and I''ll find the answer in the document
Finding information in a document is now easier with AI
Related papers
Other documents
-
 Panamorph CineVista Installation guide
-
Panamorph DCR-J1 Installation guide
-
Panamorph DCR-J1-ST Installation guide
-
Panamorph CDR-E1 Installation guide
-
-
Chief Manufacturing PL-4 User manual
-
 Panamorph AK8Pro-S User manual
-
 Panamorph DCR-S3 Direct Attach Cinema Format Conversion Lens Installation guide
-
Panamorph STE-S4 Installation guide
-
Projecta 11730003 Datasheet


