Page is loading ...

MÜV™ distributed by
Baby Trend, Inc. 1607 S. Campus Ave., Ontario, CA 91761
Customer Service: 1-800-328-7363 (8:00am - 4:30pm PST)
www.babytrend.com
Copyright © 2014, Baby Trend, Inc.
Instruction Manual for MS93
Manual de instrucciones para MS93
Read all instructions BEFORE assembly and USE of product.
KEEP INSTRUCTIONS FOR FUTURE USE.
Lea todas las instrucciones ANTES del montaje y USO del producto.
CONSERVE LAS INSTRUCCIONES PARA SU USO FUTURO.
MS93_ENSP_102114
™
™
REIS
™

1
2
Copyright © 2014, Baby Trend Inc., All Rights Reserved. Todos Los Derechos Reservados. Copyright © 2014, Baby Trend Inc., All Rights Reserved. Todos Los Derechos Reservados.
ADVERTENCIA
WARNING
WARNING: Please follow all of these instructions to
ensure the safety of your child. Keep these instructions for
future reference.
WARNING: Failure to follow these instructions could
result in serious injury or death. Avoid serious injury from
falling or sliding out, always use the safety harness and
insure that the children are properly positioned according to
these instructions.
WARNING: Never leave children unattended.
WARNING: Care must be taken when folding and
unfolding the stroller to prevent nger entrapment.
ADVERTENCIA: Por favor, siga todas estas
instrucciones para garantizar la seguridad de su hijo.
Conserve estas instrucciones para referencia futura.
ADVERTENCIA: El incumplimiento de estas
instrucciones podría ocasionar una lesión grave o la
muerte. Evite lesiones graves por caídas o resbalones.
Siempre use el arnés de seguridad y asegúrese de que
los niños estén ubicados correctamente de acuerdo a
estas instrucciones.
ADVERTENCIA: Nunca pierda de vista a
los niños.
ADVERTENCIA: Se debe ser prudente
al plegar y desplegar el cochecito para evitar que queden
dedos atrapados
.
• Purses, shopping bags, parcels, diaper bags or accessory items may change the balance
of the stroller and cause a hazardous, unstable condition.
• The maximum weight that can be carried in the storage basket is
5 pounds (2.27 kg). The maximum weight that can be carried in the cooler is 5 pounds
(2.27 kg). The maximum weight that can be carried in the infant cup holder is 1 pound
(0.45 kg). The maximum weight that can be carried in the back pocket is 1 pound (0.45
kg). Excessive weight may cause a hazardous unstable condition to exist.
• Be certain the stroller is completely opened and locked in place before allowing a child
near the stroller.
• Do not exceed 50 lbs (22.67 kg). Exceeding the weight will cause excessive wear and
may cause a hazardous unstable condition to exist. Maximum height of the child is 40
inches (101 cm).
• NEVER use the stroller on stairways or escalators.
• NEVER use the stroller with roller skates, in-line skates, skateboards or bicycles.
• NEVER allow your stroller to be used as a toy.
• Wash with mild soap and water.
• Check your stroller for loose screws, worn parts, torn material or stitching on a regular
basis. Replace or repair parts as needed.
• Discontinue use of stroller should it malfunction or become damaged. Please contact our
customer service department to arrange for repair or obtain replacement parts.
• Los bolsos, bolsas de compras, paquetes, bolsas de pañales o artículos accesorios
podrían cambiar el equilibrio del cochecito y una condición de inestabilidad peligrosa.
• El peso máximo que se puede llevar en la canasta de almacenamiento es de 5 libras.
El peso máximo que se puede llevar en la bolsa térmica es de 5 libras (2.27 kg). El peso
máximo que se puede llevar en el portavasos de bebe es de 1 libra (0.45 kg). El peso
máximo que se puede llevar en el bolsillo trasero es de 1 libra (0,45 kg). El exceso de
peso podría ocasionar una inestabilidad peligrosa.
• Procure que el cochecito esté completamente abierto y bien trabado antes de permitir
que un niño se acerque al mismo.
• No supere las 50 lbs. (22.67 kg). El exceso de peso causará un desgaste excesivo y
podría provocar una inestabilidad peligrosa. La altura máxima del niño es de 40 pulgadas
(101 cm).
• NUNCA use el cochecito en escaleras mecánicas o comunes.
• NUNCA use el cochecito con patines de ruedas, patines en línea, monopatines
o bicicletas.
• NUNCA permita el uso de su cochecito como un juguete.
• Lavar con jabón suave y agua.
• Verique con frecuencia que su cochecito no tenga tornillos sueltos, piezas gastadas,
materiales o costuras rasgados. Reemplace o repare las piezas conforme sea necesario.
• Deje de usar el cochecito si presenta fallas o daños. Por favor, comuníquese con
nuestro departamento de servicio al cliente para gestionar la reparación u obtención
de piezas de reemplazo.

3
4
Copyright © 2014, Baby Trend Inc., All Rights Reserved. Todos Los Derechos Reservados. Copyright © 2014, Baby Trend Inc., All Rights Reserved. Todos Los Derechos Reservados.
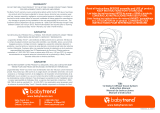
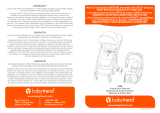
WARNINGPARTS LIST LISTA DE PIEZAS
Stroller
Cochecito
Bassinet Boot
Cubierta de la cuna
Bassinet
Cuna
Mattress
Colchón
Seat
Asiento
Front Wheels
Ruedas delanteras
Bumper Bar
Barra parachoques
Canopy Frame
Armazón de la cubierta
Rear Wheels
Ruedas traseras
Check that you have all the parts for this model before assembling the stroller.
Verique que tenga todas las piezas para este modelo antes de montar el cochecito.
IMPORTANT!
To ensure safe operation of your stroller, please follow
these instructions carefully. Please keep these instructions for future reference.
IMPORTANT! Before assembly and each use, inspect this product
for damaged hardware, loose joints, missing parts or sharp edges. NEVER
use if any parts are missing or broken.
IMPORTANT! Adult assembly is required.
¡IMPORTANTE! Para asegurar el funcionamiento seguro de su
cochecito, siga estas instrucciones cuidadosamente. Por favor, conserve
estas instrucciones para referencia futura.
¡IMPORTANTE! Antes del montaje y de cada uso, inspeccione el
producto para detectar daños en el equipo, uniones sueltas, piezas
faltantes
o bordes losos. NUNCA use el cochecito con piezas faltantes o rotas.
¡IMPORTANTE! Se requiere el montaje por parte de un adulto.
Remove stroller from box. The front wheels, rear wheels MUST be installed
prior to use.
Retire el cochecito de la caja. Antes del uso SE DEBEN instalar las ruedas
delanteras, las ruedas traseras.

5
6
Copyright © 2014, Baby Trend Inc., All Rights Reserved. Todos Los Derechos Reservados. Copyright © 2014, Baby Trend Inc., All Rights Reserved. Todos Los Derechos Reservados.
REAR WHEELS
RUEDAS TRASERAS
• Lean the stroller forward to rest on the
Front Wheels.
• Press the Rear Wheel posts into the rear
frame hub until it locks into place (Fig. 2).
NOTE: Pull on the rear wheel to ensure that
it is securely attached to the stroller. NEVER
use stroller if wheels do not lock into place.
• Incline el cochecito hacia delante de modo
que se apoye en las Ruedas delanteras.
• Oprima los postes de la Rueda trasera
dentro del cubo del armazón trasero
hasta que se trabe (Fig. 2). NOTA: Tire
de la rueda trasera para cerciorarse de
que esté sujeta de manera segura al
cochecito. NUNCA use el cochecito si las
ruedas no se traban correctamente.
ASSEMBLY MONTAJE ASSEMBLY MONTAJE
FRONT WHEELS
RUEDAS DELANTERAS
To attach the Front Wheels, unfold stroller as
described in the section following:
• Unlock the release lever. (Fig. 1a)
• Unfold stroller frame by pulling upward on
the stroller handle. (Fig. 1b)
The bar will
lock when the legs are fully extended.
• Lean the stroller backwards so that the front
wheel posts are pointing upward. Push
each front wheel assembly onto the front
wheel posts until locked into place. (Fig. 1c)
NOTE: Pull on the wheel assembly to ensure
that it is securely attached to the stroller.
Para colocar las Ruedas delanteras, despliegue el
cochecito como se describe en la siguiente secció
n:
• Destrabe la palanca de liberación. (Fig. 1a)
• Despliegue el armazón del cochecito
tirando hacia arriba del manubrio. (Fig.
1b) La barra se trabará cuando las patas
estén completamente extendidas.
• Incline el cochecito hacia atrás para que
los postes de la rueda delantera apunten
hacia arriba. Empuje cada montaje de la
rueda delantera dentro de los postes de
la rueda delantera hasta que se traben.
(Fig. 1c) NOTA: Tire del montaje de
la rueda para cerciorarse de que esté
sujeto de manera segura al cochecito.
1)
Fig. 1b
Fig. 1a
Fig. 1c
Fig. 2
2)

7
8
Copyright © 2014, Baby Trend Inc., All Rights Reserved. Todos Los Derechos Reservados. Copyright © 2014, Baby Trend Inc., All Rights Reserved. Todos Los Derechos Reservados.
ATTATCHING THE SEAT FABRIC
CÓMO COLOCAR LA TELA DEL
ASIENTO
• Make sure the Seat fabric is properly attached
to the Seat Frame. Put the Seat Fabric face-
down and place the Seat Frame over the
fabric. The longer fabric is placed at the
foot end of the Seat Frame. (Fig. 3a)
• Wrap the retention straps around the
frame and then slide the strap through the
D-Ring located on the end of the strap.
• Asegúrese de que la tela del Asiento esté
bien sujeta al Armazón del asiento. Coloque
la Tela del asiento boca abajo y el Armazón
del asiento encima de la tela. La tela más
larga se coloca en el extremo inferior
del Armazón del asiento. (Fig. 3a)
• Envuelva las correas de retención alrededor
del armazón y luego deslice la correa por el
Aro D ubicado en el extremo de la correa.
• Wrap the headrest fabric over the Seat
frame and x it to the hook and loop
fastener on the Seat back. Wrap the
Footrest fabric over the Frame and x it
with the hook and loop fastener. Wrap
side aps around the Seat Frame and
snap the buttons together. (Fig. 3b)
• Envuelva la tela del apoyacabeza por
encima del armazón del Asiento y fíjela
al sujetador de Velcro que está en el
respaldo del Asiento. Envuelva la tela del
Apoyapiés por encima del Armazón y fíjela
con el sujetador de Velcro. Envuelva las
solapas laterales alrededor del Armazón del
Asiento y abroche los botones. (Fig. 3b)
ATTATCHING THE SEAT
CÓMO COLOCAR EL ASIENTO
• Set the Brake, then attach the seat by
lining up the seat anchors on the side
of the seat with the slots on the stroller
frame and push them together until they
lock securely (Fig. 4). The seat can used
in either direction, front or backwards.
• Aplique el Freno, luego sujete el asiento
alineando los anclajes del asiento que están
al costado del asiento con las ranuras del
armazón del cochecito y presionándolos
hasta que se traben correctamente (Fig.
4). El asiento se puede usar en ambas
direcciones, hacia delante o hacia atrás.
TO REMOVE SEAT
PARA RETIRAR EL ASIENTO
• To take off the Seat, set the Brake, then push
the release buttons on both sides of the
stroller frame and pull Seat upwards (Fig. 5).
• Para retirar el Asiento, aplique el Freno,
luego oprima los botones de liberación a
ambos lados del armazón del cochecito
y tire del Asiento hacia arriba (Fig. 5).
3)
4)
5)
Fig. 3a
Fig. 3b
Fig. 4
Fig. 5
Retention
Straps
Correas
Snap Buttons
Botones
Snap Buttons
Botones
Release Button
Botón de liberación
D-Rings
Anillo D
Retention
Straps
Correas
ASSEMBLY MONTAJE ASSEMBLY MONTAJE
Hook and Loop Fasteners
Correas de Gancho y Bucle

9
10
Copyright © 2014, Baby Trend Inc., All Rights Reserved. Todos Los Derechos Reservados. Copyright © 2014, Baby Trend Inc., All Rights Reserved. Todos Los Derechos Reservados.
ATTACHING THE BUMPER BAR
CÓMO COLOCAR LA BARRA
PARACHOQUES
WARNING:
Do not use bumper bar to carry
seat with child inside. The bumper
bar is not a carrying handle.
ADVERTENCIA:
No use la barra parachoques para
trasladar el asiento con el niño
adentro. La barra parachoques no
es una manija de traslado.
• Attach the Bumper Bar by lining up
anchors with the slots on the Seat.
Push until it clicks into place. (Fig. 6a)
Note: The Bumper Bar must be securely
attached before using this product.
• To detach Bumper Bar, press the Release
Button on the bottom of the Bar and
pull bar out of the anchor. Swing the bar
upwards to access the seat. (Fig. 6b)
• Coloque la Barra parachoques alineando
los anclajes con las ranuras del Asiento.
Oprima hasta que se trabe y haga clic.
(Fig. 6a) Nota: La Barra parachoques
debe estar colocada de manera segura
antes de usar este producto.
• Para quitar la Barra parachoques, oprima
el Botón de liberación que está en la
parte inferior de la Barra y tire de la barra
hacia fuera del anclaje. Levante la barra
para acceder al asiento. (Fig. 6b)
ATTACH CANOPY FABRIC TO FRAME
CÓMO SUJETAR LA TELA DE LA
CUBIERTA AL ARMAZÓN
• To attach the Canopy Fabric to Frame:
Place the Canopy Anchor on a at sturdy
surface and push the Lock Pins in with
a use of a tool, while pulling the Canopy
Supports out of the Anchor. (Fig. 7a)
• Take the loose Canopy Supports and
thread Supports through Canopy Fabric.
Metal Support is threaded through Front
Fabric loop and Plastic Support is threaded
through Rear Fabric Loop. (Fig. 7b)
• Reattach the Supports with the canopy by
pushing the bar into the canopy anchor
until the Pins lock into place. (Fig. 7c)
• Para sujetar la Tela de la cubierta al
armazón: Coloque el Anclaje de la cubierta
sobre una supercie fuerte y plana, y oprima
los Pernos de traba con una herramienta
mientras tira de los Soportes de la cubierta
para quitarlos del Anclaje. (Fig. 7a)
• Tome los Soportes de la cubierta sueltos
y ensarte los Soportes por la Tela de la
cubierta. El Soporte metálico se ensarta
por la arandela delantera de la Tela y
el Soporte de plástico se ensarta por la
Arandela trasera de la Tela. (Fig. 7b)
• Vuelva a colocar los Soportes en la
cubierta empujando la barra dentro
del anclaje de la cubierta hasta que
los Pernos se traben. (Fig. 7c)
Metal Support
Metal Soporte
Metal Support
Metal Soporte
Plastic Support
Plástico Soporte
Plastic Support
Plástico Soporte
Lock Pins
Pernos de Traba
Lock Pins
Pernos de Traba
FIg. 7a
FIg. 7b
FIg. 7c
Front Fabric Loop
Arandela de la Tela
Trasera
Canopy Front
Frente de la Cubierta
Rear Fabric Loop
Arandela de la Tela
Delantera
6)
7)
Fig. 6a
Fig. 6b
Release Button
ASSEMBLY MONTAJE ASSEMBLY MONTAJE

11
12
Copyright © 2014, Baby Trend Inc., All Rights Reserved. Todos Los Derechos Reservados. Copyright © 2014, Baby Trend Inc., All Rights Reserved. Todos Los Derechos Reservados.
STROLLER HANDLE
MANIJA DEL COCHECITO
• The stroller handle has 3 positions. To
raise the Push Bar, press the release
button on the handle to unlock (Fig. 9).
Pull the handle to the desired height and
release the button. Note: Make sure the
handle locks into place before using.
• El manubrio del cochecito tiene 3
posiciones. Para levantar la barra del
manubrio, oprima el botón de liberación
en el manubrio para que se destrabe
(Fig. 9). Tire del manubrio hasta la
altura deseada y libere el botón. Nota:
Asegúrese de que el manubrio se trabe
correctamente antes de su uso.
TO ADJUST SEAT AND FOOT REST
PARA AJUSTAR EL ASIENTO Y EL
APOYAPIÉS
• Upright and Reclined Position: The seat
can be adjusted into upright, reclined and
carriage positions. Press the recline buttons
on both sides of the Seat and rotate the
Seat into the desired position. (Fig. 10a)
• Posición erguida y reclinada: El asiento
se puede ajustar en las posiciones
erguida, reclinada y de cochecito.
Oprima los botones de reclinación a
ambos lados del Asiento y gire el Asiento
en la posición deseada. (Fig. 10a)
• Adjustable Foot Rest: Press the
lock buttons on each side of the
footrest and rotate the Foot Rest to
the desired position. (Fig. 10b)
• Apoyapiés ajustable: Oprima los
botones de traba a cada lado del
apoyapiés y gire el Apoyapiés en
la posición deseada. (Fig. 10b)
REMOVABLE CANOPY
CUBIERTA DESMONTABLE
• To attach the Removable Canopy:
Snap the Canopy clips on the outside
of the Toddler Seat Tubes. (Fig. 8a)
• To open the canopy: push forward on
the front edge of the canopy while holding
the rear of canopy in place. (Fig. 8b)
• To fold the canopy: pull backwards
on the front edge. (Fig. 8b)
• To use the extended canopy: unzip
the back of the canopy and pull
the canopy forward (Fig 8c).
• Adjust Canopy height: slide canopy
to desired height of frame.(Fig. 8d)
• Para colocar la Cubierta desmontable:
Abroche los ganchos de la Cubierta
en la parte externa de los Tubos de la
sillita para niños pequeños. (Fig. 8a)
• Para abrir la cubierta: empuje hacia
delante el borde delantero de la cubierta
mientras sostiene la parte trasera de
la misma en su sitio. (Fig. 8b)
• Para plegar la cubierta: empuje hacia
atrás el borde delantero. (Fig. 8b)
• Para usar la cubierta extendida: Abra el
cierre de la parte trasera de la cubierta y
tire de la cubierta hacia delante (Fig. 8c).
• Ajuste la altura de la Cubierta:
Deslice la cubierta hasta la altura
deseada del armazón.(Fig. 8d)
FIg. 8a
FIg. 8b
FIg. 9
FIg. 10a
FIg. 10b
FIg. 8c
FIg. 8d
8)
9)
10)
Recline Buttons
Botones de reclinación
Lock Buttons
Botones de traba
ASSEMBLY MONTAJE ASSEMBLY MONTAJE

13
14
Copyright © 2014, Baby Trend Inc., All Rights Reserved. Todos Los Derechos Reservados. Copyright © 2014, Baby Trend Inc., All Rights Reserved. Todos Los Derechos Reservados.
TO UNFOLD STROLLER
PARA DESPLEGAR EL COCHECITO
CAUTION: Do not allow
children near stroller
while unfolding.
PRECAUCIÓN:
No permita que los niños se
acerquen al cochecito mientras lo
despliega.
• Unlock the release lever. (Fig. 12a)
• Unfold stroller frame by pulling upward on
the stroller handle. (Fig. 12b)
The bar will
lock when the legs are fully extended.
• Destrabe la palanca de
liberación. (Fig. 12a)
• Despliegue el armazón del cochecito
tirando hacia arriba del manubrio. (Fig.
12b) La barra se trabará cuando las
patas estén completamente extendidas.
TO FOLD STROLLER
PARA PLEGAR EL COCHECITO
CAUTION: Do not allow
children near stroller while folding.
PRECAUCIÓN: No
permita que los niños se acerquen
al cochecito mientras lo pliega.
• Before folding, lower the Push Bar to it’s
lowest position. Close the canopy and adjust
the seat to its upright and forward facing position,
as described in each assembly section. And pull
the stroller backward several inches to adjust
the front wheels to the front. (Fig. 11a).
• Fold the Stroller by pulling both Release
Triggers (Fig. 11b) and push handle toward
the oor. Make sure the Front Wheels
lie at against the base of the Cooler
Bag then secure the stroller in the folded
position by locking the fold latch, located
on the right side of the stroller, over the
rivet. (Fig. 11c) Fold Foot Rest in for a
more compact fold by pressing the Lock
Buttons on both sides of the Foot Rest.
• Antes de plegarlo, baje la barra del manubrio
hasta su posición más baja. Cierre la cubierta
y ajuste el asiento en su posición erguida
y orientada al frente, como se describe en
cada sección del montaje. Y tire del cochecito
hacia atrás varias pulgadas para ajustar las
ruedas delanteras hacia el frente. (Fig. 11a).
• Pliegue el Cochecito tirando de ambos
Gatillos de liberación (Fig. 11b) y empuje
el manubrio hacia el suelo. Asegúrese
de que las Ruedas delanteras se apoyen
planas contra la base de la Bolsa térmica,
luego je el cochecito en la posición plegada
trabando el pestillo de pliegue ubicado
en el lado derecho del cochecito, por
encima del remache. (Fig. 11c) Pliegue
el Apoyapiés para lograr un pliegue más
compacto presionando los Botones de
traba a ambos lados del Apoyapiés.
OPERATION FUNCIONAMIENTOOPERATION FUNCIONAMIENTO
11)
12)
Fig. 11a
Fig. 11b
Fig. 11c
Fig. 12a
Fig. 12b
Release Triggers
Gatillos de liberación
Lock Buttons
Botones de Traba

15
16
Copyright © 2014, Baby Trend Inc., All Rights Reserved. Todos Los Derechos Reservados. Copyright © 2014, Baby Trend Inc., All Rights Reserved. Todos Los Derechos Reservados.
FRONT WHEEL LOCK
TRABA DE LA RUEDA DELANTERA
• The front wheels are equipped with a
swivel locking device. Rotate the lock
on each wheel outward to engage the
locks and rotate inward to disengage
the locking device. (Fig. 14)
• Las ruedas delanteras están equipadas
con un dispositivo de traba giratoria. Gire
la traba en cada rueda hacia fuera para
activar las trabas y hacia dentro para
desactivar el dispositivo de traba. (Fig. 14)
TO SECURE THE CHILD
PARA SUJETAR AL NIÑO
WARNING: Avoid serious injury
from falling or sliding out. Always use
the safety harness.
STRANGULATION
HAZARD: Child can strangle in
loose straps. Never leave child in seat
when straps are loose or undone.
ADVERTENCIA:
Evite lesiones graves por caídas
o resbalones. Siempre use el arnés
de seguridad.
PELIGRO DE
ESTRANGULAMIENTO:
El niño se puede estrangular con las
correas sueltas. Nunca deje al niño
en el asiento cuando las correas estén
sueltas o sin terminar de colocar.
BRAKES
FRENOS
WARNING: Always set
brakes when the stroller
is not being pushed so that the
stroller will not roll away. NEVER
leave stroller unattended on a hill
or incline as the stroller may slide
down the hill.
ADVERTENCIA:
Siempre aplique los frenos cuando
el cochecito no esté siendo
empujado, para impedir que ruede
fuera de su alcance. NUNCA deje
el cochecito desatendido en una
colina o pendiente, ya que podría
deslizarse pendiente abajo.
• To engage brakes, apply downward
pressure to the brake lever located on the
rear axle. The stroller may be required to
be rolled back and forth to fully engage
the brake (Fig. 13). Check that the stroller
will not move once the brakes are properly
applied. The Brake indicator will be red
when locked and Green when unlocked. To
release, gently lift up on the brake lever.
• Para aplicar los frenos, ejerza una
presión hacia abajo a la palanca del
freno situada en el eje trasero. Es posible
que deba empujar el cochecito hacia
delante y hacia atrás para aplicar el freno
completamente (Fig. 13). Verique que el
cochecito no se mueva una vez que ambos
frenos estén aplicados correctamente.
El indicador de Freno se pondrá rojo
cuando esté trabado y Verde cuando
esté destrabado. Para soltarlo, levante
suavemente la palanca del freno.
SAFETY SEGURIDAD SAFETY SEGURIDAD
14)
Fig. 13
Fig. 14
13)

17
18
Copyright © 2014, Baby Trend Inc., All Rights Reserved. Todos Los Derechos Reservados. Copyright © 2014, Baby Trend Inc., All Rights Reserved. Todos Los Derechos Reservados.
• The 5-point Harness’ Shoulder Straps have 3
attachment positions. Select the position that
places the shoulder strap level with, or below
the top of the child’s shoulder. (Fig. 15a)
• Carefully place the child in the stroller seat
and bring the safety harness around
the
child’s waist and over the shoulders. Place the
crotch strap between the child’s legs. Insert the
male end of each shoulder/waist belt into the
buckle on the crotch strap. Tighten the harness
to be snug around the child’s waist and over
the child’s shoulders. Please see (Fig. 15b).
• Push Red Button on Center Clasp,
the two Harness Buckles will pop
free. (Fig. 15c)
• Las Correas del hombro del arnés de 5 puntos
tienen 3 posiciones de sujeción. Escoja la
posición que sitúe a la correa del hombro al
mismo nivel o a un nivel inferior a la parte
superior del hombro del niño. (Fig. 15a)
• Coloque cuidadosamente al niño en el
asiento del cochecito y pase el arnés de
seguridad por la cintura del niño y por
encima de los hombros. Coloque la correa
de la entrepierna entre las piernas del niño.
Introduzca el extremo macho del cinturón
de cada hombro o de la cintura en la hebilla
de la correa de la entrepierna. Ajuste el
arnés de modo que esté ceñido alrededor
de la cintura del niño y por encima de sus
hombros. Por favor, vea (Fig. 15b).
• Presione el Botón Rojo en el Broche
Central y se desprenderán las dos
Hebillas del Arnés. (Fig. 15c)
Fig. 15a
Fig. 15c
Center Clasp
Broche Central
Fig. 15b
15)
SAFETY SEGURIDAD
BASSINET/CARRIAGE MODE CUNA/MODO COCHECITO
WARNING: Failure to follow these warnings and the
instructions could result in serious injury or death.
FALL HAZARD: To help prevent falls, do not use this
product when the infant begins to push up on hands and knees
or has reached a height of 25in (63.5cm), a weight of 15 lbs.
(6.8kg.), whichever comes rst.
SUFFOCATION HAZARD:
INFANTS HAVE SUFFOCATED
• In gaps between extra padding and side of the
bassinet/cradle, and
• On soft bedding
Use only the pad provided by manufacturer. NEVER add
a pillow, comforter, or another mattress for padding.
• To reduce the risk of SIDS, pediatricians recommend healthy infants be placed on their backs
to sleep, unless otherwise advised by your physician.
• If a sheet is used with the pad, use only the one provided by the bassinet manufacturer or one
specically designed to t the dimension of the bassinet mattress.
• Strings can cause strangulation! Do not place items with a string around a child's neck, such as
hood strings or pacier cords. Do not suspend strings over a bassinet or attach strings to toys.
FALL HAZARD: Always check that the bassinet is securely
locked on the base/stand by pulling upwards on the bassinet bed.
WARNING: NEVER leave child unattended.
SUFFOCATION HAZARD: Infant carrier can roll over on
soft surfaces and suffocate child. NEVER place carrier on beds, sofas, or
other soft surfaces.
FALL HAZARD:Child’s activity can move carrier. NEVER place
carrier on counter tops, tables, or any other elevated surface.

20
Copyright © 2014, Baby Trend Inc., All Rights Reserved. Todos Los Derechos Reservados.
19
Copyright © 2014, Baby Trend Inc., All Rights Reserved. Todos Los Derechos Reservados.
PELIGRO DE CAÍDA: Actividad del niño puede mover
portador. NUNCA colocar portador en la parte superior de los mostradores,
mesas, o cualquier otra supercie elevada.
NUNCA utilice este portador como medio de transporte un bebé en un
vehículo de motor.
TO ASSEMBLE BASSINET
PARA MONTAR LA CUNA
WARNING: This product
must be fully assembled before
use. Always read and follow
assembly instructions.
ADVERTENCIA:
Este producto se debe montar
completamente antes de su uso.
Siempre lea y siga las instrucciones
de montaje.
• Pull Bassinet fabric back to access
the bottom of the Bassinet. Use the
handles to pull the frame supports
into the support locks. (Fig. 16a).
• Make sure the frame supports click and
are seated rmly into all 4 support locks
(Fig 16b) NOTE: Use ONLY the handles
to move Frame supports. Using your
ngers may result in getting pinched.
• For additional ventilation in the bassinet
(recommended for sleeping child),
pull vent cover open. (Fig 16c)
• To attach the mattress, make sure the
seam is at the top of the bassinet and
that the ventilation holes on the Mattress
line-up with the ventilation holes on
the Bassinet, use the hook and loop
fasteners provided to x mattress into
the Bassinet. (Fig. 16d) DO NOT use
Bassinet without the provided mattress.
BASSINET/CARRIAGE MODE CUNA/MODO COCHECITO BASSINET/CARRIAGE MODE CUNA/MODO COCHECITO
16)
ADVERTENCIA:
El incumplimiento de estas
advertencias e instrucciones podría ocasionar una lesión grave
o la muerte.
PELIGRO DE CAÍDA:
Para ayudar a impedir
caídas, no use este producto cuando el bebé comience a
levantarse con las manos y rodillas, o cuando haya alcanzado
una altura de 25 pulgadas (63.5cm), un peso de 15 lbs. (6.8kg.), lo
que suceda primero.
PELIGRO DE ASFIXIA:
SE HAN ASFIXIADO BEBÉS
• En los espacios entre acolchado adicional
y el lado de la cuna, y
• En colchones blandos
Utilice SÓLO la almohadilla suministrada de fábrica.
NUNCA agregue colchones, almohadas, edredones ni
rellenos.
• Para reducir los riesgos del SIDS, los pediatras recomiendan que los bebés saludables sean
puestos a dormir boca arriba, a menos que su médico indique lo contrario.
• Si utiliza una sábana con la almohadilla, sólo use la suministrada por el fabricante de la cuna o
una especialmente diseñada para ajustarse al tamaño del colchón de la cuna.
• ¡Las cuerdas pueden causar estrangulamiento! No coloque artículos con cuerdas alrededor del
cuello del niño, como por ejemplo cordones de capuchas o sonajeros. No suspenda cuerdas
por encima de la cuna ni sujete cuerdas a los juguetes.
PELIGRO DE CAÍDA:
Siempre controle que la cuna
esté bien trabada a la base/pie tirando hacia arriba de la cama
de la cuna.
ADVERTENCIA:
NUNCA pierda de vista al niño.
PELIGRO DE ASFIXIA: Portador puede volcarse en
supercies blandas y asxiarse. NUNCA colocar portador en camas, sofás,
o en otras supercies blandas.
Fig. 16a
Fig. 16c
Fig. 16d
Fig. 16b
Support Locks
Trabas de soporte

21
22
Copyright © 2014, Baby Trend Inc., All Rights Reserved. Todos Los Derechos Reservados. Copyright © 2014, Baby Trend Inc., All Rights Reserved. Todos Los Derechos Reservados.
• Raise the handle on the Bassinet by pulling
up on the handle. Make sure the handle
locks into position before using. (Fig. 16e)
• To lower handle, press both Release
Buttons on base of handle push the
handle backwards. (Fig. 16e)
• To use the Canopy Visor, pull the Visor
from inside of the Canopy until it is fully
extended. Push the Visor back into the
Canopy when not in use. (Fig. 16f)
• To use the Removable Boot, Pull Boot over
the Bassinet and connect the hook and loop
fasteners to keep the Boot in place. (Fig. 16g)
• Tire del respaldo de tela de la Cuna
para acceder a la parte inferior de la
Cuna. Use las manijas para colocar
los soportes del armazón dentro de
las trabas del soporte. (Fig. 16a)
• Asegúrese de que los soportes del
armazón hagan clic y se introduzcan
rmemente en las 4 trabas del soporte
(Fig. 19b) NOTA: Use SOLO las manijas
para mover los soportes del Armazón.
Si usa sus dedos podría pellizcarse.
• Para ventilación adicional en la cuna
(recomendada para niños que duermen),
abra la cubierta de ventilación. (Fig. 16c)
• Para colocar el colchón, asegúrese de
que la costura esté en la parte superior de
la cuna y que los agujeros de ventilación
del Colchón estén alineados con los
agujeros de ventilación de la Cuna, use
los sujetadores de Velcro provistos para
sujetar el colchón a la Cuna. (Fig. 16d)
NO use la Cuna sin el colchón provisto.
• Tire hacia arriba del manubrio de la
Cuna para levantarlo. Asegúrese de
que el manubrio se trabe correctamente
antes de su uso. (Fig. 16e)
• Para bajar el manubrio, oprima
ambos Botones de liberación en
la base del manubrio y empuje el
manubrio hacia atrás. (Fig. 16e)
• Para usar el Visor de la Cubierta, tire
del Visor desde el interior de la Cubierta
hasta que esté completamente extendido.
Empuje el Visor hacia atrás, dentro de la
Cubierta, cuando no esté en uso. (Fig. 16f)
• Para usar la Cubierta desmontable, tire
de la Cubierta por encima de la Cuna y
conecte las correas de gancho y bucle para
mantener la Cubierta en su lugar. (Fig. 16g)
ATTACH BASSINET TO STROLLER
SUJETE LA CUNA AL COCHECITO
• Attach the Bassinet by lining up the seat
anchors on the side of the seat with the
slots on the stroller frame and push them
together until they lock securely. (Fig. 17)
• Sujete la Cuna alineando los anclajes
del asiento que están al costado del
asiento con las ranuras del armazón del
cochecito y presionándolos hasta que
se traben correctamente. (Fig. 17)
TO REMOVE BASSINET
PARA RETIRAR LA CUNA
• To take off the Bassinet, push the release
buttons on both sides of the stroller frame
and pull Bassinet upwards (Fig. 18).
• Para retirar la Cuna, oprima los
botones de liberación a ambos lados
del armazón del cochecito y tire de
la Cuna hacia arriba (Fig. 18).
18)
17)
Release Buttons
Botones de liberación
Fig. 16e
Hook and Loop
Fasteners
Correas de Gancho
y Bucle
Fig. 16f
Fig. 16g
Fig. 17
Fig. 18
BASSINET/CARRIAGE MODE CUNA/MODO COCHECITO BASSINET/CARRIAGE MODE CUNA/MODO COCHECITO

23
24
Copyright © 2014, Baby Trend Inc., All Rights Reserved. Todos Los Derechos Reservados. Copyright © 2014, Baby Trend Inc., All Rights Reserved. Todos Los Derechos Reservados.
CARE AND MAINTENANCE
CUIDADO Y MANTENIMIENTO
STROLLER FRAME, SEAT PAD, BASSINET,
MATTRESS AND COOLER
ARMAZÓN DEL COCHECITO, ALMOHADILLA
DEL ASIENTO, CUNA, COLCHÓN Y BOLSA
TÉRMICA
• Wipe with mild soap and water.
• Limpie con jabón suave y agua.
OTHER
OTROS
• Check your stroller for loose screws, worn
parts, torn material or stitching on a regular
basis. Replace or repair parts as needed.
• Verique con frecuencia que su cochecito
no tenga tornillos sueltos, piezas gastadas,
materiales o costuras rasgados. Reemplace
o repare las piezas conforme sea necesario.
OTHER OTROS
AVAILABLE ACCESSORIES ACCESORIOS DISPONIBLES
AVAILABLE ACCESSORIES
ACCESORIOS DISPONIBLES
INFANT CUP HOLDER
PORTAVASOS PARA BEBE
WARNING: To avoid burns,
never put hot liquids in cup holder.
Avoid possible tipping, do not
place more than 1 lb. (0.45kg) in
cup holder (16 oz).
ADVERTENCIA: Para
evitar quemaduras, nunca coloque
líquidos calientes en el portavasos.
Evite posibles vuelcos, no
coloque más de 1 lb. (0.45kg) en el
portavasos (16 oz).
• To attach the Infant Cup Holder:
slide the clip on the Cup Holder over
the Cup Holder tab on the Push Bar.
Push until rmly in place. (Fig. 19)
• Para sujetar el Portavasos Para Bebé:
deslice el gancho del Portavasos por
encima de la lengüeta de Portavaso en
la Barra del manubrio. Empuje hasta
que quede rme en el lugar. (Fig. 19)
Fig. 19
19)

25
26
Copyright © 2014, Baby Trend Inc., All Rights Reserved. Todos Los Derechos Reservados. Copyright © 2014, Baby Trend Inc., All Rights Reserved. Todos Los Derechos Reservados.
KUSSEN
™
INFANT CAR SEAT
SILLITA PARA EL
AUTOMÓVIL KUSSEN
™
WARNING:
Avoid serious
injury from falling or sliding out,
always use the Infant Car Seat harness.
ADVERTENCIA:
Evite una
lesión grave por caídas o resbalones,
siempre use el arnés de la Sillita para
el automóvil.
• Attach the Kussen
™
Car Seat by facing
the car seat towards the stroller handle
and lining up the seat anchors on the
side of the car seat with the anchors on
the stroller frame and push them together
until they lock securely. (Fig. 21a) Note:
The Kussen
™
Car Seat can ONLY be
installed facing the rear of the Stroller.
• Coloque la Sillita para el automóvil
Kussen
™
apuntando la sillita hacia el
manubrio del cochecito y alineando los
anclajes del asiento que están al costado
de la sillita con los anclajes del armazón
del cochecito y presionándolos hasta
que se traben correctamente. (Fig. 21a)
Nota: La Sillita para el automóvil Kussen
™
SOLO se puede instalar apuntando
hacia la parte trasera del Cochecito.
TO REMOVE THE KUSSEN
™
CAR SEAT
PARA RETIRAR LA SILLITA PARA EL
AUTOMÓVIL KUSSEN
™
• To take off the Seat or the Infant Car Seat
Adapter, Push the release buttons on
both sides of the stroller frame and pull
Car Seat Adapter upwards (Fig. 21b).
• Para retirar la Sillita o el Adaptador de la
Sillita para el automóvil, oprima los botones
de liberación a ambos lados del armazón del
cochecito y tire del Adaptador de la Sillita
para el automóvil hacia arriba (Fig. 21b).
SNACK TRAY
BANDEJA DE BOCADILLOS
WARNING:
Do not use Snack Tray to carry seat
with child inside. The Snack Tray is
not a carrying handle.
ADVERTENCIA:
No use la Bandeja de bocadillos
para trasladar el asiento con
el niño adentro. La Bandeja de
bocadillos no es una manija de
traslado.
• Attach the Snack Tray by lining up anchors
with the slots on the Seat. Push until it
clicks into place. (Fig. 20a) Note: The
Snack Tray (optional accessory) or Bumper
Bar (comes with stroller) must be securely
attached before using this product.
• To detach Snack Tray, press the Release
Button on the bottom of the Tray and pull
Tray out of the anchor. Swing the Tray
upwards to access the seat. (Fig. 20b)
• Coloque la Bandeja de bocadillos alineando
los anclajes con las ranuras del Asiento.
Oprima hasta que se trabe y haga clic.
(Fig. 20a) Nota: La Bandeja de bocadillos
(accesorio opcional) o la Barra parachoques
(viene con el cochecito) deben estar bien
sujetas antes de usar este producto.
• Para quitar la Bandeja de bocadillos, oprima
el Botón de liberación que está en la parte
inferior de la Bandeja y tire de la Bandeja
hacia fuera del anclaje. Levante la Bandeja
para acceder al asiento. (Fig. 20b)
Fig. 21a
Fig. 21b
21)
Release Buttons
Botones de liberación
20)
Fig. 20a
Fig. 20b
Release Button
AVAILABLE ACCESSORIES ACCESORIOS DISPONIBLESAVAILABLE ACCESSORIES ACCESORIOS DISPONIBLES

27
28
Copyright © 2014, Baby Trend Inc., All Rights Reserved. Todos Los Derechos Reservados. Copyright © 2014, Baby Trend Inc., All Rights Reserved. Todos Los Derechos Reservados.
• Sujete el Adaptador de la Sillita para
el automóvil alineando los anclajes
del asiento que están al costado del
asiento con los anclajes del armazón del
cochecito y presionándolos hasta que
se traben correctamente. (Fig. 22a)
• Coloque la sillita para el automóvil en
el armazón superior con la Hebilla del
adaptador universal de la sillita para
el automóvil en la parte trasera del
Cochecito. La sillita para el automóvil
se sujeta en la posición orientada
hacia la parte trasera. (Fig. 22b)
• Abroche los Cinturones de seguridad por
la Ruta del cinturón de la Sillita para el
automóvil y conecte las hebillas. (Fig.
22c) Ajuste la correa de modo que encaje
bien y que la sillita para el automóvil esté
sujeta al armazón. Ajuste las correas
de apoyo inferior, ubicadas en la parte
trasera del armazón superior, tirando
hacia atrás de la arandela y deslizando
el ajuste hacia delante para que estén
ceñidas. (Fig. 22d) Nota: El Cinturón de
seguridad debe estar instalado por la Ruta
del cinturón antes de usar este producto.
TO REMOVE UNIVERSAL CAR SEAT
ADAPTER
PARA RETIRAR EL ADAPTADOR
UNIVERSAL DE LA SILLITA PARA EL
AUTOMÓVIL
• To take off the Seat or the Infant Car Seat
Adapter, Push the release buttons on
both sides of the stroller frame and pull
Car Seat Adapter upwards (Fig. 23).
• Para retirar el Asiento o el Adaptador de la
Sillita para el automóvil, oprima los botones
de liberación a ambos lados del armazón del
cochecito y tire del Adaptador de la Sillita
para el automóvil hacia arriba (Fig. 23).
UNIVERSAL CAR SEAT ADAPTER
ADAPTADOR UNIVERSAL DE LA
SILLITA PARA EL AUTOMÓVIL
WARNING: Avoid serious
injury from falling or sliding out,
always use the Infant Car Seat
harness.
CAUTION: Avoid serious
injury from falling, always use the
safety belt to secure car seat to
stroller.
ADVERTENCIA: Evite
una lesión grave por caídas o
resbalones, siempre use el arnés
de la Sillita para el automóvil.
PRECAUCIÓN: Evite
lesiones graves por caídas,
siempre use el cinturón de
seguridad para sujetar la sillita
para el automóvil al cochecito.
• Attach the Infant Car Seat Adapter by
lining up the seat anchors on the side
of the seat with the anchors on the
stroller frame and push them together
until they lock securely. (Fig. 22a).
• Place car seat onto the upper frame with the
Universal Car Seat Adapter Buckle at the
rear of the Stroller. The car seat attaches
in the rear facing position. (Fig 22b)
• Strap the Safety Belts through the Belt Path
on the Car Seat and connect the buckles
together. (Fig 22c) Tighten the strap so it ts
snugly and the car seat is secured to the
frame. Tighten the bottom support straps,
located on the back of the upper frame,
by pulling back on the loop and sliding the
adjuster forward for a snug t. (Fig 22d)
Note: The Saftey Belt must be installed
through the Belt Path before using
this product.
Fig. 22a
Fig. 22c
Fig. 22b
Fig. 22d
Fig. 23
22)
23)
AVAILABLE ACCESSORIES ACCESORIOS DISPONIBLESAVAILABLE ACCESSORIES ACCESORIOS DISPONIBLES

29
30
Copyright © 2014, Baby Trend Inc., All Rights Reserved. Todos Los Derechos Reservados. Copyright © 2014, Baby Trend Inc., All Rights Reserved. Todos Los Derechos Reservados.
TO REMOVE WHEELS
PARA RETIRAR LAS RUEDAS
FRONT WHEELS
RUEDAS DELANTERAS
• Push release button on front wheel hub and
pull wheel assembly from hub. (Fig. 23a)
• Oprima el botón de liberación en el cubo
de la rueda delantera y tire del montaje
de la rueda desde el cubo. (Fig. 23a)
REAR WHEELS
RUEDAS TRASERAS
• Push tab outward and pull wheel
from hub. (Fig. 23b)
• Empuje la lengüeta hacia afuera y tire
de la rueda desde el cubo. (Fig. 23b)
EASY COMPACT FOLD
PLIEGUE COMPACTO SENCILLO
Easy Fold and Compact Design: The Stroller’s compact design makes it easier for
travel. The wheels and Seat are easily removed to make the stroller frame easier to store.
Pliegue sencillo y diseño compacto: El diseño compacto del Cochecito hace que
sea más sencillo para viajar. Las ruedas y el Asiento se retiran fácilmente para que el
armazón del cochecito de pueda guardar con más facilidad.
Fig. 23b
Fig. 23a
23)
Release Buttons
Botones de liberación
CONFIGURATIONS CONFIGURACIONESCONFIGURATIONS CONFIGURACIONES
Rear Facing Positions: The Bassinet and Car Seat each ride rear facing only.
Posiciones orientadas hacia atrás: La Cuna y la Sillita para el automóvil se usan
orientadas hacia atrás solamente.
Rear and Front facing Seat: The seat can face in either direction, front or backwards.
Asiento orientado hacia atrás y hacia delante: El asiento se puede usar en ambas
direcciones, hacia delante o hacia atrás.
RIDING POSITIONS
POSICIONES DE USO

31 32
Copyright © 2014, Baby Trend Inc., All Rights Reserved. Todos Los Derechos Reservados. Copyright © 2014, Baby Trend Inc., All Rights Reserved. Todos Los Derechos Reservados.
WARRANTY
WARRANTY
DO NOT RETURN YOU PRODUCT TO THE STORE. PLEASE CALL 1 (800) 328-7363 FOR
REPLACEMENT PARTS, SERVICE AND REPAIR.
Your MŰV™ stroller warranty covers workmanship defects for a period of 2 years on all
stroller parts and 3 years on the frame from the date of purchase under normal use and in
compliance with the operating instructions.
This warranty is non-transferable and valid only to the original purchaser. Proof of purchase
is required for warranty claims. The warranty is valid only in the original country of purchase.
This warranty is subject to the conditions set forth by country in which the items were
purchased as conditions may vary. Baby Trend will ship replacement parts and provide repair
at their expense within the country of purchase. Outside the country of purchase will be the
customer expense.
Baby Trend will provide replacement parts or conduct repairs as determined tting by the
company. Parts may be replaced with new parts as the stroller is modied over time.
• The product has been subjected to misuse, abuse, abnormal use, excessive wear and
tear.
• Improper assembly by the consumer, negligence, environmental exposure or alteration.
• Any accident.
• Altered, missing or removed serial number.
• Any use of non-MÜV™ approved parts or repair center invalidates any and all claims
against the manufacturer. Please refer to this instruction booklet for guidance on stroller
use and maintenance.
• Stroller is purchased from an unauthorized retailer or dealer.
• Stroller is purchased second-hand.
• Consumer dissatisfaction with the product or buyers remorse.
If any above has occurred with your MÜV™ product it will invalidate any and all claims
against the manufacturer. Please refer to this instruction booklet for guidance on stroller use
and maintenance. Extended warranties are not available for purchase.
Baby Trend reserves the right to determine if warranty terms and conditions have been met.
Please contact Baby Trend Customer Service at 1 (800) 328-7363 if you have any questions
regarding warranty.
GARANTIA
GARANTIA
NO DEVUELVA SU PRODUCTO A LA TIENDA. POR FAVOR LLAME 1 (800) 328-7363 PARA
PIEZAS DE REPUESTO, SERVICIO Y REPARACIÓN.
Su garantía de el cochecito MŰV™ cubre defectos de fabricación por un período de 2 años
en todas las partes del cochecito y 3 años para el marco de la fecha de compra bajo uso
normal y de acuerdo con las instrucciones de funcionamiento.
Esta garantía no es transferible y es válido únicamente para el comprador original. Se
requiere prueba de compra para las reclamaciones de garantía. La garantía sólo es válida
en el país de compra original. Esta garantía está sujeta a las condiciones establecidas por el
país en el que los artículos fueron comprados como condiciones pueden variar. Baby Trend
enviará las piezas de repuesto y proporcionar reparación a su costa en el país de compra.
Fuera del país de compra será el gasto del cliente.
Baby Trend proporcionará piezas de repuesto o llevar a cabo una reparación como se
determina apropiado por la empresa. Las piezas pueden ser sustituidas por piezas nuevas
como el cochecito se modica con el tiempo.
• El producto ha sido sometido a mal uso, abuso, uso anormal, desgaste excesivo.
• Ensamblado incorrecto por parte del consumidor, negligencia, exposición ambiental o
alteración.
• Cualquier accidente.
• Modicar, falte o retire el número de serie.
• Cualquier uso de piezas o de centro de reparaciones no aprobadas por MÜV
™
invalida
cualquier y todas las demandas contra el fabricante. Consulte en este manual de
instrucciones para obtener orientación sobre el uso del cochecito y mantenimiento.
• Cochecito se compró a un distribuidor o concesionario no autorizado.
• Cochecito es comprado de segunda mano.
• Insatisfacción de los consumidores con el producto o arrepentimiento de los
compradores.
Si alguno se ha ocurrido anteriormente con su producto MÜV™ invalidará cualquier
reclamación contra el fabricante. Consulte en este manual de instrucciones para obtener
orientación sobre el uso del cochecito y mantenimiento. Las garantías extendidas no están
disponibles para su compra.
Baby Trend se reserva el derecho de determinar si se han cumplido los términos y
condiciones de la garantía. Por favor llame en contacto con Baby Trend Servicio al Cliente al
1 (800) 328-7363 si tiene alguna pregunta respecto a la garantía.

33 34
WARNING WARNING
Copyright © 2014, Baby Trend Inc., All Rights Reserved. Todos Los Derechos Reservados. Copyright © 2014, Baby Trend Inc., All Rights Reserved. Todos Los Derechos Reservados.
/