Page is loading ...


2
Contents
1. Before Use
How to use this manual ......................................................................................5
Standard Accessories .........................................................................................5
Names and Functions of Main Parts...................................................................6
Stereo headset (optional)....................................................................................9
Inserting/Removing the microSIM card (optional).............................................10
About the Built-in Memory/the microSD Card (optional)...................................11
Charging ...........................................................................................................14
Turning the unit on/off.......................................................................................16
Android™ default settings.................................................................................17
Release the lock screen ...................................................................................17
2. Basic Operation
Using the touch screen .....................................................................................18
Switching between vertical and horizontal viewing modes ...............................20
Home screen ....................................................................................................21
Status bar..........................................................................................................23
Notifications panel/Quick menu ........................................................................24
Control icons.....................................................................................................25
Using apps........................................................................................................26
Entering Text.....................................................................................................28
Basic settings....................................................................................................29
3. Connecting to networks
Connecting to mobile networks.........................................................................32
Connecting to Wi-Fi
®
networks .........................................................................34
Connecting to VPNs .........................................................................................36
Configure a portable Wi-Fi access point...........................................................37
Configure airplane mode ..................................................................................38
4. Camera
Before using the camera...................................................................................39
Recording flow ..................................................................................................41
Using camera functions ....................................................................................42
Viewing Recording screens ..............................................................................43
Taking a Still picture..........................................................................................46
Recording Motion Picture .................................................................................47
Selecting the Recording Mode..........................................................................51
Zoom and Flash................................................................................................79
Operating the control ring .................................................................................84
Setting the Menu...............................................................................................91

3
Using the [Rec] Menu .......................................................................................96
Using the [Custom] Menu ...............................................................................116
Basic camera settings ([Setup] menu)............................................................122
5. Viewer
Gallery ............................................................................................................124
6. Photo Search
Launching Photo Search ................................................................................129
7. Phone
Emergency calls .............................................................................................132
Making a call...................................................................................................132
Answering a call..............................................................................................134
Call log............................................................................................................135
Voicemail ........................................................................................................136
Caller ID information.......................................................................................137
Fixed Dialling Numbers...................................................................................137
8. People
Saving contacts ..............................................................................................138
Displaying contacts.........................................................................................139
Managing contacts..........................................................................................140
9. Email/Messaging
Email...............................................................................................................142
Gmail™...........................................................................................................145
Google Hangouts™ ........................................................................................146
10. Web browser
Launching the web browser............................................................................148
Bookmarks......................................................................................................151
11. Music
Google Play Music™ ......................................................................................152
12. Maps
Location information service...........................................................................154
Google Maps™...............................................................................................155
13. Other apps and functions
NFC ................................................................................................................156
Google Drive™ ...............................................................................................156

4
Google Keep™ ...............................................................................................158
Calendar .........................................................................................................161
YouTube™......................................................................................................163
14. Google Play
Google Play™ Store .......................................................................................164
Deleting apps..................................................................................................165
Access permissions........................................................................................166
Installing apps from unknown sources............................................................166
15. Connecting to external devices
Bluetooth
®
wireless technology.......................................................................167
USB connections ............................................................................................170
Printing............................................................................................................172
16. Synchronise/Backup/Reset
Synchronise and delete accounts...................................................................173
Backup............................................................................................................174
Reset ..............................................................................................................174
17. Security
Screen lock .....................................................................................................175
SIM card lock..................................................................................................176
18. Updates
System updates ..............................................................................................177
19. Settings list
Settings list .....................................................................................................179
20. Others
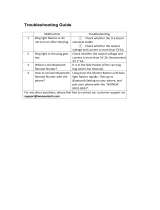
Troubleshooting ..............................................................................................183
Cautions for Use.............................................................................................189

5
1. Before Use
How to use this manual
≥ Click a cross reference in the text to jump to the corresponding page.
≥ By entering keywords in the search field at the top of the Adobe Reader screen, you can run a keyword search and
jump to the corresponding page.
≥ Operations and other details of this manual may vary depending on the Adobe Reader version you are using.
∫ About the symbols in the text
Standard Accessories
Check that all the accessories are supplied before using this unit.
≥ The accessories and their shape will differ depending on the country or area where this unit was purchased.
For details on the accessories, refer to “Basic Operating Instructions”.
≥ microSD Memory Card, microSDHC Memory Card and microSDXC Memory Card are indicated as microSD card in
the text.
≥ microSIM card and microSD card are optional.
: Indicates a general notification.
: Indicates a hint for easier use, or a key point for taking pictures with the camera.
:
Indicates conditions that prevent a certain function from being used while taking pictures with the
camera.
(P¢¢): Indicates a reference page. Click to navigate to that page.
In these operating instructions, steps for setting a menu item are described as follows.
From the Home screen > [] > [].

1. Before Use
6
Names and Functions of Main Parts
1
7810
9
2345
6
11
1
Shutter button (P46)
Press to take a picture with the camera.
Press halfway (lightly) to adjust the focus.
2
Camera selector switch (P42)
Starts or ends the camera.
3
Flash (P81)/
AF Assist Lamp (P118)
Flashes or lights up when taking a picture with the
camera.
4
[ ] button (P16)
Turns the unit on/off, or sets/releases sleep.
5
[ ]/[ ] buttons (P30, 121)
Adjusts the volume of incoming calls, receivers or
music.
When using the camera function, functions that
are used frequently during recording can be
assigned to these buttons.
6
Speaker (P133)
Plays the ringtone, music or the caller’s voice
when in handsfree mode.
7
NFC antenna (P156)
The NFC antenna is built-in.
8
Control ring (P84)
Assigned functions can be used by rotating the
control ring while taking pictures with the camera.
9 Lens front ring (Diameter: 37 mm) (P190)
10
Outward facing camera (P39)
Take pictures or motion pictures.
11
Microphone (P40, 133)
Records audio when recording motion pictures,
and limits noise to make it easier to hear the
caller’s voice.
Picks up and transmits your voice when in
handsfree mode.

1. Before Use
7
13 14 1512
19 20
21
22
16
17
18
12
microUSB terminal (P14, 170)
Use this when charging or connecting external
devices.
13
Ringtone lamp/Charging lamp (P14, 180)
Flashes if there is a missed call or new email, and
lights up when charging.
14
Light sensor/Proximity sensor
Sensor to detect the surrounding brightness and
automatically adjust the brightness of the screen,
and to prevent incorrect operation of the touch
screen during a call.
Do not cover the sensor area with your hand or
paste stickers over it in order to prevent incorrect
operation of the sensor.
15
Display (P18)
Features a touch screen. Operate it by touching
directly with your fingers.
16
Earpiece
Hear the caller’s voice.
17
Earphone terminal (P9)
Connect a headset (optional).
18
Inward facing camera (P42)
Take pictures or motion pictures.
19
microSIM card slot (P10)
Insert a microSIM card.
20
microSD card slot (P11)
Insert a microSD card.
21
Nameplate
Stowable nameplate.
Contains information such as the mobile
identification number.
22
Mouthpiece/Microphone (P40, 132)
Records audio when recording motion pictures,
and picks up and transmits your voice when
talking.

1. Before Use
8
∫ About the mobile identification number
This unit has a specific mobile identification number A.
The mobile identification number is verified as follows.
To verify the number on-screen:
1 From the Home screen > [ ] > [ ].
2 [About phone] > [Status] > check the [IMEI] item.
To verify the number by checking the nameplate:
1 Open the card slot cover.
2 Remove the microSIM card tray.
3 Pull the nameplate towards you.
≥ Be careful as the nameplate may be damaged if it is pulled too hard.

1. Before Use
9
Stereo headset (optional)
You can use a headset (optional) to listen to music or watch videos.
If the headset (optional) has a microphone, you can also use it to talk on the phone.
≥ Check that the headset (optional) plug is completely inserted into the earphone terminal.

1. Before Use
10
Inserting/Removing the microSIM card (optional)
A microSIM card is an integrated circuit that stores the customer’s phone number and
other information.
Calls and messages (SMS) cannot be sent or received unless the microSIM card is
inserted.
If you have inserted/removed the microSIM card, do not deliberately touch or damage the
IC terminals.
1
Open the card slot cover with the control ring face of this unit facing upwards.
2
Hold the hooks of the tray with your fingertips and pull it out horizontally.
3
Mount the microSIM card on the tray C with the IC face A on top.
≥ Take note of the notch B on the microSIM card and mount it in the correct direction.
4
Check the orientation of this unit and insert the tray horizontally into the slot of
the microSIM card.
5
Close the card slot cover.
∫ Removing the microSIM card
1 Open the card slot cover with the control ring face of this unit facing upwards.
2 Hold the hooks of the tray with your fingertips, pull it out horizontally, and remove the microSIM card.
3 Check the orientation of this unit and insert the tray horizontally into the slot of the microSIM card.
4 Close the card slot cover.
≥ Keep the microSIM Card out of reach of children to prevent swallowing.
≥ Keep the microSIM Card Tray out of reach of children to prevent swallowing.

1. Before Use
11
About the Built-in Memory/the microSD Card
(optional)
∫ About the motion picture recording and SD speed class
About Built-in Memory
≥ Memory size: Approx. 10 GB
≥ The access time for the built-in memory may be longer than the access time for a microSD card.
≥ You can copy the recorded pictures to a microSD card. (P126)
About microSD cards that can be used with this unit
The following microSD cards which conform to the SD standard can be used with this
unit.
(These cards are indicated as microSD card in the text.)
microSD Memory Card
(64 MB to 2 GB)
≥ microSDHC Memory Cards and microSDXC Memory Cards can
be used only with their compatible devices.
≥ Check that the PC and other equipment are compatible when
using the microSDXC Memory Cards.
≥ Check the corresponding manufacturer, capacity and other latest
compatibility information from the following support site.
http://panasonic.jp/support/global/cs/dsc/
(This Site is English only.)
Note that this does not guarantee compatibility with all operations.
≥ A message prompting to format the microSD card may be
displayed when connecting the microSD card to other devices,
but do not format.
microSDHC Memory Card
(4 GB to 32 GB)
microSDXC Memory Card
(64 GB to 128 GB)
According to the [Rec Quality] (P48) of a motion picture, the required microSD card differs. Use a microSD card
that meets the following rating of the SD Speed Class.
≥ SD Speed Class is the speed standard regarding continuous writing. Check via the label on the microSD card,
etc.
≥ The SD speed class represents the level of performance of microSD cards. The SD speed class does not serve
as a guarantee of performance for all operations.
[Rec Quality] SD Speed class Label example
FHD/HD/VGA/1:1 Class 4 or higher
4K Class 10
≥
The data on the built-in memory or the microSD card may be damaged or lost due to electromagnetic waves,
static electricity or breakdown of this unit or the microSD card. We recommend storing important data on a PC etc.
≥ Keep the microSD Card out of reach of children to prevent swallowing.

1. Before Use
12
∫ Number of recordable pictures
Aspect ratio [3:2], Quality [A]
Aspect ratio [3:2], Quality [ ]
∫ Available recording time (when recording motion pictures)
Approximate number of recordable pictures and available recording
time
≥ [9999i] is displayed if there are more than 10000 pictures remaining.
[Picture Size] 8 GB 32 GB 64 GB 128 GB
L (20M) 720 2910 5790 11600
M (10M) 1310 5310 10570 21190
S (5M) 2290 9250 18020 36100
XS (2.5M) 6010 24300 48660 97480
[Picture Size] 8 GB 32 GB 64 GB 128 GB
L (20M) 220 920 1840 3690
M (10M) 260 1070 2150 4310
S (5M) 290 1170 2350 4700
XS (2.5M) 310 1270 2540 5100
≥ “h” is an abbreviation for hour, “m” for minute and “s” for second.
≥ The recordable time is the total time of all the motion pictures which have been recorded.
[Rec Quality] 8 GB 32 GB 64 GB 128 GB
[4K 15p] 20m58s 1h24m39s 2h49m30s 5h39m36s
[FHD 30p] 52m09s 3h30m35s 7h01m41s 14h04m49s
[HD 30p] 1h43m28s 6h57m44s 13h56m28s 27h55m49s
[VGA 30p] 4h12m27s 16h59m17s 34h01m00s 68h09m04s
[1:1 30p] 4h12m27s 16h59m17s 34h01m00s 68h09m04s
≥ The maximum continuous recordable time of a motion picture is 29 minutes and 59 seconds, which is
equivalent to a file size of approximately 4 GB.
You can check the recordable time on the screen. (With [4K 15p]/[FHD 30p], the file size becomes larger,
causing the recordable time to become shorter than 29 minutes and 59 seconds)
≥ The number of recordable pictures and the available recording time are an approximation.
(These vary depending on the recording conditions and the type of microSD card.)
≥ The number of recordable pictures and the available recording time varies depending on the subjects.
≥ The maximum available continuous recording time is displayed on the screen.

1. Before Use
13
1
Open the card slot cover, ensure that
the connection terminal of the microSD
card is facing down, and insert it firmly
in the correct direction until it makes a
“click” sound.
A Do not touch the connection terminals of the
microSD card.
2
Close the card slot cover.
∫ Removing the microSD card
Push the microSD card in until it makes a “click” sound and then pull it out straight.
Inserting/Removing the microSD card

1. Before Use
14
Charging
≥ The battery is not charged when this unit is shipped. Charge the battery before use.
Connect the unit and AC adaptor to charge.
1
Open the microUSB terminal cover, check the direction of the AC adaptor cable
terminal, and insert it into the microUSB terminal.
2
Insert the AC adaptor power plug into the power outlet.
∫ When charging is complete
1 Remove the AC adaptor power plug from the power outlet.
2 Remove the AC adaptor cable terminal from the unit.
≥ When you start charging an empty battery, the charging lamp may flash. This is not a malfunction. The charging
lamp stops flashing and lights up after the battery is charged for a while.
Charge with an AC adaptor
A To power outlet
B AC adaptor
C microUSB terminal
D Charging lamp
≥ The unit and AC adaptor may become warm while charging, however this is not a malfunction.
≥ The shape of the AC adaptor power plug and power outlet may differ depending on each country/region.
≥ Do not use any other AC adaptors except the supplied one.
≥ Do not leave any metal items (such as clips) near the contact areas of the power plug. Otherwise, a fire
and/or electric shocks may be caused by short-circuiting or the resulting heat generated.
About the charging lamp
On: Charging.
Off: Charging has completed.

1. Before Use
15
≥ Approximate charging time when the battery is drained and the unit is turned off.
The charging time is longer if the unit is turned on during charging.
If the battery level falls below 15%, a message will be displayed stating that the
battery is low to notify you to charge the unit.
If the battery becomes flat, a message will be displayed stating that the battery is flat,
and the unit will turn off.
≥ The amount of time you can use the unit varies depending on how it used and the usage environment.
Recording still pictures (By CIPA standard in Programme AE Mode)
Recording motion pictures
(Recording with picture quality set to [FHD 30p])
Charging time
Charging time Approx. 150 min
When the battery becomes low (charge notification)
Approximate operating time and number of recordable pictures
Number of recordable pictures Approx. 300 pictures
Recording time Approx. 150 min
Recording conditions by CIPA standard
≥ CIPA is an abbreviation of [Camera & Imaging Products Association].
≥ Temperature: 23 oC (73.4 oF)/Humidity: 50%RH when display is on.
≥ Using a Panasonic microSDHC Memory Card.
≥ Starting the camera application and recording 30 seconds after this unit is turned on.
≥ Recording once every 30 seconds using full flash every second recording.
≥ Turning this camera application off every 10 recordings and leaving it until the temperature of the unit
decreases.
The number of recordable pictures varies depending on the recording interval time. If the recording
interval time becomes longer, the number of recordable pictures decreases.
[For example, if you were to take one picture every two minutes, then the number of pictures would be
reduced to approximately one-quarter of the number of pictures given above (based upon one picture
taken every 30 seconds).]
Recordable time Approx. 130 min
Actual recordable time Approx. 90 min
≥ The maximum continuous recordable time of a motion picture is 29 minutes and 59 seconds, which is
equivalent to a file size of approximately 4 GB.
You can check the recordable time on the screen. (With [4K 15p]/[FHD 30p], the file size becomes larger,
causing the recordable time to become shorter than 29 minutes and 59 seconds)
≥ These times are for an ambient temperature of 23 oC (73.4 oF) and a humidity of 50%RH.
Please be aware that these times are approximate.
≥ The actual recordable time is the time of recording possible with repeated start/stop of the camera function, and
start/stop of recording.

1. Before Use
16
Turning the unit on/off
Turn on the unit by pressing [ ] for 2 seconds or more.
≥ The lock screen will be displayed after a short time. (P17)
≥ The default settings screen will be displayed when you turn the unit on for the first time.
(P17)
≥ Press [ ] to enter/release sleep mode, when the unit is turned on.
∫ To turn the unit off
Press [ ] for 1 second or more > [Power off] > [OK].
∫ To restart
Press [ ] for 1 second or more > [Reboot] > [OK].

1. Before Use
17
Android™ default settings
The first time you turn the unit on after purchase, follow the on-screen instructions
and configure the language and Wi-Fi
®
settings.
1
Select language > [ ].
2
Follow the on-screen instructions to configure various settings.
3
After configuring various settings, read through description on diagnosis
information > [Deny]/[Allow].
≥ Information concerning the condition of the terminal and information required for resolution is sent to the
manufacturing source e.g. during system update or when an error occurs. This information is used for quality
and service improvement purposes only.
Data communication charges may be incurred when sending data.
≥ The tutorial screen is displayed when the default settings are completed.
Confirm the details on the screen, and tap [OK].
Release the lock screen
Slide [ ] until the guide (white line on the outer
circumference) A.
≥ If the [Screen lock] settings have been changed, use the method configured to
release the lock.
≥ The unit will acquire the date and time from the network to automatically set the date and time, however they
may not be set properly depending on the environment that the unit is used in. In this case, set the date and
time manually. (P29)
A

18
2. Basic Operation
Using the touch screen
The unit features a touch screen, which you can operate by touching directly with your
fingers.
≥ Peel off the sheet pasted to the touch screen when first bought before use.
≥ The touch screen is designed to be lightly touched with a finger.
Do not press the touch screen strongly with your finger or press objects with sharp tips (claws/ball point pens/pins etc.)
against it.
≥ The touch screen may not work even when touched in the following cases. Please note that they may also result in
incorrect operations.
– Operating with gloves on your hand
– Operating with your fingertips
– Operating with foreign objects on top of the operating surface
– Operating with a protective sheet, seal, etc. pasted on top
– Operating with the touch screen wet
– Operating with your fingers wet with sweat or water
Tapping
Tap an item or icon to select
it.
Double-tapping
Tap the touch screen quickly
two times when you want to
zoom in and out of
webpages, etc.
Tapping and holding
Tap an item or icon without
releasing your finger.
Use this to display a context
menu.
Flicking
Moving your finger quickly
across the touch screen will
move back and forth through
numerous pictures.

2. Basic Operation
19
Dragging
Tap an item or icon without
releasing your finger and
slide it.
Scrolling
Flick/drag your finger around
the screen to display a
hidden area.
Pinching
When displaying a webpage
or picture, use two fingers to
push the screen apart and
zoom in (pinch out), or bring
them together to zoom out
(pinch in).
≥ Controls may differ or not be available depending on the app being used.

2. Basic Operation
20
Switching between vertical and horizontal
viewing modes
The unit switches the screen between vertical and horizontal viewing modes depending on
its motion sensor that can detect the unit’s direction and movement.
≥ The screen display may not switch depending on the app being used and other reasons.
/