Whirlpool AMW 423/IX User guide
- Category
- Microwaves
- Type
- User guide
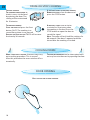
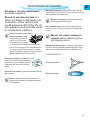
Whirlpool AMW 423/IX is a microwave oven with a 25 liter capacity, 900W power output, and 5 power levels. It features a user-friendly interface with a digital display, a kitchen timer, and a child lock for added safety. The microwave oven comes with a variety of automatic cooking programs for convenient meal preparation.
Whirlpool AMW 423/IX is a microwave oven with a 25 liter capacity, 900W power output, and 5 power levels. It features a user-friendly interface with a digital display, a kitchen timer, and a child lock for added safety. The microwave oven comes with a variety of automatic cooking programs for convenient meal preparation.


-
 1
1
-
 2
2
-
 3
3
-
 4
4
-
 5
5
-
 6
6
-
 7
7
-
 8
8
-
 9
9
-
 10
10
-
 11
11
-
 12
12
-
 13
13
-
 14
14
-
 15
15
-
 16
16
-
 17
17
-
 18
18


Whirlpool AMW 423/IX User guide
- Category
- Microwaves
- Type
- User guide
Whirlpool AMW 423/IX is a microwave oven with a 25 liter capacity, 900W power output, and 5 power levels. It features a user-friendly interface with a digital display, a kitchen timer, and a child lock for added safety. The microwave oven comes with a variety of automatic cooking programs for convenient meal preparation.
Ask a question and I''ll find the answer in the document
Finding information in a document is now easier with AI
Related papers
-
Whirlpool AMW 423/IX User guide
-
-
-
-
Whirlpool AMW 498 WH User guide
-
-
-
-
Whirlpool AMW 835/IXL User guide
-