17
ARRANGING ITEMS FOR DRYING
There are three sets of hangers inside the
cabinet. Each set has a number of rails for
hanging items to dry, as described below. The
most effi cient drying results are obtained by
hanging the items in this way.
Hang the items in the drying cabinet
according to how much space they require –
not according to their weight.
For most eff ective drying, do not position
items laid fl at on the upper hanger section.
Long garments closest to the walls of the
cabinet and shorter garments towards the
centre of the cabinet. The most eff ective
drying results are achieved by hanging the
garments in this way.
Fold up the two bottom hanger sections if
long garments are to be dried.
Hang gloves, caps, scarves and similar items on
the hanger strips on the inside of the door.
Draw the hanger hooks in the upper hanger
section forward so that the washing can be
hung more easily. Push them back when not
in use.
Do not overload the drying cabinet. If you do,
the washing will become creased and dry
unevenly. Instead, leave a space between
the garments if possible.
If there is a risk of particular items shedding
colour, free space should be left around them.
Avoid drying heavy items of clothing together
with lighter items as they have very diff erent
drying times.
Make sure not to hang knitted items. These
will stretch unnecessarily as they are heavy
when wet.
The bar hangers are used to place over the
rods on a hanger to be able to hang a shirt,
dress or equal garment in the cabinet
Shoes, boots are the best placed on
the shoe rack to get the best drying
performance.
USER TIPS
Always follow the washing instructions on
items of clothing if indicated.
If a fabric conditioner or antistatic product is
used, the manufacturer’s instructions for use
of this product must be followed.
Remove washing that is already dry. This
will reduce the drying time for remaining
washing.
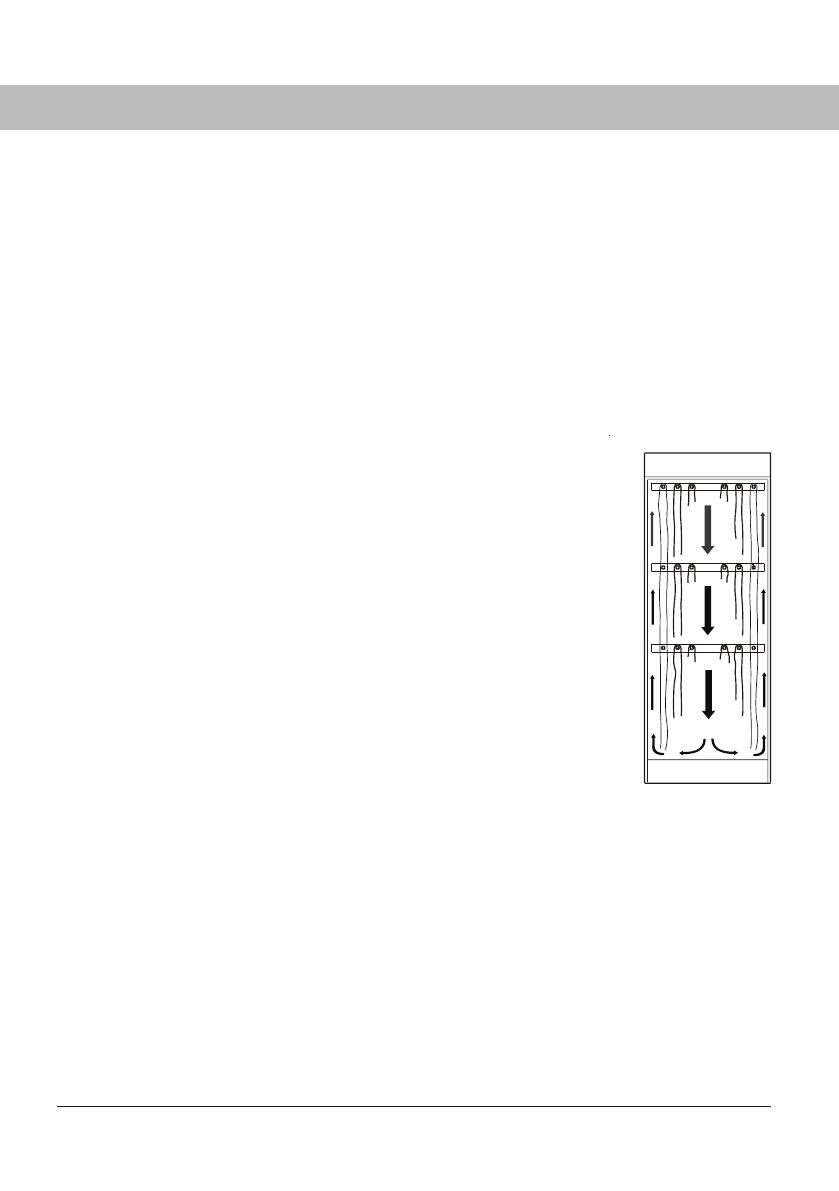
AIR FLOW
the illustration shows
the air fl ow in the drying
cabinet.
Keep the area around
the evacuation duct
clear of dust and dirt.
Make sure that the air
intake and exhaust
duct are not blocked.
______________________________________
NOTE: When the cabinet is cold, it may happen that
the door’s sealing strip does not close completely.
However, this is fully off set when the cabinet is
running as the sealing strip expands.
______________________________________
OPERATION
784509au_en.indd 17784509au_en.indd 17 21. 02. 2022 08:26:3021. 02. 2022 08:26:30


