Page is loading ...

®
Model #
24320
STORE THIS MANUAL IN A SAFE
PLACE FOR FUTURE REFERENCE
888-648-3371
NEED HELP?
!
?
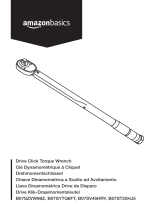
TORQUE WRENCH
OPERATOR’S MANUAL
• At low torque settings, pull wrench slowly to observe click.
Please read and understand entire manual, including all safety information, before using torque
wrench. This tool is a precision measuring instrument. Handle with care and store properly. Do
not attempt to increase leverage of this wrench with any other device. Failure to follow all
instructions could result in damage to torque wrench, property damage, or injury.
• Wrench is shipped ready to use, calibrated and tested to an accuracy of +/- 4%. To maintain
this accuracy, it is important that wrench is stored at lowest torque setting, 20 in.-lb (2.2 Nm).
This setting relieves extra tension on the internal spring, reducing fatigue that can adversely affect
accuracy.

MICROMETER SCALE
HANDLE BODY
MAIN SCALE
KNURLED HANDLE
LOCK NUT
Fig. A
20
50
80
110
140
170
200
STORE AT
20 IN.-LB.
IN.-LB.
35
65
95
125
155
185
0 10
5
5
20
50
80
110
140
170
200
STORE AT
20 IN.-LB.
IN.-LB.
35
65
95
125
155
185
100 5
Fig. B Fig. C
HANDLE
PIVOT
POINT
WRENCH OPERATION
Fig. D illustrates the basic operation of the torque wrench. For accurate operation, grasp the knurled handle only and apply
pulling force. When the desired torque setting is reached, the roller bearing and roller pin will roll over each other, causing a
click you can hear and feel. NOTE: At low torque settings, click can be subtle. Use wrench in a quiet environment.
1. Install proper socket/attachment to square drive. Place socket on nut/bolt to be tightened.
2. Operate torque wrench the same as a standard socket wrench to tighten nut/bolt. As nut/bolt becomes snug, slow
operation to a smooth, steady pull. Operating wrench too quickly or with too much force may cause you to miss the
exact torque setting. At the instant the wrench clicks, torque setting has been reached. Stop pulling wrench and
release pressure on handle. Do not continue to pull aer torque setting is reached. Doing so will overtighten the
nut/bolt and could damage wrench. Once pressure is released from the handle, wrench will automatically reset for
next operation. NOTE: At low torque settings, use extra care to release wrench at the proper point aer it clicks.
3. Wrench does not measure torque below 20 in.-lb. (2.2 Nm).
4. Do not use wrench to break free stuck fasteners.
SETTING TORQUE READING
This is a dual-range torque wrench marked with
inch pounds (in.-lb.) and Newton meters (
Nm
)
on opposite sides of handle.
The torque scale is marked on the handle body
with more precise subdivisions on the knurled
handle (Fig. A). In these instructions the handle
body scale will be referred to as the “main
scale” and the knurled handle scale will be
referred to as the “micrometer scale”.
Tighten/adjust lock nut and knurled
handle by hand only.
Inch Pounds (Example reading: 119 in.-lb.)
1. Locate lock nut on the end of handle.
Unlock knurled handle by turning lock
nut counterclockwise.
2. COARSE SCALE ADJUSTMENT (Fig. B):
Using in.-lb. scale
, turn knurled handle until
its
top edge is even with the horizontal
“
110
” mark on main scale and the “0” mark
on micrometer scale is centered on vertical
line of main scale.
3. FINE SCALE ADJUSTMENT (Fig. C):
The micrometer scale divides the main scale markings into 15 divisions.
Every micrometer scale marking equals 1 in.-lb., also known as the minimum increment. To increase torque from
110 to 119, turn micrometer handle clockwise until "9" mark is centered on vertical line of main scale.
110 in.-lb. (main scale) + 9 in.-lb. (micrometer scale) = 119 in.-lb.
4
. Lock torque setting by turning lock nut clockwise until snug. Wrench is now set to measure
119
in.-lb. of torque
and ready to use.
Newton Meters (Example reading: 10.0 Nm)
Setting desired torque on the Nm scale uses the same procedure described above for in.-lb. scale. The micrometer scale
divides the main scale markings into 15 divisions. Every micrometer scale marking equals 0.11 Nm, also known as the
minimum increment.
To set a torque value of 10.0 Nm, turn knurled micrometer handle until top is aligned with “9.0” mark on main scale and
the “0” mark on micrometer scale is centered on vertical line of main scale. To increase torque from 9.0 Nm to 10.0 Nm,
turn micrometer handle clockwise until the “9” mark is centered on vertical line of main scale. 10.0 Nm - 9.0 Nm = 1.0
Nm. 1.0 Nm ÷ 0.11 ≈ 9 micrometer scale markings. Wrench is now set to measure 10.0 Nm of torque and ready to use.
TURN
Fig. D
WRENCH ROTATION
Torque is measured
in CLOCKWISE
direction only
"CLICK"

Fig. E
5
0 10
20
50
80
110
140
170
200
STORE AT
20 IN.-LB.
IN.-LB.
35
65
95
125
155
185
1.67
2.08
2.50
2.92
3.33
3.75
4.17
4.58
5.00
5.42
5.83
6.25
6.67
7.08
7.50
7.91
8.33
8.75
9.17
9.58
10.00
10.42
10.83
11.25
11.67
12.08
12.50
12.91
13.33
13.75
14.17
14.58
15.00
15.42
15.83
16.25
16.67
2.26
2.82
3.39
3.95
4.52
5.08
5.65
6.21
6.78
7.34
7.91
8.47
9.03
9.60
10.16
10.73
11.29
11.86
12.42
12.99
13.55
14.12
14.68
15.25
15.81
16.38
16.94
17.51
18.07
18.64
19.20
19.77
20.34
20.90
21.46
22.03
22.59
20
25
30
35
40
45
50
55
60
65
70
75
80
85
90
95
100
105
110
115
120
125
130
135
140
145
150
155
160
165
170
175
180
185
190
195
200
TORQUE UNIT CONVERSION TABLE
CONVERSIONS
1 .-lb. =
0.138 m-kg
12.0 in.-lb.
1.35 Nm
13.8 cm-kg
1 Nm =
0.737 .-lb.
8.85 in.-lb.
0.102 m-kg
10.2 cm-kg
1 in.-lb. =
0.0833 .-lb.
0.113 Nm
0.0115 m-kg
1.15 cm-kg
INCH
POUNDS
(in.-lb.)
FOOT
POUNDS
(.-lb.)
NEWTON
METERS
(Nm)
INCH
POUNDS
(in.-lb.)
NEWTON
METERS
(Nm)
FOOT
POUNDS
(.-lb.)
INCH
POUNDS
(in.-lb.)
NEWTON
METERS
(Nm)
FOOT
POUNDS
(.-lb.)
1
2
3
4
5
6
7
8
9
10
11
12
13
14
15
16
17
18
19
20
21
22
1.35
2.71
4.06
5.42
6.78
8.13
9.49
10.84
12.20
13.55
14.91
16.27
17.62
18.98
20.33
21.69
23.04
24.40
25.76
27.11
28.47
29.82
12
24
36
48
60
72
84
96
108
120
132
144
156
168
180
192
204
216
228
240
252
264
2
3
4
5
6
7
8
9
10
11
12
13
14
15
16
17
18
19
20
21
22
23
17.70
26.55
35.40
44.25
53.10
61.95
70.80
79.65
88.50
97.35
106.20
115.06
123.91
132.76
141.61
150.46
159.31
168.16
177.01
185.86
194.71
203.56
1.47
2.21
2.95
3.68
4.42
5.16
5.90
6.63
7.37
8.11
8.85
9.58
10.32
11.06
11.80
12.53
13.27
14.01
14.75
15.49
16.27
16.96
MAINTENANCE AND STORAGE
1. If wrench has not been used for a long period of time, operate it several times at
a low torque setting. This will allow internal lubricant to recoat moving parts.
2. When wrench is not in use, keep adjustment at lowest torque setting,
20 in.-lb. (2.2 Nm)
(Fig. E).
Do not turn handle below lowest torque setting.
3. This wrench is a precision measuring instrument. Take care to operate wrench
correctly. Store in a clean, dry environment.
4. Clean wrench by wiping with a clean, dry, lint-free cloth. Do not immerse in any
type of liquid or cleaner. This may damage the internal components of the wrench.

0
2
4
RATCHET PAWLS
AND SPRINGS
RATCHET ARM
RETAINING
RING
HANDLE BODY
ROLLER BEARING
ROLLER PIN
ADJUSTMENT
SPRING
RATCHET
FACE PLATE
RATCHET
GEAR/DRIVE
RATCHET
SCREWS
PIVOT PIN
RUBBER
O-RING
LOCKING SHAFT
KNURLED HANDLE
LOCKING LUG
ASSEMBLY
WASHER
LOCK NUT
POMMEL NUT
CALIBRATION
SCREW
PIN
PIN
PLASTIC
CAP
NOTE: Exploded view diagram provided for illustration purposes only. Do not
disassemble any part of torque wrench. There are no user serviceable parts on
or inside wrench. Parts shown and assembly may differ slightly based on model.
Drive 1/4 in.
Ratchet 24 Tooth
Length 12 in.
Dual Range 20 - 200 in.-lb. and 2.2 - 22.6 Nm
Increment 1 in.-lb. (0.11 Nm)
Accuracy +/- 4%
© 2017
TEKTON.COM
3707 Roger B Chaffee SE
Grand Rapids, MI 49548
Made in Taiwan
/