
Instructions
TRANSITIONS
®
Modular Entry Ramp
Available in 1-, 1½-, 2-, 3-, 4-, 5-, & 6-inch Heights
14238 REV 05-26-16
LIFETIME WARRANTY. Please register at www.ezaccess.com/warranty-satisfaction.
CE Technical Files kept at: Enable Access, Marshmoor Works Great North Road, North Mymms Hatfield, AL9 5SD, UK
© EZ-ACCESS
®
, a division of Homecare Products, Inc. All rights reserved.
All text and images contained in this document are proprietary and may not be shared, modified, distributed,
reproduced, or reused without the express written permission of EZ-ACCESS.
IMPORTANT INFORMATION
Rated load is 700 pounds, 350 pounds per caster or
wheel. Never exceed rated load.
Read and follow all labels, instructions, safety and
maintenance information before use.
For additional care, use or safety information, or to
obtain replacement copies, please call 1-800-451-1903
or visit www.ezaccess.com.
Do not use if ramp is damaged or unstable.
For wheelchairs and scooters only (not intended for
commercial use).
Ramp may be slippery when wet or icy.
Use only if sufficient maneuvering room is available at
both ends of the ramp to assure safe travel when
entering and exiting the ramp.
Use ramp only with a qualified helper and always use
your lap belt.
It is important that you refer to your equipment's
(wheelchair or scooter) User Guide for the proper
degree of incline or decline and chair direction before
attempting ramp use. Never exceed its
recommendations.
PACKAGE CONTENTS (SEE FIGS. 2 & 3)
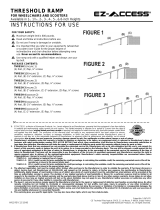
FIG. 2
TMER 1: (A) foot, (H) flap, #6 screws
TMER 1.5: (A) foot, (B) 1½” extension, (H) flap, #6
screws
FIG. 3
TMER 2: (A) foot, (C) 2” extension, (H) flap, #6 screws
TMER 3: (A) foot, (C) 2” extension, (D) 3” extension,
(H) flap, #6 screws
TMER 4: foot, (C) 2” extension, (D) 3” extension, (E) 4”
extension, (H) flap, #6 screws
TMER 5: (A) foot, (C) 2” extension, (D) 3” extension,
(E) 4” extension, (F) 5” extension, (H) flap, #6 screws
TMER 6: (A) foot, (C) 2” extension, (D) 3” extension,
(E) 4” extension, (F) 5” extension, (G) 6” extension, (H)
flap, #6 screws
SINGLE RAMP APPLICATION, STANDARD
THRESHOLD AND LANDING
1. Slide sections together starting with the foot (A) until the
hole and slot line up. Install #6 screw and tighten (FIG. 1).
Continue installing extensions until desired height is
reached. Install the flap (H), if used, in the uppermost
extension.
2. Place the ramp against the threshold or landing. The
adjustable flap should rest on the threshold or landing to
provide a smooth surface for your wheels. If the adjustable
flap is not used, simply place ramp against the edge of the
door runner and attach.
3. Attach your ramp to the threshold or landing using the holes
in either the foot section or the flap. Wood screws, sheet
metal screws, or concrete bolts may be necessary,
depending on the situation. It is also possible to use double
face tape or caulking to attach the ramp. Foam rubber or
other protective material may be put on the bottom of the
legs to protect certain floor surfaces.
MULTI-RAMP APPLICATIONS, UNEVEN THRESHOLDS OR
SLIDING DOORS
1. There are situations where a second ramp may be needed
on the inside of the threshold. If so, then the purchase of a
second ramp of equal or different height will be necessary.
Follow instructions for single ramp application when
installing a second ramp.
2. For sliding door applications, do not use the flap (H).
Instead, simply place leg of ramp against edge of door
runner and attach per number “3” in SINGLE RAMP
APPLICATION section.
SAFETY & MAINTENANCE
1. Regularly check ramp for damage and tighten any loose
fasteners.
2. Keep ramp surface clear of ice, snow, dirt, leaves, and other
debris. For snow or ice, remove accumulation and sweep
surface clean. To remove dirt, leaves, and other debris,
sweeping the surface or using a garden hose will usually
suffice. If needed, use a damp cloth or soft brush with non-
alkaloid detergent and water. Rinse well and use extra caution
if ramp surface is wet.
FIG. 1
FIG. 2
FIG. 3
-
 1
1
EZ-ACCESS TMER 5 Operating instructions
- Type
- Operating instructions
Ask a question and I''ll find the answer in the document
Finding information in a document is now easier with AI
Related papers
-
EZ-ACCESS TAEP 12 Operating instructions
-
EZ-ACCESS TMER 3 Operating instructions
-
EZ-ACCESS SUITCASE SF04 Operating instructions
-
EZ-ACCESS TRAVERSE SF08 Operating instructions
-
EZ-ACCESS SUITCASE SFAS04 Operating instructions
-
EZ-ACCESS SUITCASE TFAS10 Installation guide
-
 Homecare Enterprise Mobility Aid User manual
-
EZ-ACCESS TAER 24 Operating instructions
-
EZ-ACCESS P3G SEM08 Installation guide
-
EZ-ACCESS P3G SLPS55 Operating instructions
Other documents
-
 Peace Of Mind POMPF4 Operating instructions
-
 RHYTHM HEALTHCARE LR060TH Operating instructions
-
 Peace Of Mind POMT3 Operating instructions
-
 Doorline S05196 Operating instructions
-
 Ez Access Mobility Aid ez-access User manual
-
 Ez Access Mobility Aid 12101 User manual
-
Cessna 1980 172RG Cutlass Pilot Operating Handbook
-
Sunrise Medical Stroller Mighty Lite User manual
-
Sunrise Medical R2 User manual
-
Cessna 152 1979 Pilot Operating Handbook


