Page is loading ...

HD-50
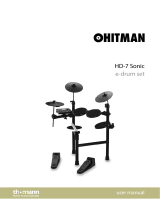
e-drum set
user manual

Musikhaus Thomann e.K.
Treppendorf 30
96138 Burgebrach
Germany
Telephone: +49 (0) 9546 9223-0
E-mail: [email protected]
Internet: www.thomann.de
19.10.2012

Table of contents
1 General notes............................................................................................................................ 4
2 Safety notes............................................................................................................................... 5
3 Features....................................................................................................................................... 7
4 Scope of delivery..................................................................................................................... 8
5 Assembly..................................................................................................................................... 9
6 Installation.............................................................................................................................. 12
7 Connections and controls................................................................................................ 14
8 Operation................................................................................................................................. 17
8.1 Functions......................................................................................................................... 17
8.2 Factory settings............................................................................................................. 20
9 Technical data........................................................................................................................ 23
10 Cleaning.................................................................................................................................... 24
11 Protecting the environment........................................................................................... 25
12 Appendix.................................................................................................................................. 26
12.1 Kit list............................................................................................................................... 26
12.2 Song-style list............................................................................................................... 26
12.3 Sound list....................................................................................................................... 26
12.4 MIDI implementation................................................................................................ 29
Table of contents
HD-50
3

1
General notes
This user manual contains important information on safe operation of the device.
Read and follow all safety notes and all instructions. Save this manual for future refer‐
ence. Make sure that it is available to all persons using this device. If you sell the
device, include the manual for the next owner.
Our products are subject to a process of continuous development. We therefore
reserve the right to make changes without notice.
This section provides an overview of the symbols and signal words used in this user
manual.
Signal word Meaning
DANGER! This combination of symbol and signal
word indicates an immediate dangerous
situation that will result in death or
serious injury if it is not avoided.
CAUTION! This combination of symbol and signal
word indicates a possible dangerous sit‐
uation that can result in minor injury if it
is not avoided.
NOTICE! This combination of symbol and signal
word indicates a possible dangerous sit‐
uation that can result in material and
environmental damage if it is not
avoided.
Warning signs Type of danger
Warning – danger zone.
Symbols and signal words
General notes
e-drum set
4

2
Safety notes
Drum modules are intended to be used for converting digital trigger signals from
drum pads to various percussion sounds. Use the unit only as described in this
manual. Any other use or use under other operating conditions is considered to be
improper and may result in personal injury or property damage. No liability will be
assumed for damages resulting from improper use.
This device may be used only by persons with sufficient physical, sensorial, and intel‐
lectual abilities and having corresponding knowledge and experience. Other persons
may use this device only if they are supervised or instructed by a person who is
responsible for their safety.
DANGER!
Danger for children
Ensure that plastic bags, packaging, etc. are disposed of properly and
are not within reach of babies and young children. Choking hazard!
Ensure that children do not detach any small parts (e.g. knobs or the
like) from the unit. They could swallow the pieces and choke!
Never let children unattended use electrical devices.
CAUTION!
Possible hearing damage
With loudspeakers or headphones connected, the device can produce
volume levels that may cause temporary or permanent hearing impair‐
ment.
Do not operate the device permanently at a high volume level.
Decrease the volume level immediately if you experience ringing in
your ears or hearing impairment.
NOTICE!
Operating conditions
This device has been designed for indoor use only. To prevent damage,
never expose the device to any liquid or moisture. Avoid direct sunlight,
heavy dirt, and strong vibrations.
Intended use
Safety
Safety notes
HD-50
5

NOTICE!
External power supply
The device is powered by an external power supply. Before connecting
the external power supply, ensure that the input voltage (AC outlet)
matches the voltage rating of the device and that the AC outlet is pro‐
tected by a residual current circuit breaker. Failure to do so could result
in damage to the device and possibly the user.
Unplug the external power supply before electrical storms occur and
when the device is unused for long periods of time to reduce the risk of
electric shock or fire.
Safety notes
e-drum set
6

3
Features
n 193 sounds
n 10 preset drum kits, 1 user kit
n 10 songs
n Metronome
n Recording and playback function
n Flexible assignment of pad sounds
n Headphones, AUX IN and USB-MIDI interface
Features
HD-50
7

4
Scope of delivery
Verify before assembling the e-drum set that the entire delivery is included,
as listed below.
n Bottom case with bass-drum pedal and hi-hat controller
n 2 × stand tube (left-hand stand tube with snare drum support)
n Drum module with three toms
n 2 × longer cymbal holders for ride and crash cymbals
n shorter hi-hat cymbal holder
n 3 × cymbal (ride, crash and hi-hat)
n Snare drum support
n Snare drum
n Complete pad cabling
n 9 V
(DC) power supply unit
Scope of delivery
e-drum set
8

5
Assembly
Loosen the wing nuts on the holder clamps before inserting the tubes. Mount the
various elements in the specified sequence as shown in the illustration below.
1. Put the bottom case with the bass-drum pedal and the hi-hat controller (1) on
the floor. Insert the two stand tubes (2, with snare drum support) and (3) and
tighten the wing nuts on the holder clamps.
2. Insert the drum module with the three toms (4) into the stand tubes (2) and (3)
and tighten the holder clamps on the wing nuts.
Assembly
HD-50
9

3. Insert the two longer cymbal holders (5) and (6) for the ride and crash cymbals
and the shorter hi-hat holder (7) into the guides provided as shown in the illus‐
tration and tighten the wing nuts on the holder clamps.
4. Place the two ride and crash cymbals (8) and (9) onto the cymbal holders (5)
and (6) as shown in the illustration and tighten the corresponding wing nuts.
5. Place the hi-hat cymbal (10) onto the holder (7) as shown in the illustration and
tighten the corresponding wing nut.
Assembly
e-drum set
10

6. Insert the longer end of the L-piece snare drum support (11) into the holder
clamp provided on the left-hand stand tube (2) and tighten the wing nut on
the holder clamp.
7. Place the snare drum (12) onto the shorter end of the L-piece snare drum sup‐
port and tighten the wing nut on the holder clamp.
The assembled e-drum set should now look like the following illustration:
Assembly
HD-50
11

6
Installation
Set up the pads and cymbals according to your needs. In a next step, the drum
module needs to be connected to the rear of the bottom case and and all triggers
need to be cabled with the drum module. Please observe the labelling on the rear of
the drum module and the labelling on the individual cable ends. Finally check that all
cables between the pads and the drum module have been properly connected.
Connect the CONNECT TO BASE (10) terminal on the rear of the drum module with
the CONNECT TO MODULE terminal on the rear of the bottom case using the
included 6-pole cable in order to connect the bass-drum pedal and the hi-hat con‐
troller to the drum module.
n You produce a closed hi-hat sound when you pedal the hi-hat controller while
hitting the hi-hat
n You produce an open hi-hat sound when you do not pedal the hi-hat controller
while hitting the hi-hat
n You produce the hi-hat pedal sound when pedalling the hi-hat controller directly
without hitting the hi-hat
n An open hi-hat sound changes smoothly to a closed hi-hat sound when you
pedal the hi-hat controller while hitting the hi-hat.
Connect the included pad cables to the corresponding RIDE, CRASH, HI-HAT and
SNARE inputs on the rear of the drum module. The cables have different lengths.
Each cable is labelled on both ends with the corresponding pad designation.
Connect the included power supply unit to the DC 9V input on the rear of the
bottom case and then insert the power plug into the socket outlet.
Set-up and cabling
Connecting the bass-drum pedal and
the hi-hat controller to the drum
module
Hi-hat controller
Connecting the pads
Connecting the power supply
Installation
e-drum set
12

Connect your PC (Windows Vista/XP® or Windows7, Mac) to the USB port (12) on the
rear of the drum module.
Connect audio devices like CD or MP3 players, etc. to the AUX IN input (13) on the
rear of the drum module.
Connect your stereo headphones to the PHONES output (14) on the rear of the drum
module.
Connecting USB devices
Connecting audio devices
Connecting headphones
Installation
HD-50
13

7
Connections and controls
1 MASTER VOLUME
Knob control for adjusting the overall volume of the drum module.
2 LED display
PAD name
KIT mode SONG mode
Displays the Song, Kit and Pad numbers and various setting parameters. In the SONG mode, the song number
appears on the display. In the PAD mode, an abbreviated pad name for snare, crash, tom, etc. appears. In the KIT
mode, the drum kit number appears on the display.
3 [TEMPO/TAP] button
Adjusts the tempo of the click and of the song playback.
4 [KIT] button
Opens the KIT menu.
5 [CLICK] button
Turns the metronome on and off and opens the click menu.
6 TRIGGER LED
Lights up when trigger pulses are generated.
7 [REC/PLAY] button
Allows you to record and play back your performance.
Drum module top view
Connections and controls
e-drum set
14

8 [SONG] button
Controls the selection and playback of songs.
9 [–] / [+] buttons
Buttons to navigate through the ten drum kits, select parameters, sounds, etc.
10 CONNECT TO BASE
6-pole input for connecting the bass-drum pedal and hi-hat controller to the drum module using the included
cable.
11 Trigger input jacks for RIDE, CRASH, HI-HAT and SNARE
Input jacks for connecting the pads using the included cables.
12 USB
USB port for connecting a PC with USB-MIDI interface.
13 AUX IN
Input jack (3.5-mm stereo mini jack) for connecting audio devices, such as CD, MP3 players, etc.
14 PHONES
Headphones (3.5-mm stereo mini jack)
Rear of the drum module
Connections and controls
HD-50
15

15 POWER ON / OFF
Main switch to turn the device on/off.
16 DC 9V
Connecting socket for power supply unit.
17 CONNECT TO MODULE
6-pole input for connecting the bass-drum pedal and hi-hat controller to the drum module using the included
cable.
Rear of the bottom case
Connections and controls
e-drum set
16

8
Operation
8.1
Functions
Before switching on the device, check all cables for proper connection.
Before switching on, turn the [MASTER VOLUME] control of the drum
module to minimum.
Use the [POWER ON/OFF] switch on the rear of the bottom case to switch on the
drum module.
To set the volume, hit a pad while slowly turning the MASTER VOLUME control
clockwise.
A drum kit is a compilation in which each trigger is assigned to a certain sound and
several sound parameters. By selecting a drum kit, you can tailor the sound of your e-
drum kit in seconds to the desired style of music. In addition to the ten preset drum
kits you can create and save your own user kit (for more information, see
Ä
Chapter 12.1 ‘Kit list’ on page 26.
1. Press [KIT]. The display shows the number of the first preset drum kit.
2. Use the [–] / [+] keys to select the desired drum kit. Value range: ‘001’ to‘010’,
user kit.
Power on
Adjusting the volume
Selecting a drum kit
Operation
HD-50
17

Press the [KIT] and[+] or[–] buttons simultaneously to adjust the pad volume.
You also can select the individual pads by hitting them. Value range: ‘0’
to‘127’.
Press [KIT] and [REC/PLAY] simultaneously, then hit a pad for which you want to
change the sound and use the [+] or [–] button to select the sound.
Example: Selecting a sound for tom 1
1. Press [KIT] and [REC/PLAY] simultaneously. The LED display shows the selected
pad. Hit tom 1, and the LED display will show tom 1.
2. Hit another pad and select its sound using the [+] or [–] buttons.
3. You can also press [CLICK] to listen to the sound.
4. Finally press the [REC/PLAY] button to save your settings in the user kit.
5. Press any other key to exit the menu.
1. Click type
Press [CLICK] for two seconds to enter the metronome type menu, then use the
[+] or [–] buttons to select the click type. Value range: ‘1/4’, ‘2/4’, ‘3/4’, ‘4/4’,
‘6/4’, ‘3/8’, ‘6/8’, ‘12/8’. Default setting: ‘4/4’.
2. Click sound
When the click is activated press and hold [CLICK], then use the [+] or [–] but‐
tons to select the click sound. Value range: ‘001’ to‘003’.
KIT button
Selecting a sound
CLICK button
Operation
e-drum set
18

3. Click volume
When the click is deactivated press and hold [CLICK], then use the [+] or [–]
buttons to select the click volume. Value range: ‘001’ to ‘032’.
1. Recording
Press and hold [REC/PLAY] for two seconds. The metronome does a one-bar
precount before recording starts.
2. Playing record
Press [REC/PLAY] to play back your recording. Press [REC/PLAY] again to stop
playback.
Your drum module provides 10 preset songs. Press [SONG] and [KIT] simultaneously
to enter the SONG mode.
1. Switching the percussion track on and off
In the SONG mode, press and hold [SONG] for two seconds. The LED display
shows ‘oN’ or ‘oFF’.
n ‘oN’
The percussion track of the song is switched on.
n ‘oFF’
The percussion track of the song is muted.
2. Selecting a song
Press [SONG], then use the [+] or [–] buttons to select any of the ten songs.
REC/PLAY button
SONG button
Operation
HD-50
19

3. Song volume
In the SONG mode, press and hold [SONG], then use the [+] or [–] buttons to
select the song volume. Value range: ‘000’ to ‘032’.
There are two way you can adjust the tempo using the [TEMPO/TAP] button:
1. Press [TEMPO/TAP]. The LED display shows the currently set tempo that you
can adjust by means of the [+] or [–] buttons. Value range: ‘020’ to‘240’.
2. Press and hold [TEMPO/TAP] for two seconds to enter the TAP mode. The LED
display is flashing.
Hit four times rhythmically on a pad to change the tempo. The value is deter‐
mined by the time interval between the last two hits.
8.2
Factory settings
8.2.1
Resetting to factory defaults
To reset the drum module to its factory defaults, do the following:
1. Use the POWER ON/OFF switch on the rear of the bottom case to switch off the
drum module.
2. Press and hold the [+] and [–] buttons on the drum module simultaneously
with one hand an turn on the drum module using the POWER ON/OFF switch
on the rear of the bottom case.
This will reset your drum module to the factory defaults and delete all your set‐
tings.
TEMPO/TAP button
Operation
e-drum set
20
/