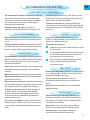
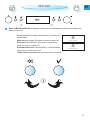
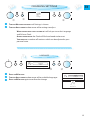
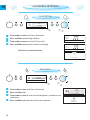
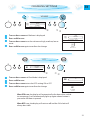
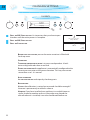
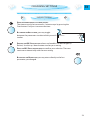
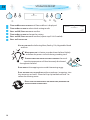
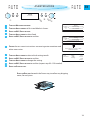
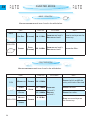
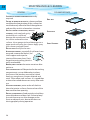
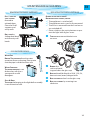
Whirlpool AMW 592/IXL is an advanced microwave oven designed with a range of innovative features to make cooking convenient and versatile. With its large 25-liter capacity, you can easily accommodate a variety of dishes. The microwave offers six power levels, providing precise control over the cooking process. It comes equipped with automatic programs for various food categories, making it easy to prepare meals with just a few touches. Additionally, the defrost function allows you to quickly and safely thaw frozen foods.
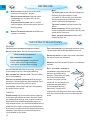
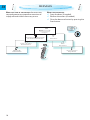
Whirlpool AMW 592/IXL is an advanced microwave oven designed with a range of innovative features to make cooking convenient and versatile. With its large 25-liter capacity, you can easily accommodate a variety of dishes. The microwave offers six power levels, providing precise control over the cooking process. It comes equipped with automatic programs for various food categories, making it easy to prepare meals with just a few touches. Additionally, the defrost function allows you to quickly and safely thaw frozen foods.


-
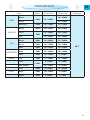
 1
1
-
 2
2
-
 3
3
-
 4
4
-
 5
5
-
 6
6
-
 7
7
-
 8
8
-
 9
9
-
 10
10
-
 11
11
-
 12
12
-
 13
13
-
 14
14
-
 15
15
-
 16
16
-
 17
17
-
 18
18
-
 19
19
-
 20
20
-
 21
21
-
 22
22
-
 23
23
-
 24
24
-
 25
25
-
 26
26
-
 27
27
-
 28
28
-
 29
29
-
 30
30
-
 31
31
-
 32
32
-
 33
33
-
 34
34
-
 35
35
-
 36
36
-
 37
37
-
 38
38
-
 39
39
-
 40
40
-
 41
41
-
 42
42


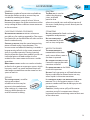
Whirlpool AMW 592/IXL is an advanced microwave oven designed with a range of innovative features to make cooking convenient and versatile. With its large 25-liter capacity, you can easily accommodate a variety of dishes. The microwave offers six power levels, providing precise control over the cooking process. It comes equipped with automatic programs for various food categories, making it easy to prepare meals with just a few touches. Additionally, the defrost function allows you to quickly and safely thaw frozen foods.
Ask a question and I''ll find the answer in the document
Finding information in a document is now easier with AI
Related papers
-
Whirlpool AMW 599 IXL User guide
-
Whirlpool AMW 599 IX User guide
-
-
Whirlpool ECTM 8245 PT User guide
-
-
Whirlpool AMW 582 IX User guide
-
Whirlpool ESDE 8145 PT User guide
-
-
-
KitchenAid KOCV 3625 IX User guide
Other documents
-
HQ W9-20566 Datasheet
-
-
-
KitchenAid KMQCXB 45600 User guide
-
-
KitchenAid KOSCX 45600 Owner's manual
-
-
KitchenAid KOCCX 45600 Owner's manual
-
KitchenAid KOQCX 45600 Owner's manual
-