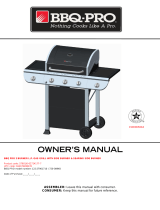
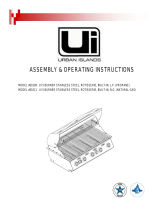
Bull 69009ce Operating instructions

Category
Barbecues & grills
Type
Operating instructions

This manual is also suitable for

Bull 69009ce is a premium 3 burner stainless steel, built-in, natural gas grill that offers a range of features to enhance your outdoor cooking experience. With a total heat input of 11.55kw, this grill provides ample power for grilling a variety of foods. The grill's burners are made of durable stainless steel and are designed to provide even heat distribution, ensuring that your food cooks evenly. The grill also features a built-in ignition system for easy and reliable lighting, as well as a temperature gauge to help you monitor the heat of the grill.

Bull 69009ce is a premium 3 burner stainless steel, built-in, natural gas grill that offers a range of features to enhance your outdoor cooking experience. With a total heat input of 11.55kw, this grill provides ample power for grilling a variety of foods. The grill's burners are made of durable stainless steel and are designed to provide even heat distribution, ensuring that your food cooks evenly. The grill also features a built-in ignition system for easy and reliable lighting, as well as a temperature gauge to help you monitor the heat of the grill.

ASSEMBLY & OPERATING INSTRUCTIONS
MODEL
#69008 STEER
PREMIUM
3
BURNER STAINLESS STEEL,
BUILT-IN, L.P. (PROPANE)
MODEL
#69009 STEER
PREMIUM 3 BURNER STAINLESS STEEL, BUILT-IN,
N.G.
(NATURAL
GAS)
MODEL #69008CE STEER PREMIUM
3
BURNER STAINLESS STEEL, BUILT-IN,
L.P. (PROPANE)
MODEL #69009CE STEER PREMIUM 3 BURNER STAINLESS STEEL, BUILT-IN, N.G. (NATURAL
GAS)
CE
TABLE OF CONTENTS
PAGE#
SAFETY INSTRUCTIONS .................................................................................................................................................. 2
THELOCA TION FOR YOUR
GRILL
..
... ........ ............ ..........
..
...
.
..
.
.
.
.
.
.
.
..
.
.
.
.
.
...... ..............
.
................................ ........... 2
CHECKING FOR GAS LEAKS......
.. . .. .. .. .. .. ... ... .. .. .. ... .. . .. .... ..
...
..
... .
.. ...... ..
..
. .... .. ...... ... .. ...................................... 2
NATURAL GAS SAFETY ........................................................................................... , ........ .-.....
. ....................... 3
PROPANE
GAS
SAFETY'............
.. ..
..
....
.. . ...... ... .. ........................................................• >l ................................. 4
INST ALLA Tl ON INSTRUCTIONS........................................................................................................ .. .. . . ....................... 5
SPECIF/CATIONS FOR BARBECUE STRUCTURE .........................................................................................................
5
CONNECTING TO
GAS SOURCE... ............................................................................................................................. 6
NATURAL
GAS
CONNECTIONS ..................................................................................................................................
. 6
PROPANE
GAS
CONNECTIONS ..............................................................................................................................
....... 6
OUTDOOR NATURAL
GAS
BBQ INSTALLATION SPECIF/CATIONS ..................................................................................
7
OUTDOOR PROPANE
GAS
BBQ INSTALLATION
SPECIF/CATIONS
.................................................................................
. 8
LP
GAS
TANK RETENTION ...................................................................................................................................................................... 9
INSPECTING/ CLEANING BURNERS AND
GAS VALVE ORIFICES
............................................................................................
10
BURNER
CLEANING ................................................................................................................................................................................ 10
BURNER SHUTTER CLIP INSPECTION
I
ADJUSTMENT... ............................................................................................
.. 10
BURNER REPLACEMENT INTO
INSERT.. ....................................................................................................................... 11
/GN/TOR
I
ELECTRODE
CHECK ................................................................................................................................. 11
BURNER OPERATION
CHECK ...................................................................................................................................... 11
COOKING COMPONENT INSTALLATION ...........................................................................................................................
13
LIGHTING & OPERATING
INSTRUCTIONS
.............................................................................................................................
14
LIGHTING PROCEDURES
.....................................................
....
...
.
..
. ......
.... .
.
..
.
..
...
.
.
...........
..
.
.....
.....
..
...........................
14
OPERATING
PROCEDURE ......................................................................................................................................... 14
COOKING
TEMPERATURES
...................
......
..
.........
.
.........
.
..
.
........
..
.......
..
.....
..
....
....
...
..
..
.
.
...
....
..
...
..
.
.
.
.
.
.............
.
........ 14
CLEANING
& MAINTENANCE
........................................................................................................................................... 16
TROUBLESHOOTING.......
. .........................................................................................................................................................
17
IF GRILL FAILS TO OPERATE
PROPERL
Y ........................................................................................................................................... 17
YELLOW
FLAME.
.................................................................................................................................................................................. 18
FLASH
BACK ............................................................................................................................................................................................ 18
LOCATIONS OF SERIAL NUMBER.
................................................................................................................................................................
19
PARTS
LIST ........................................................................................................................................................................ 20
EXPLODED ILLUSTRATION ............................................................................................................................................... 21
LIMITED WARRANTY
.......................................................................................................................................................... 22
REGISTERING YOUR
GRILL. ................................................................................................................................................................. 22
· READ THE FOLLOWING INSTRUCTIONS
CAREFULLY AND BE SURE YOUR GRILL
IS
PROPERLY
INSTALLED, ASSEMBLED AND
CARED FOR. FAILURE TO FOLLOW THESE INSTRUCTIONS MAY
RESULT
IN
SERIOUS
BODILY INJURY AND/OR PROPERTY DAMAGE.
IF YOU HAVE QUESTIONS CONCERNING ASSEMBLY OR OPERATION, CONSULT YOUR DEALER, GAS APPLIANCE SERVICE
REPRESENTATIVE OR YOUR GAS COMPANY.
·
NOTE
TO
INSTALLER:
LEAVE THESE INSTRUCTIONS WITH THE CONSUMER AFTER INSTALLATION.
-NOTETOTHECONSUME
RETAIN THESE INSTRUCTIONS FOR FUTURE REFERENCE.
· THIS OUTDOOR COOKING GAS APPLIANCE IS
NOT INTENDED TO BE INSTALLED IN OR ON
RECREATIONAL VEHICLES AND/OR
BOATS.
*FOR WARRANTY PURPOSES, PLEASE RECORD YOUR MODEL NUMBER, SERIAL NUMBER, DATE OF PURCHASE & A COPY OF YOUR
RECEIPT OR INVOICE
IN THE
BACK OF
YOUR
MANUAL ON PAGE 22.
· CE: LP NOMINAL HEAT INPUT: MAIN BURNER: Qn
=
12.15kw. LP TOTAL HEAT INPUT: Qn
=
12.15kw(884.3g/h)
.
LP GAS CATERGORIES:
13+(28-30/37): G30 Butane at 28-30mbar and G31 Propane at
37mbar.
I3B/P(30): G30 Butane and G31 Propane at 30mbar.I3B/P(50): G30
Butane and G31 Propane at 50mbar. NG NOMINAL HEAT
INPUT: MAIN
BURNER: Qn=11.55kw. NG TOTAL HEAT INPUT:
Qn
=
11.55kw(840.9g/h). NG GAS CATERGORIES: 12H: G20 at 20mbar.I2E: G20 at 20/25mbar. 12E+: G20/25 at 20/25mbar.
Revision: 10/2015
SAFETY INSTRUCTIONS
This gas grill must be installed
in
accordance 'th local codes o , if in an area withou local codes, with t elates
i ion of
the National Fuel Gas
Code ANSI 2223.1. In Canad.e.: insJallatiOJl rriust conform to tl\e sta dard
N/
C_§A -b149.1 and/or .2
(lnstal
atio Code for Gas
Burning
Appliances and Equipment)
ana an
local
cotles. Outside
the
United.States, installa ion must conform
withJ l\ S edition of CE
Norms EN498.
Parts that are sealed by the manufacturer or agent must not be altered by the user. U
'-
WARNING:
Fuels used in gas or oil-fired appliances and the products of combustion of such fuels, contain chemicals knownJo the State of
California to cause cancer, birth defects and/or reproductive harm. This warning is issued pursuant to California Health & Safety Code Sec.
25249.6.
THE LOCATION FOR YOUR GRILL
DO NOT use your gas grill in garages, porches, breezeways, sheds or other enclosed areas. Your gas grill is to be used OUTDOORS ONLY,
with at least 21 inches/54 cm clearance from the back and side of any combustible surface. The grill should not be placed under or on top of any
surface that will burn. Do not obstruct the flow of combustion and ventilation air around the grill housing.
PROTECT CHILDREN: Keep children away
from
the grill
during use and until the grill has
cooled
after
you are finished. Do not allow children to
operate the
grill.
WARNING!
FOR
YOUR SAFETY
...
- DO
NOT
store
or use gasoline or other flammable vapors and liquids
in
the vicinity of this or
any other appliance.
- DO NOT store empty or full spare gas cylinders and/or chemicals under or near this or any
other
appliance.
- Keep
the
fuel
hose
and electrical cord away from hot surfaces.
Protect
the fuel hose
from
dripping
grease. Avoid
unnecessary twisting of the hose. Visually inspect
the hose prior to each
use for cuts, cracks excessive wear or other damage
and
replace if necessary.
- NEVER test for gas
leaks
with a lighted match or open flame.
- NEVER light grill with lid closed
or before checking to ensure
burner tubes are fully seated
over gas valve orifices.
- NEVER lean
over
cooking surface while lighting grill. Use barbecue tools with
wood
handles
and
good quality insulated oven
mitts when
operating grill.
DANGER! IF YOU SMELL GAS
...
1. Shutoff gas to
the
appliance at
its'
source.
2. Extinguish any open flame.
3. Open grill lid to release any accumulation of fumes.
4. If gas odor persists, immediately contact your gas supplier or your fire department.
CHECKING FOR GAS LEAKS
NEVER TEST FOR GAS LEAKS WHILE
THE
GRILL IS
LIT! Prior to the first use and at the beginning of each new season (or, if using LP,
whenever gas
cylinder is changed), it
is a must that you
check
for gas
leaks.
Follow these
steps:
1. Make a soap solution by mixing one part liquid detergent and one part water.
2. Turn off heat control valve(s), and then turn on gas at source.
3. Apply the soap solution to all gas connections: bubbles will appear in the soap solution if connections are not properly sealed. Tighten or repair
as
necessary.
4. If you have a gas leak that you cannot repair, turn off the gas at the source, disconnect fuel line from the grill and immediately call your grill
dealer and gas supplier for professional assistance.
2
SAFETY INSTRUCTIONS (CONT.)
)
•
Your Natural Gas
(G2Q)_grill is designed to operate on natural gas ONLY afa pressure of
'1'
water column
(V'{.C.)/10
mbar regulated at the
natural gas regulator attached
at
the back of the
grill. Check with your gas utility for local gas
pressure
and
wifh your local municipality for building
code requirements. In the United
States, the
natural
gas orifice
size
is 1.93mm. Outside the United
States, the natural gas orifice size is 1.60mm.
Check with your gas utility or with local building codes for instructions to install gas supply line, or call a licensed and knowledgeable installer.
It is recommended that an "ON-OFF" shutoff valve be installed at the gas supply source:
- Outdoors after gas line piping exits outside wall or
before
gas line piping enters ground.
- Indoors
in
the branch fuel line in an accessible location near the supply line.
Pipe sealing compound or pipe thread tape
of
the type resistant
to
the
action of
natural gas must be used on all male pipe thread. Apply
compound or tape to at least the first three threads when making the connection.
Disconnect your gas grill from fuel source when the gas
supply
is
being tested at
high pressures. This appliance and its individual shutoff valve
must be
disconnected from the
gas supply piping system during any pressure testing of that system at pressures in excess of 1 /2 psig (3.5
kPa)/37 mbar.
Turn off your gas grill when the gas supply is being tested at low pressures. This appliance must be isolated from the gas
supply piping
system by
closing
its
individual valve.
WARNING:
Gas
valves
are preset at the factory to operate on LP or natural gas. If you wish to convert to a different
gas type, be sure to contact
your grill dealer, licensed plumber or authorized service center
for further details.
Conversion kits are not sold
to
the general public and require a
professional to perform service. Failure to properly convert a unit can cause serious
injury
to yourself and/or others, irreparable damage to your
grill and void of warranty.
SAFETY!
BEWARE OF SPIDERS
CAUTION: BURNERS
MUST
BE
INSPECTED
AND CLEANED BEFORE FIRST
USE.
Spiders and small insects occasionally
spin webs or make nests in the burners during warehousing,
transit and/or after long periods of non-use.
These webs can lead to a gas flow obstruction, which could
result in a fire in and around the
burner
tubes.
This type of fire is known as 'FLASH-
BACK" and can cause serious damage to your grill and
create
an
unsafe
operating condition for the user. Although an obstructed burner tube is
not the only cause of 'FLASH
BACK'
it is the most
common
cause,
and frequent inspection
and cleaning of the burners is necessary.
3
Your Propane gas (G31) grill is designe to operate on propane gasONl:Y, at"a-pressure regulated at 11' wale column (W.C.)/27.4 mbar when
equipped with the correct propane orifices on the valves and a propane regulator on the supply line. In the l:initeo Stales, the liquid propane orifice
size is 1.18mm. Outside the United States, the liquid propane orifice size is 1.05mm.
Your propane gas grill is designed to be used
with
a
standard
20
lb/7 kg gas cylinder.
In the United
States,
the gas cylinder must be constructed
and marked in accordance
with specifications
of the
US Department of Transportation for Propane
Gas
Cylinders.
Outside the United States, the
gas cylinder must be approved under CE NORMS:
EN417 and test code 215. Gas cylinder must be
constructed and marked with CE regulations
for the European country of destination, where it will be used.
Always keep
cylinder
securely fastened in an upright position.
Never connect an unregulated propane gas cylinder to the grill.
Do not subject Propane cylinders to excessive heat.
CAUTION:
Never
store a Propane
gas cylinder inside a building or in
the
vicinity of any gas-burning
appliance.
WARNING:
Gas valves are preset at the factory to operate
on LP or natural gas. If you wish to convert to
a different gas type, be sure to contact
your grill dealer, licensed plumber or authorized service center for further
details.
Conversion kits are not sold to the general public and require a
professional
to perform service. Failure to properly convert a unit can cause serious injury to yourself and/or others, irreparable damage
to your
grill and void of warranty.
SAFETY!
BEWARE OF SPIDERS
CAUTION: BURNERS MUST BE
INSPECTED AND CLEANED BEFORE FIRST USE.
Spiders and small insects occasionally spin webs or make
nests in the burners during
warehousing, transit and/or after long periods of non-use.
These webs can lead to a gas flow obstruction, which could
result in
a
fire in and
around the
burner
tubes. This type of fire is
known as
'FLASH-
BACK"
and can cause serious damage
to
your grill
and create an unsafe operating condition for
the user. Although an obstructed burner tube is
not the only cause of 'FLASH BACK' it is the most
common cause, and frequent inspection and
cleaning of the burners is necessary.
WARNING
• Do not store a spare or
disconnected liquid propane
cylinder under or near
this barbecue.
• A dented or rusty liquid propane
cylinder
may
be
hazardous and should be
check
by
your liquid propane provider.
• Do not use a liquid propane cylinder with
a
damaged valve.
4
INSTALLATION INSTRUCTIONS
SPECIFICATIONS FOR BARBECUE STRUCTURE
1. Your choice of masonry can be used for cabinet construction for the built-in gas grill; however
it
must be
non-combustible
material. Keep in
mind when choosing a location for your grill that it should NOT
be
located under any overhead combustible
construction. Upper and lower level
vents must
be provided for combustion air on both sides
of
built-in cabinet. Vents on BBQ insert must remain unobstructed to allow for combustion
air
and ventilation. Upper vents must be located
within 5
inches from
the top of
the island enclosure to the bottom of the vent. Lower vents must be
located within 1 inch from the bottom of the island enclosure to the bottom
of
the first vent openings and no more than 5 inches from the bottom of
the island enclosure to the top of the vent. If
not
using
Bull vents, the vents you use must meet
ANSI Standard codes. The upper vents must
have
openings that
have
a total free area of not less than 1 sq in per
lb
of stored fuel capacity
per vent
and the lower vents must have openings that
have
a
total
free area
of not less than 1
/2
sq in per
lb
of stored fuel capacity per vent. Both upper and lower vent
openings must have
minimum
dimensions so as to permit the entrance of a 1/8 in diameter
rod.
TOP OF ISLAND ENCLOSURE
-- -__ff__-
--v'--
t
4 1/16
l
1/2
BOTTOM OF ISI...Afll) ENCLOSURE
2. The BBQ grill requires a wall opening of the following dimensions: See PAGES 8 & 9 for different models.
3.
Place gas grill assembly into wall
opening
as shown in
illustration on pages 8
& 9.
BBQ rests on
side
and
back edges of the BBQ insert.
4. For propane
gas LP TANK STORAGE
AREA MUST
BE
ISOLATED FROM
GRILL AND VENTED.
5. Do not use
any combustible
materials for this construction. Minimum horizontal clearance to adjacent
combustible surface from side and
back of
the
grill must
be 21 inches/54
cm. A 6 inch
clearance is required behind grill to allow front portion of
hood
to open
and for ventilation purposes.
5
(f:Zfl!N
NATURAL
GAS
CONNECTIONS
IMPORTANT:
Bull Outdoor
Products
does not
recommend
the use of
any quick
connect
fittings or
lines
to the unit. Use
of these
types
of fittings
or lines
could
cause
low gas flow
and greatly reduce
the
performance
of the
unit.
- Pipe
sealing
compound or
pipe thread
tape
of
the
type resistant
to
the
action
of natural
gas must
be used on
all
male
pipe
thread.
-Apply
compound
or tape
to
at least the
first three
threads
when
making
the
connection.
- Remove
plastic
cap from
regulator
installed on
grill.
-
Attach stainless
steel flex line
3/8"/9.5 mm
flare-female
end to
the
regulator.
-
Attached
the other end
of
flex line to
shut-off
valve
through a
nipple.
-Attach
a shut-off valve to
gas
supply
pipe.
PERFORM GAS
LEAK
CHECK
- REFER
TO
PAGE 2
PROPANE
GAS
CONNECTIONS
CAUTION:
Changing
the gas
tanks must
be done
away
from
any source
of
ignition.
-
In
the United
States, the LP gas
pressure
regulator
and hose
assembly
supplied with
this
unit
must
be used
without
alteration and
must be
less
than
59in/1.5meters
in
length. If this
assembly
needs
to be
replaced, use
only the
type 1
specified
in the
parts list
supplied
with
this
unit.
Use a LP tank
with
a type 1 cylinder
valve.
-
Outside
the United
States, the LP
gas
pressure
regulator
is not
supplied
with the grill
but
Cavagna
Group
BS3016 Type 634PR
regulator
or equivalent
can be
purchased
from
Bull
dealers
or hardware
stores.
- Make
sure the tank
is firmly
secured in
an
upright
position.
- In
the
United States,
turn the
black
coupling
nut
of the hose
and
regulator
assembly
in
a
clockwise direction
(see
picture
to the
right).
-
Outside the
United
States,
turn the
coupling
nut of the
hose
and regulator
assembly
in
a
clockwise
direction with
an
adjustable
wrench (see
picture
below).
-
Make
sure it is
completely
threaded
onto the
cylinder
valve
before turning
gas
supply
on.
PERFORM GAS
LEAK
CHECK -
REFER
TO
PAGE
2
6
GAS
SUPPLY
(NOT PROVIDED)
7
SHUT-OFF
VALVE
I
NG
REGULATOR
(NOT
PROVIDED)
I
\
I
I
(PROVID.,.E,.D·
)
I
v?
NIPPLE
&
.IV"
(NOT
PROVIDED)
1 ....
w··'·
,wee:mm"J
(NO
I PROVIDE OJ
·
I./
_/'.
(TURN
CLOCKWISE
·=
--
r
(NOT
PROVIDED)
COU?tlNGC::
D E R
VALVE / ::
R
E
L
I
E
F
TO
CONNECT!
\
\r·
,
'-..
\
·--- 4
-..
/. '\----
',
'
\
': BLEED
OFF VALVE
l LP
REGULAlOR
L
(TURN
CLOCKV.'ISE
(PROVIDED)
TO
CLOSE)
f:2IJ!N
INSTALLATION
INSTRUCTIONS
(CONT.)
)
-
Vents most
be p,o,;ded
for combosbon
,;,
and
,eni;iabon
on both s;des
,1
rn,;11-;n
cab;net
�
NOTE:
._
OUTDOOR
NA
T,URAf/:.
G:4S
B
· Q
/ff.JSTAIJLA
7i/ON
SPECIFIC
TIONS
.,{.�·
- When
choosing
a location
for
your gas
grill
keep in mind
that it should
never
be located
under any
overhead
combustible
c0nstruction.
- The
sides and
back of the
grill should
not be
any closer
than
21
inches/54
cm
to
combustible
construction.
- DO
NOT
store empty
or full spare tanks
under
or
near this
or any
other appliance.
-
There must be a
minimum
of 6"
counter
space behind
the
grill in order
to allow
the grill
hood to clear
properly.
NG REGULATOR
(SUPPLIED)
------
Detail A
OUTER
UPS OF
GRILL RESTS
ON ISLAND
CUTOUT
EDGES
7
GRILL
NG GAS
SUPPLY
(NOT
SUPPLIED)
NON-COMBUSTIBLE
CONSTRUCTION
f:
1
11,
a
INSTALLATION INSTRUCTIONS
(CONT.)
_)
NOTE:
-
Vents
must be provided for combustion
air
and
ventilation on
both sides of built-in cabinet.
-
When
choosing a location for
your
gas
grill keep in mind that it should never be located under any overhead
combustible c0nstruction.
- The sides and back of the grill should not be any closer than 21 inches/54 cm to combustible construction.
- DO NOT store empty or full spare tanks under or near this
or
any other appliance.
- There must be a minimum
of
6" counter space behind
the grill in order to allow
the grill hood
to
clear property.
- The cylinder valve on the tank must be readily accessible
for hand operation.
The
tank must
be isolated enough to where it is shielded from
radiation, open flames and protected from foreign matter such as hot drippings.
- There must be access so the tank can be connected,
disconnected, inspected and leak
tested outside of the cabinet. As well access so that
connections which could be disturbed when installing the tank in the cabinet can be leak tested inside the cabinet.
\
-
LP HOSE
(SUPPLIED)
Detail B
OUTER
LIPS OF GRILL RESTS
ON
ISLAND CUTOUT EDGES
8
GRILL
LP TANK
(NOT SUPPLIED)
NON-COMBUSTIBLE
CONSTRUCTION
/
I
I
'"""
"'
TANK
RETENT
ION
------
Q
r-..
I/
,7
---=- ".::.-.:.-.:.-.:.
--,
TANK
RETENTION
BOLT
The tank
retention system
must
be
securely
fastened
to
the bottom
of the
island with the
use of
bolts,
washers and
nuts.
There must
be a
minimum
clearance of 2"
between the
floor
and the
cylinder
enclosure.
Once
secured,
place the LP
tank in the
tank retention
system
and
tighten
the
tank
retention bolt until the
tank is
snug and
cannot
move.
,
r ,
! !
!
+
+
+
!
!
! I
BOLT
WASHER
TANK
RETENTION
�WASHER
L-------NUT
TANK
RETENTION
BOLT
9
INSPECTING /
CLEANING
BURNERS AND GAS
V LV o· IFICES
_.
,
CAUTION - Always turn off the gas supply prior
to
clearing your grill.
BURNER CLEANING
1. Remove burner from the grill insert (See drawing below). Bend a stiff
wire
(a light-weight coat hanger works well) into a small hook as shown to
the
right. Run the hook through
each burner tube
and burner several
times.
c::J
,
REMOVE COTTER PIN
FROM CAST PEG
BEFORE
l
LIFTING UP THE BURNER
CAST PEG
ON BURNER
---
--
+-
Detail C
2. Use a narrow bottlebrush with a flexible handle. Run the hook through each burner tube and burner several times.
3. Wire brush
entire outside surface of burner
to remove loose corrosion.
4. Clean any clogged
hole with
a stiff wire (such as
an
open paper clip).
5. Inspect the burner
assembly
for
any
openings
caused by
corrosion.
BURNER SHUTTER CLIP INSPECTION I ADJUSTMENT
The burners are set to a factory setting; however the air to fuel mixture may need to be adjusted to accommodate different gas pressures. In order
to adjust the air to fuel mixture, loosen the screw and rotate the shutter clip to the appropriate setting (see diagrams below). Tighten the screw and
repeat adjustment procedure to the remaining burners. This should improve burner efficiency.
â—Š, .
SCR
\ SHUTTER CLIP
(CLOSEO FOR
NG)
10
SHUTTER CLIP
(OPEN FOR LP)
CAUTION -
Always
turn off the gas supply prior to clearing your grill.
1. Replace burner back into the grill insert. There is no need to replace
the
cotter
pin
back into the cast peg, ii is for shipping purposes only.
2. Check the burner for proper location after replacing. Make sure the valve orifices are inside of the burner tubes (see drawing below). If the
valve orifices do not fit inside the burner tubes, lighting the burners may cause explosion and/or fire.
Detrnl D
ENSURE
VALVE ORIFICE
INSIDE BURNER TUBE
/GNITOR I ELECTRODE CHECK
Detail
E
INSERT ASSEMBLY
CAST PEG ON BURNER
RESTS IN HOLE
With all control knobs set
to
"OFF", check each igniter individually for presence of spark at electrode. In turn, push
each
control
knob in
fully and
turn
slowly about a 1/4 turn to the left (counter-clockwise) until a click is heard;
the
trigger hitting the strike block should produce a blue spark at
the
electrode tip. Return control knob to "OFF" before checking next igniter.
BURNER OPERATION CHECK
NOTE: Upon first assembly the gas lines and burners will be full
of
air. In
order for
the burners
to
light properly the lines must fill with gas. It
may
require
several attempts at lighting the burners before you are successful.
1.
With
BBQ
Grill control knobs
in
"OFF" position, turn on
the Gas supply.
11
INSPECTING /
CLEANING
BURNERS AND GAS
VAILVE ORIFICES
(OONt/
_.,
2. Ughtany
burner
by
pushing
i•
control ob in fully and slo ly (3 to 4 seconds) I
ming
It
about 1
4
tuc
!Ollie 1,%1er �,ock,.se)
until a
click is
heard. The 3 to� secona ouration
shoula provrae enough gas toligfit !lie burner.
ftlie
Burner
does
ot l\ghl,
immediately return the
control knob to "OFF", wait several
minutes for
the
gas to disperse, and repeat the process. After
burner lig� s sbc"eessfullY. turn control knob to
"OFF".
3.
Repeat process for each control knob/igniter, in
turn, ensuring that other knobs
are in "OFF"
position
as you perform each check.
4. If any burners fail to light after several attempts, discontinue gas supply at source and re-inspect for obstructions to gas flow and orifices.
VALVE
INSPECT IGNITION ORIFICE
INSPECT
BURNER ORIFICE
MANIFOlO
12
COOKING
COMPONENT INSTALLATION
CAUTION:
DO
NOT
LEAVE GRILL
UNATTENDED WHILE GRILL IS IN USE
1. Place stainless steel heat shields on lowest ledge under burners in grill
insert (see drawing to the right).
2. Place stainless steel flame tamers on lower ledge above burners in
grill
insert
(see drawing to the right).
3. Place cooking grates in grill insert on ledge above flame tamers
(see drawing to the right).
NOW YOUR
GAS
GRILL IS
READY TO
USE!
Before first use and at the beginning of each barbecue season:
1. Please read Safety, Lighting and Operating Instructions carefully.
2. Check gas valve orifices, burner tubes and burner ports for any obstructions.
3. PERFORM GAS LEAK
CHECK
-
REFER TO
PAGE 2.
13
f:
1
1J!N
LIGHTING
& OPERATING INSTRUCTIONS
Lighting
Main Burner(sl:
_____ _____ :."'---
1. Become
familiar with the
safety guidelines at the front of the manual.
DO
NOT SMOKE WHILE
LIGHTING
GRJLL
OR CHECKING GAS
SUPPLY CONNECTIONS!
2. If your grill fuel
source is a LP gas
cylinder, check to see that cylinder
is filled.
3. Check that the end of each burner tube is properly located over each valve orifice.
4. Make sure all gas connections are securely lightened.
TEST FOR LEAKS WITH A SOAP SOLUTION, NEVER
WITH A
FLAME.
(Gas Leak
Check instructions are on page 2).
5. Always open lid before lighting.
6.
Set ALL
BBQ
Grill control knobs to "OFF" and
open gas supply,
LP
cylinder
or Natural Gas Valve.
7. Ignite only the burners you intend to use, using
the same method
for each:
Push in
control knob completely and rotate slowly (3 to 4 seconds)
about
1/4
turn to the left (counter clockwise)
until
a
click is heard. The 3 to 4 second duration should provide enough
gas to
light the burner. If the
burner does not
light, immediately return
the control knob to 'OFF', wait several minutes for the gas to
disperse, and repeat the process.
After
burner ignites, repeat procedure with any other burner needed.
8. Adjust control
knob{s) to
desired cooking temperature.
NOTE:
If
igniters
fail to produce a spark at the electrode tip, burners can be
manually lit with a fireplace-type match.
NOTE: To light gas grill with a fireplace-type
match,
follow steps 1 through
6
above. Remove
cooking grid and flame tamer from burner you
wish to light. Insert lighted fireplace-type match or long-necked butane
lighter placing
flame
near to
burner
ports.
Press in control knob and rotate
left to "HIGH" setting to release gas. Burner should light immediately. If more
than
one burner
is
needed, repeat procedure with each burner.
Replace flame tamer and cooking grid. Tum off burners not needed, and adjust other burners to desired cooking temperature.
OPERATING PROCEDURE
Burn-off:
Before cooking on your gas grill for the first time, burn the grill to get rid it of any odors or foreign matter by igniting the burners, closing
the lid, and operating at "HIGH" setting for about five minutes. You may
then either
set the
controls
to "OFF" or
cook on
your grill immediately by
turning the control knobs to a lower
setting.
CAUTION: DO NOT LEAVE GRILL UNATTENDED
WHILE IN USE.
Preheating:
It is necessary to preheat the grill for a short time before cooking certain foods, depending on the type
of
food and the cooking
temperature. Food that requires a high cooking
temperature needs preheat for five minutes; food that requires
a lower cooking temperature
needs
only a period
of
two to three minutes. There is no need to preheat for casseroles or other foods that require
slow cooking.
It
is
recommended you
use protective gloves to operate the grill when handling
any components with
transferred
heat temperature.
Do not move the appliance when it is in use.
Turn off the gas supply at the gas supply source after usage.
WARNING: Any modification of the appliance may be dangerous.
COOKING TEMPERA TURES
HIGH setting - Use this setting only for fast warm-up, for searing steaks and chops, and for burning food residue from the cooking grids after the
cookout is over.
MEDIUM setting - Use this setting for most grilling,
roasting or baking, and
for
cooking hamburgers
and vegetables.
LOW setting • Use this setting for all smoke cooking, rotisserie cooking,
and when
cooking very lean cuts such as fish.
Note:
These temperatures vary
with
the outside temperature and the amount
of
wind.
14
(f:JJJ!li
Cooking With lndirect eat: You-can cook r:ioultry and large cuts of meat slowly top rfeclion on one side o the
rill by
indirect heat from the next
burner. The heat from tpe lighJed b mer c· culates
gently thro gho4( the g ill, cooking the ll)eat or poultry
wit out a direct flame beneath
or below
the food you
are preparing.
This method greatly reduces flare- ps when cooking
exya
fatty!-cuts, because ti) e ·s no direct flame to ignite the fats
and juices that drip down
during
cooking. Place a drip pan:;lightly smaller than the cut of meat-on-the coo'l<i'fi§ gflds oi
e tamer
surface under
the meat being
cooked.
This will allow you to catch meat juices for making gravy.
'-
\,,
Flare-Ups:
The
fats and juices
that
drip
from the meat cause flare-ups. Since flare-ups impart the distinctive
taste and color for food cooked over
an open flame, they should
be
expected
and encouraged within reason. Nevertheless, uncontrolled flaring can result in a ruined meal. To control
excessive flare-ups
caused by
too high
a
heat setting, tum the heat control knob to
a lower setting.
CAUTION:
If
burners
go out
during
operation, close gas supply at source, and turn all gas valves off. Open
lid
and
wait five minutes before
attempting to
re-light (this allows accumulated gas fumes
to clear).
CAUTION: Should a grease fire occur, close gas supply at source, turn off all burners and leave lid closed until
fire is out.
Do
not use
water or any
liquid to extinguish
a
grease fire.
CAUTION: Do not attempt to disconnect any
gas
fitting
while your barbecue
is in
operation or while
gas feed is on.
15
CLEANING & MAINTENANCE
)
CLEANING THE FLAME TAMERS & HEAT SHIELDS
Washing the flame tamers & heat shields after every use is not necessary
but
periodically it is suggested you wash them in a
soap
and warm water
solution. Use
a wire brush to
remove stubborn burned on cooking residue. Dry the flame tamers & heat shield thoroughly
before you
reinstall it in
the cooking insert.
CLEANING THE BURNERS
IMPORTANT:
Gas control knobs should be in the "OFF" position, and fuel line should be disconnected from gas valve manifold. To reduce the
chance
of
FLASHBACK,
the
procedure below should be followed at least once a month or when your grill has not been
used
for an extended
period of time.
1. Remove burners from grill by carefully lifting each burner up and away from gas valve orifice.
2. Wire brush entire outer surface of burner
to
remove food
residue and
dirt. Clean
any
clogged ports with a stiff wire such as an open paper clip.
3. Inspect the burner for damage (cracks or
holes) and
if
such
damage
is
found, order and install a new burner.
4. After installation, check to insure that gas
valve
orifices
are correctly placed
inside
ends
of
burner
tubes.
Also
check position of spark electrode.
CLEANING THE GREASE TRAY
The grease tray should be emptied and wiped down
periodically
and
washed
in a mild detergent and warm water solution.
ANNUAL CLEANING
OF
GRILL HOUSING
Burning-off the grill after every cookout will
keep it
ready
for instant use. However, periodically the
grill should
be
given an entire thorough
cleaning
to
ensure optimal performance.
1. Shut off gas supply at source and disconnect fuel line from gas valve manifold. Protect fuel line fitting.
2.
Remove and clean (as explained above) the cooking grids, flame tamers and burners.
3.
Remove
warming
rack and
wash with mild detergent and warm water.
4. Cover the gas valve orifices with a piece of aluminum foil.
5. Brush the inside and bottom of the grill with a stiff wire brush, and wash down with a mild soap and warm water solution. Rinse thoroughly and
let dry.
6. Remove aluminum foil from orifices and check orifices for obstruction.
7.
Check
electrode
as instructed on page 11.
8. Replace flame tamers, cooking
grids,
and
warming rack.
9. Reconnect to gas source and observe burner flame for correct operation.
IMPORTANT:
You should NOT line the bottom of the grill housing with aluminum foil, sand or any other grease absorbent substance. Grease will
not be
able
to
drip down into grease collector and a grease
fire
could
occur.
STAINLESS
STEEL CLEANING AND MAINTENANCE
Stainless steel
is
a corrosion resistant chromium/nickel alloy steel that is both durable as well as strong with an
outstanding luster.
The
goal
of your
cleaning and maintenance routine should be
to
keep the
stainless steel's protective chromium
oxide layer intact. This is what prevents corrosion.
Contrary to popular belief, stainless steel is
NOT rustproof, especially in the environment of
a swimming pool. Chlorine, bromine, some fertilizers
and other elements are extremely caustic chemicals for stainless steel. These chemicals combined with heat
and humidity greatly increase
the
corrosiveness
of these chemicals.
Regular cleaning is the best way to prevent corrosion and add years
of
enjoyment
to your
Bull
stainless steel
products.
16
FLASH BACK
When fire occurs in and around the burner tubes, immediately tum off gas at its source and turn the control knob(s)
to
"OFF". Wait until the grill has
cooled, then
clean
the burner
tubes and burner ports as described
on
page
10.
18
  • Page 1 1
  • Page 2 2
  • Page 3 3
  • Page 4 4
  • Page 5 5
  • Page 6 6
  • Page 7 7
  • Page 8 8
  • Page 9 9
  • Page 10 10
  • Page 11 11
  • Page 12 12
  • Page 13 13
  • Page 14 14
  • Page 15 15
  • Page 16 16
  • Page 17 17
  • Page 18 18
  • Page 19 19
  • Page 20 20
  • Page 21 21
  • Page 22 22
  • Page 23 23

Bull 69009ce Operating instructions

Category
Barbecues & grills
Type
Operating instructions
This manual is also suitable for

Bull 69009ce is a premium 3 burner stainless steel, built-in, natural gas grill that offers a range of features to enhance your outdoor cooking experience. With a total heat input of 11.55kw, this grill provides ample power for grilling a variety of foods. The grill's burners are made of durable stainless steel and are designed to provide even heat distribution, ensuring that your food cooks evenly. The grill also features a built-in ignition system for easy and reliable lighting, as well as a temperature gauge to help you monitor the heat of the grill.

Ask a question and I''ll find the answer in the document

Finding information in a document is now easier with AI