
KNAACK® products are protected by one or more of the following patents or trademarks: U.S. - 6772613, 945736, 4288134, 4290281, 4383721, 5076078, 1182980, 1182981, 1182982, 1182983, 1266140, 1517767,
1560477, 1897535, 260062, 2290111; Canada - 1176681, 280058, 280798, 281398, 283281; U.K. - 2172510, 2233036, 1390299, 1392022; Australia - 754069, 754070; N.Z. - 296048, 296050; other patents pending.
NOTE: This lock system is designed to be used with a Master Lock®* No. 1, Master Lock No. 5 or American Lock®* No. 50, or an equivalent sized lock. If you
are using a padlock not listed above, it is your responsibility to make sure the lock mechanism is working correctly. Padlocks must meet ALL requirements
listed in Figure 2 or Figure 3.
TOOL REQUIRED - Ratchet Wrench with 1/2" Socket or 1/2" Combination Wrench
Master Lock® is a U.S. registered trademark of Master Lock Company.
American Lock® is a U.S. registered trademark of American Lock Company.
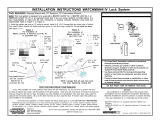
1. Unbolt the padlock tab using a 1/2" socket or wrench. Place the Latch Rod in "LATCHED" position as shown in Figure 1. Install 5/16" x 3/4" Carriage Bolt into correct
hole in Padlock Tab, install Padlock shackle into Padlock tab then secure to Lock Box using Locking Nut. See Figure 2 or 3.
TEST THE FUNCTION OF YOUR PADLOCK
(If you have installed one of the padlocks listed above per the instructions, you do not have to perform this test.)
2. Before locking the padlock, open cover and slide Latch Rod into "OPEN" position. If you are unable to move Latch Rod fully to "OPEN" position, the lock you have
installed is not acceptable for use, see note above.
3. Close the cover, move Latch Rod to "LATCHED" position. Lock padlock and try to move the Latch Rod to "OPEN" position and open the cover. If you are able to move
Latch Rod fully to "OPEN" position and open the cover, the lock you have installed is not acceptable for use, see note above.
*
INSTALLATION INSTRUCTIONS WATCHMAN® IV Lock System
DO NOT PAINT OVER OR REMOVE THIS DECAL
- NOTICE -
Any modification or unintended use of this product shall immediately
void all manufacturers warranties. Manufacturer disclaims all liability
for injuries to persons or property resulting from any modification to,
or unintended use of this product.
Figure 2.
Figure 3.
Use square
Hole for 5/16"
dia. shackle
(Master No. 1)
Use round Hole
for 3/8" dia.
shackle
(Master No. 5,
American No. 50)
For Installation of
Master Lock No. 1 or
equivalent size
For Installation of
Master Lock No. 5, American Lock No. 50
or equivalent size
Use top
hole only
Use top
hole only
Shackle
3/8" dia.
to 11/32"
dia.
1-3/16"
or
less
closed
1-7/16"
7/8" to
1-1/8"
7/8" to
1-1/8"
1-3/16"
Shackle
5/16"
dia.
or less
15/16" or
less
closed
or more
open
or more
open
FRONT CORNER OF BOX
Latch Rod
Padlock Tab
Padlock
Tab
Figure 1.
5/16" x 3/4"
Carr. Bolt
5/16" x 3/4"
Carr. Bolt
Locking
Nut
Locking
Nut
NOTE: Carriage Bolt will seat into
round hole when tightening
Locking Nut.
Lock Box
Lock
Box
2-1/4"
max.
2-1/4"
max.
SOLVENTS
GAS
GAS POWERED
EQUIPMENT
EXPLOSIVES
TANKS
F
L
A
M
M
A
B
L
E
S
Do not put fuels, flammables, explosives or
hazardous materials inside these products.
Gasoline, solvents, gun powder or other muni-
tions, dynamite, propane, acetylene or other
such products can explode if stored inside
these products.
Use these products ONLY for storing and
transporting electric or hand tools and
equipment, and other similar materials.
Failure to follow these warnings or modification
or other uses of these products could result in
death, serious injury or property damage.
Part No. 14-0008 REV. F ECN 5282 03/13
If you have any questions,
please call toll free at 1-800-456-7865.
©2013 Knaack LLC
Knaack LLC
ATTN: Warranty Claims
420 E. Terra Cotta Avenue
Crystal Lake, IL 60014

DANGER
-
 1
1
-
 2
2
Ask a question and I''ll find the answer in the document
Finding information in a document is now easier with AI
Related papers
-
 Knaack 42 Operating instructions
-
 Knaack 109 Installation guide
-
 Knaack 109 User manual
-
 Knaack 100 Installation guide
-
 Knaack 2060 Installation guide
-
 Knaack 59 Installation guide
-
 Knaack 89 Operating instructions
-
 Knaack 118-01 Installation guide
-
 Knaack 44 Installation guide
-
 Knaack 44 Operating instructions
Other documents
-
L.A. Steelcraft LA-H175 Installation guide
-
 SnapSafe 76020 Installation guide
-
LocknCharge 10165 Operating instructions
-
LocknCharge 10135 Operating instructions
-
 desired tools FBA_DTPL1PBK User manual
-
RIDGID 48R-OS User manual
-
Master Lock 101KA User manual
-
 inVue Smart Padlock for Multipurpose Security User guide
-
Schlage 70A User manual
-
Assa Abloy high security lock User manual


