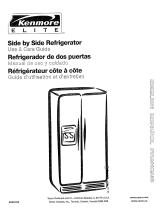
Crosley TR1203LW3 Owner's manual

Category
Fridges
Type
Owner's manual
Refrigerator
Use & Care Guide
Utilisation
0
et entretmn
Table Of Contents
Refrigerator Safety .............................................. 2
Child Entrapment .............................................. 3
Installing Your Refrigerator ............................. 4
Unpacking Your Refrigerator ................... 4
Space Requirements ................................... 4
Electricial Requirements ............................ 5
Reversing the Door Swing ......................... 5
Understanding Sounds S%u Max-Hear ..... 6
Using Your Refrigerator .................................... 6
Ensuring Proper iZir Circulation ............... 6
Setting the Controls .................................... 6
Food Storage Guide ................................... 7
Refrigerator Features ........................................ 8
Refrigerator Shelves ................................... 8
Adjustable Meat Tray. ................................. 8
Crisper and Crisper Cover ........................ 8
Light Bulbs .................................................. 8
Caring for your Refrigerator ............................ 9
Cleaning _%ur Refrigerator ....................... 9
Power Interruptions ................................... 10
Vacation and Moving Care ........................ 10
Troubleshooting .................................................. 11
Table De Matieres
S6curit6 du r6frig6rateur ................................... 13
Risque de pi6ge pour enfant ............................. 14
Installation du r6frig6rateur ............................. 15
Ddballage de votre rdfrigdrateur ................ 15
Espacement requis ......................................
Sp4cification dtectriques ........................... 16
Inversion du sens d'ouverture des portes ..16
La bruits de l'appareit que vous pouvez
entendre ....................................................... 17
Utilisation du r4frig4rateur ................................ 17
Pour s'assurer d'une circulation d'air
appmpride .................................................. 17
Rdglage des commandes ........................... 17
Guide d'entreposage des aliments ............18
Caract_ristiques du r_frig_rateur ..................... 19
Tablette du r_frig_rateur ............................ 19
Tablette _ viande r4frig4rator ..................... 19
Bac a 14gumes et couvercle du bac a
14gumes........................................................ !9
Ampoules d'eclairage ............................... 19
Entretien de votre r_frig_rateur ........................ 20
Nettoyage dn r4frig4rateur ........................ 20
Pintoes de courant ...................................... 2!
Entretien avant les vacances ou lors
d'un d4m4nagement ................................. 22
Guide de d4pannage ........................................... 22
Printed in Canada / Imprim6 aux Canada 3-60218-001 Rev.05
REFRIGERATOR SAFETY
Your safety and the safety of others is very important.
We have provided many important safety messages in this manual and on your appliance.
Always read and obey all safety messages.
This is the safety alert symbol.
This symbol alerts you to hazards that can kill or hurt you and others.
All safety messages will be preceded by the safety alert symbol and the
word "DANGER" or "WARNING." These words mean:
You will be killed or seriously injured if you
don't follow instructions.
You can be killed or seriously injured if you
don't follow instructions.
All safety messages will identify the hazard, tell you how to reduce the chance of injury, and tell you
what can happen if the instructions are not followed.
IMPORTANT SAFETY INSTRUCTIONS
WARNING - To reduce the risk of fire, electric shock, or injury when using your refrigerator, follow
these basic precautions:
Plug into a grounded 3 prong outlet.
Do not remove ground prong.
Do not use an adapter.
Do not use an extension cord.
Disconnect power before servicing.
Replace all panels before operating.
Remove doors from you old refrigerator.
Use nonflammable cleaner.
Keep flammable materials and vapors, such
as gasoline, away from refrigerator.
Use two or more people to move and install
refrigerator.
Disconnect power before installing ice maker.
- SAVE THESE INSTRUCTIONS -
p Save i| 's
Warning: Risk of Child Entrapment.
Suffocation Hazard
Remove doors from your old refrigerator.
Failure to do so can result in death or
brain damage.
Never allow children to operate, play with, or crawl inside a refrigerator. Always leave the
shelves in so children cannot easily crawl inside.
if you are storing a refrigerator:
1.Block the door open: Glue thick wooden blocks to the door so it can't close.
Be sure to use strong glue and place the blocks high, out of children's reach. Leave only
enough room to allow ventilation to keep appliance from collecting mildew.
2. Band, tape or secure the door shut: Use strong tape and wrap it
all the way around the appliance several times or pass a heavy duty chain
around the appliance and through the handle(s) and then padlock it
ensuring it cannot slide loose.
Before you throw away your old refrigerator:
1. Take off the door: The hinge of chest type freezers are under
spring tension, instructions for removal of the hinges are found on the back of
the freezer.
2. Cut off any electrical wires: Ordinary household tools are all you need.
3. Leave the shelves in place: so that children may not easily climb inside.
Talk to your children about the dangers of playing around or inside
any container that might shut them in.
WHY aHthese precautions?
Each year children die because they climb inside an old refrigerator or freezer; the door closes
and they are trapped inside and suffocate.., usually in less than 10 minutes!
Please take a few minutes and prevent such a needless tragedy.
iNSTALLiNG YOUR
REFRIGERATOR
Unpacking Your Refrigerator
Excessive Weight Hazard
Use two or more people to move and install
refrigerator.
Failure to do so can result in back or other injury.
Removing Packaging Materials
* Remove tape and any labels from your refrigerator
before using (except the model and serial number label),
Do not remove any permanent instruction labels,
To remove any remaining tape or glue, rub the area
briskly with your thumb. Tape or glue residue can also
be easily removed by rubbing a small amount of liquid
dish soap over the adhesive with your fingers. Wipe with
warm water and dry.
Do not use sharp instruments, rubbing alcohol, flam-
mable fluids, or abrasive cleaners to remove tape or
glue. These products can damage the surface of your
refrigerator. For more information, see "Important Safety
Instructions" in the "Refrigerator Safety" section.
Do not install the refrigerator near an oven, radiator,
or other heat source, not in a location where the
temperature will fall below 40°F (5°C).
Note: Some shelf trim comes with a protective
film. Look for the "Peel Off" strip to remove this
protective film.
Space Requirements
Explosion Hazard
Keep flammable materials and vapors, such as
gasoline, away from refrigerator.
Failure to do so can result in death, explosion
or fire.
Toensure proper ventilation for your refrigerator, allow for a
1"(2.5 cm) space on each side.
Allow 3"" (7.5 cm) of space between overhead cabinets
and refrigerator top.
Allow at least 1" (2.5 cm) between back of cabinet and the
wall.
If the hinge side of the refrigerator is to be against a wall,
you might want to leave extra space so the door
can swing open.
1---- r-qD -I
v
3 in./po, rain (7.5 cm)
== [E ==
_1 I in./po, mink.
(2,54 cm)
I[ w
Electrical Requirements
Electrical Shock Hazard
Plug into a grounded 3 prong outlet.
Do not remove ground prong.
Do not use an adapter.
Do not use an extension cord.
Failure to do so can result in death, fire or
electrical shock.
Before you move your refrigerator into its final location, it
is important to make sure you have the proper electrical
connection:
3-Prong
(Grounding) Plug
Properly Folarized
and Grounded Outlet
Recommended Grounding Method
A 115 Volt, 60 Hz, AC only 15 or20 ampere fused,
grounded electrical supply is required. It is recom-
mended that a separate circuit serving only your refrig-
erator be provided. Use an outlet that cannot be turned
off by a switch. Do not use an extension cord.
Note: Before performing any type of installation, clean-
ing, or removing a light bulb, turn the Thermostat Control
(or Refrigerator Control depending on the model) to OFF
and then disconnect the refrigerator from the electrical
source. When you are finished, reconnect the refrigera-
tor to the electrical source and reset the Thermostat
Control (or Refrigerator Control) to the desired setting.
To Reverse Door Swing
(Pictured as doors will look when reversed.)
Hinge Cover_ _,_ Hinge Screws
Top Hinge --
Door Plugs/\
Door Stop
Screws
HingeHingeNut m---__'Pin./ ,
,
2.
3.
,
5.
,
,
8.
9.
Remove top hinge and lift door off the bottom
hinge.
Remove door plugs, and two screws that hold
door handle to the door.
Mount door handle to the opposite side and door
plugs to the remaining holes on the face of the
door.
Remove lower grille
Remove bottom hinge and move to the opposite
side.
Remove bottom hinge pin by unscrewing nut on
bottom of hinge and reassemble hinge pin on
other hole on the bottom hinge.
Put door on bottom hinge, align with cabinet and
secure with top hinge.
Make sure all hinge screws are tight.
Replace lower grille and upper hinge cover
Level the refrigerator
USING YOUR
REFRIGERATOR
Lowe Raise
1. Locate the 2 front levelling legs among the packing
materials.
2. Screw these legs into the front holes on the bottom of
the freezer. The back of the freezer rests on 2 fixed
supports.
3. Adjust the 2 front legs so freezer does not rock.
Ensuring Proper Air Circulation
In order to ensure proper temperature, you need to
permit airflow. Cool air enters through the refrigerator
section and moves up. The air then flows through the
vents. Do not block any of these vents with food
packages. If the vents are blocked, airflow will be
prevented and temperature and moisture problems
may occur.
Understanding Sounds
You May Hear
Your new refrigerator may make sounds that your old
one didn't make. Because the sounds are new to you,
you might be concerned about them. Most of the new
sounds are normal. Hard surfaces, like the floor, walls,
and cabinets, can make the sounds seem louder than
they actually are. The following describes the kinds of
sounds and what may be making them.
The defrost timer will click when the automatic defrost
cycle begins and ends. Also, the thermostat refrigerator
control, will click when cycling on and off.
Rattling noises may come from the flow of
refrigerant, the water line, or items stored on top of the
refrigerator.
Your refrigerator is designed to run more efficiently to
keep your food items at the desired temperature. The
high efficiency compressor may cause your new
refrigerator to run longer than your old one, and you may
hear a pulsating or high-pitched sound.
Water dripping on the defrost heater during a defrost
cycle may cause a sizzling sound.
As each cycle ends, you may hear a gurgling sound
due to the refrigerant flowing in your refrigerator.
Contraction and expansion of the inside walls may
cause a popping noise.
You may hear air being forced over the condenser by
the condenser fan.
Setting the Controls
The temperature control is located on the side wall of the
refrigerator compartment. It controls the temperature in
both the refrigerator and freezer compartments (found on
some models). When you plug in the refrigerator for the
first time, set the temperature control knob to "4".
Temperature control adjustments range from 1 (warmest
to 7 (coldest).
Give your refrigerator time to cool down completely
before adding food. It is best to wait 24 hours before
you put food into the refrigerator. The control is set
correctly when milk or juice is as cold as you like. Move
the dial one number at a time and wait 24 hours between
adjustments.
NOTE: During high humidity, moisture may form on the
outside of the cabinet. To prevent rust, dry the cabinet
and reset the temperature control to a colder setting.
IMPORTANT: If you add food before the refrigerator
has cooled completely, your food may spoil.
Turning the temperature control to a higher (colder)
than recommended setting will not cool the
compartments any faster.
You may hear water running into the drain pan during
the defrost cycle. 6
Food Storage Guide
Wrap or store food in the refrigerator in airtight and
moisture-proof material unless otherwise noted. This
prevents food odor and taste transfer throughout the
refrigerator. For dated products, check code date to
ensure freshness.
Butter or margarine
Keep opened butter in covered dish or closed compart-
ment. When storing an extra supply, wrap in freezer
packaging and freeze.
Cheese
Store in the original wrapping until you are ready to use it.
Once opened, rewrap tightly in plastic wrap or aluminum
foil.
Milk
Wipe milk cartons. For best storage, place milk on
interior shelf.
Eggs
Store in original carton on interior shelf.
Vegetables with skins (carrots, peppers)
Place in plastic bags or plastic container and store in
crisper.
Fish
Use fresh fish and shellfish the same day as purchased.
Meat
Store most meat in original wrapping as long as it is
airtight and moisture-proof. Rewrap if necessary. See
the following chart for storage times. When storing meat
longer than the times given, freeze the meat.
Chicken ........................................................... 1-2 days
Ground beef .................................................... 1-2 days
Variety meats (liver, heart, etc.) ....................... 1-2 days
Cold cuts ......................................................... 3-5 days
Steaks/roasts ................................................... 3-5 days
Cured meats ................................................. 7-1 0 days
Leftovers
Cover leftovers with plastic wrap or aluminum foil.
Plastic containers with tight lids can also be used.
REFRIGERATOR
FEATURES
Refrigerator Shelves
The shelves in your refrigerator are adjustable to match
your individual storage needs,
Storing similar food items together in your refrigerator
and adjusting the shelves to fit different heights of items
will make finding the exact item you want easier. It will
also reduce the amount of time the refrigerator door is
open, and save energy.
To remove a shelf:
1. Remove all items from the shelf.
2. Slide shelf straight out aligning the 'shelf stops' on
each side of the shelf with the notches (or openings)
on both sides of foodliner.
3. Lift straight up. The 'shelf stops' will slide through the
notches in the food liner.
4. Slide shelf out the rest of the way.
To replace a shelf:
1. Slide shelf along rail offood liner.
2. Align the 'shelf stops' with the notches (or openings)
on both sides of the food liner.
2. Push 'shelf stops' down through the notches.
3. Slide shelf all the way to the back of the refrigerator.
Adjustable Meat Tray
Your refrigerator is equipped with a meat tray that can be
aligned to the right or left side.
To adjust the meat tray from one side to the other:
1. Remove the meat tray.
2. Remove the shelf that holds the meat tray.
Note: The meat tray has one fixed support, it is the
support that runs down the centre of the shelf.
The other support is the adjustable one.
3. Using a philips (+) screwdriver, unscrew the screw
located on adjustable support.
4. Remove support and attach to preferred side of shelf.
5. Place screw back into adjustable support and fasten.
6. Slide meat tray back into position.
Crisper and Crisper Cover
To remove the crisper:
1. Slide crisper straight out to the stop.
2. Lift the front.
3. Slide crisper out the rest of the way.
Replace the crisper by sliding it back in fully past the
drawer stop.
To remove the crisper cover:
1. Lift cover up and slide out.
2. Replace cover by fitting back of cover against back
wall of cabinet. Then lower front into place.
Light Bulbs
To replace interior light:
1. Unplug refrigerator or disconnect power.
2. Remove light shield by pulling forward slightly and
pulling out.
3. Replace bulb with same wattage appliance bulb.
4. Replace light shield by inserting front tabs into slots
and squeezing shield lightly to insert back tabs into
slots.
5. Plug in refrigerator or reconnect power.
CARING FOR YOUR
REFRIGERATOR
2. Remove all frozen food. Wrap frozen food in several
layers of newspaper and cover with a blanket. Food will
stay frozen for several hours. You may also store frozen
food in a cooler, an additional refrigerator-freezer, or a
cool area.
Cleaning Your Refrigerator
Explosion Hazard
Use nonflammable cleaner.
Failure to do so can result in death, explosion
or fire.
Both the refrigerator and freezer sections defrost auto-
matically. However, clean both sections about once a
month to prevent odours from building up. Wipe up spills
immediately.
Energy Saving Tips
Clean the condenser coils regularly, as described in the
cleaning chart in this section. To clean refrigerator:
3. Place pans of hot water in freezer with door open to
speed melting. Directing air from an electric fan into
freezer will also help. Do not place fan or any electrical
device in freezer.
4. Use a plastic scraper to remove frost.
Note: Do not use an ice pick, knife or other sharp-
pointed tool to defrost freezer. Damage can occur.
5. Wipe water from walls with a towel or sponge.
6. Wash the inside walls with a solution of mild detergent
in warm water or 2 tablespoons (26 mg) baking soda to 1
quart (0.95 L) warm water. Do not use abrasive or harsh
cleaners.
7. Rinse well and wipe dry with a clean soft cloth.
8. Use a clean sponge or soft cloth and mild detergent in
warm water to clean outside of refrigerator, door liner and
gasket.
9. Rinse well and wipe dry with a clean, soft cloth.
10. Wax painted metal surfaces outside of refrigerator to
provide rust protection. Note: Do not use wax on plastic
parts. Wax may damage them.
Additional cleaning tips are listed below:
Unplug refrigerator or disconnect power.
Remove all removable parts from inside, such as
shelves, crispers, etc.
Use a clean sponge or soft closth and a mild detergent
in warm water. Do not use abrasive or harsh cleaners.
Hand wash, rinse, and dry all surfaces thoroughly.
Plug in refrigerator or reconnect power.
Defrosting and Cleaning
Your Freezer
(on some models)
Defrost and clean your freezer when frost has built up to
about 1/4 inch (6 mm) thickness. Complete defrosting
and cleaning should be done at least once a year. High
humidity areas may need more frequent defrosting and
cleaning.
Do not use abrasive cleaners on your freezer. Do not
use cleaning waxes, concentrated detergents, bleaches,
or cleaners containing petroleum on plastic parts.
Damage can occur.
1. Unplug freezer or disconnect power
Parts
Outside
inside Walls
(allow freezer
to warm up so
cloth won't
stick)
Door liners
and gaskets
Plastic Parts
(cover and
panels)
9
Comments
Waxing external painted metal
surfaces helps provide rust
protection. Do not wax plastic parts.
Wax painted metal surfaces at least
twice a year using appliance wax
(or auto paste wax). Apply wax with
a clean, soft cloth.
To help remove odors, you can
wash with a mixture of warm water
and baking soda (2 tlbs. to 1 quart
or 26 grams to .95 litres) of water.
Do not use cleaning waxes,
concentrated detergents, bleaches,
or cleaners containing petroleum
on plastic parts.
Do not use paper towels, window
sprays, scouring cleansers or
flammable fluids. These can
scratch or damage material.
Power Interruptions
If the electricity in your house goes off, call the power
company and ask how long it will be off.
1. If the power will be out for 24 hours or less, keep
both refrigerator doors closed to help foods stay
cold and frozen.
.
If the power will be out for more than 24 hours:
a) Remove all frozen food and store it in a frozen
food locker.
OR
b) Place 2 lb. (907 g) of dry ice in the freezer for every
cubic foot (28 liters) of freezer space. This will keep
the food frozen for two to four days. While
handling dry ice, wear gloves to protect your hands
from ice burns.
OR
c) If neither a food locker nor dry ice is available,
consume up or can perishable food at once.
Moving
When you are moving your refrigerator to a new home,
follow these steps to prepare it for the move.
1. Remove all food from the refrigerator and pack all
frozen food in dry ice.
2. Depending on your model, turn the Thermostat
Control (or Refhgerator Control, depending on the
model) to OFF. See the "Setting the Controls"
section.
3. Unplug the refrigerator.
4. Empty water from the defrost pan.
5. Clean, wipe, and dry thoroughly.
6. Take out all removable parts, wrap them well, and tape
them together so they don't shift and rattle during the
move.
REMEMBER: Afull freezer stays cold longer than a
partially filled one. A freezer full of meat stays cold longer
than a freezer full of baked goods. If you see that food
contains ice crystals, it may be safely refrozen, although
the quality and flavor may be affected. If the condition of
the food is poor, or if you feel it is unsafe, dispose of it.
,
,
Depending on the model, raise the front of the
refrigerator so it rolls easier OR screw in the leveling
legs so they don't scrape the floor. See the "Door
Closing and Alignment" section.
Tape the doors shut and the power cord to the
refrigerator cabinet.
Vacation and Moving Care
Vacations
When you get to your new home, put everything back
and refer to the "Installing Your Refrigerator" section for
preparation instructions. Also, if your refrigerator has an
automatic ice maker, remember to reconnect the water
supply to the refrigerator.
If you choose to leave the refrigerator on while
you're away, use these steps to prepare your
refrigerator before you leave.
1. Use up any perishables and freeze other items.
If you choose to turn the refrigerator off before you
leave, follow these steps.
1. Remove all food from the refrigerator.
,
Depending on your model, turn the Thermostat
Control (or Refrigerator Control, depending on the
model) to OFR See the 'Setting the Controls'
section.
4. Clean refrigerator, wipe it, and dry well.
5. Tape rubber or wood blocks to the tops of both doors
to prop them open far enough for air to get in. This
stops odor and mold from building up.
10
TROUBLESHOOTING
Try the solutions suggested here first in order to
possibly avoid the cost of a service call.
Your refrigerator will not operate
* The power supply cord is unplugged.
Firmly plug the cord into a live outlet with proper voltage.
* A household fuse or circuit breaker has tripped.
Replace the fuse or reset the circuit.
* The temperature control is turned to the
"OFF" position.
Refer to the "Setting the Controls" section.
* The refrigerator is defrosting.
Recheck to see if the refrigerator is operating in
30 minutes. Your refrigerator will regularly run an
automatic defrost cycle.
The lights do not work.
* The power supply cord is unplugged.
Firmly plug the cord into a live outlet with proper voltage.
* A light bulb is loose in the socket.
Turn the temperature control to OFF. Disconnect the
refrigerator from the electrical supply. Gently remove the
bulb and reinsert. Then reconnect the refrigerator to the
electrical supply and reset the refrigerator control.
* A light bulb has burned out.
Replace with an appliance bulb of the same wattage,
size, and shape. See the "Changing the Light Bulbs"
section.
There is water in the defrost drain pan
The refrigerator is defrosting.
The water will evaporate. It is normal for water to drip
into the defrost pan.
* It is more humid than normal.
Expect that the water in the defrost pan will take longer to
evaporate. This is normal when it is hot or humid.
The motor seems to run too much.
The room temperature is hotter than normal.
Expect the motor to run longer under warm conditions.
At normal room temperatures, expect your motor to run
about 40% to 80% of the time. Under warmer conditions,
expect it to run even more of the time.
* A large amount of food has just been added to the
refrigerator.
Adding a large amount of food warms the refrigerator. I
is normal for the motor to run longer in order to cool the
refrigerator back down. See the "Food Storage Guide"
section.
* The doors are opened often.
Expect the motor to run longer when this occurs. In
order to conserve energy, try to get everything you
need out of the refrigerator at once, keep food
organized so it is easy to find, and close the door as
soon as the food is removed.
* The controls are not set correctly for the
surrounding conditions.
Refer to the "Setting the Controls" section.
The doors are not closed completely.
Push the doors firmly shut. If they will not shut all the
way see "The doors will not close completely" later in
this section.
* The condenser coils are dirty.
This prevents air transfer and makes the motor work
harder. Clean the condenser coils. Refer to the
"Cleaning Your Refrigerator" section.
NOTE: Your new refrigerator will run longer than your old
one due to its high efficiency motor.
The refrigerator seems to make too much noise
* The sounds may be normal for your refrigerator.
Refer to the "Understanding Sounds You May Hear"
section.
11
Temperature is too warm The doors are difficult to open
The air vents are blocked in either compartment.
This prevents the movement of cold air from the
freezer to the refrigerator.
Remove any objects from in front of the air vents. Refer
to "Ensuring Proper Air Circulation" for the location of air
vents.
The door (s) are opened often.
Be aware that the refrigerator will warm when this
occurs. In order to keep the refrigerator cool, try to get
everything you need out of the refrigerator at once, keep
food organized so it is easy to find, and close the door as
soon as the food is removed.
* A large amount of food has just been added to the
refrigerator or freezer.
Adding a large amount of food warms the refrigerator. It
can take several hours for the refrigerator to return to the
normal temperature.
* The controls are not set correctly for the
surrounding conditions.
Refer to the "Setting the Controls" section.
There is interior moisture build-up
* The air vents are blocked in the refrigerator.
Remove any objects from in front of the air vents. Refer
to "Ensuring Proper Air Circulation" for the location of air
vents.
The gaskets are dirty and sticky.
Clean gaskets and the surface that they touch. Rub a
thin coat of paraffin wax on the gaskets following clean-
ing.
The doors will not close completely
Food packages are blocking the door open.
Rearrange containers so that they fit more tightly and
take up less space.
The crisper cover, pans, shelves or baskets are out
of position.
Correct their postions. See the "Refrigerator Features"
section for more information.
The gaskets are sticking.
Clean gaskets and the surface that they touch. Rub a
thin coat of paraffin wax on the gaskets following clean-
ing.
The refrigerator wobbles or seems unstable.
Level the refrigerator. Refer to the "Door Closing and
Alignment" section.
The doors were removed during product installa-
tion and not properly replaced.
Remove and replace the doors according to the "To
Reverse Door Swing" section or call a qualified service
technician.
The room is humid.
It is normal for moisture to buld up inside the refrigerator
when the room air is humid.
* The controls are not set correctly for the
surrounding conditions.
Refer to the "Setting the Controls" section.
The door is opened often.
To avoid humidity build-up, try to get everything you need
out of the refrigerator at once, keep food organized so it
is easy to find, and close the door as soon as the food is
removed. (When the door is opened, humidity from the
room air enters the refrigerator. The more often the door
is opened, the faster humidity builds up, especially when
the room itself is very humid.)
The food is not packaged correctly.
Check that all food is securely wrapped. If necessary,
repackage food according to the guidelines in the "Food
Storage Guide" section. Wipe off damp food containers
before placing in the refrigerator.
A self-defrost cycle was completed.
It is normal for droplets to form on the back wall after the
refrigerator self-defrosts. 12
  • Page 1 1
  • Page 2 2
  • Page 3 3
  • Page 4 4
  • Page 5 5
  • Page 6 6
  • Page 7 7
  • Page 8 8
  • Page 9 9
  • Page 10 10
  • Page 11 11
  • Page 12 12
  • Page 13 13
  • Page 14 14
  • Page 15 15
  • Page 16 16
  • Page 17 17
  • Page 18 18
  • Page 19 19
  • Page 20 20
  • Page 21 21
  • Page 22 22
  • Page 23 23
  • Page 24 24

Crosley TR1203LW3 Owner's manual

Category
Fridges
Type
Owner's manual

Ask a question and I''ll find the answer in the document

Finding information in a document is now easier with AI

in other languages