Bosch KGE36AWCA User guide

Category
Fridge-freezers
Type
User guide
en Instructions for use Fridge-freezer 3
Fridge-freezer
KGE..
en Table of contents
Safety and warning information ........... 3
Information concerning disposal ......... 6
Scope of delivery ................................... 6
Installation location ................................ 7
Ambient temperature and
ventilation ................................................. 7
Connecting the appliance .................... 8
Getting to know your appliance .......... 9
Switching the appliance on ................ 10
Setting the temperature ...................... 10
Holiday mode ....................................... 11
Alarm functions .................................... 11
Usable capacity .................................... 12
Refrigerator compartment .................. 12
Super cooling ....................................... 13
Freezer compartment .......................... 13
Freezing capacity ................................. 13
Freezing and storing food .................. 13
Freezing fresh food ............................. 14
Super freezing ...................................... 15
Thawing frozen food ............................ 16
Interior fittings ....................................... 16
Sticker “OK” .......................................... 18
Switching off and disconnecting
the appliance ........................................ 18
Defrosting .............................................. 18
Cleaning the appliance ....................... 19
Odours ................................................... 20
Light (LED) ............................................ 20
Tips for saving energy ........................ 21
Operating noises ................................. 21
Eliminating minor faults yourself ....... 22
Appliance self-test ............................... 24
Customer service,
product / production number
and technical data ............................... 24
en
3
enTable of contents
enInstructions for useFridge-freezer
Safety and warning
information
Before you switch ON the
appliance
Please read the operating and
installation instructions carefully!
They contain important
information on how to install,
use and maintain the appliance.
The manufacturer is not liable if
you fail to comply with the
instructions and warnings.
Retain all documents for
subsequent use or for the next
owner.
Technical safety
Fire hazard
The tubes of the
refrigeration circuit convey a
small quantity of an
environmentally friendly but
flammable refrigerant (R600a). It
does not damage the ozone
layer and does not increase the
greenhouse effect. If refrigerant
escapes, it may injure your eyes
or ignite.
If damage has occurred
Keep naked flames and/or
ignition sources away from the
appliance,
thoroughly ventilate the room
for several minutes,
switch off the appliance and
pull out the mains plug,
inform customer service.
The more refrigerant an
appliance contains, the larger
the room must be in which the
appliance is situated. Leaking
refrigerant can form a
flammable gas-air mixture in
rooms which are too small.
The room must be at least 1 m³
per 8 g of refrigerant. The
amount of refrigerant in your
appliance is indicated on the
rating plate inside the appliance.
When installing the appliance,
ensure that the mains cable is
not trapped or damaged.
If the power cord of this
appliance is damaged, it must
be replaced by the
manufacturer, Customer Service
or a similarly qualified person.
Improper installations and
repairs may put the user at
considerable risk.
Repairs may be performed by
the manufacturer, customer
service or a similarly qualified
person only.
en
4
Only original parts supplied by
the manufacturer may be used.
The manufacturer guarantees
that only these parts satisfy the
safety requirements.
Do not use multiple sockets,
extension leads or adapters.
Fire hazard
Portable multiple outlets or
power supplies may overheat,
causing a fire.
Never leave portable multiple
outlets or portable power
supplies behind the appliance.
Important information when
using the appliance
Never use electrical
appliances inside the
appliance (e.g. heaters,
electric ice makers, etc.). Risk
of explosion!
Never defrost or clean the
appliance with a steam
cleaner! The steam may
penetrate electrical parts and
cause a short-circuit. Risk of
electric shock!
Do not use additional means
to accelerate the defrosting
process other than those
recommended by the
manufacturer. Risk of
explosion!
Do not use pointed or sharp-
edged implements to remove
frost or layers of ice. You
might damage the refrigerant
tubes.Leaking refrigerant may
cause eye injuries or ignite.
Do not store products which
contain flammable propellant
(e.g. spray cans) or explosive
substances in the appliance.
Risk of explosion!
Do not stand on or lean
heavily against the base of the
appliance, drawers, doors,
etc.
For defrosting and cleaning,
pull out the mains plug or
switch off the fuse. Do not pull
out the mains plug by tugging
on the power cord.
Store high-percentage alcohol
tightly sealed and in an
upright position.
Keep plastic parts and the
door seal free of oil and
grease. Otherwise, plastic
parts and the door seal will
become porous.
Never cover or block the
ventilation openings of the
appliance.
en
5
Avoiding placing children
and vulnerable people at
risk:
At risk here are children,
people who have limited
physical, mental or sensory
abilities, as well as people
who have inadequate
knowledge concerning safe
operation of the appliance.
Check that children and
vulnerable people have
understood the hazards.
A person responsible for
safety must supervise or
instruct children and
vulnerable people who are
using the appliance.
Only children aged 8 years
and above may use the
appliance.
Supervise children while the
appliance is being cleaned or
maintained.
Never allow children to play
with the appliance.
Do not store bottled or
canned liquids (especially
carbonated drinks) in the
freezer compartment.Bottles
and cans may burst!
Never put frozen food straight
from the freezer compartment
in your mouth.
Risk of low-temperature burns!
Avoid prolonged touching of
frozen food, ice or the
evaporator pipes, etc.
Risk of low-temperature burns!
Children in the household
Keep children away from
packaging and its parts.
Danger of suffocation from
folding cartons and plastic
film!
Do not allow children to play
with the appliance!
If the appliance features a
lock:
keep the key out of the reach
of children!
General regulations
The appliance is suitable
for refrigerating and freezing
food,
for making ice.
This appliance is intended for
use in the home and the home
environment.
The refrigeration circuit has
been checked for leaks.
This appliance complies with the
relevant safety regulations for
electrical appliances and is
fitted with noise suppression.
This appliance is intended for
use up to a maximum height of
2000 metres above sea level.
en
6
Information concerning
disposal
* Disposal of packaging
The packaging protects your appliance
from damage during transit. All utilised
materials are environmentally safe and
recyclable. Please help us by disposing
of the packaging in an environmentally
friendly manner.
Please ask your dealer or inquire at your
local authority about current means of
disposal.
* Disposal of your old
appliance
Old appliances are not worthless
rubbish! Valuable raw materials can be
reclaimed by recycling old appliances.
m Warning
Redundant appliances
1. Pull out the mains plug.
2. Cut off the power cord and discard
with the mains plug.
3. Do not take out the trays
and receptacles: children are
therefore prevented from climbing in!
4. Do not allow children to play with
the appliance once it has spent its
useful life. Danger of suffocation!
Refrigerators contain refrigerant
and gases in the insulation. Refrigerant
and gases must be disposed
of professionally. Ensure that tubing
of the refrigerant circuit is not damaged
prior to proper disposal.
Scope of delivery
After unpacking all parts, check for any
damage in transit.
If you have any complaints, please
contact the dealer from whom you
purchased the appliance or our
customer service.
The delivery consists of the following
parts:
Free-standing appliance
Interior fittings (depending on model)
Bag containing installation materials
Operating instructions
Installation manual
Customer service booklet
Warranty enclosure
Information on the energy
consumption and noises
This appliance is labelled in
accordance with European
Directive 2012/19/EU concerning
used electrical and electronic
appliances (waste electrical and
electronic equipment - WEEE).
The guideline determines the
framework for the return and
recycling of used appliances as
applicable throughout the EU.
en
7
Installation location
A dry, well ventilated room is suitable as
an installation location. The installation
location should not be exposed to direct
sunlight and not placed near a heat
source, e.g. a cooker, radiator, etc. If
installation next to a heat source is
unavoidable, use a suitable insulating
plate or observe the following minimum
distances from the heat source:
3 cm to electric or gas cookers.
30 cm to an oil or coal-fired cooker.
The floor of the installation location must
not give way; if required, reinforce floor. If
the floor is uneven, compensate with
supports.
Distance from wall
Fig. #
A gap is not required between the
appliance and side wall. The containers
and shelves are still fully extendable.
Reversing the door
(if required)
If required, we recommend that you have
the door hinges changed over by our
customer service. You can find out the
costs for changing over the door hinges
from your appropriate customer service.
m Warning
While changing over the door hinges,
ensure that the appliance is not
connected to the power supply. Pull out
the mains plug beforehand. To prevent
damaging the back of the appliance,
place adequate padding underneath.
Carefully place the appliance on its
back.
Note
If the appliance is placed on its back,
ensure that the wall spacer is not fitted.
Ambient temperature
and ventilation
Ambient temperature
The appliance is designed for a specific
climate class. Depending on the climate
class, the appliance can be operated at
the following temperatures.
The climate class can be found on
the rating plate. Fig. 4
Note
The appliance is fully functional within
the room temperature limits
of the indicated climatic class. If
an appliance of climatic class SN
is operated at colder room temperatures,
the appliance will not be damaged up to
a temperature of +5 °C.
Climate class Permitted ambient
temperature
SN +10 °C to 32 °C
N +16 °C to 32 °C
ST +16 °C to 38 °C
T +16 °C to 43 °C
en
8
Ventilation
Fig. $
The air on the rear
panel of the appliance heats up.
Conduction of the heated air must
not be obstructed. Otherwise,
the refrigerating unit must work harder.
This increases power consumption.
Therefore: Never cover or block
the ventilation openings!
Connecting
the appliance
After installing the appliance, wait at least
1 hour until the appliance is switched on.
During transportation the oil in
the compressor may have flowed into
the refrigeration system.
Before switching on the appliance for
the first time, clean the interior of
the appliance (see chapter “Cleaning
the appliance”).
Electrical connection
The socket must be near the appliance
and also freely accessible following
installation of the appliance.
m Warning
Risk of electric shock!
If the length of the mains cable is
inadequate, never use multiple sockets
or extension leads. Instead, please
contact Customer Service for
alternatives.
The appliance complies with protection
class I. Connect the appliance to 220–
240 V/50 Hz alternating current via a
correctly installed socket with protective
conductor. The socket must be protected
by a 10 A to 16 A fuse.
For appliances operated in non-
European countries, check whether the
indicated voltage and current type match
the values of your electricity supply. This
information can be found on the rating
plate, Fig. 4.
m Warning
Never connect the appliance
to electronic energy saver plugs.
Our appliances can be used with mains
and sine-controlled inverters. Mains-
controlled inverters are used
for photovoltaic systems which
are connected directly to the national
grid. Sine-controlled inverters must be
used for isolated applications (e.g. on
ships or in mountain lodges) which are
not connected directly to the national
grid.
en
9
Getting to know your
appliance
Please fold out the illustrated last page.
These operating instructions refer
to several models.
The features of the models may vary.
The diagrams may differ.
Fig. !
* Not all models.
Controls
Fig. "
A Refrigerator compartment
B Freezer compartment
1-9 Controls
10 Light (LED)
11 Glass shelf in the refrigerator
compartment
12* Bottle shelf
13 Cold storage compartment
14 Vegetable container
15* Butter and cheese compartment
16* Door shelf “EasyLift”
17 Shelf for large bottles
18 Frozen food container (small)
19 Glass shelf in the freezer
compartment
20 Frozen food container (large)
21 Condensation outlet
22 Height-adjustable feet
1 On/Off button
Serves to switch the whole
appliance on and off.
2 “Super” button (freezer
compartment)
Switches super freezing
on and off.
3 Temperature selection buttons
freezer compartment
These buttons set
the temperature in the freezer
compartment.
4 Temperature display freezer
compartment
The numbers correspond
to the set freezer compartment
temperatures in °C.
5 Alarm button
Used to switch off the warning
signal, see chapter “Alarm
function”.
6 Holiday button
Is used to switch vacation mode
on and off (see chapter entitled
Vacation mode).
7 Temperature selection buttons
refrigerator compartment
These buttons set
the temperature in the refrigerator
compartment.
8 Temperature display refrigerator
compartment
The numbers correspond to the
set refrigerator compartment
temperatures in °C.
9 “Super” button refrigerator
compartment
Switches super cooling on and
off.
en
10
Switching
the appliance on
Fig. "
1. Switch on the appliance with the On/
Off button 1.
A warning signal sounds,
the temperature display 4 flashes and
the alarm button 5 is lit.
2. The warning signal is switched off by
pressing the alarm button 5.
The appliance begins to cool. Light is
switched on when the door is open.
The factory has recommended
the following temperatures:
Refrigerator compartment: +4 °C
Freezer compartment: -18 °C
Operating tips
When the appliance has been
switched on, it may take several hours
until the set temperatures have been
reached.
Do not put any food in the appliance
beforehand.
The sides of the housing are
sometimes heated slightly. This
prevents condensation in the area of
the door seal.
If the freezer compartment door
cannot be immediately re-opened after
it has been closed, wait until the
resulting low pressure has equalised.
Setting
the temperature
Fig. "
Refrigerator compartment
The temperature can be set from +2 °C
to +8 °C.
Keep pressing temperature setting
button on refrigerator compartment 7,
until the required refrigerator
compartment temperature is set.
The value last selected is saved. The set
temperature is indicated on the
temperature display for the refrigerator
compartment 8.
Perishable food should not be stored
above +4 °C.
Freezer compartment
The temperature can be set from –16 °C
to –24 °C.
Keep pressing temperature setting
button freezer compartment 3 until
the required freezer compartment
temperature is set.
The value last selected is saved. The set
temperature is indicated on temperature
display for the freezer compartment 4.
en
11
Holiday mode
If leaving the appliance for a long period
of time, you can switch the appliance
over to the energy-saving holiday mode.
When holiday mode is switched on,
automatic super freezing is switched off.
The refrigerator compartment
temperature is automatically switched to
+14 °C.
Do not store any food in the refrigerator
compartment during this time.
Switching on and off
Fig. "
Press the holiday button 6.
If vacation mode is switched on, the
button is lit and the refrigerator
compartment temperature 8, no longer
indicates a temperature.
Alarm functions
Door alarm
A warning signal is switched on if the
appliance door is left open for a while.
Close the door to switch off the warning
signal.
Temperature alarm
The temperature alarm switches on
if the freezer compartment is too warm
and the frozen food is at risk of thawing.
When the alarm button 5 is pressed,
the freezer compartment temperature
display 4 indicates for five seconds
the warmest temperature reached
in the freezer compartment.
Then this value is deleted. The
temperature display for the freezer
compartment 4 indicates the set freezer
compartment temperature without
flashing.
Henceforth the “warmest temperature”
will be redefined and saved.
The alarm may switch on without any
risk to the frozen food:
when the appliance is switched on,
when large quantities of fresh food are
placed in the appliance,
if the freezer compartment door is
open too long.
Note
Do not refreeze thawing or thawed food.
Only ready meals (boiled or fried) may
be refrozen.
No longer store the frozen produce for
the max. storage period.
Switching off the alarm
Fig. "
Press the alarm button 5 to switch off
the warning signal.
en
12
Usable capacity
Information on the usable capacity can
be found inside your appliance on
the rating plate. Fig. 4
Fully utilising the freezer
volume
The maximum amount of food can be
placed in the freezer by removing all
fittings. The food can be stacked directly
on the shelves and in the bottom
of the freezer compartment.
Removing the fittings
Pull out the frozen food container all
the way, lift at the front and remove.
Fig. 0
Refrigerator
compartment
The refrigerator compartment is the ideal
storage location for ready meals, cakes
and pastries, preserved food, condensed
milk, hard cheese, fruit and vegetables
sensitive to cold.
Note when loading products
Wrap or cover food before placing
in the appliance. This will retain
the aroma, colour and freshness
of the food. In addition, flavours will not
be transferred between foods
and the plastic parts will not become
discoloured.
Note
Avoid contact between food and rear
panel. Otherwise the air circulation will
be impaired.
Food or packaging could freeze
to the rear panel.
Note the chill zones
in the refrigerator
compartment
The air circulation in the refrigerator
compartment creates different chill
zones:
Coldest zone
is on the rear panel inside
the appliance and on the cold storage
compartment. Fig. !/13
Note
Store perishable food e.g. fish,
sausage, meat in the coldest zones.
Warmest zone
is at the very top of the door.
Note
Store e.g. hard cheese and butter
in the warmest zone. Cheese can then
continue to release its flavour and the
butter will still be easy to spread.
en
13
Super cooling
Super cooling sets the refrigerator
temperature to the coldest temperature
setting for approx. 15 hours. Then
the appliance automatically switches
to the temperature set prior to super
cooling mode.
Switch on super cooling mode, e.g.
before placing large quantities of food
in the refrigerator compartment.
for the fast cooling of drinks.
Note
When super cooling is switched on,
increased operating noises may occur.
Switching on and off
Fig. "
Press super button 9 refrigerator
compartment.
The button is lit when super cooling
is switched on.
Freezer compartment
Use the freezer compartment
To store deep-frozen food.
To make ice cubes.
To freeze food.
Note
Ensure that the freezer compartment
door has been closed properly. If
the door is open, the frozen food will
thaw. The freezer compartment will
become covered in thick ice. Also: waste
of energy due to high power
consumption!
Freezing capacity
Information on the freezing capacity can
be found on the rating plate. Fig. 4
Prerequisites for freezing
capacity
Switch on fast freezing 24 hours
before placing fresh products
in the compartment (see chapter “Fast
freezing”).
Preferably freeze large quantities of
food in the bottom compartment. This
is where food freezes particularly
quickly and therefore also gently.
Freezing and storing
food
Purchasing frozen food
Packaging must not be damaged.
Use by the “use by” date.
Temperature in the supermarket
freezer must be -18 °C or lower.
If possible, transport deep-frozen food
in an insulated bag and place quickly
in the freezer compartment.
Freezing food
Freeze fresh and undamaged food
only.
Keep food which is to be frozen away
from food which is already frozen.
To prevent food from losing its flavour
or drying out, place in airtight
containers.
en
14
Storing frozen food
Insert frozen food container all the way to
ensure unrestricted air circulation.
If you have to store lots of food, it is
possible to transfer the food to the glass
shelves and stack it on the base
of the freezer base.
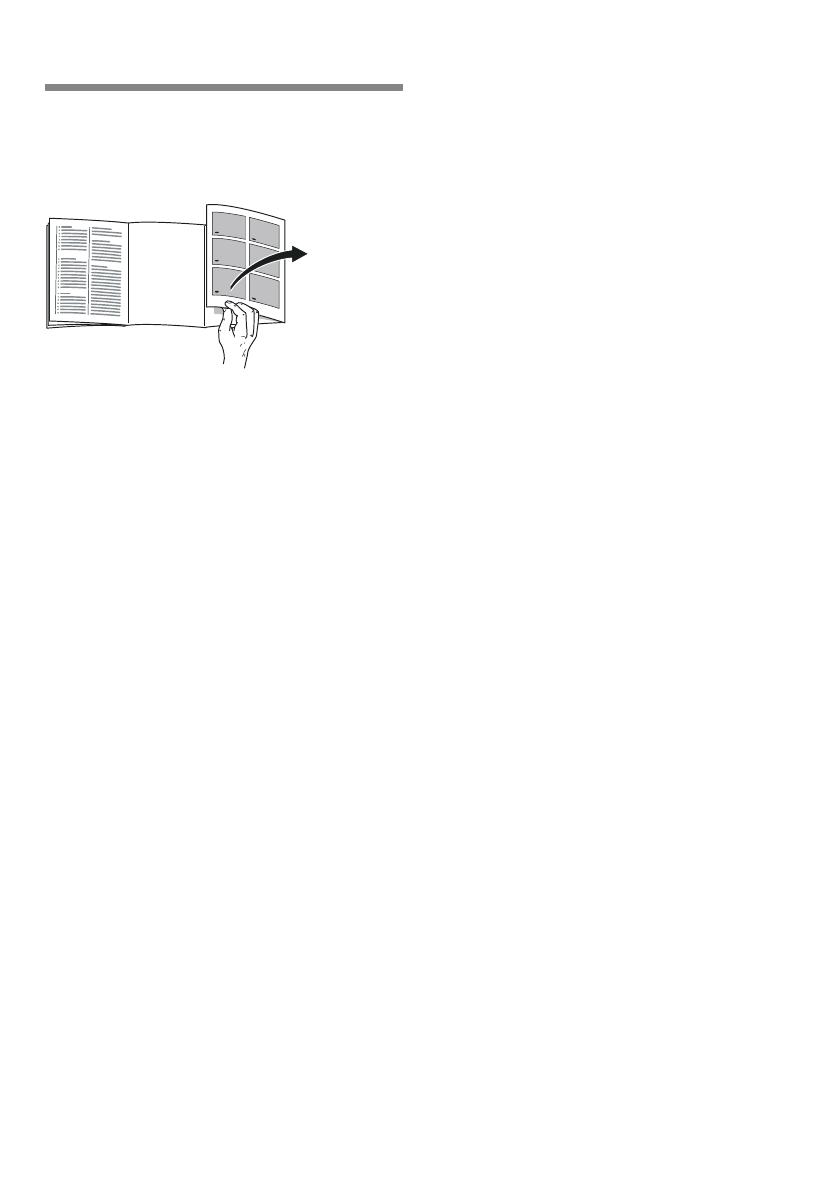
1. To do this, remove all the frozen food
containers.
2. Pull out the frozen food containers all
the way, lift at the front and remove.
Fig. 0
Freezing smaller amounts of
food
How you freeze smaller amounts of food,
so that they are frozen solid extremely
quickly, can be found in the section
Automatic super freezing.
Freezing fresh food
Freeze fresh and undamaged food only.
To retain the best possible nutritional
value, flavour and colour, vegetables
should be blanched before freezing.
Aubergines, peppers, zucchini and
asparagus do not require blanching.
Literature on freezing and blanching
can be found in bookshops.
Note
Keep food which is to be frozen away
from food which is already frozen.
The following foods are suitable for
freezing:
Cakes and pastries, fish and seafood,
meat, game, poultry, vegetables, fruit,
herbs, eggs without shells, dairy
products such as cheese, butter and
quark, ready meals and leftovers such
as soups, stews, cooked meat and
fish, potato dishes, soufflés and
desserts.
The following foods are not suitable
for freezing:
Types of vegetables, which are usually
consumed raw, such as lettuce or
radishes, eggs in shells, grapes,
whole apples, pears and peaches,
hard-boiled eggs, yoghurt, soured
milk, sour cream, crème fraîche and
mayonnaise.
Packing frozen food
To prevent food from losing its flavour
or drying out, place in airtight containers.
1. Place food in packaging.
2. Remove air.
3. Seal the wrapping.
4. Label packaging with contents
and date of freezing.
Suitable packaging:
Cling wrap, tubular film made of
polyethylene, aluminium foil, freezer
containers.
These products are available from
specialist outlets.
Unsuitable packaging:
Wrapping paper, greaseproof paper,
cellophane, bin liners and used shopping
bags.
en
15
Items suitable for sealing packaged
food:
Rubber bands, plastic clips, string, cold-
resistant adhesive tape, etc.
Bags and tubular film made of
polyethylene (PE) can be sealed with a
film heat sealer.
Shelf life of frozen food
Storage duration depends on the type
of food.
At a temperature of -18 °C:
Fish, sausage, ready meals and cakes
and pastries:
up to 6 months
Cheese, poultry and meat:
up to 8 months
Vegetables and fruit:
up to 12 months
Super freezing
Food should be frozen solid as quickly
as possible in order to retain vitamins,
nutritional value, appearance and flavour.
The appliance runs constantly when
super freezing has been switched on.
The freezer compartment temperatures
are much lower than in normal operation.
Switching on super freezing
Depending on the amounts of food to be
frozen, you can use super freezing in
different ways.
Note
When super freezing is switched on,
increased operating noises may occur.
Automatic super freezing
Smaller amounts of food are frozen solid
extremely quickly if you freeze them as
follows:
in the top frozen food container
On left
Automatic super freezing automatically
switches on when warm food items are
placed inside the freezer.
Manual super freezing
Fig. "
Preferably freeze larger quantities of food
in the bottom compartment. Here, it
freezes particularly quickly and therefore
also gently.
Several hours before placing fresh food
in the freezer compartment, switch on
super freezing to prevent an unwanted
temperature rise.
If the freezing capacity according to the
rating plate is to be used, switch on
super freezing 24 hours before the fresh
products are placed in the freezer
compartment.
Press 2 super button.
If super freezing has been switched on,
the button is lit.
Switching off super freezing
Fig. "
Press 2 super button.
Super freezing is now switched off.
When super freezing has finished, the
appliance automatically switches to
normal mode.
With automatic super freezing: As
soon as the smaller amounts of food
to be frozen have frozen solid.
With manual super freezing: After
approx. 2½ days.
en
16
Thawing frozen food
Depending on the type and application,
select one of the following options:
at room temperature
in the refrigerator
in an electric oven, with/without fan
assisted hot-air
in the microwave
m Caution
Do not refreeze thawing or thawed food.
Only ready meals (boiled or fried) may
be refrozen.
No longer store the frozen produce for
the max. storage period.
Interior fittings
(not all models)
Butter and cheese
compartment
To open the butter compartment, gently
press in the middle of the butter
compartment flap.
To clean the compartment, lift
it at the bottom and take out.
Adjustable “EasyLift” door
shelf
Fig. %
The height of the shelf can be adjusted
without taking it out.
Simultaneously press side buttons on the
shelf to move the shelf downwards. It
can be moved upwards without pressing
the buttons.
Bottle holder
Fig. '
The bottle holder prevents bottles from
falling over when the door is opened
and closed.
Glass shelves
Fig. (
If required, you can vary the shelves
inside the appliance: To do this, pull out
shelf, lift at the front and take out.
Variable shelf
Fig. )
The shelf can be folded down if required:
Pull shelf forwards, lower and press
backwards.
The shelf is suitable for storing food and
bottles.
Breakfast set
Fig. *
The containers for the breakfast set can
be taken out and filled individually.
You can take out the breakfast set for
loading and unloading. To do this, lift the
breakfast set and pull out. The container
holder can be moved.
Bottle shelf
Fig. +
Bottles can be stored securely on
the bottle shelf. The holder can be
adjusted.
en
17
Cold storage compartment
Fig. !/13
The cold storage compartment has lower
temperatures than the refrigerator
compartment. Even temperatures below
0 °C may occur.
Ideal for storing fish, meat and sausage.
Not suitable for lettuce and vegetables
and produce sensitive to cold.
Vegetable container with
humidity controller
Fig. -
To create the optimum storage climate
for fruit and vegetables, you can set the
air humidity in the vegetable container
depending on the quantity stored:
smaller quantities of fruit and
vegetables – high air humidity
large quantities of fruit and vegetables
– low air humidity
Notes
Fruit sensitive to cold (e.g. pineapple,
banana, papaya and citrus fruit) and
vegetables sensitive to cold (e.g.
aubergines, cucumbers, zucchini,
peppers, tomatoes and potatoes)
should be stored outside
the refrigerator at temperatures
of approx. +8 °C to +12 °C for
optimum preservation of quality and
flavour.
Condensation may form in the
vegetable container depending on the
type and quantity of products stored.
Remove condensation with a dry cloth
and adjust air humidity in the
vegetable container with the humidity
controller.
Vegetable container insert
Fig. .
The insert can be taken out.
Frozen food container (large)
Fig. !/20
For the storage of large frozen items,
e.g. turkey, duck and goose.
Note
Partition (if available) cannot be taken
out.
Ice cube tray
Fig. 2
1. Fill the ice cube tray ¾ full of drinking
water and place in the freezer
compartment.
2. If the ice tray is stuck to the freezer
compartment, loosen with a blunt
implement only (spoon-handle).
3. To loosen the ice cubes, twist the ice
tray slightly or hold briefly under
flowing water.
Ice pack
The ice pack can be removed to cool
food temporarily, e.g. in a cold bag.
If a power failure or malfunction occurs,
the ice pack can be used to slow down
the thawing process.
en
18
Sticker “OK”
(not all models)
The sticker “OK” lets you check whether
the refrigerator compartment achieves
the safe temperature ranges of +4 °C or
colder recommended for food. If the
sticker does not indicate “OK”, gradually
reduce the temperature.
Note
When the appliance is switched on, it
may take up to 12 hours until the set
temperature is reached.
Correct setting
Switching off and
disconnecting the
appliance
Turn off appliance
Fig. "
Press the On/Off button 1.
Temperature display 8 goes out,
refrigeration unit switches off.
Disconnecting the appliance
If you do not use the appliance
for a prolonged period:
1. Switch off the appliance.
2. Pull out mains plug or switch off fuse.
3. Clean the appliance.
4. Leave the appliance door open.
Defrosting
Refrigerator compartment
Defrosting is actuated automatically.
The condensation flows
into the evaporation
area of the appliance via
the condensation channels
and the drainage hole.
Freezer compartment
The freezer compartment does not
defrost automatically, otherwise
the frozen food would start thawing. A
layer of frost in the freezer compartment
impairs refrigeration of the frozen food
and increases power consumption.
Remove the layer of hoarfrost regularly.
m Caution
Do not scrape off hoarfrost or ice with
a knife or pointed object. You could
damage the refrigerant tubes. Leaking
refrigerant may ignite or cause eye
injuries.
Proceed as follows:
Note
Approx. 4 hours before defrosting
the appliance, switch on super freezing
so that the food drops to a very low
temperature and can therefore be stored
at room temperature for a longer period.
1. Switch off appliance to defrost it.
2. Pull out mains plug or switch off fuse.
3. Place the freezer drawers containing
the food in a cool location. Place
the ice pack (if enclosed) on the food.
4. Open condensation outlet. Fig. 3
en
19
5. The shelf for large bottles can be used
to collect the condensation. To do this,
take out the shelf for large bottles (see
chapter entitled Cleaning
the appliance) and place under
the open condensation outlet.
6. To accelerate the defrosting process,
place two pans of hot water on a trivet
in the appliance.
7. When the freezer compartment has
defrosted, pour the water out of
the freezer drawer. Wipe any
remaining water off the bottom of
the freezer compartment with
a sponge.
8. Close condensation outlet.
9. Re-insert shelf for large bottles into
the door.
10.When defrosting is complete, connect
and switch on the appliance again.
Cleaning the appliance
m Caution
Do not use abrasive, chloride or acidic
cleaning agents or solvents.
Do not use scouring or abrasive
sponges.
The metallic surfaces could corrode.
Never clean shelves and containers
in the dishwasher.
The parts may become deformed!
Proceed as follows:
1. Before cleaning: Switch off the
appliance.
2. Pull out mains plug or switch off fuse.
3. Take out the frozen food and store
in a cool location. Place the ice pack
(if enclosed) on the food.
4. Wait until the layer of frost has thawed.
5. Clean the appliance with a soft cloth,
lukewarm water and a little pH neutral
washing-up liquid. The rinsing water
must not run into the light.
6. Wipe the door seal with clear water
only and then wipe dry thoroughly.
7. After cleaning reconnect and switch
the appliance back on.
8. Put the frozen food back into
the appliance.
Interior fittings
All variable parts of the appliance
can be taken out for cleaning.
Take out shelves in the door
Fig. &
Lift shelves upwards and take out.
Take out glass shelves
Fig. (
Lift the glass shelves, pull forwards,
lower and swivel out to the side.
Taking out pull-out container
Lift the container and pull out.
en
20
Condensation outlet fascia
To clean the condensation outlet
channel, the glass shelf above
the vegetable container, Fig. !/14, must
be separated from the condensation
outlet fascia:
1. Take out the glass shelf.
2. Lift condensation outlet fascia and
take out. Fig. ,
Note
Regularly clean the condensation
channel and drainage hole with a cotton
bud or similar implement to ensure that
the condensation can drain.
Vegetable container
Fig. /
The fascia of the vegetable container can
be removed for cleaning.
Press side buttons in succession
and remove fascia from the vegetable
container.
Removing the container
Fig. %
Pull out the container all the way, lift at
the front and remove.
Odours
If you experience unpleasant odours:
1. Switch off the appliance with the On/
Off button. Fig. "/1
2. Take all food out of the appliance.
3. Clean interior (see chapter “Cleaning
the appliance”).
4. Clean all packages.
5. Seal strong smelling food in order
to avoid odours from forming.
6. Switch the appliance on again.
7. Store food in the appliance.
8. Check whether the formation
of odours is still occuring after
24 hours.
Light (LED)
Your appliance features a maintenance-
free LED light.
These lights may be repaired
by customer service or authorised
technicians only.
  • Page 1 1
  • Page 2 2
  • Page 3 3
  • Page 4 4
  • Page 5 5
  • Page 6 6
  • Page 7 7
  • Page 8 8
  • Page 9 9
  • Page 10 10
  • Page 11 11
  • Page 12 12
  • Page 13 13
  • Page 14 14
  • Page 15 15
  • Page 16 16
  • Page 17 17
  • Page 18 18
  • Page 19 19
  • Page 20 20
  • Page 21 21
  • Page 22 22
  • Page 23 23
  • Page 24 24
  • Page 25 25
  • Page 26 26
  • Page 27 27
  • Page 28 28
  • Page 29 29
  • Page 30 30

Bosch KGE36AWCA User guide

Category
Fridge-freezers
Type
User guide

Ask a question and I''ll find the answer in the document

Finding information in a document is now easier with AI