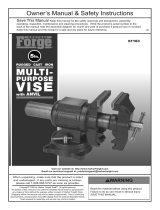
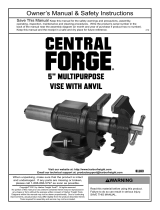
Central Forge Item 67415 Owner's manual
- Category
- Power tools
- Type
- Owner's manual
This manual is also suitable for

5" Multi-Purpose Vise
Item 67415
Read this material before using this product.
Failure to do so can result in serious injury.
SAVE THIS MANUAL.
When unpacking, make sure that the product is intact and undamaged.
If any parts are missing or broken, please call 1-800-444-3353 as soon as possible.
Visit our website at: http://www.harborfreight.com
Email our technical support at: [email protected]
Copyright
©
1997 by Harbor Freight Tools
®
. All rights reserved. No portion of this manual or any artwork contained herein may be
reproduced in any shape or form without the express written consent of Harbor Freight Tools. Diagrams within this manual may not be
drawn proportionally. Due to continuing improvements, actual product may differ slightly from the product described herein. Tools required
for assembly and service may not be included.
Revised Manual 11f

Page 2SKU 67415 For technical questions, please call 1-800-444-3353.
SAVE THIS MANUAL
Keep this manual for the safety warnings and
precautions, assembly, operating, inspection, maintenance
and cleaning procedures. Write the product’s serial number
in the back of the manual near the assembly diagram (or
month and year of purchase if product has no number). Keep
this manual and the receipt in a safe and dry place for future
reference.
IMPORTANT SAFETY
INFORMATION
In this manual, on the labeling, and all
other information provided with this
product:
WARNING Read all safety warnings
and instructions. Failure to follow the
warnings and instructions may result in
electric shock, re and/or serious injury.
1. Work area safety
a. Keep work area clean and well lit.
Cluttered or dark areas invite accidents.
b. Keep children and bystanders away
while operating the Vise. Distractions
can cause you to lose control.
2. Personal safety
a. Stay alert, watch what you are doing and
use common sense when operating the Vise.
Do not use while you are tired or under the
inuence of drugs, alcohol or medication.
A moment of inattention while operating the
Vise may result in serious personal injury.
b. Use safety equipment. Always wear ANSI-
approved eye protection. Safety equipment such
as dust mask, non-skid safety shoes, hard hat, or
hearing protection used for appropriate conditions
will reduce the chance of personal injuries.
c. Keep hands clear of Jaws.
d. Do not overreach. Keep proper footing
and balance at all times. This enables better
control of the tool in unexpected situations.
e. Dress properly. Do not wear loose clothing or
jewelry. Keep your hair, clothing and gloves
away from moving parts. Loose clothes, jewelry
or long hair can be caught in moving parts.
3. Tool use and care
a. Do not force the tool. Use the correct tool for
your application. Do not use additional leverage for
tightening jaw grip. If required, use a larger size vise.
b. Maintain tools. Check for misalignment or
binding of moving parts, breakage of parts
and any other condition that may affect
the tool’s operation. If damaged, have the
tool repaired before use. Many accidents
are caused by poorly maintained tools.
c. Use the tool in accordance with these
instructions, taking into account the working
conditions and the work to be performed. Use
of the tool for operations different from those
intended could result in a hazardous situation.
4. Service
a. Have your tool serviced by a qualied
repair person using only identical
replacement parts. This will ensure that
the safety of the tool is maintained.
Vise Safety Warnings
1. Maintain labels and nameplates on the tool.
These carry important safety information. If
unreadable or missing, contact Harbor
Freight Tools for a replacement.
2. This product is not a toy. Keep it
out of reach of children.
3. Do not strike Vise with hardened tool.
Inspect before use; discard if chipped.
4. Secure the Vise with appropriate
hardware (not supplied) before use.
5. The anvil is used for light forming applications.
For heavier jobs use a full size vise.
6. The warnings, precautions, and instructions
discussed in this instruction manual cannot
cover all possible conditions and situations
that may occur. It must be understood by the
operator that common sense and caution are
factors which cannot be built into this product,
but must be supplied by the operator.
SAVE THESE
INSTRUCTIONS.
Rev 09h

Page 3SKU 67415 For technical questions, please call 1-800-444-3353.
SPECIFICATIONS
Jaw Throat Depth 3 IN.
Pipe Jaw Capacity 2 IN.
Swivel Capacity 360°
INSTRUCTIONS FOR
PUTTING INTO USE
Read the ENTIRE IMPORTANT SAFETY
INFORMATION section at the beginning of
this manual including all text under
subheadings therein before set up or use of
this product.
Note: For additional information regarding
the parts listed, refer to the Assembly
Diagram near the end of this manual.
1. Vise must be mounted on a solid, level surface
capable of supporting combined weight of Vise,
intended workpieces, and applicable forces.
2. Use the holes in the base of the Vise as a template
to mark the bench surface. Verify that the installation
surface has no hidden utility lines before drilling
or driving screws. Drill holes and attach the Vise
rmly to the work surface with appropriate hardware
(1/2” lug bolts or hexagonal bolts, at washers,
and self locking hex nuts, all sold separately).
OPERATION
1. Turn the Base Lock Bar (1) to open the Jaws
(3, 6) and place the workpiece between them.
2. Loosen Lock Screws (7) and rotate the Vise to
the best orientation for the job. A choice of three
jaws are available: straight Jaws, Pipe Jaws
or the V-Jaws. Tighten the Locking Bolt (17)
to secure the Vise before starting any work.
3. Close the Jaws until the workpiece is held securely.
Do not overtighten the Jaws. Overtightening
the Jaws could damage the workpiece. Use
soft jaws when necessary to prevent damage to
the workpiece. The orientation of the Jaws will
become xed after the handle is tightened.
MAINTENANCE AND SERVICING
Procedures not specically explained
in this manual must be performed
only by a qualied technician.
1. BEFORE EACH USE, inspect the general condition
of the tool. Check for misalignment or binding of
moving parts, cracked or broken parts and any
other condition that may affect its safe operation.
2. AFTER USE, clean external surfaces
of the tool with clean cloth.
3. Lubricate the moving parts of the Vise
periodically with a high quality machine oil.
4. In moderate to extensive use or when foreign
particles accumulate on the Faceplate Screws
(5) or Cut Jaw Screws (15), take the Vise
apart, thoroughly clean all components,
re-assemble and properly lubricate.
Replacing the Jaws
To replace straight or V-jaws, insert a
screwdriver or wrench to remove the securing
screws. For added security, Attach and tighten
the new jaws with the same screws.
PLEASE READ THE FOLLOWING CAREFULLY
THE MANUFACTURER AND/OR DISTRIBUTOR HAS
PROVIDED THE PARTS LIST AND ASSEMBLY DIAGRAM
IN THIS MANUAL AS A REFERENCE TOOL ONLY.
NEITHER THE MANUFACTURER OR DISTRIBUTOR
MAKES ANY REPRESENTATION OR WARRANTY OF ANY
KIND TO THE BUYER THAT HE OR SHE IS QUALIFIED
TO MAKE ANY REPAIRS TO THE PRODUCT, OR THAT
HE OR SHE IS QUALIFIED TO REPLACE ANY PARTS
OF THE PRODUCT. IN FACT, THE MANUFACTURER
AND/OR DISTRIBUTOR EXPRESSLY STATES THAT
ALL REPAIRS AND PARTS REPLACEMENTS SHOULD
BE UNDERTAKEN BY CERTIFIED AND LICENSED
TECHNICIANS, AND NOT BY THE BUYER. THE BUYER
ASSUMES ALL RISK AND LIABILITY ARISING OUT OF
HIS OR HER REPAIRS TO THE ORIGINAL PRODUCT OR
REPLACEMENT PARTS THERETO, OR ARISING OUT
OF HIS OR HER INSTALLATION OF REPLACEMENT
PARTS THERETO.
Record Product’s Serial Number Here:
Note: If product has no serial number, record
month and year of purchase instead.
Note: Some parts are listed and shown for
illustration purposes only, and are not available
individually as replacement parts.
Rev 09g; 09h; 11f

Page 4SKU 67415 For technical questions, please call 1-800-444-3353.
Part Description Qty
1 Base Lock Bar 1
2 Vise Screw 1
3 Adjusting Jaw 1
4 Jaw Faceplate 2
5 Faceplate Screw 4
6 Back Jaw 1
7 Lock Screw 2
8 Housing 1
9 Screw Cap 1
10 Washer 1
Part Description Qty
11 Cap Screw 2
12 Nut 1
13 Locking Pin 1
14 Outer Cut Jaw 1
15 Cut Jaw Screw 3
16 Inner Cut Jaw 1
17 Locking Bolt 1
18 Base 1
19 Rotation Collar 1
Rev 09h
PARTS LIST
19
LIMITED 90 DAY WARRANTY
Harbor Freight Tools Co. makes every effort to assure
that its products meet high quality and durability standards,
and warrants to the original purchaser that this product is free
from defects in materials and workmanship for the period of
90 days from the date of purchase. This warranty does not
apply to damage due directly or indirectly, to misuse, abuse,
negligence or accidents, repairs or alterations outside our
facilities, criminal activity, improper installation, normal wear
and tear, or to lack of maintenance. We shall in no event be
liable for death, injuries to persons or property, or for incidental,
contingent, special or consequential damages arising from the
use of our product. Some states do not allow the exclusion
or limitation of incidental or consequential damages, so the
above limitation of exclusion may not apply to you. THIS
WARRANTY IS EXPRESSLY IN LIEU OF ALL OTHER
WARRANTIES, EXPRESS OR IMPLIED, INCLUDING THE
WARRANTIES OF MERCHANTABILITY AND FITNESS.
To take advantage of this warranty, the product or part
must be returned to us with transportation charges prepaid.
Proof of purchase date and an explanation of the complaint
must accompany the merchandise. If our inspection veries
the defect, we will either repair or replace the product at our
election or we may elect to refund the purchase price if we
cannot readily and quickly provide you with a replacement.
We will return repaired products at our expense, but if we
determine there is no defect, or that the defect resulted from
causes not within the scope of our warranty, then you must
bear the cost of returning the product.
This warranty gives you specic legal rights and you
may also have other rights which vary from state to state.
3491 Mission Oaks Blvd. • PO Box 6009
Camarillo, CA 93011 • (800) 444-3353
-
 1
1
-
 2
2
-
 3
3
-
 4
4
Central Forge Item 67415 Owner's manual
- Category
- Power tools
- Type
- Owner's manual
- This manual is also suitable for
Ask a question and I''ll find the answer in the document
Finding information in a document is now easier with AI
Related papers
-
 Central Forge Item 94276 Owner's manual
-
Harbor Freight Tools 97160 Owner's manual
-
Harbor Freight Tools 3 in. Swivel Vise with Anvil Owner's manual
-
 Central Forge 61163 5 in. Multi-Purpose Vise Owner's manual
-
Harbor Freight Tools 6 in. Cross Slide Vise Owner's manual
-
 Central Forge Item 61163-UPC 792363611633 Owner's manual
-
Harbor Freight Tools Item 69159 Owner's manual
-
Harbor Freight Tools 6 in. Portable Carpenter's Vise Owner's manual
-
Harbor Freight Tools 4 In Drill Press Vise Owner's manual
-
Harbor Freight Tools 2_3/4 in. Articulated Vacuum Vise Owner's manual
Other documents
-
Harbor Freight Tools 18 in. Bolt Cutters User manual
-
 Pittsburgh 41146 User manual
-
Franke RUG110GR Datasheet
-
Harbor Freight Tools 5655 User manual
-
Harbor Freight Tools 94386 User manual
-
Klutch Please see replacement item# 4911987. Multi-Purpose Bench Vise Owner's manual
-
Harbor Freight Tools Metal Shrinker/Stretcher Set Owner's manual
-
Central Machinery 93212 User manual
-
Harbor Freight Tools Item 61483 Owner's manual
-
Harbor Freight Tools 10 in. 12 Speed Bench Drill Press User manual


