Page is loading ...

1100
Cabinet trolley
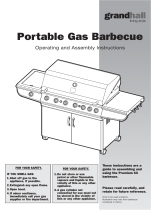
Assembly Instructions
FOR OUTDOORS USE ONLY
To suit models:
1100s
1100e
1100
2, 3, 4 or 5 Burners

2
Content:
Mrk Qty description
1 1 Base Panel
2 1 Right Hand Side Panel
3 1 Left Hand Side Panel
4 1 Rear Panel
5 1 Top Front Brace
6 1 Left Hand Side Door
7 1 Right Hand Side Door
8 2 Door Handle
9 1 Side Shelf
10 1 Side Burner
11 1 Wheels Axel
12 2 Wheel
13 2 Wheel Hub Cap
14 2 Castor
15 2+2 Door Hinge
16 Condiment Basket (optional)
Bolt Pack Content
Mrk Qty description
A 2 Circlips
B 29 M6 x 12 screw
C 33 M6 washer
D 4 M4 x 10 countersunk screw
E 6 M6 Nut
F 2 Rubber grommet
G 8 Fiber Washer
H 8 M6 x 25 Screw
I 4 Magnets
J 1 Gas Hose

3
1100Series Assembly Procedure
Step 1
2 x ‘A’
Step 2
13 x ‘B’, 13 x ‘C’, 2 x ‘F’
Turn the Base Panel upside-down, insert the Wheel Axel through the 2 holes, and
place a wheel on each side. Secure with a circlip on outside of wheel. Place Cap.
insert each castor to its place in the other 2 corners
Turn the base back upright, and attach the side and back panels.
Insert grommet in side and rear panel holes.

4
Step 3
4 x ‘D’
Step 4
4 x ‘B’, 4 x ‘C’
Attach the Top Brace.
Do not tighten. That will be done after fitting the doors.
If required, attach the Hinge Blocks to front of side panels. Note: the block
should be on the inside, with only the small bends protruding out.

5
Step 5
Step 6
4 x ‘B’, 4 x ‘C’
Hold each door at ~60° open angle, and insert through opening at door internal skin over the
hinge block pins. Ensure correct engagement in both brackets simultaneously.
Remove all loose parts from inside the Barbecue. Place the Barbecue
over the trolley and attach with screws. Ensure the lugs in the middle of
trolley side panels engage with corresponding slots in BBQ body.

6
Step 7
Adjust the Top Brace (from step 4) to right position, so the doors are closing straight,
and tighten the 4 screws.
Step 8
8 x ‘H’, 8 x ‘G’
Fit the shelf and Side Burner (or 2 shelves) to the side of the Barbecue.
Note: screws to go from the inside of barbecue body out.
Step 9
Make gas connections and conduct
Leak-Test.
Regulator to be connected to entry ‘A’.
Entry ‘B’ remove cap and connect Side-
Burner hose, if required.
Refer also to Barbecue book P. 4
for Leak-Test procedure.

7
Step 10
8 x ‘J’
If connecting Side Burner, the hose is attached to inlet ‘B’ above, and
connected to Side Burner manifold as follows:
Warranty
Warranty terms and condition in BBQ Instructions book P. 11 apply to this trolley as well.
All parts and workmanship of this trolley are covered for a period of 1 year from date of purchase.
Technical Information
Note: Do not modify this appliance or any of its parts. Any deviation from factory
settings could result in a safety hazard.
Side Burner manifold inlet thread is 3/8 SAE male flare fitting.
Input Energy: 15Mj.
Nozzle sizes: LPG – 1.05mm, NG – 1.7mm
For your records:
Model Number: ________________________________________________________________________
Date of Purchase: ________________________________________________________________________
Place where purchased:
________________________________________________________________________
Serial Number:
_________________________________________________________________________
Images in this manual are for illustrative purposes only.
Due to constant improvement, BeefEater advises that
changes to the design, material, specifications and product
configuration may occur at any time without notice.

8
Spare Parts:
Woodland Home Products
3-5 Birmingham Av, Chester-
Hill, NSW, Australia, 2162
Phone: 1800 356 660
Facsimile: 02 9724 8899
E-mail: mail@beefeaterbbq.com
Website:
www.beefeaterbbq.com
1100_Trol_Inst_AU_V0
/