NAPOLEON PTH10PSS Owner's manual
- Category
- Barbecues & grills
- Type
- Owner's manual
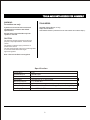
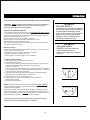
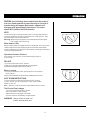
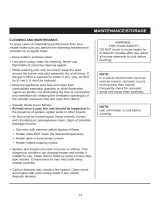
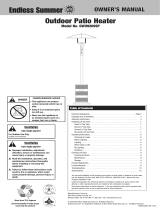
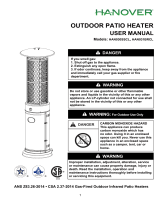
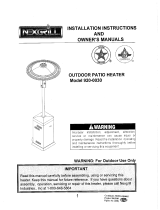
NAPOLEON PTH10PSS tabletop patio heater provides efficient and safe outdoor heating with a rated heat input of 10,000 BTU/hr. Utilizing propane as fuel, it features a flame failure device, tilt switch, and Oxygen Depletion Safety (ODS) pilot for enhanced safety. The CSA-certified heater has a manifold pressure of 11.0 inches W.C and an injector size of 0.91mm. Enjoy cozy outdoor gatherings without the worry of carbon monoxide emissions, as it's designed for outdoor use only.
NAPOLEON PTH10PSS tabletop patio heater provides efficient and safe outdoor heating with a rated heat input of 10,000 BTU/hr. Utilizing propane as fuel, it features a flame failure device, tilt switch, and Oxygen Depletion Safety (ODS) pilot for enhanced safety. The CSA-certified heater has a manifold pressure of 11.0 inches W.C and an injector size of 0.91mm. Enjoy cozy outdoor gatherings without the worry of carbon monoxide emissions, as it's designed for outdoor use only.


-
 1
1
-
 2
2
-
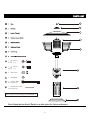 3
3
-
 4
4
-
 5
5
-
 6
6
-
 7
7
-
 8
8
-
 9
9
-
 10
10
-
 11
11
-
 12
12
-
 13
13
-
 14
14


NAPOLEON PTH10PSS Owner's manual
- Category
- Barbecues & grills
- Type
- Owner's manual
NAPOLEON PTH10PSS tabletop patio heater provides efficient and safe outdoor heating with a rated heat input of 10,000 BTU/hr. Utilizing propane as fuel, it features a flame failure device, tilt switch, and Oxygen Depletion Safety (ODS) pilot for enhanced safety. The CSA-certified heater has a manifold pressure of 11.0 inches W.C and an injector size of 0.91mm. Enjoy cozy outdoor gatherings without the worry of carbon monoxide emissions, as it's designed for outdoor use only.
Ask a question and I''ll find the answer in the document
Finding information in a document is now easier with AI
Related papers
Other documents
-
 Inferno SRPT08 User guide
-
Patio Festival PF19110-110-110-110-901-G Operating instructions
-
 Inferno SRPH68 User guide
-
Uniflame 200209 Owner's manual
-
 Blue Rhino GWU9209SP User manual
-
Endless Summer 233000 Owner's manual
-
 Lava Heat MINI LAVA Owner's manual
-
 Nexgrill 920-0030 Owner's manual
-
Fire Sense 55006 Installation guide
-
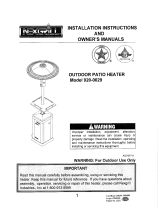 Nexgrill 920-0029 Owner's manual


