Page is loading ...

2
DEUTSCH
Inhalt
Übersicht der Bedienelemente .....................................Seite 3
Bedienungsanleitung .....................................................Seite 4
Technische Daten .......................................................... Seite 10
Garantie .........................................................................Seite 10
Entsorgung ....................................................................Seite 11
NEDERLANDS
Inhoud
Overzicht van de bedieningselementen ....................Pagina 3
Gebruiksaanwijzing ....................................................Pagina 12
Technische gegevens ................................................Pagina 18
Verwijdering ................................................................Pagina 18
FRANÇAIS
Sommaire
Situation des commandes ........................................... Page 3
Mode d’emploi .............................................................. Page 19
Données techniques .................................................... Page 25
élimination .................................................................... Page 25
ESPAÑOL
Índice
Indicación de los elementos de manejo ....................Página 3
Instrucciones de servicio ............................................Página 26
Datos técnicos ............................................................Página 32
Eliminación .................................................................Página 32
ITALIANO
Indice
Elementi di comando ..................................................Pagina 3
Istruzioni per l’uso .......................................................Pagina 33
Dati tecnici ..................................................................Pagina 39
Smaltimento ................................................................Pagina 39
ENGLISH
Contents
Overview of the Components ...................................... Page 3
Instruction Manual ........................................................ Page 40
Technical Data .............................................................. Page 46
Disposal ........................................................................ Page 46
JĘZYK POLSKI
Spis treści
Przegląd elementów obłsugi ...................................... Strona 3
Instrukcja obsługi ........................................................Strona 47
Dane techniczne .........................................................Strona 53
Warunki gwarancji ...................................................... Strona 53
Usuwanie .................................................................... Strona 54
MAGYARUL
Tartalom
A kezelőelemek attekintése ..........................................Oldal 3
Használati utasítás ........................................................Oldal 55
Műszaki adatok..............................................................Oldal 61
Hulladékkezelés ............................................................Oldal 61
YKPAÏHCBKA
Зміст
Огляд елементів управління .......................................стор 3
Інструкція з експлуатації ..............................................стор 62
Технічні параметри .......................................................стор 68
РУССКИЙ
Содержание
Обзор деталей прибора ...............................................стр. 3
Руководство по эксплуатации......................................стр. 69
Технические данные .....................................................стр. 75
3 .............................................
81 ..............................................................
76 ................................................................
Page is loading ...
Page is loading ...
Page is loading ...
Page is loading ...
Page is loading ...
Page is loading ...
Page is loading ...
Page is loading ...
Page is loading ...
Page is loading ...
Page is loading ...
Page is loading ...
Page is loading ...
Page is loading ...
Page is loading ...
Page is loading ...
Page is loading ...
Page is loading ...
Page is loading ...
Page is loading ...
Page is loading ...
Page is loading ...
Page is loading ...
Page is loading ...
Page is loading ...
Page is loading ...
Page is loading ...
Page is loading ...
Page is loading ...
Page is loading ...
Page is loading ...
Page is loading ...
Page is loading ...
Page is loading ...
Page is loading ...
Page is loading ...
Page is loading ...

40
Instruction Manual
Thank you for choosing our product. We hope you will enjoy
using the appliance.
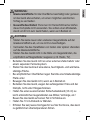
Symbols in these Instructions for Use
Important information for your safety is specially marked. It is
essential to comply with these instructions in order to avoid
accidents and prevent damage to the machine:
WARNING:
This warns you of dangers to your health and indicates pos-
sible injury risks.
CAUTION:
This refers to possible hazards to the machine or other
objects.
NOTE:
This highlights tips and information.
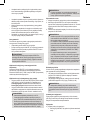
General Notes
Read the operating instructions carefully before putting the
appliance into operation and keep the instructions including the
warranty, the receipt and, if possible, the box with the internal
packing. If you give this device to other people, please also
pass on the operating instructions.
• The appliance is designed exclusively for private use and
for the envisaged purpose. This appliance is not t for com-
mercial use.
• Do not use it outdoors. Keep it away from sources of heat,
direct sunlight, humidity (never dip it into any liquid) and
sharp edges. Do not use the appliance with wet hands. If
the appliance is humid or wet, unplug it immediately.
• When cleaning or putting it away, switch off the appliance
and always pull out the plug from the socket (pull the plug
itself, not the lead) if the appliance is not being used and
remove the attached accessories.
• Do not operate the machine without supervision. If you
leave the room you should always turn the device off.
Remove the plug from the socket.
• The device and the mains lead have to be checked regu-
larly for signs of damage. If damage is found the device
must not be used.
• Use only original spare parts.
• In order to ensure your children’s safety, please keep all
packaging (plastic bags, boxes, polystyrene etc.) out of their
reach.
WARNING!
Don’t let small children play with foils for danger of suffo-
cation!
Specic safety notes for induction hot plates
On the products you will nd symbols that indicate warnings or provide
information:
WARNING: Hot surface!
Danger of burns!
• During operation the temperature of the exposed surface may be
very hot.
• The induction cooker initially heats only the base of the cooking
utensils used, not the cooking zone itself. However, because of
the heat radiated during cooking, dangerously high temperatures
may also occur at the cooking zone after the cooking cycle.
• Induction heat! Metal objects as, e.g., knives, forks, spoons and
pot lids should not be placed on the cooking zone as they may get
hot.

41
WARNING:
• Glass-ceramic surface! If the surface is damaged or has cracks
the device must be switched off to avoid the hazard of electrical
shocks.
• Potential damage to your health! People wearing pacemakers
must not use this cooker. You should keep a minimum distance of
60 cm to the appliance when it is in use.
CAUTION:
• To prevent damage, do not place any rough or uneven objects
onto the glass ceramic surface.
• Avoid dropping hard or pointed utensils onto the glass ceramic
surface.
• Do not place the appliance near objects which are sensitive to
magnetic elds (e.g. radio, TV).
• Please do not operate the device with an external timer or a sepa-
rate remote control system.
• Place the appliance on an even, moisture and heat-resistant sur-
face.
• Use a heat resistant plate when placing on sensitive surfaces.
• Do not move the device when it is in operation.
• Due to the rising heat and vapours the device should not be oper-
ated under wall cupboards.
• Keep the unit at a safe distance from easily inammable objects
such as furniture, curtains, etc. (30 cm). Under no circumstances
should the device be installed in cupboards.
• Keep a safety distance of 10 cm to the walls.
• Do not heat empty pots on the cooking zone as this may lead to
dangerous overheating.

42
• Ventilation: Always keep the ventilation slots free from any ob-
structions and dirt.
• During and after use, ensure that the power cord does not come
into contact with the hot surface of the appliance.
• This appliance can be used by children aged from 8 years and
above and persons with reduced physical, sensory or mental ca-
pabilities or lack of experience and knowledge if they have been
given supervision or instruction concerning use of the appliance in
a safe way and understand the hazards involved.
• Children shall not play with the appliance.
• Cleaning and user maintenance shall not be made by children
unless they are older 8 years and supervised.
• Keep the appliance and its cord out of reach of children less than
8 years.
• Do not try to repair the appliance on your own. Always contact an
authorized technician. To avoid the exposure to danger, always
have faulty cable be replaced only by the manufacturer, by our cus-
tomer service or by qualied person and with a cable of the same
type.
• This appliance is not designed to be immersed in water during
cleaning. Please follow the instructions provided in the chapter
“Cleaning”.
Intended Use
This appliance is intended for preparing foodstuffs in induction
cookware.
It is intended for the use in private households and similar ap-
plications. The appliance is only to be used as described in the
user manual. Do not use the appliance for any other purpose.
Any other use is not intended and can result in damages or
personal injuries.
The manufacturer assumes no liability for damages caused by
improper use.
Unpacking the appliance
1. Remove the appliance from its packaging.
2. Remove all packaging materials such as lms, ller mate-
rial, cable clips and carton.
3. To prevent hazards, check the appliance for any transport
damage.
4. In the case of damage, do not operate the appliance.
Return it to your dealer immediately.
NOTE:
Production residue or dust may have collected on the appli-
ance. We recommend cleaning the appliance according to
chapter “Cleaning”.

43
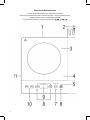
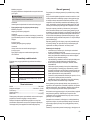
Overview of the Components
1 Air outlet
2 Mains plug
3 Housing
4 Glass ceramic surface
5 Indicator lights POWER / TEMP. / TIME / ON/OFF
6
ON/OFF (on/standby button)
7
selector button
8 Setting the power / temperature / turn-off time
UP increase
DOWN reduce
9 Display
10 Direct selection of the highest or lowest power setting
highest
lowest
11 Air inlet
General information
Cooking with induction technology
When cooking with induction technology, heat is only generated
by means of magnetic power, if a pot or pan with a magne-
tisable base is placed on a switched-on cooking zone. The
induction cooker heats only the base of the cooking utensils
used, not the cooking zone itself. Under the glass-ceramics
surface, the induction coil is located. If the coil is supplied with
electrical power a magnetic eld develops generating whirls in
the pot’s base. This results in the heating of the base material.
The induction process saves energy as heat is solely produced
where it is needed.
What cooking utensils may I use?
For induction cooking plates cookware made from magneti-
sable material is needed. Today, cooking utensils appropriate
for induction cooking usually bear a note saying “Suitable for
induction hob” or similar.
But principally you may use any iron-based cooking utensils; to
nd out whether a pot or pan is suitable, i.e., magnetisable just
try the following:
Position the cookware. If several warning signals sound and if
the message “E0” appears, the cookware is unsuitable.
NOTE:
For safety reasons, the appliance will switch to standby mode
after about 30 seconds.
Cooking utensils made of the following materials are not
suitable for induction hobs:
Clay, glass or aluminium.
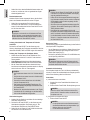
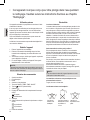
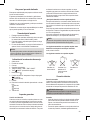
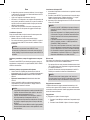
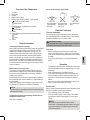
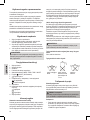
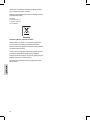
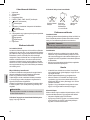
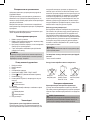
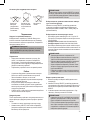
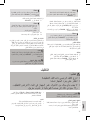
Do not use the following types of pots :
Pots with bended
(convex/parabo-
lic) bases.
Pots with a base
diameter of less
than 12 cm.
Pots standing on
feet.
Electrical Connection
Connected load/wattage
The hob can take up an overall load of 3500 W. Because of
this high connected load it is recommended to use a separate
connection protected over a 16 A safety switch.
CAUTION: Overload!
Do not use extension cables or multiple sockets as the power
consumption of this device is too high for these.
Connection
• Before inserting the mains plug into the socket check
whether the voltage which you intend to use corresponds
to that of the machine. Please see the label on the machine
for details.
• Only connect the machine to a correctly installed safety
socket.
Operation
• The appliance has a ne sensor. A light touch of the control
panel with the nger is sufcient. Use the nger, not the tip
of the nger.
• Each registered touch is conrmed by a beep.
• In the event that the appliance does not react when you
press the buttons, clean the control panel with a soft, dry
cloth. Even a thin lm of water can make the operation
difcult.
• Ensure that the control panel is always clean and dry and
that it is not covered by objects of any kind.
Standby mode
After you have connected the device’s plug to the mains supply,
the hub is in standby mode. A signal will sound.
• Put a suitable pot on the cooking zone.
• Press the ON/OFF button to start cooking. The indicator
light above the ON/OFF button lights up. The fan starts
running.
NOTE:
You must now press the SELECT button within
60 seconds, or the hotplate will switch back to the operat-
ing mode of standby. The indicator light above the ON/
OFF button turns off.

44
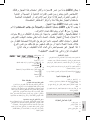
Selecting performance, shut-off time or temperature as the
function
Press the SELECT button to select the control by power, shut-
off time or temperature. The indicator lights POWER, TIME and
TEMP. will show the selection.
Selecting the power or temperature of the hotplate
• Use the UP or DOWN buttons to select a temperature level
between 60 °C and 240 °C or one of the 6 power settings:
• Left cooking hob 500/800/1200/1500/1800/2000 W
• Right cooking hob 500/800/1000/1200/1300/1500 W
• Use the MAX or MIN buttons to directly select the highest or
lowest power setting respectively. The display will show the
max. or min. power setting.
NOTE:
• The temperature setting changes in intervals of 20°.
• The left cooking hob always starts at 1200 W or a
temperature setting of 240 °C.
• The right cooking hob always starts at 1000 W or a
temperature setting of 240 °C.
• The display shows the selected setting. The respec-
tive pilot lamp above the SELECT button will also light
up.
• Please observe that the cooking behavior in the pots
differs. It depends on the nature and the quality of the
cooking vessels.
Enter Off Time
1. Turn the appliance on and select any range or temperature.
2. Press the SELECT button to select the control after the
shut-off time. The display will show “0”. The indicator light
TIME above the SELECT button will ash.
3. Set a turn-off time between 5 and 180 minutes by using the
UP or the DOWN button.
NOTE:
• Press the UP or DOWN buttons to set the time in
increments of 5 minutes. The display will show the
desired setting.
• Once you have set a time, the display will remain for
a few seconds. The remaining time and the function
that you have chosen beforehand are then shown
alternately.
• You may change the previous turn-off time at any
time. The other settings (POWER and TEMP.) will
remain.
• After the set time has elapsed, the cooking time will
automatically be turned off and a beep will sound. The
appliance is in standby mode again.
• In order to cancel the shut-off time before-hand, set
the time to “0”. You may also turn the appliance off
directly with the ON/OFF button.
Key lock
To safeguard against unwanted use, the appliance is equipped
with a disable function.
• In order to activate the key lock, simultaneously press the
UP and DOWN buttons after you have completed your
desired settings. The display will show “L”.
• Press the UP and DOWN buttons again at the same time
to cancel the disable function.
NOTE:
When the key lock has been activated, all buttons are
locked except for the ON/OFF button. The appliance can
only be operated again after unlocking it.
Automatic shut-off
The hot plate turns off automatically after 120 minutes, if no
input was given over the operator control panel during this time.
This switching serves as security for you.
Switching off
a) Switch off one single cooking hob
1. Press the MIN button to select the lowest power setting.
2. Press the DOWN button. The cooking hob turns off.
NOTE:
If you want to set a temperature below 60°C using the
DOWN button, the hotplate will also turn off.
b) Switch off the entire hotplate
1. Press the ON/OFF button.
NOTE:
• The hot plate is reset from its operational state to
standby mode. The fan may continue to run for a
period of time.
• The indicator lights will go out.
2. Pull the plug.
3. Let the device cool down, before you put it away.
Pan recognition
The device has a pot recognition function. It gives several
warnings to indicate that the cookware has been removed. The
message “E0” appears on the display. For safety reasons, the
appliance will switch to standby mode after about 30 seconds.
The fan may continue running.
In this context, please pay attention to the following:
WARNING:
After use, the hot plate is to be switched off by means of its
regulation and control devices ON/OFF button and not just by
pan recognition.
WARNING: Hazard of burns!
Because of the heat radiated during cooking, dangerously
high temperatures may occur at the cooking zone after the
cooking cycle.

45
CAUTION:
• Do not use a wire brush or any abrasive items.
• Do not use any acidic or abrasive detergents.
Glass ceramic Hob
• Clean the surface from food remains when it’s still warm
using a moist cloth or tissue.
• Wash the hob using a soft sponge and some water, then
wipe dry with a soft cloth.
• Cleaning agent for glass-ceramics surfaces: In case of
stubborn, baked-in remains, use suitable cleaning products
available at special departments of department stores.
Housing
• Clean the housing after use using a slightly moist cloth.
• Make sure that no uid matter gets into any of the openings
of the housing. This might damage the device or result in an
electric shock.
Storage
• Only store the appliance clean and after it has cooled down.
• During longer periods of non-use we recommend storing
the appliance in its original packaging.
• Always store the appliance in a well-ventilated and dry
place out of reach of children.
CAUTION: Risk of breakage!
Please note that the glass ceramic surface can be damaged
by heavy or falling objects.
Troubleshooting
• Device does not function, no indication on the display.
Remedy:
Check the mains connection.
• Several warnings will sound after the appliance has
been turned on and after the cooking function has
been selected.
Cleaning
WARNING:
• Always remove the mains lead before cleaning!
• Wait until the machine has cooled down completely!
• Under no circumstances should you immerse the device in water
for cleaning purposes. Otherwise this might result in an electric
shock or re.
Possible cause:
No cookware or unsuitable cookware was placed onto the
plate.
NOTE:
For safety reasons, the appliance will switch to standby
mode after about 30 seconds.
Remedy:
Put a pot on the hob that is suitable for induction hobs.
• The hob suddenly switches off during operation.
Possible cause:
The thermal cut-off is activated.
Remedy:
Disconnect the appliance from mains power supply and let
it cool down for approx. 20 minutes. Then start operating
the device again.
Further cause:
The ventilation slots are obstructed.
Remedy:
Free the ventilation slots from any obstructions.
Further cause:
The hot plate was automatically switched off after
120 minutes.
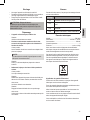
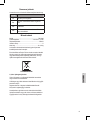
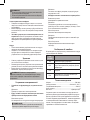
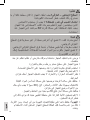
Error messages
During operation the following error messages can be dis-
played:
Message
E0 The cookware is unsuitable.
E01 Temperature sensor IGBT has failed.
E02 Overheating.
E03
Problem with power supply. Check the power
supply!

46
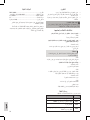
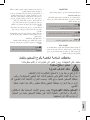
Technical Data
Model: .............................................................................DKI 3609
Power supply: ................................................220-240 V~, 50 Hz
Power consumption: ........................................................3500 W
Protection class: ......................................................................... ΙI
Net weight: .............................................................approx. 4.8 kg
The right to make technical and design modications in the
course of continuous product development remains reserved.
This device has been tested according to all relevant current
CE guidelines, such as electromagnetic compatibility and low
voltage directives, and has been constructed in accordance
with the latest safety regulations.
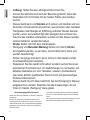
Disposal
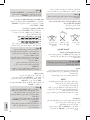
Meaning of the “Wheelie Bin” Symbol
Take care of our environment, do not dispose of electrical appli-
ances via the household waste.
Dispose of obsolete or defective electrical appliances via
municipal collection points.
Please help to avoid potential environmental and health
impacts through improper waste disposal.
You contribute to recycling and other forms of utilization of old
electric and electronic appliances.
Your municipality provides you with information about collecting
points.
Page is loading ...
Page is loading ...
Page is loading ...
Page is loading ...
Page is loading ...
Page is loading ...
Page is loading ...
Page is loading ...
Page is loading ...
Page is loading ...
Page is loading ...
Page is loading ...
Page is loading ...
Page is loading ...
Page is loading ...
Page is loading ...
Page is loading ...
Page is loading ...
Page is loading ...
Page is loading ...
Page is loading ...
Page is loading ...
Page is loading ...
Page is loading ...
Page is loading ...
Page is loading ...
Page is loading ...
Page is loading ...
Page is loading ...
Page is loading ...
Page is loading ...
Page is loading ...
Page is loading ...
Page is loading ...
Page is loading ...
Page is loading ...
-
 1
1
-
 2
2
-
 3
3
-
 4
4
-
 5
5
-
 6
6
-
 7
7
-
 8
8
-
 9
9
-
 10
10
-
 11
11
-
 12
12
-
 13
13
-
 14
14
-
 15
15
-
 16
16
-
 17
17
-
 18
18
-
 19
19
-
 20
20
-
 21
21
-
 22
22
-
 23
23
-
 24
24
-
 25
25
-
 26
26
-
 27
27
-
 28
28
-
 29
29
-
 30
30
-
 31
31
-
 32
32
-
 33
33
-
 34
34
-
 35
35
-
 36
36
-
 37
37
-
 38
38
-
 39
39
-
 40
40
-
 41
41
-
 42
42
-
 43
43
-
 44
44
-
 45
45
-
 46
46
-
 47
47
-
 48
48
-
 49
49
-
 50
50
-
 51
51
-
 52
52
-
 53
53
-
 54
54
-
 55
55
-
 56
56
-
 57
57
-
 58
58
-
 59
59
-
 60
60
-
 61
61
-
 62
62
-
 63
63
-
 64
64
-
 65
65
-
 66
66
-
 67
67
-
 68
68
-
 69
69
-
 70
70
-
 71
71
-
 72
72
-
 73
73
-
 74
74
-
 75
75
-
 76
76
-
 77
77
-
 78
78
-
 79
79
-
 80
80
-
 81
81
-
 82
82


Ask a question and I''ll find the answer in the document
Finding information in a document is now easier with AI
in other languages
- italiano: Clatronic DKI 3609 Manuale del proprietario
- français: Clatronic DKI 3609 Le manuel du propriétaire
- español: Clatronic DKI 3609 El manual del propietario
- Deutsch: Clatronic DKI 3609 Bedienungsanleitung
- русский: Clatronic DKI 3609 Инструкция по применению
- Nederlands: Clatronic DKI 3609 de handleiding
- polski: Clatronic DKI 3609 Instrukcja obsługi
Related papers
-
Clatronic DKP 3668 E Owner's manual
-
-
Clatronic EKP 3582 Owner's manual
-
Clatronic WK 3445 User manual
-
-
-
Clatronic HL 3631 Owner's manual
-
-
-
Other documents
-
Inventum KI 120T Owner's manual
-
Leonard LEM6000E User manual
-
ZANKER EHE60000X User manual
-
Progress PEM6000E User manual
-
Indesit KP 968I MS(X)/DE (T) User guide
-
-
Inventum IKI9040 User manual
-
Steba IK 400 S.B.EK. User manual
-
Whirlpool KP9I96(X)/DE User guide
-
Panasonic KY-B84BG Owner's manual