Page is loading ...

INSTRUCTION MANUAL
MANUEL D'INSTRUCTION
MANUAL DE INSTRUCCIONES
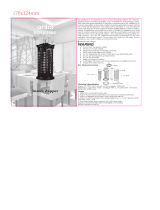
Cordless Area Worklight
Lampe de Zone Chantier
Luz Inalámbrica para Área de Trabajo
DML810
IMPORTANT: Read Before Using.
IMPORTANT : Lire avant usage.
IMPORTANTE: Lea antes de usar.

2 ENGLISH
ENGLISH (Original instructions)
SPECIFICATIONS
Model: DML810
LED 0.2 W x 202
Rated voltage A.C. 100V - 240V, 50/60Hz
D.C. 14.4V / 18V
Luminous ux 5,500lm / 3,000lm / 1,500lm
Operating time
(with BL1860B x2, all LEDs light up)
4 hours (5,500lm) / 18 hours (1,500lm)
Maximum number of interconnectable appliances 8
Operating temperature 0 °C ~ 40 °C
Storage temperature -20 °C ~ 60 °C
Dimensions
(L x W x H)
420 mm x 420 mm x 787 mm (16-1/2" x 16-1/2" x 31")
Net weight
(without battery cartridge and power cord)
13.9kg (30.6lbs)
• Due to our continuing program of research and development, the specications herein are subject to change
without notice.
• Specications may dier from country to country.
• Operating times are approximate and may dier depending on battery type, charging status, and usage
condition.
Applicable battery cartridge and charger
Battery cartridge D.C.14.4 V Model BL1430B
D.C.18 V Model
BL1815N / BL1820B / BL1830 / BL1830B / BL1840B / BL1850B / BL1860B
Charger
DC18RC / DC18RD / DC18RE / DC18SD / DC18SE / DC18SF / DC18SH
• Some of the battery cartridges and chargers listed above may not be available depending on your region of
residence.
WARNING: Only use the battery cartridges and chargers listed above. Use of any other battery cartridges
and chargers may cause injury and/or re.
Symbols
The followings show the symbols used for the equip-
ment. Be sure that you understand their meaning before
use.
Take particular care and attention.
Optical Radiation (UV and IR).
Minimize exposure to eyes or skin.
Do not stare at operating lamp.
Use appropriate shielding or eyes
protection.
Do not use the appliance in the rain or
snow when using with AC power.
Breaker restart button.
SAFETY WARNINGS
IMPORTANT SAFETY
INSTRUCTIONS
WARNING – When using ash-
lights or lanterns, additional pre-
cautions should always be fol-
lowed, including the following:
1. When the appliance is not in use, always
switch o, and unplug / remove the battery
cartridge from the appliance.
2. Do not cover the lamp, or clog the vent of the
appliance with cloth or carton, etc. Otherwise it
may cause a ame.
3. When using the appliance with AC power,
do not use the appliance in damp or wet
locations.

3 ENGLISH
4. Do not expose the appliance to rain or snow.
Never wash it in water.
5. Do not use the appliance in explosive atmo-
spheres, such as in the presence of ammable
liquids, gases or dust.
6. Appliance plugs must match the outlet. Never
modify the plugs in any way. Use of unmodied
plugs and matching outlet will reduce risk of elec-
tric shock.
7. When operating the appliance, avoid body
contact with earthed or grounded surfaces
such as pipes, radiators, microwave ovens, or
refrigerators. There is an increased risk of elec-
tric shock if your body is earthed or grounded.
8. Do not abuse the cord. Never use the cord for
carrying, pulling or unplugging the appliance.
Keep cord away from heat, oil, sharp edges
or moving parts. Damaged or entangled cords
increase the risk of electric shock.
9. When operating the appliance outdoors, use
an extension cord suitable for outdoor use.
Use of a cord suitable for outdoor use reduces
the risk of electric shock.
10. If the external exible cable or cord of this
luminaire is damaged, it shall be replaced by a
special cord or cord exclusively available from
the manufacturer or his service agent.
11. Do not stare at the source of light directly.
12. Do not handle the plug with wet or greasy
hand.
13. Always place the appliance on a level and sta-
ble place. Otherwise a falling accident may occur.
14. Always place the appliance in upright position.
15. The light source contained in this luminaire
shall only be replaced by the manufacture or
his service agent or a similar qualied person.
16. Do not leave the power cord disconnected
from the appliance while the power is supplied
from an outlet. Doing so might cause an electric
shock.
17. Do not use the carrying handle any other
purpose than carrying the appliance, such as
hoisting.
18. Do not expose the appliance to sparks or cor-
rosive atmosphere, etc.
19. To reduce the risk of injury, close supervision
is necessary when a product is used near
children.
20. Do not contact hot parts.
21. Unplug from outlet when not in use and before
servicing or cleaning.
22. Do not operate any product with a damaged
(cord or) plug, or after the product malfunc-
tions or is dropped or damaged in any manner.
Return product to the nearest authorized ser-
vice facility for examination, repair, or electri-
cal or mechanical adjustment.
23. Connect to a properly grounded outlet only.
See Grounding Instructions.
24. The outlet is live whenever the product is
plugged in. The outlet is not switched on or o
by the switch.
25. Use only extension cords which have plugs
and receptacles which accept the product’s
plug. Replace damaged extension cords.
26. Make sure your extension cord is in good
condition. When using an extension cord, be
sure to use one heavy enough to carry the
current your product will draw. An undersized
extension cord will cause a drop in line voltage
resulting in loss of power and overheating.
Table 1 shows the correct size to use depend-
ing on cord length and nameplate ampere
rating. If in doubt, use the next heavier gage.
The smaller the gage number, the heavier the
cord.
27. Don’t Abuse Cord – Never carry product by
cord or yank it to disconnect from receptacle.
Keep cord from heat, oil, and sharp edges.
28. Do not insert foreign objects into this product.
29. Servicing of a product requires extreme care
and knowledge of the system, and should
be done only by qualied service personnel.
Replacement parts for a product must be iden-
tical to those parts in the product.
30. Store product indoors when not in use.
31. Keep out of reach of children.
32. Do not clean this product with a water spray
or the like. Follow manufacturers cleaning
instructions.
Table 1: Minimum gage for cord
Volts Total length of cord in feet
120V 25 ft. 50 ft. 100 ft. 150 ft.
220V - 240V 50 ft. 100 ft. 200 ft. 300 ft.
Ampere rating
More Than Not More Than AWG
0 A 6 A 16 16 14 12
6 A 10 A
10 A 12 A 16 16 14 12
12 A 16 A 14 12 Not Recommended

4 ENGLISH
GROUNDING INSTRUCTIONS
This product must be grounded. In the event of mal-
function or breakdown, grounding provides a path
of least resistance for electric current to reduce the
risk of electric shock. This product is equipped with
a cord having an equipment-grounding conductor
and a grounding plug. The plug must be plugged
into an appropriate outlet that is properly installed
and grounded in accordance with all local codes
and ordinances.
DANGER – Improper connection of the equip-
ment-grounding conductor can result in a risk of
electric shock. The conductor with insulation hav-
ing an outer surface that is green with or without
yellow stripes is the equipment-grounding conduc-
tor. If repair or replacement of the cord or plug is
necessary, do not connect the equipment-ground-
ing conductor to a live terminal. Check with a
qualied electrician or serviceman if the grounding
instructions are not completely understood, or
if in doubt as to whether the product is properly
grounded. Do not modify the plug provided with the
product – if it will not t the outlet, have a proper
outlet installed by a qualied electrician.
A qualied electrician should be consulted if there
is any doubt as to whether an outlet box is properly
grounded.
Battery tool use and care
1. Prevent unintentional starting. Ensure the
switch is in the o-position before connecting
to battery pack, picking up or carrying the
appliance. Carrying the appliance with your nger
on the switch or energizing appliance that have
the switch on invites accidents.
2. Disconnect the battery pack from the appli-
ance before making any adjustments, chang-
ing accessories, or storing appliance. Such
preventive safety measures reduce the risk of
starting the appliance accidentally.
3. Recharge only with the charger specied by
the manufacturer. A charger that is suitable for
one type of battery pack may create a risk of re
when used with another battery pack.
4. Use power tools only with specically desig-
nated battery packs. Use of any other battery
packs may create a risk of injury and re.
5. When battery pack is not in use, keep it away
from other metal objects, like paper clips,
coins, keys, nails, screws or other small metal
objects, that can make a connection from one
terminal to another. Shorting the battery termi-
nals together may cause burns or a re.
6. Under abusive conditions, liquid may be
ejected from the battery; avoid contact. If con-
tact accidentally occurs, ush with water. If
liquid contacts eyes, additionally seek medical
help. Liquid ejected from the battery may cause
irritation or burns.
7. Do not use a battery pack or tool that is dam-
aged or modied. Damaged or modied batteries
may exhibit unpredictable behaviour resulting in
re, explosion or risk of injury.
8. Do not expose a battery pack or tool to re or
excessive temperature. Exposure to re or tem-
perature above 130 °C may cause explosion.
9. Follow all charging instructions and do not
charge the battery pack or tool outside the
temperature range specied in the instruc-
tions. Charging improperly or at temperatures
outside the specied range may damage the
battery and increase the risk of re.
10. Have servicing performed by a qualied repair
person using only identical replacement parts.
This will ensure that the safety of the product is
maintained.
11. Do not modify or attempt to repair the appli-
ance or the battery pack except as indicated in
the instructions for use and care.
SERVICE
1. This appliance service must be performed only by
qualied repair personnel. Service or maintenance
performed by unqualied personnel could result in
a risk of injury.
2. When servicing this appliance, use only identical
replacement parts. Use of unauthorized parts or
failure to follow maintenance instructions may
create a risk of electric shock or injury.
3. Do not incinerate this appliance, even if it is
severely damaged. The batteries can explode in a
re. Dispose of the appliance in accordance with
the local regulations.
Important safety instructions for
battery cartridge
1. Before using battery cartridge, read all instruc-
tions and cautionary markings on (1) battery
charger, (2) battery, and (3) product using
battery.
2. Do not disassemble battery cartridge.
3. If operating time has become excessively
shorter, stop operating immediately. It may
result in a risk of overheating, possible burns
and even an explosion.
4. If electrolyte gets into your eyes, rinse them
out with clear water and seek medical atten-
tion right away. It may result in loss of your
eyesight.
5. Do not short the battery cartridge:
(1) Do not touch the terminals with any con-
ductive material.
(2) Avoid storing battery cartridge in a con-
tainer with other metal objects such as
nails, coins, etc.
(3) Do not expose battery cartridge to water
or rain.
A battery short can cause a large current
ow, overheating, possible burns and even a
breakdown.
6. Do not store the tool and battery cartridge in
locations where the temperature may reach or
exceed 50 °C (122 °F).
7. Do not incinerate the battery cartridge even if
it is severely damaged or is completely worn
out. The battery cartridge can explode in a re.
8. Be careful not to drop or strike battery.
9. Do not use a damaged battery.

5 ENGLISH
10. The contained lithium-ion batteries are subject
to the Dangerous Goods Legislation require-
ments.
For commercial transports e.g. by third parties,
forwarding agents, special requirement on pack-
aging and labeling must be observed.
For preparation of the item being shipped, consult-
ing an expert for hazardous material is required.
Please also observe possibly more detailed
national regulations.
Tape or mask o open contacts and pack up the
battery in such a manner that it cannot move
around in the packaging.
11. When disposing the battery cartridge, remove
it from the tool and dispose of it in a safe
place. Follow your local regulations relating to
disposal of battery.
12. Use the batteries only with the products
specied by Makita. Installing the batteries to
non-compliant products may result in a re, exces-
sive heat, explosion, or leak of electrolyte.
13. If the tool is not used for a long period of time,
the battery must be removed from the tool.
SAVE THESE INSTRUCTIONS.
CAUTION: Only use genuine Makita batteries.
Use of non-genuine Makita batteries, or batteries that
have been altered, may result in the battery bursting
causing res, personal injury and damage. It will
also void the Makita warranty for the Makita tool and
charger.
Tips for maintaining maximum
battery life
1. Charge the battery cartridge before completely
discharged. Always stop tool operation and
charge the battery cartridge when you notice
less tool power.
2. Never recharge a fully charged battery car-
tridge. Overcharging shortens the battery
service life.
3. Charge the battery cartridge with room tem-
perature at 10 °C - 40 °C (50 °F - 104 °F). Let
a hot battery cartridge cool down before
charging it.
4. Charge the battery cartridge if you do not use
it for a long period (more than six months).
FCC caution
For United States
This device complies with Part 15 of the FCC Rules.
Operation is subject to the following two conditions:
(1) this device may not cause harmful interference, and
(2) this device must accept any interference received,
including interference that may cause undesired
operation.
Changes or modications not expressly approved by
the party responsible for compliance could void the
user’s authority to operate the equipment.
Note: This equipment has been tested and found
to comply with the limits for a Class B digital device,
pursuant to part 15 of the FCC Rules. These limits are
designed to provide reasonable protection against
harmful interference in a residential installation. This
equipment generates, uses and can radiate radio
frequency energy and, if not installed and used in
accordance with the instructions, may cause harmful
interference to radio communications. However, there is
no guarantee that interference will not occur in a partic-
ular installation. If this equipment does cause harmful
interference to radio or television reception, which can
be determined by turning the equipment o and on, the
user is encouraged to try to correct the interference by
one or more of the following measures:
— Reorient or relocate the receiving antenna.
— Increase the separation between the equipment
and receiver.
— Connect the equipment into an outlet on a cir-
cuit dierent from that to which the receiver is
connected.
— Consult the dealer or an experienced radio/TV
technician for help.
ICES-005 standard
For Canada
CAN ICES-005(B)/NMB-005(B)

6 ENGLISH
PARTS DESCRIPTION
10
1
1
8
7
6
2
3
4
5
9
12
11
13
14
1 Carrying handle 2 Brightness indicator 3 Brightness change button
4 Power switch button 5 Lighting area change button 6 Hole for padlock
7 Battery cover 8 Cover lock 9 Power cord
10 Hook for power cord 11 Socket cover 12 AC outlet
13 Breaker restart button 14 AC inlet - -
NOTE: The shape of the plug of the power cord varies from country to country.

7 ENGLISH
FUNCTIONAL DESCRIPTION
CAUTION: Always be sure that the appli-
ance is switched o and the battery cartridge is
removed before adjusting or checking function on
the appliance.
Installing or removing battery cartridge
CAUTION:
Always switch o the appliance
before installing or removing of the battery cartridge.
CAUTION:
Hold the appliance and the battery car-
tridge rmly when installing or removing battery cartridge.
Failure to hold the appliance and the battery cartridge rmly
may cause them to slip o your hands and result in damage to
the appliance and battery cartridge and a personal injury.
CAUTION:
Be careful not to trap nger(s)
between the appliance and battery cartridge when load-
ing battery cartridge as well as between the appliance
and the battery cover when closing the battery cover.
To install the battery cartridge, release the cover lock,
and open the battery cover.
1
2
► 1. Cover lock 2. Battery cover
To install the battery cartridge, align the tongue on the battery
cartridge with the groove in the housing and slip it into place.
Insert it all the way until it locks in place with a little click.
Then close the battery cover.
1
2
► 1. Button 2. Battery cartridge
To remove the battery cartridge, slide it from the
appliance while sliding the button on the front of the
cartridge.
CAUTION: Always install the battery cartridge
fully. If not, it may accidentally fall out of the appli-
ance, causing injury to you or someone around you.
CAUTION: Do not install the battery cartridge
forcibly. If the cartridge does not slide in easily, it is
not being inserted correctly.
NOTE: Up to two battery cartridges can be installed,
although the appliance uses one battery cartridge for
operation.
Indicating the remaining battery
capacity
Only for battery cartridges with the indicator
1
2
► 1. Indicator lamps 2. Check button
Press the check button on the battery cartridge to indi-
cate the remaining battery capacity. The indicator lamps
light up for a few seconds.
Indicator lamps Remaining
capacity
Lighted O Blinking
75% to 100%
50% to 75%
25% to 50%
0% to 25%
Charge the
battery.
The battery
may have
malfunctioned.
NOTE: Depending on the conditions of use and the
ambient temperature, the indication may dier slightly
from the actual capacity.

8 ENGLISH
Appliance / battery protection
system
The appliance is equipped with the protection system.
This system automatically cuts o power to extend
appliance and battery life. The appliance will automati-
cally stop during operation if the appliance or battery is
placed under one of the following conditions.
Overload protection
When the appliance is operated in a manner that
causes it to draw an abnormally high current, the appli-
ance automatically stops without any indication. In this
situation, remove and install the battery cartridge when
using with DC power, or push the breaker restart button
when using AC power. Then turn the appliance on to
restart.
1
► 1. Breaker restart button
Overdischarge protection
When the battery capacity becomes low, the LED
lights go out except a part of LEDs as illustrated. Then
approximately ve to ten minutes later, the system auto-
matically cuts o power. In this situation, remove the
battery cartridge from the appliance and charge it.
Hole for padlock
For anti-theft of battery cartridges, hole for padlock is
provided.
1
► 1. Hole for padlock
OPERATION
CAUTION: This appliance is intended for
commercial use. Do not use the appliance for
household purpose.
Turning on / o the appliance
Press the power switch button to turn on the appliance.
Press the power switch button again to turn o the
appliance.
1
► 1. Power switch button
NOTE: The appliance turns on at the same mode as
the last setting.

9 ENGLISH
Changing brightness
Press the brightness change button while the appliance is
operating. The brightness decreases every time you press
the brightness change button. The brightness will return to
the highest when operating in the lowest brightness.
1
► 1. Brightness change button
Changing lighting area
Press the lighting area change button while the appliance is operating.
1
► 1. Lighting area change button
The lighting area changes every time you press the
lighting area change button as illustrated.
Using with AC power
WARNING: Never use the appliance when the
cord or plug is damaged.
WARNING: Do not handle the plug with wet or
greasy hand.
WARNING: Do not leave the power cord dis-
connected from the appliance while the power is
supplied from the mains. Small children may put the
live plug in their mouth and cause injury.
WARNING: Do not put the live plug or cord
into your mouth. Doing so might cause an electric
shock.
WARNING: Make sure that the voltage rating
of the main power supply corresponds with that
of the appliance.
WARNING: An outlet that is plugged must be
grounded.
When using the appliance with AC power, use the
power cord supplied with the appliance.
Insert the plug to AC inlet of the appliance and then
insert the other end to an outlet.
1
2
3
4
► 1. Power cord 2. Socket cover (AC inlet) 3. Plug (for
the appliance) 4. Plug (for an outlet)
CAUTION: Be sure to insert the plug into the
appliance rst, then insert the other end to an
outlet.
CAUTION: Always close the socket cover
rmly when the power cord is not plugged.
NOTE: Even operating in DC power, the appliance
automatically changes to AC power when the power
cord plugged in.
NOTE: The AC power does not charge the battery
inserted to the appliance.
NOTE: The shape of the plug of the power cord var-
ies from country to country.

10 ENGLISH
Interconnected use
CAUTION: Do not connect any appliance other
than DML810 to AC outlet.
CAUTION: Always use the power cord supplied
with the appliance.
CAUTION: Do not interconnect appliances
beyond the maximum number of interconnectable
appliances specied in the instruction.
When using the appliance interconnected with other
appliance, connect them with the power cord.
Insert the plug into the AC inlet of the appliance to be
powered, and then insert the other end to the AC outlet
of the appliance to power.
1
► 1. AC outlet
NOTE: When using the appliances interconnected,
operations such as turning on / o, changing bright-
ness, and changing lighting area are not linked. Each
appliance needs to be operated.
Organizing the power cord
Coil the power cord on the hook for power cord tightly.
1
2
► 1. Power cord 2. Hook for power cord
MAINTENANCE
CAUTION: Always be sure that the appliance
is switched o, unplugged, and the battery car-
tridge is removed before attempting to perform
inspection or maintenance.
NOTICE: Never use gasoline, benzine, thinner,
alcohol or the like. Discoloration, deformation or
cracks may result.
To maintain product SAFETY and RELIABILITY,
repairs, any other maintenance or adjustment should
be performed by Makita Authorized or Factory Service
Centers, always using Makita replacement parts.
OPTIONAL
ACCESSORIES
CAUTION: These accessories or attachments
are recommended for use with your Makita tool
specied in this manual. The use of any other
accessories or attachments might present a risk of
injury to persons. Only use accessory or attachment
for its stated purpose.
If you need any assistance for more details regard-
ing these accessories, ask your local Makita Service
Center.
• Makita genuine battery and charger
NOTE: Some items in the list may be included in the
tool package as standard accessories. They may
dier from country to country.
MAKITA LIMITED
WARRANTY
Please refer to the annexed warranty sheet for the
most current warranty terms applicable to this product.
If annexed warranty sheet is not available, refer to the
warranty details set forth at below website for your
respective country.
United States of America: www.makitatools.com
Canada: www.makita.ca
Other countries: www.makita.com

30 ESPAÑOL
MANTENIMIENTO
PRECAUCIÓN: Asegúrese siempre de que
el aparato haya sido apagado y desconectado,
y que el cartucho de batería haya sido extraído
antes de intentar realizar una inspección o tarea
de mantenimiento.
AVISO: Nunca use gasolina, bencina, diluyente
(tíner), alcohol o sustancias similares. Puede que
esto ocasione grietas o descoloramiento.
Para mantener la SEGURIDAD y FIABILIDAD del pro-
ducto, las reparaciones, y cualquier otra tarea de man-
tenimiento o ajuste deberán ser realizadas en centros
de servicio autorizados o de fábrica Makita, empleando
siempre repuestos Makita.
ACCESORIOS
OPCIONALES
PRECAUCIÓN: Estos accesorios o aditamen-
tos están recomendados para utilizarse con su
herramienta Makita especicada en este manual.
El empleo de cualquier otro accesorio o aditamento
puede conllevar el riesgo de lesiones personales.
Utilice los accesorios o aditamentos solamente para
su n establecido.
Si necesita cualquier ayuda para más detalles en
relación con estos accesorios, pregunte a su centro de
servicio local Makita.
• Batería y cargador originales de Makita
NOTA: Algunos de los artículos en la lista pueden
incluirse en el paquete de la herramienta como acce-
sorios estándar. Éstos pueden variar de país a país.
GARANTÍA LIMITADA DE
MAKITA
Ésta Garantía no aplica para México
Consulte la hoja de la garantía anexa para ver los
términos más vigentes de la garantía aplicable a este
producto. En caso de no disponer de esta hoja de
garantía anexa, consulte los detalles sobre la garantía
descritos en el sitio web de su país respectivo indicado
a continuación.
Estados Unidos de América: www.makitatools.com
Canadá: www.makita.ca
Otros países: www.makita.com

Makita Corporation
3-11-8, Sumiyoshi-cho,
Anjo, Aichi 446-8502 Japan
www.makita.com
DML810-NA3-1911
EN, FRCA, ESMX
20191105
/