Page is loading ...

Assem bly Instructio ns
This Grill Is For
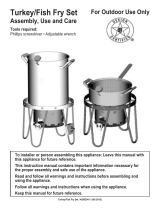
Outdoor Use Only
Liquid Propane Gas Grill
Model No. 415.167411
O O O
_1_WARNING
• Failure to follow all manufacturer's
instructions could result in serious
personal injury and/or property
damage.
WARNING
Combustion by-products produced
when using this product contain
chemicals known to the ,State of
California to cause cancer, birth
defects, or other reproductive harm.
CAUTION
• Read and follow all Safety State-
ments, Assembly Instructions and
Use and Care Directions before
attempting to assemble and cook.
Some parts may contain sharp
edges, especially as noted in these
instructions. Wear protective gloves
if necessary.
• Parts • Use and Care
• Assembly • Troubleshooting
• Safety Rules • Recipes
Assembly Questions?
Call 1-800-241-7548
Parts Ordering:
Call 1-800-366-PART (7278)
To Installer/Assembler: Leave
these instructions with
consumer.
To Consumer: Keep this
manual for future reference.
Sears, Roebuck and Co., Hoffman Estates, IL 60179 U.S.A.

WARNING
FOR YOUR SAFETY
1. Do not store or use gasoline or other
flammable vapors and liquids in the
vicinity of this or any other appliance.
2. An LP Tank not connected for use
shall not be stored in the vicinity of
this or any other appliance.
:OR YOUR SAFETY
If you smell gas:
1. Shut off gas to the appliance.
2. Extinguish any open flame.
3. Open lid.
4. If odor continues, immediately call
your gas supplier or your fire
department.
Call Grill Service Center For Help And Parts
• Ifyou have questions orneed assistanceduring assembly,
please call _1-800-241-7548. You wUlbe speakingto a
representative of the Gnll manufacturer and not a Sears
employee.To order new pairs call Sears PartDirects_ at
1-800-366-PART (7278).
Important: Fill out Warranty Information below
Warranty Information
ModelNumber
UPC(oncarton) Label Lot # GG
SerialNumber
DatePurchased
Installation Safety Precautions
• Use grill only with LP (propane) gas and the regulator/valve
assembly supplied.
, Gdll installation must conform withlocal codes, or in their
absence with National Fuel Gas Code, NFPA 54 / ANSI
Z223.1, Handling and storage of LP cylinders must conform
to LP Gas Code NFPNANS158. Grill is notfor use in or on
recreational vehicles and/or boats.
• All electrical accessories (such as rotisserie) must be
electricallygroundedin accordancewith local codes,or
National Electdcal Code, ANSI / NFPA 70. Keep any
electricalcordsand/orfuel supplyhoses awayfrom any hot
surfaces.
This grill is safety certified for use in the United States only.
Do not modify for use in any other location. Modification will
result in a safety hazard,
Safety Symbols
• The symbols and boxesshownbelow explainwhat each
headingmeans, Read and fellow all of themessagesfound
throughoutthe manual.
DANGER
• DANGER: Indicatesan imminentlyhazardous
situation which,if not avoided,will result in death or
serious injury.
i i
WARNING
• WARNING: Be alert to the possibilityof serious
bodily injury if the instructionsare not followed. Be
sure to read and carefullyfollow all of the
messages.
CAUTION
• For residential use only, Do not use for commercial
cooking.
CAUTION
CAUTION: Indicates a potentially hazardous situation
which, if not avoided, may result in minor or
moderate injury.
ProtectedunderoneormoreofthefollowingU.S.Patents:4,598,692;4,624,240;4,747,391;4,747,391;4,989,579;5,090,398;5,109,834;5,224,676;5,421,319;5,441226;
5,452,707;5,458,309;5,566,606;5,566,606;5,579,755;5,613,486;5,649,475;5,706,797;5,711,663;5,765,543;5,931,149;5,996,573;S,095,132;6,135,104;6,279,566;
D341,292;D343,337;D364,535;D372,637;D373,701;D377,735;D383,035;£)397,910;D405,543;D405,643;D406,005;D406,009;D413,043;D413,229;D4!3,229;
D414,982;D415,388;D416,164;£)416,441;D416,441;O417,587;£)422,516;D423,274;D423,876;D428,303;D435,396;£)436,004;D438,059;D438,060;D438,427;
D439,!10;D442,505;D443,179;D443,354;£)447,384;£)447,385;D447,909;D448,510;D448,615;D448,616.OtherPatentsPending.AssernblyInstructions@2001Sears
Corporation,AllRightsReserved.
4638231 . 2

ForYour Safety ........................................... 2
Call Grill Service Center ForHelp And Parts ................. 2
Warranty Information ...................................... 2
Installation Safety Precautions............................. 2
SafetySymbols ........................................... 2
Tableof Contents ........................................ 3
KenmoreGrill Warranty ................................... 3
PartsList ................................................ 4
Parts Diagram ........................................... 5
Assembly .............................................. 6-14
Use& Care ........................................... 15-21
Troubleshooting ........................................ 22
Recipes ............................................. 23-28
KENMORE GRILL WARRANTY
Fullf-YearWarrantyonGrill
ForoneyearfromthedateofpurchaseSearswillrepairorreplace,
atouroption,anygrillpart(exceptforpaintfinish)thatisdefectivein
materialorworkmanship.
LimitedWarrantyonSelectedGrillParts
Fromoneyearafterthedateofpurchaseforthedesignatedtime
periodslistedbelow,Searswillreplacethefollowinggrillpartsifthey
are defectiveinmaterialorworkmanship.Youwillbechargedfor
labor.
UfetimeofGdll:AluminumTopandBottomCastings
(exceptforpaintfinish)
2 years:BurnerAssembly
WARRANTYSERVICE
WarrantyserviceisavailablebycontactingyournearestSears
ServiceCenter.
WARRANTYRESTRICTIONS
Thiswarrantyisvoidifgritiisusedforcommercialorrentalpurposes.
Thiswarrantyappliesonlywhenthegdl]isusedintheUnitedSates.
Thiswarrantygivesyouspecificlegalrights,andyoumayalsohave
otherdghtswhichvaryfromstatetostate.
Sears,RoebuckandCo.,Dept.817WA,
HoffmanEstates,IL60179
4638231• 3

Key Qtv _ Part#
1 2 LegAssembly 4502049
2 2 Rail 4502039
3 1 Brace 5502006
4 11 #10-24x2-1/4MachScrew 4080369 STD511022
5 !5 #10-24HexNut (keps) 4080208
6 1 Caster/SocketSet 4154420
7 4 EndCap 4154246
8 2 Wheel 4154417
9 2 5/16AxleBolt 4080155
10 1 "RIt-TankBracket 4502020
11 4 3/4HitchPin 4156515
12 1 FrontPanel 4154426
13 1 PaneIWireSet 4156097
14 1 CondimentBasket 4150345
15 2 PushNut 4080636
16 1 ConsoleAssembly 4530029
18a 3 #10-24x3/8#8TorxScrew 4080050
16b 1 Ignitor 5156113
16c 3 Bad{plate 4154450
15d 3 ContmlKnob 4154452
16e 1 H_e./Valv_anifoldAssy. 4158093
16f I Console 4526021
169 1 ShortlgnitorWire 4153720
16h 1 LonglgnitorWim 5156112
17 2 #10x1/2Self-TapScrew 4080652
18 1 G#llBot_m 4580102
19 2 1/4-20x1-1/2MachScrew 4080324STD512515
20 5 #10x3/8Screw 4080060
21 2 1/4-20HexNut 4080656STD541025
Key Qtv _ Part#.
22 1 GreaseClip 5156610
23 1 GreaseCup 5156609
24 1 AirShield 5501035
25 1 Elecf_odeAssembly 4153174
26 3 Burner 4158121
27 1 ShelfPanel 4526026
28 1 SideShelf 4154368
29 5 #10x2 Screw 4080757
30 1 GdllUd 4580117
31 2 l/4xl-l/8 HingePin 4156513
32 1 Handle 4069516
33 2 #10-24xl MachScrew 4080302 STD511010
34 t Heatlndicator/Bracket 4156800
35 I LogoPlate 4157122
36 2 3/16PaINut 4153096
37 1 SwingAway 4152125
38 1 ToolHolder 4154371
39 1 ToolHolder8racket 4501385
40 2 #10x1/2Screw 4080737
41 1 SidebumerBody 4526029
42 1 SideburnerFrame 4501705
43 2 #6-32x3/8MachScrew 4080361STD510603
44 1 SidebumerValveBracket 4500209
45 2 #10-24x5/8Self-TapScrew 4080040
46 1 Sideburner 5068011
47 1 SideburnerGrate 4156376
48 1 SideburnerKnob 4154248
49 1 TankWire 4154195
50 1 CookingGrate 4152741
Before Beginning Assembly
Necessary tools for assembly of your grill include:
screwdrivers (flathead and phillips), hammer, pliers
and adjustable wrench.A 3/8" and 7/16" nut driver
would be ideal.
4 • 4638231

13
14
50
19
43
17
ConsoleAssembly(16)
16e
\
-16f
__6Z_226o
16a
16a
16d
4638231 • 5

I Railwithlabelshasserialnumber_
nd modelnumberfor yourgrill,|
rite thisinformationon page2J
this manualin the"Warranty l
nformation"box. ,,)
NOTE:Labelson rail
shouldNOTbeupside
downwhencartstands
in uprightposition.
Holeon rail
edgetoward
of leg.
Railwith labels
g
Caster
lP: Usethefiatsideofthe_
ammerheadto gentlytap|
asterintocastersocket. ,)
5 4
Qty. 4 (Black)
Qty. 4
6 •4638231

Qty. 2
0
0
9
Qty.2
CompletedAssembly
J
7
Repeaton rightside
(Tapwithhammerif
11
Qty.2
Panel
inside
cart
Pan
Wire
Alignwires
withpanelholes
4638231 • 7

17
Qty.2
Allowhoseand
ignitorwiresto
hang BEHIND
panel.
Note: Panelnot I
shownfor clarity.|
Note:
Wheelsare
to left.
bottomto
consolewitht
screws(20).
°
Placegrill
bottomonto
cart,insert
screws(19).
I
I
I
I
19
Qty.2
I
I
Grill
bottom
Grease
iliP
4638231 • 8

Snapelectrodeintoshield.
Opensectionofelectrode
faces backofshield.
(E/ectrodetowardright
end of shie/d)
Holeon shield
fitsoverpinin
Placeshield/electrode
intogrill bottom.
(Electrodeto rightside)
Wireextends
throughholei
grillbottom.
Gb VERY IMPORTANT:
FCorrectengagementbetween
valveandburnertube.
0
Tiltbumersapprox.45 degrees
and insertburnertubes into
holesin front of grill
to engagevalves.Burner
portsin downposition.
0
Secureeachburner
torearofgrillbottom
withscrew(20).
Rotateburnerto fiat
positiononcetubehas
(seeinsetC).
2O
Qty.3
4638231 . 9

29
(Silver)
Qty.4
Placeshelfpanelandside
shelfontorightlegs,
attachwithscrews(29).
t _ TiP:Attachtwo
outerscrewsfirst.
• Maximumloadfor sideshelfis10Ibs,
• Do notovertightenscrews.
31
(Black)
Qty.2
Qty.2
36
Gty.2
5
Qty.3
Heat
indi_
NOTE:
Do not overtighten
heatindicatornutor
bendbracket.
4638231 • 10

_1 • SwingAwaywillkeepfood warm whilekeepingit
awayfromflames. DonotuseSwingAwayfor
cookingmeatsor heavyfood items.
Leg
Wire
• Legwire mustrun
underneathSwingAway
surface.
4
QtyBlack)
.I
5
Qt-/.t
29
(Silver)
Qty. 1
40
_y. 2
Tool Holder
Bracket
4638231• 11

45
Qty.2
43
Qty.2
5
Qty.I
Thread43
halfwayinto
sidebumer
valve,placeI
in rightslot
of valve
bracket.
Tube
with45
ht
Slot
Note valve-to-burnertube
engagementE.
intosmall
5
E is complete.
RoutetheSHORT wiretothe main
electrodewirebeneathgrit[bottom.
0
Routethe LONG wirefrom
the ignitorthroughthe Small
holein therearofthecasting
seat(seeinsetC below).
Attachto electrodetab on
sideburner.
sideburnerwire
J
contactwithgrillbottom.
• Ignitorwiresmustbefirmlyconnected
properignition.
• See Use&Caremanualfor valvecheck.
4638231 • 12

Inserttankwireintoleft
legsandrotateinward.
NOTE: Somepreviously
assembledfeatures not J
shownfor clarity. J
4638231• 13

Tilttankto
rightand
positionon
bracket.
• LP GAS TANK IS SOLD SEPARATELY. Before attaching to grill
and regulator, fill and leak check. See Use & Care Section.
• Curved portion of tank wire should be inside of tank collar.
NOTE: Somepreviously
assembledfeatures not
shownfor clarity.
Tilttank to
upright
position.
Collar
Tiltbracket
towardtank.
CAUTION
Tank collaropeningmustface to
front of cart oncetank isattached.
Failure to install tank correctly
may allow gas hose to be
damaged in operation.
Curved
tankwire.
LPgastankin
correctposition.
_ Performthe"Burner FlameCheck"inthe Use& Caresection.
4638231 • 14

LP Tank
• The LP tank used with your grill must meet the
following requirements:
LP Tank Exchange: You may chooseto replaceyour empty
LP tank through an exchange service. Use only those
reputable exchange companies that inspect, precision fill,
test and certify their cylinders. Exchange for OPD safety
feature equipped tank as described in LP Tank
• PurchaseLPtanksonlywiththeserequiredmeasurements:
12"(30.5cm)(diameter)x 18"(45.7cm) (tall)with20 lb.(9
kg.) capacitymaximum.
• Be constructedand marked in accordance with
specifications for LPtank of the U.S. Department of
Transportation (DOT) or for Canada, CAN/CSA-B339,
cylinders, spheres and tubes for transportation of dangerous
goods, Transport Canada (TC). See LP tank collar for
marking.
• LPtank valve musthave:
• Type 1 outlet compatiblewith regulator
or grill.
• Safety reliefvalve.
• UL listed Overfill Protection Device
(OPD). This OPD safety feature is
identified by a unique trfangular hand
wheel. Use only tanks equipped with this type
of valve,
OPDHandWheel
Supplysystemmustbearrangedfor vaporwithdrawaland
includecollartoprotectLPtankvalve.
LP (Liquefied Petroleum Gas)
• Is nontoxic, edodess and colorlesswhen produced. For
Your Safety, LP gas hasbeen givenan odor(similarto
rotten cabbage)sothat itcan be smelled.
• LP gas is highly flammable and may ignite unexpectedly
when mixed withair.
• Always keep LP tank in uprightpositionduring use, transit or
storage.
• Leaktest LP tank BEFOREconnectingto grill.
LP Tank Leak Test
For your safety
• Leaktest must be repeated eachtime LP tankisexchanged
or refilled.
• Do not smoke dudng leak test.
• Do not use an open flame to check for gas leaks.
• Grill must be leak checked outdoors in well-ventilated area,
away from ignition sources such as gas fired or electrical
appliances. Dudng leak test, keep grill away from open
flamesor sparks.
Use a clean paint brashand 50/50 soapand water
solution. Use mild soap and water. • Do not use
household cleaning agents. Damage to gas train
componentscan result.
Brush soapy solution onto
the shaded areas.
LP Tank Filling
• Use only licensed and experienced dealers.
• LP tank must be purged before filling.
• Dealer should NEVER fill LP tank more than 80% of LP tank
volume. Volume of propane in tank will vary bytemperature.
• A frosty regulator indicates gas overfill. Immediatelyclose LP
tank valve and call local LP gas dealer for assistance.
Do not release liquidpropane (LP) gas into the atmosphere.
This is a hazardous practice.
To remove gas from LP tank, contact an LP dealer or call a
local fire department for assistance. Check the telephone
directory under "Gas companies" for nearest certified LP
dealers.
Connecting The Regulator To The LP Tank
1. LP tank must be properly secured onto grill. (Referto
Assembly Section)
2. Turn all controlknobs,includingsidebumer,to the OFF
position.
3. Turn LP tank OFF byturning hand-wheel clockwiseto a full
stop,
4. Remove the protective
capfrom LPtankvalve.
Hand
Always usecap and Wheel
sOapsuppliedwithvalve.
SafetyRelief with thread
Valve on outside
4638231• 15

Useof this POL transport plug (A)
(plastic part with external threads)
will defeat safety feature of valve.
5. Hold regulator, insert nipple (B) into LP tank valve.
Handtighten coupling nut, holding regulator in a
straight line (C) with LP tank valve so as not to cross
thread the connection.
Nipplehasto be
centeredintothe
LPbankvalve
Holdcouplingnut andregulatoras
shownfor properconnectionto LP
tankvalve.
WARNING
• Do not use grill until leak checked.
• If leak is detected at any time, STOP and call the
Fire Department.
• If you cannot stop a gas leak, immediately close LP
tank valve and call LP gas supplier or your fire
department!
Leak Testing Valves, Hoses and Regulator
1. Turn all grill control knobs to OFF.
2. Be sureregulatoristightlyconnectedto LPtank.
3. Completely openLPtankvalve byturninghandwheel
counterclockwise.If you hear a rushing sound, turngas off
immediately.There isa majorleak at the connection.
Correct before proceeding.
4. Brushsoapy solutionontofollowingconnections:
SideburnerHose.
6. Turn the couplingnut clockwiseto tighten to a full solid stop.
The regulatorwillsealon the back-check feature in LP tank
valve, resultingin some resistance. An additional one-half
to three quarters turn is required to complete
connection. Tighten by hand only - do not use tools.
NOTE: If you cannotcompleteconnection, disconnect
regulator and repeat steps5 and 6 If you are still unableto
complete the connection, do not use this regulator!
WARNING
• Do not insert any foreign objects into the valve
outlet. You may damage the valve and cause a
leak. Leaking propane may result in explosion,
fire, severe personal injury, or death.
• Never attempt to attach this grill to the self-
contained LP gas system of a camper trailer or
motor home.
SideburnerValve
Manifoldbehind
controlpanel
Hoseconnectionat manifold
• Never remove opening
at end of valve
5. "If growing" bubblesappear, there is a leak. Close LP tank
valve immediatelyand retightenconnections.If leaks
cannot be stopped "do not try to repair" call for
replacementparts. To ordernew partscall Sears
PartsDirectsMat 1-800-366-PART(7278).
6. Always closeLPtankvalveafter performing leak testby
turninghand wheel clockwise.
4638231• 16

WARNING
For Safe Use Of Your Grill:
i o not let children operate or play near gdll.
Keep grill area clear and free from materials that bum.
Do not block holes in bottomor back of grill
Check burner flames regularly.
to Use gdll only in well-ventilated space. NEVER use in
enclosedspace such as carport, garage, porch, covered
patio, or under a surface that cancatch fire.
• Use grill at least 3 ft. from any wall or surface, Maintain 10
ft. clearance to objects that can catch fire or sources of
ignition such as pilot lights on waterheaters, live
electrical appliances, etc.
• Do not use charcoal in a gas grill.
Apartment Dwellers:
Check with management to learn the requirements and
fire codes for using an LP Gas Grill inan apartment. If
allowed, use outside on the ground floor with a three (3)
foot clearance from walls or rails. Do not use on or under
balconies made of wood.
• NEVER attempt to light burner with lid closed. A
buildup of non-ignited gas inside a closed grill is
hazardous.
• Never operate grill with LP tank out of correct
position specified in Assembly Instructions.
Always close LP tank valve and remove coupling
nut before moving LP tank from specified operating
position.
Safety Tips
• Before openingLPtankvalve, checkthe couplingnutfor
tightness.
• Whengrillisnotin use, turnoff allcontrolknobsand LP
tank valve.
• Never move grill while in operation or still hot.
• Use.long-handled barbecue utensils to avoid burns and
splatters.
• Maximumloadfor sidebumerand side shelf is 10 Ihs.
• The grease cup must be attached to greaseclipand
emptiedafter each use. Do not remove greasecup until
grillhas completelycooled.
• If younoticegreaseor otherhot material drippingfrom grill
ontovalve, hoseor regulator turnoffgas supplyat once.
Determinethe cause, correct,clean and inspect valve,
hose and regulator before continuing.Performa leak test.
• The regulatormay make a hummingor whistlingnoise
duringoperation.Thiswillnot affect safety or useofgrill.
• Ifyou have a grillproblemsee the "Troubleshooting
Section".
CAUTION
i utting out grease fires by closing the lid is not
possible. Grills are well ventilated for safety
reasons.
Do not use water on a grease fire. Personal injury
may result. If a grease fire develops turn knobs and
LP tank off.
• Do not leave grill unattended while preheating or
burning off on high. If grill has not been regularly
cleaned a grease fire can occur that may damage
the product.
Before Your First Cookout
Light bumers, checkto make sure they are lit,closethe lid
and warmup grill on HI for 10 minutes.Curing of paint and
partswillproducean odoronly on firstlighting.
Ignitor Lighting
• Do not lean over grill while lighting.
1. Open lid. Turn on gas at LP tank.
2. Turn RIGHT knobto HI.
3. Press ignitor button rapidly _ for up to 5 seconds. Be
sure burner lightsand stays lit.
4. Turnother knobs to HI. to light other burners.
5. [f IGNITOR does not work, follow match lighting
instructions.
After Lighting:Knobs remain on HI for warm-up.
4638231• 17

Match Lighting
• Do not lean over grill while lighting.
1.Open lid. Turn on gas at LP tank.
2.Place lit match into matchlightinghole from outsidegdll
bottom(as shown).
3. Push inand turnRIGHT knob to HI. Be sure burner
lightsandstayslit.
4.Lightotherburners by pushingknobs Jnand turningto
HI.
After Lighting: Knobs remain on HI for warm-up.
-- Match lighting hole
Ignitor Lighting The Sideburner
1. Turn gas on at LP tank.
2. Pushin and turnknob to HIGH.
3. Pressignitorbuttonrapidly (_ for up
to5 seconds.Be sureburnerlightsand
stayslit.
Match Lighting
1. Turn gason at LP tank.
2. To light useany hole on sidebumer. Push in and turn
knob to HIGH. Be sure burner lights and stays lit.
Burner Flame Check
Lightburner,rotateknob(s)from HIGH to LOW.
You shouldsee a smallerflamein LOW
positionthan seen on . I_ ,_,, _ ,_,, _. HIGH
HIGH. Always check _ LOW
flame priorto each
use. Perform flame o ,_ _, o 8
checkfor sidebumer.If onlylowflame isseenreferto
"Sudden drop or lowflame" in the Troub/eshooting Section.
Turning Grill Off
• Turnall knobstoOFFposition.TurnLPtankOFFbyturning
hand-wheelclockwisetoa fullstop.
WARNING
• If burner does not light turn knobs to OFF, wait 5
minutes, try again.
Ignitor Check
• Turn gas off at LP tank. Press Electronic Ignition button.
"Click" should be heard and spark seen eachtime between
collector box or burner and electrode. See "Troubleshooting"
if no click or spark.
Valve Check
• Important: Make sure gas is OFF at LP tank before
checking valves. Knobslock in OFF position.To check
valves,first pushinknobsand release, knobs shouldspring
back. If knobsdo notspringback, replacevalveassembly
beforeusinggrill.Turn knobsto LOW positionthenturnback
toOFF position.Valvesshouldturnsmoothly.
Hose Check
• Before eachuse, checkto see if hoses are cutor worn.
Replacedamagedhosesbefore usinggrill.Use onlyvalve/
hose/regulator specified by manufacturer.
A CAUTION
• Clean burners prior to useafter storing, atthe beginning
of grilling season or a period of one month not being
used. Spidersand insects like to build nests in burner
tubes (especially during colder months). These nests
can cause fires in burner tubes or under grill.
Typical spider webs inside burner
• See followingpagesfor specificcleaning
instructions.
General Grill Cleaning
• Do not mistake brown or black accumulationof greaseand
smokefor paint. Interiorsofgas gritlsare notpaintedatthe
factory (and should never be painted). Apply a strong
solution of detergentand wateror usea gdllcleanerwith
scrubbrushto insidesofgdll lid and bottom. Rinseandallow
to completelyair dry. Do not apply a caustic grill/oven
cleaner to painted surfaces.
Plastic parts: wash withwarmsoapy waterandwipe dry.
• Do not use citrisol,abrasivecleaners, degreasers or a
concentrated grill cleaneron plastic parts. Damage to and
failure of parts can result.
4638231• 18

Plated wire grate and air shield: Wash grate and air
shield with concentrated gdll cleaner or use soap and water
solution. Dry thoroughly. Store grate indoors between
cookouts.
• Porcelain grates: Because of glass-like composition,most
residue can be wiped away with baking soda/water solution
or specially formulated cleaner. Use nonabrasive scouring
powder for stubborn stains.
Repainting Your Grill
• Nter extended use and exposureto weather,paint on grill
may deteriorate or become spotted. Although this detracts
from grill's appearance, it will not impair its performance.
To refinish your gdll, brush outsideof grill lid and bottom with
wire brush and lightly sand with fine grit sandpaper. Sanding
allows new paint to adhere more easily. Wash grill lid and
bottom with soap and waterto remove dust and grease. Do
not use a grill cleaner on outside of grill. Wipe withvinegar.
Refinish outsidewith heat-resistantpaint. Do not paint
inside of gdll,
Cleaning The Burners
Followthese ins_uctionstodean and/orreplaceburners,orifyou
havetroubleignitinggrill.
1. Turn gas off at control knobs and LP tank.
2. Removecookinggrates.
3. Removecanfrom greaseclip.
4. Removescrewsholdingbumersto grillbottom.
5. Rotateburnersapprox,45 degreeswhileliftingoutofgrill
bottomtodisengageburnertubefrom valves.
6. Cleanoutsideofburnerswithsoapandwater.Layburners
upsidedownonflatsurface,insertgardenhosetoforce water
throughtubes.Makesurewatercomesoutofall burnerholes.
Open cloggedholeswitha thin wire. Shakeout excess
water andexamineholes.Due tonormalwearandcorrosion
someholesmay becomeenlarged.If anylarge cracksor
holesarefound replaceburner.
7. To removeair shieldfor cleaning,disconnectignitorwire_m
electredewire beneathgrillbottom. Wash air shieldwith
concentratedgrillcleaner or use soap and water solution
and drythoroughly.Returnair shieldto gdllbottom and
cormectignitor wire to electrodewire.(Refer toassembly
stops 7 and 14 for assistance.)
8. If gnllistobestored,coatburnerslightlywith cookingoil.Wrap
inprotectivecovertokeepinsects out.Ifnotstoringgrill,tilt
burnersapprox.45 degreesand insertburnertubesintoholes
in frontofgrillbottomtoengagevalves.Rotateburnerstoflat
positionand attachto gdllbottomwithscrews.(Referto
assembly step 8 for assistance.)
VERY IMPORTANT: Burnertubes must engage valves.
9. Beforecooking again on grill,follow "BurnerFlame Check"
DANGER
• NEVER store a spare LP tank under or near gal!!or
in enclosed areas.
• Never fill the cylinder beyond 80% full. An
overfilled spare LP tank is hazardous due to
possible gas released from the safety relief valve.
The safety relief valve on a LP tank could activate
releasing gas and cause a fire.
• If you see, smell or hear escaping gas, immediately
get away from the LP tank/grill and call your fire
department.
• All spare LP tanks must have safety caps installed
on the LP tank outlet.
LP Tank Removal, Transport And Storage
• Turn OFF all control knobs and LP tankvalve. Turn coupling
nutcounterclockwiseby handonly- do not usetoolsto
disconnect.LiftLP tankwire upwardoffof LPtankcollar,lift
LPtank upand offofsupport
bracket.Installsafetycaponto
LPtankvalve.Always use
cap and strapsupplied
with valve. Failure to use
safety cap as directed
/
may result in serious
personal injury and/or
property damage. Safety
LP Tank Cap
Valve Retainer
Strap
• A disconnected LPtank in storage or being transported must
have a safety cap installed (as shown). Do not store an LP
tank in enclosed spaces such as a carport, garage, porch,
covered patioor other building. Never leave a LP tank inside
a vehicle which may become overheated by the sun.
• Do not store LPtankin an area wherechildrenplay.
Storing Your Grill
• Cleancookinggrates.
Storein dry location.
When LP tankis connected to grill, store outdoors in well-
ventilated space and out of reach of children
Cover griil if stored outdoors.
• Store grill indoorsONLY if LP tank isturned off and
disconnected, removed from grill and stored outdoors.
• When removing grill from storage follow "CleaningBurner
Assembly" instructionsbefore starting grill.
4638231• 19

Cooking Chart
Cookingtimesand temperaturesmayvaryaccordingtospecificrecipes,cookingconditionsor barbecueequipmentused,Take
thesefactorsintoconsiderationto insurebestresults.Ifyou usetheindirectcookingmethodallowmoregrillingtime.
Temperatures: High = 650 F° / Medium = 450 F° / Low = 300 F°
Food
Beef
Hamburger1/2"thick
Steak1/2"
Roast
Pork
Chops1/2"
Ribs5-61bs
Roast3-51bs
HamStaakl/2"
Setting Cooking Time
Medium
Medium-HI
Low
Medium
Low-Medium
Low-Medium
Medium-HI
Med:7-10rain/Welldone:10-15rain
Rare:3-6min/Med:6-9rain/Welldone:9-12min
Rare:18-22minperIb/Med:22-28rainperIb
Welldone:28-32minperIb
Welldone:15-20rain
Welldone:45-90rain
Welldone:15-23minperIb
12-15min
Ham5Ibfullycooked
Lamb
Chops1/2"
Poultry
Chicken21/2-3 1/2Ibs
Chicken-halvedorquartered
Turkey
Seafood
Sleaks1"thick
Fillets6-8oz
Shhmplargeorjumbo
Venison
Steak1"thick
Burgers1/2"
Roast3-4Ibs
v_
Wrapvegetablesinfoil
Bakingpotato,whole
Onions,whole
Tomatoes,half
Corn,whole
Mushrooms
Low-Medium
Medium
Low
Low
Low-Med.
Medium-HI
Medium-HI
Low-Medium
Medium
Medium
Low-Medium
Low
Low
Medium
Low
Medium
20minperIb
6-12rain
1hr15 mintoI hr30 min
40-60min
18-20minperlb
Welldone:10-15min
8-12min
8-12rain
Rare:8-10min/Med:10-12rain
Rare:10-12min/Med:12-15rain
Rare:20-22rainperIb/Med:22-25minperIb
55-60min
45rain
30-40rain
35-45min
15-20min
Food Safety
Foodsafetyisa veryimportantpartof
enjoyingtheoutdoorcookingexperi-
ence.Tokeepfoodsafefromharmful
bacteria,followthesefourbasicsteps:
Clean: Wash hands, utensils,and
surfaces with hotsoapy water before
and after handling raw meat and
poultry.
Separate: Separate raw meats and
poultryfrom ready-to-eatfoods to
avoid cross contamination. Use a
clean platter and utensils when
removing cooked foods.
Cook: Cook meat and poultry thoroughly
to killbacteria. Use a thermometer
to ensure proper internalfood
temperatures.
Chili: Refrigeratepreparedfoodsand
leftoverspromptly.
For more information call: USDA
Meat and Poultry Hotline at
1-800-535-4555 In Washington, DC
(202) 720-3333, 10:00 am-4:00 pm EST
4638231• 20
/