Page is loading ...

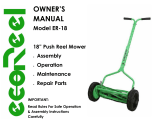
OWNER’S
MANUAL
Model ER-18
18” Push Reel Mower
• Assembly
• Operation
• Maintenance
• Repair Parts
IMPORTANT:
Read Rules For Safe Operation
& Assembly Instructions
Carefully

• RULES FOR SAFE OPERATION
1. Read the Owner’s Manual carefully. Be very familiar with the proper use of the equipment/parts before you begin.
2. Never allow children to operate the mower. Only person’s well acquainted with these rules of safe operation should be al-
lowed to use the mower.
3. Keep the area of operation clear of all persons, especially small children and pets. Make sure the area of operation is
completely cleared of objects, such as limbs, rocks, wire, toys, bones, and other such foreign objects. A small object may
get overlooked and could be accidentally thrown by the mower.
4. Always wear substantial closed-toed footwear and DO NOT operate equipment when barefoot or wearing open-toed
sandals.
5. Always wear proper eye protection when using the mower.
6. Mow only in daylight.
7. Take a firm stand while operating the mower; keep a firm hold on the handle and walk. Never run with the mower.
8. Never operate the mower in wet grass.
9. When cleaning, repairing, or inspecting the mower, make certain the blade and all moving parts have been stopped.
10. Before attempting to unclog the mower, be sure the blades have stopped completely.
11. Mow across the face of slopes, never up or down. Exercise extreme caution when changing direction on slopes.
12. Keep all nuts, bolts and screws tight, to be sure the mower is in safe working condition at all times.
LOOK FOR THIS SYMBOL TO POINT
OUT IMPORTANT SAFETY
PRECAUTIONS.
IT MEANS — ATTENTION, BECOME
ALERT.
YOUR SAFETY IS INVOLVED.
CAUTION: THE MOWER BLADES HAVE
SHARP EDGES. KEEP HANDS AND
FEET CLEAR AT ALL TIMES. USE
CARE WHEN ADJUSTING, CLEANING
AND STORING THE MOWER.
2

• CARTON CONTENTS
Your ER-18 Eco-Reel Mower carton contains parts as shown in Figure 1 below. The carton contains
parts shown in this diagram. Part numbers 1, 2, 3, 4, and 5 (not shown). Lay out and identify all
parts as illustrated in Figure 1.
PARTS IN CARTON
1. Upper Handle (2 pcs) left and
right
2. Handle Panel
3. Handle Brace (2 pcs) left
and right
4. Reel Assembly —
5. Hardware Package (not shown)
(nuts, bolts, washers, screws)
FIGURE 1
3

• ASSEMBLY INSTRUCTIONS
TOOLS REQUIRED FOR ASSEMBLY
1. 8mm Open or Boxed End Wrench
(included)
2. Pair of Pliers
3. 14mm Open or Boxed End
Wrench (included)
Arrange carton contents as shown in Figure 1, page 2 and contents as shown in Figures 2 and 3.
Insert the left handle brace through the slots and over the pin in the end plate (Figure 2).
Repeat step and attach right handle brace.
Insert the M8x60 hex bolt and tighten with a washer and M8 locknut (Figure 3)
FIGURE 2 FIGURE 3
4

• ASSEMBLY INSTRUCTIONS (cont.)
4. Attach the right and left upper handles (Part 1) to the handle braces (Part 3) with two M8x65 hex
bolts. Hand tighten the nuts (Figure 4).
5. Assemble the upper handles (Part 1) at the top with a M8x55 hex bolt, washer and nut.
6. Tighten all four bolts and nuts (Figures 4 and 5).
7. Place the handle panel (Part 2) in position over the handle (Figure 5).
8. Assemble the 5x5x25 hex washer head screw through the handle panel into the notch between
the upper handles (Part 1). Tighten both hex washer head screws.
FIGURE 4 FIGURE 5
5
Before tightening handle
bolts, fasten the handle
panel with the hex washer
head screws, then tighten
handle bolts.

• ADJUSTMENTS
CUTTING HEIGHT
Each wheel has a lever with five positions.
To move the lever, tilt the mower back on the roller
and press the levers (one at a time) towards the outside
of the mower and move the lever to the desired position.
Both levers must be in the same relative position
(Figure 6).
KNOB
FIGURE 6
WHEEL
LEVER
• To adjust wheel lever (Figure 6) use 8mm wrench to loosen bolts, set height, then tighten bolts.
• To adjust the roller, tilt the mower forward and loosen the knobs on each roller at least two full turns and
move the roller to the desired position. Both roller knobs must be in the same relative position and firmly
seated in the notch.
CUTTING HEIGHT CHART:
6

• ADJUSTMENTS (cont.)
• To increase the clearance between the cutter bar and the
blades, loosen the lower nut 1/4 turn and then tighten the upper
nut 1/4 turn. Adjust each side of the mower equally until a
0.003” clearance is obtained (Figure 8).
• To adjust the roller, tilt the mower forward and loosen the
knobs on each roller at least two full turns and move the roller
to the desired position. Both roller knobs must be in the same
relative position and firmly seated in the notch.
*NOTE: To eliminate any play or looseness before adjusting
the cutter bar, make certain the bolt and the trunnion which are
threaded into the cutter bar are tight.
Paper Test
1. Push the handle of the mower forward and let it rest on the
ground. (The roller will be off the ground.)
2. Using paper as a gauge, insert a strip of quality 0.003” thick
paper (writing paper approximately 2” wide x 6” long be-
tween the cutter bar and the blades as show in (Figure 9).
Correct cutter bar clearance should pinch, but not cut the pa-
per.
3. Perform this test in at least three different points along the
cutter bar.
UPPER NUT
UPPER TRUNNION
LOWER NUT
CUTTER BAR
BOLTS (2)
FIGURE 8
FIGURE 9
7

• LUBRICATION
Once a season or whenever the reel is sharpened also
lubricate the wheels and bearings. (Figure 10)
A. Remove the hub cap.
B. Remove the E-ring with a screwdriver.
C. Lift off the wheel.
D. If rust is on the axle, clean with solvent and crocus
cloth.
E. Coat the axle with light grease.
F. Take off the snap ring with a pair of snap ring pliers
and remove the pinion gear (Figure 10).
G. Pull the pawl from the reel shaft.
H. Apply light grease to the gear teeth on the inside of
the wheel.
NOTE:
• Use the proper tool to remove the snap ring. Over-
stretching the snap ring will result in a loss of
hold-ing power and the pinion gear will come off.
• Be sure the pawl is installed the same way it was
re-moved or the wheel will not drive.
• Using engine oil, lightly lubricate points indicated in
(Figure 11) on roller and between the end plates and
the wheel dust covers. Periodic lubrication for these
points will ensure smooth mechanical operation.
(Figure 11).
FIGURE 10
FIGURE11
8
SNAP
RING
PAWL
PINION
GEAR
BEARING

• MAINTENANCE
SHARPEN BLADES
Sharpen blades when the mower will not cut satis-
factory without the reel blades wiping on the cutter
bar.
GEAR HOUSING ASSEMBLY
If the gear housing assembly is removed for service,
it is very important for the gear housing assembly to
fit UNDER the lip of the retainer. The shoulder on
the shoulder waster must fit into the slot on the end
plate. (Figure 12)
If the gear housing is not assembled
properly, it will result in loose wheels
and an early failure of the pinion and
wheel. (Figure 12)
FIGURE 12
9

• STORAGE
The following steps should be taken to prepare reel mover for storage.emove the hub cap.
1. Clean and lubricate mower thoroughly as described in the maintenance instructions.
2. DO NOT use water to clean the mower — use a broom or brush to remove grass and dirt.
3. Coat mower’s cutting blades with a chassis grease to prevent rusting.
4. Store mower in a dry, clean area.
10

• REPAIR PARTS FOR ECO-REEL® MODEL ER-18 / 18” PUSH REEL MOWER
11

• SPARE PARTS FOR ECO-REEL® MODEL ER-18 / 18” PUSH REEL MOWER
REF
PART
QTY.
DESCRIPTION
REF
PART
QTY.
DESCRIPTION
REF
PART
QTY.
DESCRIPTION
NO.
NO.
NO.
NO.
NO.
NO.
1
1834
2
Handle
20
1801-1
1
Plate LH
39
B-02
2
Unlock bead flange
2
B-07
1
M8×55 Hex Bolt
21
1828
2
Roller Knob
40
1842
2
Hub cap
3
B-10
4
M8 Lock Nut
22
1829
1
Roller Bracket LH
41
B-08
2
Lock nut M5
4
1835
2
Right and left upper Han-
23
B-20
2
Flat washer 8
42
B-15
2
Flat washer 20
dle
5
B-23
2
M8×65 Hex Bolt
24
B-14
2
Square neck bolt
43
1822
2
Axle
6
B-06
1
M8×60 Hex Bolt
25
1802
2
Pin
44
1808
2
Wheel Lever
7
1836
2
Right and left Handle
26
B-18
8
Self-plugging rivet
45
1814
2
Protecting jacket
Brace
8
18-01
2
Gear case assembly
27
18-03
1
Beam components
46
B-01
2
Bearing
9
1809-2
1
Gear Housing RH.
28
B-09
2
Lock nut M8
47
1803
2
Bearing block
10
1829
1
Roller Bracket RH
29
1810
2
Shoulder Washer
48
B-17
6
Self-plugging rivet
11
1830
1
18” Roller
30
B-12
2
Lock nut M10x1
49
18-04
1
The Blades
12
1831
1
Roller Axle
31
B-05
2
Hex bolts M5x10
50
B-13
2
5.5×25 Hex Washer Head Screw
13
1818
1
Locating screw(Ⅱ)
32
1804
2
Retainer
51
1838
1
Handle Panel
14
18-02
1
Cutter Bar
33
1805
2
Lip Of Retainer
52
1801-2
1
Plate RH
15
1815
2
Upper Trunnion
34
1819
2
Pawl
53
1809-1
1
Gear Housing LH
16
B-12
4
Nut M10x1
35
1820-1
1
Pinion Gear LH
54
1820-2
1
Pinion Gear RH
17
1816
2
Movable bolt
36
B-03
2
Snap Ring
55
1813
2
Dirt-proof boot
18
1817
2
Cutter bar bolt (I)
37
1839
2
Wheel
56
B-22
6
Self-drilling tapping screws ST2.9×8
19
1818
1
Cutter bar bolt(Ⅱ)
38
B-16
2
Flat washer 16
N/A
N/A
N/A
NOT SHOWN
12

• PACKING LIST FOR ECO-REEL® ER-18 / 18” PUSH REEL MOWER
REFERENCE
DESCRIPTION
PART NO.
QUANTITY
NOTES
NO.
1
Reel Assembly
N/A
1
2
Upper Handle
1835
2
3
Handle Brace
1836
2
4
Handle Panel
1838
1
5
Box End Wrench
N/A
2
6
M8 x 55 Hex Bolt
B-07
1
7
M8 x 60 Hex Bolt
B-06
1
8
M8 x 65 Hex Bolt
B-23
2
9
Hex Washer Head Screws
B-13
2
10
M8 Locknut
B-10
4
11
Flat Washer
B-20
4
12
Owner’s Manual
N/A
1
For More Information Contact:
Encore Power Equipment, Inc.
PH: 402-228-4255
401 N Commerce St
FAX: 402-223-4103
Beatrice, NE 68310
13
/

