Page is loading ...

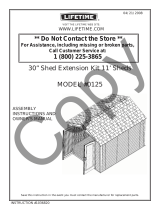
MODEL #0125
OWNER’S MANUAL
OUTDOOR STORAGE
Keep this Identification Number in case you need to contact our Customer Service Department.
Copy

2
IMPORTANT! PLEASE READ BEFORE BEGINNING ASSEMBLY
Dear Valued Customer,
We would like to congratulate you on your purchase of a Lifetime© Outdoor Storage Shed! We are
confi dent that you have made the perfect choice and you will be very pleased with your new storage
solution.
Lifetime© Outdoor Storage is part of the family of products created and manufactured by Lifetime®
Products, Inc. Like all of our products, you can be assured that the quality of your Lifetime Outdoor
Storage Shed is the best in the world! And, we back that quality up by offering the best warranty in the
business—A 10-year warranty that fully covers the Shed!
All of our Sheds are built with the highest-quality steel and high-density polyethylene (HDPE) parts. The
design and construction of our steel-reinforced double-Wall Panels is second to none. All of our exposed
steel parts and gables are powder coated and we use high-density polyethylene plastic. What makes
polyethylene so special? It has superior strength and durability, and, it won’t crack or degrade outdoors.
So now that you know the quality you are getting in a Lifetime Outdoor Storage Shed, please take the
time to READ THIS INSTRUCTION MANUAL!
We have taken great care in providing the best possible form of instructions to help you put your new
Outdoor Storage Shed together. Before you get started, PLEASE read the following preparation tips to
help you get started!
We can assure you, your construction experience will be a lot more enjoyable if you do!
PREPARATION TIPS:
t5IFmSTUTUFQJTTJNQMFy3&-"9:PVIBWFNBEFBHSFBUQVSDIBTFCVU3PNFXBTOPUCVJMUJOB
day. Plan to spend a good part of your weekend putting together your fi ne Outdoor Storage Shed. Our
QIJMPTPQIZJTJGJUDPNFTUPHFUIFSRVJDLMZBOEFBTJMZJUTVSFMZXJMMDPNFBQBSURVJDLMZBOEFBTJMZ:PVS
Lifetime© Outdoor Storage Shed will surely last a long, long time, if you are patient, and take all the time
necessary to put it together as we have instructed.
t(SBCBGSJFOEUPKPJOJOPOUIFGVO5IJTJTOPUBPOFQFSTPOFOEFBWPS8FIBWFGPVOEUIBUOPUPOMZXJMM
things go smoother if you have two or more people participating in the construction of the Shed, but it
will go quicker as well. So, the more the merrier!
t.BLFTVSFZPVIBWFBMMUIFUPPMTOFDFTTBSZGPSDPOTUSVDUJOHZPVSOFX4IFE5IFSFJTBi5PPMT3F
quired For This Assembly” list on page fi ve of this Owner’s Manual.
t5IFQMBTUJDQJFDFTPGZPVS4IFENBZCFDPNFEBNBHFECZPWFSUJHIUFOJOHUIFTDSFXT5PBWPJEUIJT
damage, we strongly recommend the use of a low-powered power screwdriver or a drill that has an
adjustable clutch that is set on a low-torque setting. If neither is available, use a hand screwdriver. If a
IBOETDSFXESJWFSJTBMMZPVIBWFUBLFTFWFSBMCSFBLTyZPVSXSJTUXJMMOFFEJU
t:PVXJMMBMTPOFFEUXPTNBMMMBEEFSTXIFOJUDPNFTUJNFUPEPUIFSPPG
2/10/2012
Instruction #1050484 D
Copy

3
IMPORTANT! PLEASE READ BEFORE BEGINNING ASSEMBLY
t#FGPSFCFHJOOJOHBTTFNCMZSFNPWFUIF1BSUT-JTUGSPNUIFDFOUFSPGUIJT0XOFST.BOVBMBOEUBLFBO
inventory of the parts included with your Outdoor Storage Shed. Also, read through the entire instruc-
tion manual. It’s always a great practice to get a feel for the fl ow of the process and to familiarize your-
self with the parts involved. But, try not to get ahead of yourself and start the process out of order.
t'0--085)&*/4536$5*0/4*/03%&3&WFSZUIJOHHPFTUPHFUIFSJOBDFSUBJOPSEFSBOEXFIBWF
learned what that correct order should be. In our state-of-the-art research and testing facility, we have
painstakingly created these instructions. The order of construction is there for a reason, and some parts
simply will not fi t if built out of order. Just follow along with the order in the instructions and everything
will fi t together and things will go very smooth.
t:0634)&%.645#*-50/"-&7&-463'"$&*GUIFTQPUZPVIBWFDIPTFOUPQMBDFZPVS
wonderful new Outdoor Storage Shed is not level, the Shed will not assemble correctly! We recommend
BDPODSFUFQBUJPBXPPEQMBUGPSNPSDSFBUJOHBQBEXJUIQFBHSBWFM:PVS4IFEJTNFBOUUPMBTUBMJGF
time, so provide the proper foundation for it before you start to build.
t#FGPSFZPVCVJMEJUNBLFTVSFZPVBSFBMMPXFEUPCVJMEJU$POTVMUBMMCVJMEJOHDPEFTBTXFMMBTDJUZ
and county ordinances, to ensure that you do not require a building permit to construct your Outdoor
Storage Shed. Proper building permit documentation may be required in your neighborhood, and it
would be quite unfortunate to learn this after your Outdoor Storage Shed is already built!
Now that you’re ready to begin the construction of your wonderful new Outdoor Storage Shed, step
back, take a deep breath, get yourself a large cold beverage and enjoy yourself. We guarantee that after
spending the right amount of time in building your Shed, you will be able to enjoy it for years to come.
Thanks for choosing Lifetime©, and have fun!
ABOUT LIFETIME PRODUCTS, INC.
Lifetime Products, Inc., has applied innovation and cutting-edge technology in plastics and
metals to create a family of affordable lifestyle products that feature superior strength and
durability. The world’s leading manufacturer of folding tables and chairs, Lifetime was found-
ed in 1986 as the maker of portable basketball systems that revolutionized the industry with
patented technology. With diverse offerings such as outdoor storage sheds and steel utility
trailers, Lifetime continues to develop innovative products that outfi t the way you live.
Lifetime makes the things you need for the lifestyle you want. By innovating products in and
around the home, Lifetime simplifi es your everyday life and enables you to get the most out
of your free time.

4
Most injuries are caused by misuse and/or not following instructions. Use caution when using this product.
To ensure safety, do not attempt to assemble this product without following the instructions carefully. Check entire box and inside all
packing material for parts and/or additional instruction material. Before beginning assembly, read the instructions and identify parts
using the hardware identifi er and parts list in this document. Proper and complete assembly, use and supervision are essential to
reduce the risk of accident or injury.
FAILURE TO FOLLOW THESE WARNINGS MAY RESULT IN SERIOUS INJURY OR PROPERTY
DAMAGE AND WILL VOID WARRANTY.
t%POPUVTFPSTUPSFIPUPCKFDUTTVDIBTHSJMMTCMPXUPSDIFTXFMEJOHFRVJQNFOUFUDOFBSUIFQSPEVDU
t*GVTJOHBMBEEFSEVSJOHBTTFNCMZVTFFYUSFNFDBVUJPO
t5XPDBQBCMFBEVMUTBSFSFRVJSFEGPSBTTFNCMZ*UJTBMTPSFDPNNFOEFEUIBUBUIJSEBEVMUGVODUJPOBTBOJOTUSVDUJPOSFBEFS
SAFETY INSTRUCTIONS
REGISTER YOUR PRODUCT ONLINE AT WWW.LIFETIME.COM
LIFETIME’S PROMISE TO YOU:
We invite you to read our privacy policy at www.lifetime.com
REGISTER today!
At Lifetime, we are committed to providing innovative and quality products. While registering, you will have the opportunity to give us your feedback. Your input
is valuable to us.
t:PVDBOBMTPPQUJOUPSFDFJWFOFXQSPEVDUOPUJmDBUJPOTPSQSPNPUJPOT
t*OUIFVOMJLFMZFWFOUPGBQSPEVDUSFDBMMPSTBGFUZNPEJmDBUJPOZPVSSFHJTUSBUJPOQSPWJEFTUIFJOGPSNBUJPOXFOFFEUPOPUJGZZPV
directly.
t3FHJTUSBUJPOJTGBTUFBTZBOEDPNQMFUFMZWPMVOUBSZ
Maintaining your privacy is our long-standing policy at Lifetime. And you can rest assured that Lifetime will not sell or provide your
personal data to other third parties, or allow them to use your personal data for their own purposes.
**For customers outside the U.S. or Canada, please contact the store for assistance.**
**U.S. and Canada customers ONLY**
IF ASSISTANCE IS NEEDED,
DO NOT CONTACT THE STORE!
CALL OUR CUSTOMER SERVICE DEPARTMENT at 1 (800) 225-3865
HOURS: 7:00 a.m. to 5:00 p.m. Monday through Friday (Mountain Standard Time)
**Call, or visit our Web site for Saturday hours**

5
*See “Screwdriver Notice” on page 7.
TOOLS REQUIRED FOR THIS ASSEMBLY
*Two adults required to complete assembly*
Only adults should set up the product. Do not allow children
in the set-up area until assembly is complete.
BEFORE BEGINNING ASSEMBLY
Keep the hardware bags and their contents separate. If any parts are missing, call our
Customer Service Department.
3FBEUIFi$POHSBUVMBUJPOTwMFUUFSPOQBHFIdentify and inventory all parts and hardware
using the parts and hardware lists and identifi ers in this document.
*Phillips Screwdriver *Electric Drill 7/16" Wrench 3/8" Wrench Safety Glasses
(x1) (x1) Y (x1)
(1 pair for each
person)
1. Check contents of boxes and compare to parts listed on the Parts List.
'PMMPXJOTUSVDUJPOTUIBUDBNFXJUIZPVSTIFECVUBEEFYUSBnPPSQBOFMXBMMQBOFMT3PPG$BQBOE4LZMJHIUBU
appropriate points in the assembly.
1. Remove any bolts or screws being used to anchor the shed to the ground.
3FNPWFBOZPCKFDUTGSPNCBDLTIFMWFT
3FNPWFBOZTIFMWFTQFHCPBSEPSQFHCPBSETUSJQTPSPUIFSPCKFDUTIBOHJOHPOUIFMBTUUXP4JEF8BMM1BOFMTPOFJUIFS
side.
4. Check contents of boxes and compare to parts listed on the Parts List.
5. Follow the steps in this manual.
6. If you are extending an 8’ x 5’ shed you will need to modify the following instructions by not removing as many parts as
shown in the illustrations.
IF YOU ARE INSTALLING A NEW SHED
IF YOU ARE EXTENDING AN EXISTING SHED

6
This area is located at the top, left-hand
corner of the page and indicates which tools
and hardware are needed to complete the
assembly steps on a page.
This area is located at the top, right-hand
corner of the page and shows an image of the
product with shaded parts indicating which
section is being assembled.
SEC
#
Note:
!
Refer to the following areas throughout the instructions
to assist in the assembly process:
This area is usually located in the bottom,
left-hand corner of a step and indicates that
special attention is needed to perform a
particular part of a step.
These areas are usually located in the bottom,
right-hand corner of a step and indicate that
damage to the product or serious injury may
occur if the caution or warning is not heeded.
Throughout the Parts & Hardware List, Part
& Hardware Identifi ers, and instructions
are three-letter IDs. These IDs are below
the images of the parts and hardware to
help you locate and identify the parts and
hardware during assembly. These IDs are not
necessarily on the parts themselves.
WARNING
ASSEMBLY GUIDE
TOOLS AND HARDWARE REQUIRED FOR THIS PAGE
CAUTION
ADZ (x10)
1/4” x 5/8” Pan-Head Screw

7
Consult all local building codes, as well as city and county ordinances, to ensure that the construction of the
Outdoor Shed does not require a building permit. Proper building permit documentation may be required in
your neighborhood, and it would be unfortunate to learn this after constructing the Shed.
Surface must be leveled before installation. We recommend building a level work space with a concrete
or patio style surface. If the surface is not properly leveled, the Outdoor Shed will not assemble correctly.
Proper surface leveling will save you time in the long run, so please do not ignore this step.
Level Surface Notice:
Building Code Notice:
:PVNBZVTFB1IJMMJQTIFBETDSFXESJWFSCJUBOEBQPXFSTDSFXESJWFSPSESJMMJOTUFBEPGBIBOE
screwdriver. However, be aware that the plastic pieces of your Shed can be damaged by overtightening of
screws. To avoid damage we strongly recommend the use of a low-powered power screwdriver or a drill that
has an adjustable clutch that is set on a low torque setting. If neither is available, use a hand screwdriver. In
any case use caution to avoid overtightening the screws.
Screwdriver Notice:
Sharp objects may damage your fl oor. If resting sharp, heavy objects on your Shed fl oor, place a block of
wood between the sharp object and fl oor.
Floor Puncture Notice:
If more than six (6) inches of snow accumulate on the roof of the shed, carefully remove the snow to avoid
possible roof collapse. While standing on the ground, remove the snow from the roof with a broom or snow
shovel. Do not stand on the roof to remove snow.
Snow Load Kit available from Customer Service for high snow areas.
IMPORTANT NOTICES
CAUTION:

8
TRUSS ASSEMBLY HARDWARE [BGV]
Hardware shown at actual size (*unless indicated otherwise)
WALL & ROOF INSTALLATION HARDWARE [BGT]
Hardware shown at actual size (*unless indicated otherwise)
PARTS & HARDWARE LIST
HARDWARE IDENTIFIER
ID Description Quantity
Main Parts
"': $FOUFS3PPG$BQ
"') 5SVTT(VUUFS$IBOOFM
"'2 8BMM4VQQPSU$IBOOFM
"'( 5SVTT#SBDF$IBOOFM
"(2 $FOUFS3PPG1BOFM
")% 8BMM1BOFM
"(+ *OOFS'MPPS1BOFM
AFL Roof Support Strip 6
"'1 5SVTT4VQQPSU4USJQ
ADJ (x10)
1/4” Cap Nut
ID Description Quantity
BJK 0125 Hardware Bag
BGV Truss Assembly Hardware
"", wYw)FY#PMU
ADJ 1/4” Cap Nut 10
AIP Truss Connector 1
")5 'MPPS#SBDLFU
BGT Wall & Roof Installation Hardware
ADZ 1/4” x 5/8” Phillips Pan-Head Screw 60
AJA Foam Cube 4
"$+ Yw1IJMMJQT1BO)FBE4DSFX
"&% Yw'FOEFS8BTIFS
AHTY
Floor Bracket
AAK (x10)
wYw)FY#PMU
AIP (x1)*
Truss Connector
ADZ (x60)
1/4” x 5/8” Phillips Pan-Head Screw
ACJ (x4)
Yw1IJMMJQT1BO)FBE4DSFX
AED (x4)
Yw'FOEFS8BTIFS
AJA (x4)*
Foam Cube
Note: Throughout the Parts & Hardware List, Part & Hardware Identifiers, and instructions are three-
letter IDs. These IDs are below the images of the parts and hardware to help you locate and identify
the parts and hardware during assembly. These IDs are not necessarily on the parts themselves.
!

9
PARTS IDENTIFIER
Parts shown at 4% of actual size
AHDY
Wall Panel
Parts shown at 8% of actual size
28 7/8”
20 1/8”
AFHY
5SVTT(VUUFS$IBOOFM
AFY (x1)
Center Roof Cap
AFPY
Truss Support Strip
AFL (x6)
Roof Support Strip
AFG (x1)
Truss Brace Channel
AFQY
Wall Support Channel
71 11/16”
79 1/2 ”
79 1/2”
AGQY
Center Roof Panel
AGJY
Inner Floor Panel
v

TOOLS AND HARDWARE REQUIRED FOR THIS PAGE
10
SEC
1
16”
14”
SEC
1.1
5IJTFYUFOTJPOLJUBEETBOPUIFSwUPUIFMFOHUIPGZPVSTIFE#FGPSFCFHJOOJOHFYQBOTJPOPGZPVSTIFE
CFTVSFUIBUZPVSTJUFDBOBDDPNNPEBUFUIFOFXTJ[F"EEwUPUIFMFOHUIPGZPVSTJUFTXPPEFOQMBUGPSN
(shown) or cement platform; the width will remain the same. This may require the use of additional lumber or
other materials.
SITE SELECTION
REFER TO YOUR CURRENT SHED PLATFORM FOR MATERIALS USED
Note: Floor studs are all 16” on center with one at 14” on center. Refer to Site Selection & Platform Instructions in Owner’s Manual.
!

TOOLS AND HARDWARE REQUIRED FOR THIS PAGE
11
SEC
NO HARDWARE REQUIRED FOR THIS PAGE
2
Remove this panel whether it’s a regular Wall
Panel or Window Wall Panel.
Remove this panel whether it’s a regular
Wall Panel or Window Wall Panel.
SEC
2.1
Remove the four Center Roof Panels and two Center Roof Caps highlighted below.
SHED DISASSEMBLY
SEC
2.2
Remove all Screws from the highlighted Wall Panel that connect it to adjoining Wall Panels and to the Wall Support.
**SAVE ALL HARDWARE FOR RE-ASSEMBLY!**
If your existing shed is anchored to the ground, remove all anchoring hardware before following these
steps.
Note: Your shed may be shorter than one shown above. Skip the very back Roof Panels (slightly more narrow than the middle Roof
Panels) and then remove the next two Roof Panels from each side of the shed (along with the connected Roof Caps).
!

TOOLS AND HARDWARE REQUIRED FOR THIS PAGE
12
SEC
SEC
2.3
Tip the Wall Panel inward.
NO HARDWARE REQUIRED FOR THIS PAGE
SEC
2.4
Use a long flat screwdriver to gently pry the bottom corner of the Wall Panel so that it has room to slide on
the inside of adjacent Wall Panel. Slide the Wall Panel to the left, and then remove the Panel. Repeat steps 2.2
through 2.4 for the other side of the shed.
2
Note: You’re Shed may be a different length than the Shed shown, but the
ideas are the same.
Note: To remove a Wall Panel, slide it to the left (when looking at it from inside the shed) until it lifts out.
!
!

TOOLS AND HARDWARE REQUIRED FOR THIS PAGE
13
SEC
SEC
2.5
SEC
2.6
Remove the Truss Assembly and set it aside for later.
With at least on person on each side of the shed, tip the back section of the shed forward to about a 45° angle
and slide the back section away from the shed.
As you remove the Wall Panels, have one
person support the Truss assembly so that it
does not fall over.
CAUTION
2
NO HARDWARE REQUIRED FOR THIS PAGE

14
FLOOR ASSEMBLY
PLASTIC PARTS REQUIRED
TOOLS REQUIRED
SEC
3
Safety Glasses
v
AGJY
Inner Floor Panel
Part shown at 4% of actual size

TOOLS AND HARDWARE REQUIRED FOR THIS PAGE
15
SEC
AGJ
AGJ
SEC
3.1
SEC
3.2
Fit together the two Inner Floor Panels (AGJ).
Tip the Inner Floor Panel Assemblies forward at a 45° angle and connect them to the Inner Floor Panels on the
main section of the shed.
3
NO HARDWARE REQUIRED FOR THIS PAGE
FLOOR ASSEMBLY

TOOLS AND HARDWARE REQUIRED FOR THIS PAGE
16
SEC
3
SEC
3.3
With at least one person on each side of the shed, tip the back section of the shed forward at about a 45° angle
and slide it forward to re-connect it to the rest of the shed.
NO HARDWARE REQUIRED FOR THIS PAGE

20 1/8”
71 11/16”
79 1/2”
79 1/2”
7/16” WrenchY
TRUSS ASSEMBLY
HARDWARE REQUIRED
HARDWARE BAG REQUIRED: BGV
METAL PARTS REQUIRED
TOOLS REQUIRED
SEC
Safety Glasses
AFPY
Truss Support Strip
AIP (x1)
5SVTT(VUUFS$POOFDUPS
AHTY
Floor Bracket
AFHY
5SVTT(VUUFS$IBOOFM
AFG (x1)
Truss Brace Channel
AFQY
Wall/Shelf Support Channel
AAK (x10)
wYw)FY#PMU
ADJ (x10)
1/4” Cap Nut
Parts shown at 8% of actual size
Hardware shown at actual size
Hardware shown at 50% of actual size
4

TOOLS AND HARDWARE REQUIRED FOR THIS PAGE
SEC
AFH
AFG
AAK
ADJ
ADJ
AFP
AFP
AFH
AFH
AAK
AIP
AFP
AFP
AFG
AFPY
AAK
ADJ
AAK (x6)
ADJ (x6)
SEC
SEC
Fit two Truss Support Strips (AFP) together. Bolt Truss Support Strips, Truss Gutter Connector (AIP), and two Truss Gutter
Channels (AFH) as shown using the required hardware.
Attach Truss Support Strips (AFP) to the center of a Truss Brace Channel (AFG) (Truss Support Strips fi t inside the Truss
Brace Channel). Attach each end of the Truss Brace Channel to the Truss Gutter Channels (AFH) using the required
hardware. Tighten all hardware.
Note: Only fi nger tighten hardware.
!
7/16”Y
WARNING
Do not overtighten the Cap Nut. If the end of
the Bolt breaks through the plastic cap, call our
Customer Service Department. Exposed threads
on the end of the Bolt may cause serious injuries.
WARNING
Do not overtighten the Cap Nut.
AIP (x1)
(Not to scale)
TRUSS ASSEMBLY
4.1
4.2
4

TOOLS AND HARDWARE REQUIRED FOR THIS PAGE
SEC
AFQ
AAK
ADJ
AFH
AFQ
AAKY
ADJY
SEC
Attach Truss Assembly to two Wall Support Channels (AFQ) using 1/4” x 1 1/2” Hex Bolts (AAK) and 1/4” Cap Nuts (ADJ).
Do not completely tighten the Cap Nut until after Truss is secured to the Wall.
Note: Only fi nger tighten hardware.
!
WARNING
Do not overtighten the Cap Nut.
7/16”Y
4.3
4.4
4

TOOLS AND HARDWARE REQUIRED FOR THIS PAGE
SEC
AAKY
ADJY
SEC
Attach one Floor Bracket (AHT) to the bottom of each Wall/Shelf Support Channel using the required hardware.
Tighten all hardware. Repeat this section for all Trusses. You need only do this step if you plan to anchor your Shed. See the
“Anchoring the Shed” step at the end of this Owner’s Manual.
ADJ
AFQ
AHT
AAK
AHTY
(Not to scale)
7/16”Y
4.4
4
/