Page is loading ...

User instructions
Kullanma K›lavuzu
®
VHD610-17S
ÇAMAfiIR MAK‹NES‹
EN
TR

EN
OUR COMPLIMENTS
With the purchase of this Hoover household appliance, you
have shown that you will not accept compromises: you want
only the best.
Hoover is happy to present their new washing machine,the
result of years of research and market experience through
direct contact with Consumers.You have chosen the quality,
durability and high performance that this washing machine
offers.
Hoover is also able to offer a vast range of other household
appliances: washing machines, dishwashers, washer-dryers,
cookers, microwave ovens.Traditional ovens and hobs,
refrigerators and freezers.
Ask your local retailer for the complete catalogue of Hoover
products.
Please read this booklet carefully as it provides important
guide lines for safe installation, use and maintenance and
some useful advise for best results when using your washing
machine.
Keep this booklet in a safe place for further consultation.
When contacting Hoover
or a Customer Services Centre always refer to the Model,
No., and G number (if applicable of the appliance see
panel).
3
2
This appliance is marked according to the European directive 2002/96/EC on Waste Electrical and Electronic
Equipment (WEEE).
By ensuring this product is disposed of correctly, you will help prevent potential negative consequences for the
environment and human health, which could otherwise be caused by inappropriate waste handling of this product.
The symbol on the product indicates that this product may not be treated as household waste. Instead it shall be
handed over to the applicable collection point for the recycling of electrical and electronic equipment
Disposal must be carried out in accordance with local environmental regulations for waste disposal.
For more detailed information about treatment, recovery and recycling of this product, please contact your local city
office, your household waste disposal service or the shop where you purchased the product.

5
E
AB
C
F
EN
CHAPTER 1
GENERAL POINTS ON DELIVERY
On delivery, check that the following are included with the
machine:
A) INSTRUCTION MANUAL
B) CUSTOMER SERVICE ADDRESSES
C) GUARANTEE CERTIFICATES
D) CAPS
E) BEND FOR OUTLET TUBE
F) LIQUID DETERGENT OR LIQUID BLEACH
COMPARTMENT (CONTAINER)
KEEP THEM IN A SAFE
PLACE
Check that the machine has not incurred damage during
transport. If this is the case, contact your nearest Hoover
Centre.
D
CHAPTER
1
2
3
4
5
6
7
8
9
10
11
12
13
4
EN
INDEX
Introduction
General points on delivery
Guarantee
Safety Measures
Technical Data
Setting up and Installation
Control Description
Table of Programmes
Selection
Detergent drawer
The Product
Washing
Cleaning and routine maintenance
Faults Search

7
EN
CHAPTER 3
SAFETY MEASURES
IMPORTANT: FOR ALL CLEANING AND MAINTENANCE
WORK
● Remove the plug
● Turn off the water inlet tap.
● All Hoover appliances are earthed. Ensure that the main
electricity circuit is earthed. Contact a qualified electrician if
this is not the case.
Appliance complies with European Directives
73/23/EEC and 89/336/EEC, replaced by 2006/95/EC and
2004/108/EC, and subsequent amendments.
● Do not touch the appliance with wet or damp hands or
feet.
● Do not use the appliance when bare-footed.
● Extreme care should be taken if extension leads are used
in bathrooms or shower rooms. Avoid this where possible.
WARNING: DURING THE WASHING CYCLE, THE WATER
CAN REACH A TEMPERATURE OF 90°C.
● Before opening the washing machine door, ensure that
there is no water in the drum.
6
EN
CHAPTER 2
GUARANTEE
The appliance is supplied with a guarantee certificate which
allows free use of the Technical Assistance Service.

9
kg 6
6÷15
2150
1.8
10
Min. 0.05
Mak. 0.8
230
l
W
kWh
A
SSEEEE RRAATTIINNGG PPLLAATTEE
MPa
V
52 cm
60 cm
85
cm
EN
CHAPTER 4
MAXIMUM WASH
LOAD DRY
NORMAL WATER LEVEL
SUPPLY VOLTAGE
POWER INPUT
ENERGY CONSUMPTION (PROG. 90°C)
POWER CURRENT FUSE AMP
SPIN r.p.m.
WATER PRESSURE
TECHNICAL DATA
8
EN
● Do not use adaptors or multiple plugs.
● This appliance is not intended for use by persons (including
children) with reduced physical,sensory or mental
capabilities, or lack of experience and knowledge, unless
they have been given supervision or instruction concerning
use of the appliance by a person responsible for their safety.
Children should be supervised to ensure that they do not
play with the appliance.
● Do not pull the mains lead or the appliance itself to
remove the plug from the socket.
● Do not leave the appliance exposed to atmospheric
agents (rain, sun etc.)
● In the case of removal, never lift the appliance by the
knobs or detersive drawer.
● During transportation
do not lean the door against the trolley.
Important!
When the appliance location is on carpet floors, attention
must be paid so as to ensure that there is no obstruction to
the bottom vents.
● Lift the appliance in pairs as illustrated in the diagram.
● In the case of failure
and/or incorrect operation, turn the washing machine off,
close the water inlet tap and do not tamper with the
appliance. Contact a Hoover Technical Assistance Centre
for any repairs and ask for original Hoover spare parts.
Avoidance of these norms may compromise the safety of
the appliance.
● Should the supply cord (mains cable) be demaged,this is
to be replaced by a specific cable available from the after
sales service centre.

11
min 50 cm
max 85 cm
+2,6 mt max
max 100 cm
min 4 cm
EN
Fix the sheet of corrugated material on the bottom as shown
in picture.
The appliance must be connected to the water mains using
new hose-sets.The old hose-sets should not be reused.
IMPORTANT: DO NOT TURN THE TAP ON AT THIS TIME.
IMPORTANT
This appliance is set to be connected to hot and cold water
supply for improved energy consumption.
The grey hose must be attached to the cold
water tap and the red hose must be attached to the hot
water tap.
Should the hot water supply not be available is possible
connect the appliance to the cold water supply only, but in
this case, for some programmes, the appliance can take few
minutes before starts working.
Position the washing machine next to the wall. Hook the
outlet tube to the edge of the bath tub, paying attention
that there are no bends or contractions along the tube.
It is better to connect the discharge hose to a fixed outlet of
a diameter greater than that of the outlet tube and at a
height of min. 50 cm. If is necessary to use the plastic sleeve
supplied.
10
EN
CHAPTER 5
SETTING UP INSTALLA
TION
Move the machine near its permanent position without the
packaging base.
Carefully cut the securing strap that holds the main cord
and the drain hose.
Remove the 4 fixing screws marked (A) and remove the 4
spacers marked (B)
Cover the 4 holes using the caps provided in the instruction
booklet pack.
WARNING:
DO NOT LEAVE THE PACKAGING IN THE REACH OF
CHILDREN AS IT IS A POTENTIAL SOURCE OF DANGER.

13
A
B
C
D
E
F
G
H
I
L
M
N
O
P
Q
CHAPTER 6
CONTROLS
Door handle
Door locked indicator light
Start button
Intensive button
Start Delay button
Aquaplus button
Crease Guard button
Spin Speed button
Spin speed indicator light
Time countdown system
Wash temperature indicator light
“Wash Temperature” button
Buttons indicator light
Timer knob for wash programmes with OFF position
Detergent drawer
EN
12
A
B
C
EN
Use the 4 feet to level the machine with the floor:
a) Turn the nut clockwise to release the screw adjuster of the
foot.
b) Rotate foot to raise or lower it until it stands firmly on the
ground.
c) Lock the foot in position by turning the nut anti-clockwise
until it comes up against the bottom of the machine.
Ensure that the knob is on the “OFF” position and the load
door is closed
Insert the plug.
ATTENTION:
should it be necessary to replace the supply cord, connect
the wire in accordance with the following colours/codes:
BLUE - NEUTRAL (N)
BROWN - LIVE (L)
YELLOW-GREEN - EARTH ( )
After installation, the appliance must be positioned so that
the plug is accessible.
B H NP
A
G
Q
O
F
E
D
C
M
LI

15
D
E
EN
The option buttons should be selected before pressing the
START button
INTENSIVE BUTTON
By pressing this button, which can only be activated in the
Cotton cycles, the sensors in the new Activa system come into
operation.They affect both the selected temperature, keeping
it at a constant level throughout the wash cycle,and the
mechanical function of the drum.
The drum is made to turn at two different speeds at crucial
moments. When the detergent enters the garments, the drum
rotates in such a way that the detergent is distributed in a
uniform manner; during the wash and rinse procedures,
however, the speed increases in order to maximise the
cleaning action.Thanks to this special system,the efficiency of
the wash procedure is improved WITHOUT ANY INCREASE IN THE
LENGTH OF THE PROGRAM.
START DELAY BUTTON
Appliance start time can be set with this button, delaying the
star by 3, 6 or 9 hours.
Proceed as follow to set a delayed start:
Select a programme (“STOP”indicator light blinks)
Press Start Delay button (each time the button is pressed the
start will be delayed by 3, 6 or 9 hours respectively and the
corresponding light will blink).
Press START to commence the Start Delay operation (the
indicator light associated with the selected Start Delay time
stops blinking and remains ON).
At the end of the required time delay the programme will start.
To cancel the Start Delay function :
press the Start Delay button until the indicator lights will be off
(The STOP light blinks) and the programme can be started
manually using the START button or switch off the appliance by
turning the programme selector to off position.
AQUAPLUS BUTTON
By pressing this button you can activate a special new wash
cycle in the Colourfast and Mixed Fabrics programs, thanks to
the new Sensor System.This option treats with care the fibres of
garments and the delicate skin of those who wear them.
The load is washed in a much larger quantity of water and this,
together with the new combined action of the drum rotation
cycles, where water is filled and emptied, will give you
garments which have been cleaned and rinsed to perfection.
The amount of water in the wash is increased so that the
detergent dissolves perfectly, ensuring an efficient cleaning
action.The amount of water is also increased during the rinse
procedure so as to remove all traces of detergent from the
fibres.
This function has been specifically designed for people with
delicate and sensitive skin, for whom even a very small amount
of detergent can cause irritation or allergy.
You are advised to also use this function for children’s clothing
and for delicate fabrics in general, or when washing garments
made of towelling, where the fibres tend to absorb a greater
quantity of detergent.
To ensure the best performance for your wash,this function is
always activated on the Delicates and Woollens programs.
F
14
A
2 min.
B
DESCRIPTION OF CONTROL
DOOR HANDLE
Press the finger-bar inside
the door handle to open the door
IMPORTANT:
A SPECIAL SAFETY DEVICE PREVENTS THE DOOR FROM
OPENING AT THE END OF THE WASH/SPIN CYCLE. AT THE
END OF THE SPIN PHASE WAIT UP TO 2 MINUTES BEFORE
OPENING THE DOOR.
DOOR LOCKED INDICATOR
The “Door Locked” indicator light is illuminated when the door
is fully closed and the machine is ON.
When START is pressed on the machine with the door closed
the indicator will flash momentarily and then illuminate.
If the door is not closed the indicator will continue to flash.
A special safety device prevents the door from being opened
immediately after the end of the cycle.Wait for 2 minutes after
the wash cycle has finished and the Door Locked light has
gone out before opening the door. At the end of cycle turn the
programme selector to OFF .
START BUTTON
When a programme is selecting, wait for the “STOP” indicator
light to flash before pressing the START button.
Press to start the selected cycle (according to the selected
cycle one indicator lights will go on) .
NOTE: WHEN THE START BUTTON HAS BEEN PRESSED, THE
APPLIANCE CAN TAKE FEW SECONDS BEFORE STARTS
WORKING.
CHANGING THE SETTINGS AFTER THE PROGRAMMES HAS
STARTED (PAUSE)
The programme may be paused at any time during the wash
cycle by holding down the "Start/Pause" button for about two
seconds. When the machine is in the paused mode,the
indicator light "Countdown" and option buttons will flash.
To restart the programme, press the START button once again.
If you wish to add or remove items during washing, wait 2
minutes until the safety device unlocks the door.
When you have carried out the manoeuvre, close the door,
press START button and the appliance will continue working
where it left off.
CANCELLING THE PROGRAMME
To cancel the programme,set the selector to the OFF position.
Select a different programme.
Re-set the programme selector to the OFF position.
EN
C

17
H
I
L
EN
SPIN SPEED BUTTON
The spin cycle is very important to remove as much water as
possible from the laundry without damaging the fabrics.You
can adjust the spin speed of the machine to suit your needs.
By pressing this button, it is possible to reduce the maximum
speed, and if you wish,the spin cycle can be cancelled.
To reactivate the spin cycle is enough to press the button until
you reach the spin speed you would like to set.
For not damage the fabrics, it is not possible to increase the
speed over that automatically suitable during the selection of
the program.
It is possible to modify the spin speed in any moment, also
without to pause the machine.
SPIN SPEED INDICATOR LIGHT
When you set a program,the maximum possible spin speed
will be automatically shown by the relevant indicator light.
Choosing a smaller spin speed by the appropriate button, the
relevant indicator light will go on.
TIME COUNTDOWN SYSTEM INDICATOR LIGHTS
In order to better manage your time, this washing machine
features an indicator light system that keeps you constantly
informed on the remaining cycle time.
Indicator light 90: Remaining time above 60 minutes
Indicator light 60: Remaining time less than 60 minutes
Indicator light 30: Remaining time less than 30 minutes
Indicator light 15: Remaining time less than 15 minutes
Indicator light Stop: End of the programme.
WASH TEMPERATURE INDICATOR LIGHT
When a programme is selected the relevant indicator will
light up to show the recommended wash temperature. The
Temperature button can be used to decrease or increase the
temperature of your chosen wash cycle. Each time the
button is pressed, the new temperature level is shown on the
Wash Temperature Indicator.
M
16
G
EN
CREASE GUARD BUTTON
The Crease Guard function (Not available on COTTON
programmes) minimizes creases as much as possible with a
uniquely designed anti-crease system that is tailored to
specific fabrics.
MIXED FABRICS - the water is gradually cooled throughout the
final two rinses with no spinning and then a delicate spin
assures the maximum relaxation of the fabrics.
DELICATE FABRICS – final two rinses with no spinning and then
the fabrics are left in water until it is time to unload.When you
are ready to unload, press the "Crease Guard" button – this will
drain.
WOLLENS/SILK – after the final rinse the fabrics are left in water
until it is time to unload and the button indicator blinking.
When you are ready to unload,press the "Crease Guard"
button, this will drain and spin ready for emptying.
If you do not want to spin the clothes and activate drain only:
- Turn the programme selector to the "OFF" position;
- Select programme drain only ;
- Switch on the appliance again by pressing the "Start/Pause"
button.

18
N
O
EN
“WASH TEMPERATURE” BUTTON
When a programme is selected the relevant indicator will
light up to show the recommended wash temperature.
The Temperature button can be used to decrease or
increase the temperature of your chosen wash cycle.
Each time the button is pressed, the new temperature level is
shown on the Wash Temperature Indicator.
BUTTONS INDICATOR LIGHT
The indicator light around the option buttons will light when
specific options are selected.
If you select an option button that is not compatible with the
programme required the button light will not illuminate.
PROGRAMME SELECTOR WITH OFF POSITION
ROTATES IN BOTH DIRECTIONS.
THE MACHINE IS TURNED ON BY SELECTING A
PROGRAMME VIA THE PROGRAMME SELECTOR.
THIS STATUS WILL BE INDICATED BY THE STOP
INDICATOR LIGHT FLASHING, THIS LIGHT WILL
CONTINUE TO FLASH UNTIL THE MACHINE HAS
STARTED OR THE MACHINE IS RETURNED TO THE OFF
POSITION.
TODAY, MOST DETERGENTS HAVE BEEN IMPROVED TO
WASH EFFICIENTLY AT LOWER TEMPERATURES,
THEREFORE WE HAVE SET THE DEFAULT TEMPERATURE
SETTINGS OF EACH PROGRAMME TO A LOWER LEVEL,
SAVING ELECTRICITY AND REDUCING THE CARBON
FOOTPRINT OF YOUR MACHINE.
YOU CAN SELECT AN HIGH TEMPERATURE BY
PRESSING THE TEMPERATURE BUTTON.
PLEASE REFER TO THE PROGRAMME GUIDE FOR THE
MAXIMUM TEMPERATURE TO WHICH EACH
PROGRAMME CAN BE SET.
Press the "Start/Pause" button to start the selected cycle.
The programme carries out with the programme selector
stationary on the selected programme till cycle ends.
Switch off the washing machine by turning the selector to
OFF.
NOTE:
THE PROGRAMME SELECTOR MUST BE RETURN TO THE
OFF POSITION AT THE END OF EACH CYCLE OR WHEN
STARTING A SUBSEQUENT WASH CYCLE PRIOR TO THE
NEXT PROGRAMME BEING SELECTED AND STARTED.
P

WEIGHT
MAX
Kg
MAX
TEMP.
°C
Up to:
40°
Up to:
90°
Up to:
60°
Up to:
40°
Up to:
50°
Up to:
40°
-
-
-
Up to:
40°
Up to:
30°
Up to:
60°
Up to:
40°
Up to:
40°
Up to:
30°
20 21
21
●●
●●●
●●
●●
●●
●●
●
●●
●●
●●
●●
●●
●●
PROGRAMMES
SELECTOR ON:
TABLE OF PROGRAMMES
CHARGE DETERGENT
CHAPTER 7
EN
PROGRAM FOR
Resistant fabrics
Resistant fabr
ics
Cotton, linen
Cotton, mixed
resistant
Cotton
Mixed fabrics and
synthetics
Mixed, resistant
V
ery delicate f
abrics
Specials
RINSE
SPIN
DRAIN ONLY
WOOLMARK
SILK – HAND
WASH
RESISTANT
FABRICS
RESISTANT or MIXED
FABRICS
RESISTANT or MIXED
FABRICS
MIXED FABRICS
Please read these notes
When washing heavily soiled laundry it is recommended the load is reduced to 3 kg maximum.
**Programme also recommended for low temperature wash (below the indicated Max.
temperature).
Programme tested in accordance with CENELEC EN 60456 with a temperature of 60°C.
The spin speed may also be reduced, to match any guidelines suggested on the fabric label, or
for very delicate fabrics cancel the spin completely this option is available with a spin speed
button.
Pressing the wash temperature button makes it possible to wash at any temperature below the
maximum allowed.
When only a limited number of articles have stains which require treatment with liquid
bleaching agents, preliminary removal of stain can be carried out in the washing machine.
Pour the bleach into the liquid bleach container, inserted into the compartment marked "2" in
the detergent drawer, and set the special programme "RINSE" .
When this phase has terminated, turn the programme selector on the "OFF" position, add the
rest of the fabrics and proceed with a normal wash on the most suitable programme.
6
6
6
6
3
2
-
-
-
1
1
3
3,5
2
2,5
RECOMMENDED
TEMP.
°C
40°
60°
40°
40°
40°
40°
-
-
-
40°
30°
60°
30°
30°
30°
**

23
EN
SPECIAL “RINSE” PROGRAMME
This programme carries out three rinses with a intermediate
spin (which can be reduced or excluded by using the
correct button). It can be used for rinsing any type of fabric,
eg. use after hand-washing.
This program can be also used as cycle of Bleaching (see
table of washing cycle programmes).
SPECIAL “FAST SPIN” PROGRAMME
Programme “FAST SPIN” carries out a maximum spin (which
can be reduced by using the correct button).
DRAIN ONLY
This programme drains out the water.
WOOLMARK PROGRAMME
The special cycle, certified by WOOLMARK, enables to
thoroughly wash garments without damaging them.
The cycle comprises of alternate periods of activity and
pauses with a maximum temperature of 40°C and concludes
with 3 rinses and a short spin.
SPECIAL SILK PROGRAMME
This washing machine also has a gentle Silk and Hand Wash
programme cycle.This programme allows a complete
washing cycle for garments specified as ‘Hand Wash only’
and laundry items made from Silk on the fabric label.
The programme has a maximum temperature of 30° and
concludes with 3 rinses and no final spin.
22
WEIGHT
MAX
Kg
5
5
5
5
2
2
TEMP.
°C
Up to: 90°
Up to: 60°
Up to: 40°
Up to: 40°
Up to: 50°
Up to: 40°
(*
PROGRAM FOR
Resistant fabrics
Cotton, linen
Cotton, mixed
resistant
Cotton
Resistant fabrics
Mixed fabrics and
synthetics
Mixed, resistant
ery delicate fabrics
❙
PROGRAMMES
SELECTOR ON:
()
()
()
()
TABLE OF PROGRAMMES
CH
EN
HAPTER 7
- 90
- 60
- 40
AA 40°C - 40
- 50
- 40
EN
CHAPTER 8
SELECTION
For the various types of fabrics and various degrees of dirt the
washing machine has different programme bands according to:
wash cycle, temperature and lenght of cycle (see table of
washing cycle programmes).
AA SPECIAL PROGRAMME AT 40°C
This special programme has been studied to allow you to obtain
the best washing performance, even at full load, as the 60°C
Cotton programme (the normative cycle),but with the
advantage of an energy saving due to 40°C temperature,
instead of 60°C.
The length of this programme lasts almost the 3 hours.
RESISTANTS FABRICS
The programmes have been designed for a maximum wash and
the rinses, with spin intervals, ensure perfect rinsing.
The final spin gives more efficient removal of water.
MIXED AND SYNTHETIC FABRICS
The main wash and the rinse gives best results thanks to the
rotation rhythms of the drum and to the water levels.
A gentle spin will mean that the fabrics become less creased.
SPECIAL DELICATE FIBRES
This is a new wash cycle which alternates washing and soaking
and is particularly recommended for very delicate fabrics.
The wash cycle and rinses are carried out with high water levels to
ensure best results.

25
EN
CHAPTER 9
DETERGENT DRAWER
The detergent draw is split into 3 compartments:
- the compartment labelled "1" is for prewash detergent;
- the compartment
labelled “✿✿” is for special additives, fabric softeners,
fragrances, starch, brighteners etc;
- the compartment labelled "2" is for main wash detergent.
If liquid detergents are used, please insert the special
container supplied into the compartment marked “2” in the
detergent drawer. This ensures that the liquid detergent enters
the drum at the right stage of the wash cycle.
This special container must be inserted into the compartment
marked "2" in the detergent drawer, also when you wish to use
the "RINSE" programme as BLEACHING cycle.
NOTE: SOME DETERGENTS ARE DIFFICULT TO REMOVE.
FOR THESE, WE RECOMMEND YOU USE THE SPECIAL
DISPENSER WHICH IS PLACED IN THE DRUM.
NOTE: ONLY PUT LIQUID PRODUCTS IN THE
COMPARTMENT
LABELLED “✿✿”. THE MACHINE IS PROGRAMMED TO
AUTOMATICALLY TAKE UP ADDITIVES DURING THE
FINAL RINSE STAGE FOR ALL WASH CYCLES.
24
EN
“A” WASH 59 '
This specially designed programme maintains the high quality
wash performance identified with the “A” rating whilst greatly
reducing the wash time.The progrramme is designed for a
maximum load of 3 kg with a temperature of 60°C and
concludes with 2 rinses and a high speed spin sequence.
DAILY WASH 40°C – FAST PROGRAMMES
By maintaining exceptional washing performance, these
programmes allow you to know in advance the necessary time
for your everyday laundry. In fact, this washing machine is
equipped wit 2 daily rapid programmes at 40°C, that were just
studied for lightly soiled fabrics and medium or little load.
DAILY WASH 40°C – FAST 44’
A complete washing cycle (wash, rinse and spin), able to wash
in approximately 44 minutes:
- a maximum load of 3,5 kg;
- lightly soiled fabrics (cotton and mixed fabrics)
We recommend, with this programme, a 30% detergent loading
dose (compared to the normal one), in order to avoid
detergent waste.
DAILY WASH 40°C – FAST 29’
A complete washing cycle (wash, rinse and spin), able to wash
in approximately 29 minutes:
- a maximum load of 2 kg;
- lightly soiled fabrics (cotton and mixed fabrics)
We recommend, with this programme, a 20% detergent loading
dose (compared to the normal one), in order to avoid
detergent waste.
SPORTS
Hoover has given sports items their own wash care
programme.
The washing machine has a unique Sportswear programme. It
is specially designed to wash mixed sportswear fabrics that
cannot be washed on hotter programmes and is designed to
remove the soil and staining created by participation in
sports activities.This programme washes at a cool 30°C, rinses
and spins slowly for the best care of your heavily soiled,
delicate garments.

27
EN
CHAPTER 11
CUSTOMER AWARENESS
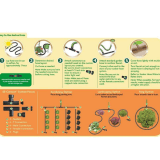
A guide environmentally friendly and economic use of your
appliance.
MAXIMISE THE LOAD SIZE
Achieve the best use of energy, water, detergent and time by
using the recommended maximum load size.
Save up to 50% energy by washing a full load instead of 2 half
loads.
DO YOU NEED TO PRE-WASH?
For heavily soiled laundry only!
SAVE detergent, time, water and between 5 to 15% energy
consumption by NOT selecting Prewash for slight to normally
soiled laundry.
IS A HOT WASH REQUIRED?
Pretreat stains with stain remover or soak dried in stains in water
before washing to reduce the necessity of a hot wash
programme.
Save up to 50% energy by using a 60°C wash programme.
WASHING
VARIABLE CAPACITY
This washing machine automatically adapts the level of the water
to the type and quantity of washing.In this way it is also possible to
obtain a “personalized” wash from an energy saving point of view.
This system gives a decrease in energy consumption and a sensible
reduction in washing times.
EXAMPLE:
A net bag should be used for particularly delicate fabrics.
Let us suppose that the washing consists of HEAVILY SOILED
COTTON (tough stains should be removed with suitable stain
removal).
It is advisable not to wash a load made up entirely of articles
in towelling fabric which absorb a lot of water and become
too heavy.
● Open the detergent drawer.
● Put 120 g in the main wash compartment marked 2.
● Put 50 ml of the desired additive in the additives
compartment
✿✿
.
● Close the detergent drawer.
26
EN
CHAPTER 10
THE PRODUCT
IMPORTANT:
When washing heavy rugs, bed spreads and other heavy
articles, it is advisable not to spin.
To be machine-washed,woollen garments and other articles
in wool must bear the “Machine Washable Label”.
IMPORTANT:
When sorting articles ensure that:
- there are no metal objects in the washing (e.g.brooches,
safety pins, pins, coins etc.).
- cushion covers are buttoned, zips and hooks are closed,
loose belts and long tapes on dressing gowns are
knotted.
- runners from curtains are removed.
- attention is paid to garment labels.
- when sorting, any tough stains should be removed prior to
washing using stain removers only recommended on
label.

29
EN
CHAPTER 12
CLEANING AND ROUTINE MAINTENANCE
Do not use abrasives, spirits and/or diluents on the exterior of
the appliance. It is sufficient to use a damp cloth.
The washing machine requires very little maintenance:
● Cleaning of drawer compartments.
● Filter cleaning
● Removals or long periods when the machine is left
standing.
CLEANING OF DRAWER COMPARTMENTS
Although not strictly necessary, it is advisable to clean the
detergent, bleach and additives compartments occasionally.
Remove the compartments by pulling gently.
Clean with water.
Put the compartments back into place
28
● Ensure that the water inlet tap is turned on.
● And that the discharge tube is in place.
PROGRAMME SELECTION
Refer to the programme guide to select the most suitable
programme.
Turning the selector knob required programme is activate.
Wait for the “STOP” indicator light to flash.
Then press the START button.
When the START button is pressed the machine sets the
working sequence in motion.
The programme carries out with the programme selector
stationary on the selected programme till cycle ends.
Warning: If there is any break in the power supply while the
machine is operating, a special memory stores the selected
programme and,when the power is restored, it continues
where it left off.
● At the end of the programme the indicator light “end
cycle” will go on.
● Wait for the door lock to be released (about 2 minutes after
the programme has finished).
● Switch off the machine by turning the programme selector
to the “OFF” position.
● Open the door and remove the laundry.
FOR ALL TYPES OF WASH CONSULT THE PROGRAMME
TABLE AND FOLLOW THE OPERATIONS IN THE ORDER
INDICATED.
EN

31
30
EN
FILTER CLEANING
The washing-machine is equipped with a special filter to
retain large foreign matter which could clog up the drain,
such as coins, buttons, etc.These can,therefore, easily be
recovered.The procedures for cleaning the filter are as
follows:
● Open the flap
● Only available on certain models:
Pull out the corrugated hose, remove the stopper and drain
the water into a container.
● Before removing the filter, place an absorbent towel below
the filter cap to collect the small amount of water likely to be
inside the pump
● Turn the filter anticlockwise till it stops in vertical position.
● Remove and clean.
● After cleaning, replace by turning the notch on the end of
the filter clockwise.Then follow all procedures described
above in reverse order.
REMOVALS OR LONG PERIODS WHEN THE MACHINE IS LEFT
STANDING
For eventual removals or when the machine is left standing for
long periods in unheated rooms, the drain hose should be
emptied of all remaining water.
The appliance must be switched off and unplugged. A bowl is
needed. Detach the drainage hose from the clamp and
lower it over the bowl until all the water is removed.
Repeat the same operation with the water inlet hose.
CHAPTER 13
EN
FAULT
NOTE:
THE MACHINE IS FITTED WITH A SPECIAL ELECTRONIC DEVICE, WHICH PREVENTS THE SPIN CYCLE
SHOULD THE LOAD BE UNBALANCED.
THIS REDUCES THE NOISE AND VIBRATION IN THE MACHINE AND SO PROLONGS THE LIFE OF YOUR
MACHINE.
If the fault should persist, contact a Hoover Technical Assistance Centre. For prompt servicing, give the model of
the washing machine, to be found on the label placed on the cabinet inside of the porthole or on the
guarantee certificate.
Important
1 The use of environment friendly detersives without phosphates may produce the following effects:
- The discharge rinse water may result cloudier due to the presence of zeolites in suspension. This does not
compromise the efficiency of the rinses.
- The presence of white powder (zeolites) on the washing at the end of the washing cycle. This does not
remain incorporated in the fabric and does not alter the colour.
- The presence of foam in the last rinse water which is not necessarily a sign of inadequate rinsing.
- The non-ionic surface-active agents present in the composition of washing machine detersives are often
difficult to remove from the washing itself and, even in small quantities, may produce visible signs of the
formation of foam.
- Carrying out further rinses, in cases such as this, is not useful.
2 If your washing machine fails to function, carry out the above-mentioned checks before calling the Hoover
Technical Assistance Service.
The manufacturer declines all responsibility in the event of any printing mistakes in this booklet. The manufacturer also
reserves the right to make appropriate modifications to its products without changing the essential characteristics.
1. Does not function
on any
programme
2. Does not load
water
3. Does not discharge
water
4. Water on floor
around washing
machine
5. Does not spin
6. Strong vibrations
during spin
Mains plug not plugged in
Mains switch not on
No power
Electric circuit fuses failure
Load door open
See cause 1
Inlet tap turned off
Timer not set correctly
Discharge tube bent
Odd material blocking filter
Leak from the washer between the tap
and inlet tube
The washing machine has not
discharged water
“No spin” setting (some models only)
Washing machine not perfectly level
Transport bracket not removed
Washing load not evenly distributed
Insert plug
Turn on mains switch
Check
Check
Close load door
Check
Turn on water inlet tap
Set timer on correct position
Straighten discharge tube
Check filter
Replace washer and tighten the tube
on the tap
Wait a few minutes until the machine
discharges water
Turn the programme dial onto spin
setting
Adjust special feet
Remove transport bracket
Distribute the washing evenly
CAUSE
REMEDY

33
TR
TEBR‹KLER
Hoover marka bu ev aletini sat›n almakla ödün vermeyi kabul
etmeyece¤inizi göstermifl oldunuz: sadece en iyisini istiyorsunuz.
Hoover, Müflteriler ile do¤rudan temas sa¤lanarak elde edilen
y›llar süren pazar araflt›rmas›n›n sonucu olarak gelifltirdi¤i yeni
çamafl›r makinesini sunmaktan gurur duyar. Bu çamafl›r
makinesinin sa¤lad›¤› kaliteyi, dayan›kl›l›¤› ve yüksek performans›
tercih etmifl bulunuyorsunuz.
Hoover, bunun yan› s›ra genifl bir yelpazeye sahip olan di¤er ev
aletlerini de hizmetinize sunmaktad›r: çamafl›r makineleri,
kurutmal› çamafl›r makineleri, f›r›nlar, mikrodalga f›r›nlar.
Geleneksel ocaklar ve s›cak tutma cihazlar›, buzdolaplar› ve derin
dondurucular..
Bölgenizdeki bayiinizden bütün Hoover ürünlerinin yer ald›¤›
katalo¤u isteyin.
Lütfen bu kullanma k›lavuzunu dikkatli bir flekilde okuyun, çünkü
bu k›lavuz size çamafl›r makinenizin montaj›, kullan›m› ve
bak›m›na iliflkin baz› kurallar ile birlikte çamafl›r makinenizden en
iyi sonuçlar› elde edebilmeniz için faydal› ipuçlar› sunar.
Bu kullanma k›lavuzunu daha sonra baflvurmak üzere emin bir
yerde saklay›n.
Hoover'e veya bir Yetkili Müflteri Servisi Merkezi'ne
baflvurdu¤unuzda daima cihaz›n›z›n Modelini, Seri Numaras›n› ve
G numaras›n› (e¤er cihazda mevcut ise cihaz›n paneline bakarak)
bildirin.

35
E
AB
C
F
TR
BÖLÜM 1
TESL‹MATA ‹L‹fiK‹N GENEL HUSUSLAR
Ürünü teslim ald›¤›n›zda cihaz ile birlikte afla¤›daki kalemlerin de
teslim edildi¤ini kontrol edin:
A) KULLANMA KILAVUZU
B) YETK‹L‹ SERV‹S ADRESLER‹
C) GARANT‹ BELGELER‹
D) KAPAKLAR
E) ÇIKIfi HORTUMU ‹Ç‹N U-fiEK‹LL‹ PARÇA
F) SIVI DETERJAN VEYA SIVI ÇAMAfiIR SUYU
BÖLMES‹ (KABI)
NOT
BU MALZEMELER‹ EM‹N B‹R YERDE SAKLAYIN
Çamafl›r makinesin nakliye esnas›nda hasar görmemifl
oldu¤undan emin olacak flekilde kontrol edin. Hasar görmüfl
olmas› durumunda en yak›n Hoover Yetkili Servisine baflvurun.
D
BÖLÜM
1
2
3
4
5
6
7
8
9
10
11
12
13
34
TR
‹Ç‹NDEK‹LER
Girifl
Teslimata iliflkin genel hususlar
Garanti
Güvenlik Önlemleri
Teknik Veriler
Cihaz›n kurulmas› ve Montaj›
Kontrollerin Aç›klanmas›
Programlar Tablosu
Seçimlerin Yap›lmas›
Deterjan Çekmecesi
Ürün
Y›kama
Cihaz›n Temizlenmesi ve Rutin Bak›m›
Ar›za Arama

37
TR
BÖLÜM 3
GÜVENL‹K ÖNLEMLER‹
ÖNEML‹ NOT:
C‹HAZIN TEM‹ZLENMES‹NE VE BAKIMINA ‹L‹fiK‹N
BÜTÜN ‹fiLERDEN ÖNCE.
● Cihaz›n fiflini prizden çekin.
● Su girifli muslu¤unu kapat›n.
● Bütün Hoover cihazlar› topraklanm›flt›r. Cihaz›n ba¤lanaca¤›
elektrik prizinin topraklanm›fl oldu¤undan emin olun. Prizin
topraklanmam›fl olmas› durumunda uzman bir teknisyenden
yard›m al›n.
Bu cihaz 73/23/EEC, 2006/95/EC ve 2004/108/EC ile
de¤ifltirilmifl olan 89/336/EEC Avrupa Yönergeleri ile bunlar›n
sonraki eklerine uygundur.
● Cihaza nemli veya ›slak ellerle ve ayaklar›n›z nemli yada
›slakken dokunmay›n.
● Cihaz› ayaklar›n›z ç›plakken kullanmay›n.
● Banyolarda veya dufl odalar›nda uzatma kablolar› kullan›l›rken
son derece dikkatli olunmal›d›r. Bu uygulamadan mümkün
oldu¤unca kaç›n›n.
UYARI:
Y›kama program› esnas›nda suyun s›cakl›¤› 90°C'ye
ulaflabilir
● Çamafl›r makinesinin kapa¤›n› açmadan önce kazan›n›n
içerisinde su bulunmad›¤›ndan emin olun.
36
TR
BÖLÜM 2
GARANT‹
Cihaz ile birlikte Teknik Yard›m Servisinin ücretsiz olarak
kullan›lmas›n› sa¤layan bir garanti belgesi verilir.

39
kg 6
6÷15
2150
1.8
10
Min. 0.05
Mak. 0.8
230
l
W
kWh
A
C‹HAZIN T‹P ET‹KET‹NE
BAKIN
MPa
V
52 cm
60 cm
85
cm
TR
BÖLÜM 4
YIKANAB‹LECEK MAKS‹MUM KURU ÇAMAfiIR M‹KTARI
NORMAL SU SEV‹YES‹ ( l )
BESLEME GER‹L‹M‹
ELEKTR‹K GÜCÜ GEREKS‹N‹M‹
ENERJ‹ TÜKET‹M‹ (90°C PROGRAMINDA)
ELEKTR‹K S‹GORTASI DE⁄ER‹ (A )
SANTR‹FÜJ DEVR‹ (d/d)
SU BASINCI
TEKN‹K VER‹LER
38
TR
● Adaptör prizleri veya çoklu prizler kullanmay›n.
● Aparat çocuk, ürünü kullanmay› bilmeyen veya kullanma
kapasitesi bulunmayan kifliler taraf›ndan kullanmamal›d›r. Yaln›zca
güvenliklerinden sorumlu olan kifliler taraf›ndan e¤itilir veya control
edilirlese kullanabilirler.
Çocuklara, aparat ile oynamalar›na izin verilmemelidir.
● Cihaz›n fiflini prizden çekmek için elektrik kablosunu veya
cihaz›n kendisini çekmeyin.
● Cihaz› ya¤mur, günefl v.s. gibi atmosferik etkilere maruz
b›rakmay›n.
● Cihaz›n yerinin de¤ifltirilmesi durumunda cihaz› kesinlikle
dü¤melerinden veya deterjan çekmecesinden tutarak kald›rmay›n.
● Cihaz›n nakliyesi esnas›nda cihaz›n kapa¤›n› tafl›ma arabas›n›n
üzerine dayamay›n.
Önemli Not !
Cihaz›n hal› kapl› bir zemin üzerine konulmufl olmas› durumunda,
cihaz›n alt›ndaki havaland›rma deliklerinin t›kanmamas›na özen
gösterilmelidir.
● Cihaz› flekilde gösterildi¤i gibi iki kifli birlikte kald›r›n.
● Cihaz›n ar›zalanmas› ve/veya düzgün çal›flmamas› durumunda,
çamafl›r makinesini kapat›n, su girifli muslu¤unu kapat›n ve cihaz›
kurcalamay›n. Cihaz›n tamir edilmesi için bir Hoover Yetkili
Servisimi aray›n ve orijinal Hoover yedek parçalar›n›n
kullan›lmas›n› talep edin. Bu standartlara uyulmamas› cihaz›n
güvenli¤inden ödün verilmesine neden olabilir.
● Cihaz›n elektrik kablosunun hasar görmesi durumunda bunu bir
yetkili servis merkezinden temin edilebilecek özel bir kablo ile
de¤ifltirilmesi gerekir.
/