Epson R800 User guide

Category
Photo printers
Type
User guide

This manual is also suitable for

Epson Stylus Photo R800
1/04 Epson Stylus Photo R800 - 1
Printer Parts User Replaceable Parts
Accessories
Ink Cartridges
Caution: To ensure good results, use genuine Epson ink cartridges
and do not refill them. Other products may cause damage to your
printer not covered by Epson’s warranty.
Paper support
and extension
Sheet feeder
Left edge
guide
Printer
cover
Output tray
extensions
Output tray
(in lower
position)
Output tray
(in upper position)
CD/DVD tray
Ink cartridge
holder (in home
position)
Control panel
Roll paper
edge guide
Roll paper holder IEEE 1394
(FireWire) port
USB
port
Paper support
(closed)
CD position
check disc
CD adapter ring
User replaceable part Reference number Part number
CD tray 12 1262744
CD adapter ring 8 1264619
CD dummy sheet 13 1236444
Roll paper holder (R) 11 1274012
Roll paper holder (L) 10 1274011
Cartridge Part number
Yellow T054420
Magenta T054320
Cyan T054220
Matte Black T054820
Photo Black T054120
Red T054720
Blue T054920
Gloss Optimizer T054020
Epson Stylus Photo R800
2 - Epson Stylus Photo R800 1/04
Epson Papers
* Availability of paper types varies by location. See page 11 or your
paper instructions to select the Type or Media Type setting. If you
load paper not listed as a setting in your printer software, you may
see smears, roller marks, misting, or other problems.
Printer Specifications
Printing
Printing method Advanced Micro Piezo pigment ink
technology, optimized for photo printing
Nozzle
configuration 1440 nozzles (180 × 8)
Electrical
* Check the label on the back of the printer for its voltage.
Environmental
* Stored in a shipping container
** Without condensation
Standards and Approvals
Paper name* Size Part number
Epson Premium
Bright White Paper
Letter (8.5 x 11 inches) S041586
Epson Photo Quality
Ink Jet Paper
Letter (8.5 x 11 inches) S041062
Legal (8.5 x 14 inches) S041067
A4 (8.3 x 11.7 inches) S041061
Epson Photo Quality
Ink Jet Cards
A6 (4.1 x 5.8 inches) S041054
Epson Photo Quality
Self Adhesive
Sheets
A4 (8.3 x 11.7 inches) S041106
Epson Enhanced
Matte Paper
Letter (8.5 x 11 inches) S041341
Epson Matte Paper
Heavyweight
Letter (8.5 x 11 inches) S041257
8 x 10 inches,
borderless
S041467
Epson Premium
Glossy Photo Paper
Letter (8.5 x 11 inches) S041286/S041667
4 x 6 inches, borderless S041727
5 x 7 inches, borderless S041464
8 x 10 inches,
borderless
S041465
4 inches x 26 ft roll
paper
S041302
8.3 inches x 32.8 ft roll
paper
S041376
Epson Premium
Semigloss Photo
Paper
Letter (8.5 x 11 inches) S041331
4 inches x 26 ft roll
paper
S041329
Epson Premium
Luster Photo Paper
Letter (8.5 x 11 inches) S041405
8.3 inches x 32.8 ft roll
paper
S041408
PremierArt Matte
Scrapbook Photo
Paper for Epson
Letter (8.5 x 11 inches) SCR1002
120 V Model 220-240 V Model
Input voltage range 99 to 132 V 198 to 264 V
Rated frequency range 50 to 60 Hz
Input frequency range 49.5 to 60.5 Hz
Rated current 0.5 A (Max. 0.8 A) 0.25 A (Max. 0.4 A)
Power consumption Approx. 20 W
(ISO10561 Letter
Pattern)
Approx. 2 W in
Sleep mode
Approx. 20 W
(ISO10561 Letter
Pattern)
Approx. 2.5 W in
Sleep mode
Temperature Operation:
50 to 95°F (10 to 35°C)
Storage:
–4 to 104°F (–20 to 40°C)
1 month at 104° (F40°C)
Transit*:
–4 to 140°F (–20 to 40°C)
120 hours at 140°F (60°C)
Humidity Operation:
20 to 80% RH
Storage:*
,
**
5 to 85% RH
Safety UL 1950
CSA C22.2 No.60950
EMC FCC Part 15 Subpart B Class B
CSA C108.8 Class B
Epson Stylus Photo R800
1/04 Epson Stylus Photo R800 - 3
Mechanical
Ink Cartridges
* Ink thaws and is usable after approximately 3 hours at
77°F (25°C).
Paper
See page 2 for a list of special paper distributed by Epson.
Caution: Poor quality paper may reduce print quality and cause
paper jams or other problems. If you encounter problems, switch to
a higher grade of paper.
Do not load curled or folded paper.
Use paper under normal conditions:
Temperature: 59 to 77 °F (15 to 25 °C)
Humidity: 40 to 60% RH
Epson Photo Quality Self-Adhesive Sheets should be stored under
the following conditions:
Temperature: 59 to 86 °F (15 to 30 °C)
Humidity: 20 to 60% RH
Paper sizes which can be used with this printer range from 3.5 × 5”
(89 × 127 mm) up to A4 (210 × 297 mm) or Legal
(8.5 × 14”
[216 × 356 mm])
size.
Paper path Sheet feeder, top entry
Sheet feeder
capacity
About 100 sheets at 24 lb (90 g/m²) paper
Dimensions Storage
Width: 19.5 inches (495 mm)
Depth: 12.0 inches (305 mm)
Height: 7.6 inches (193 mm)
Printing
Width: 19.5 inches (495 mm)
Depth: 25.6 inches (644 mm)
Height: 12.7 inches (322 mm)
Weight 17.6 lb (8.0 kg) without the ink cartridges
Color Yellow, Magenta, Cyan, Matte Black, Photo Black,
Red, Blue, Gloss Optimizer
Cartridge life Within 6 months of opening the package, at
77 °F (25 °C)
Temperature Storage:
–4 to 104 °F (–20 to 40 °C)
1 month at 104 °F (40 °C)
Transit:
–22 to 122 °F (–30 to 50 °C)
10 days at 122 °F (50 °C)
Freezing:*
3.2 °F (–16 °C)
Dimensions 0.5 inch (12.7 mm) [W] × 2.89 inch (73.5 mm) [D] ×
2.18 inch (55.3 mm) [H]
Single sheets
Size Letter (8.5 × 11 inches[216 × 279 mm])
Legal (8.5 × 14inches [216 × 356 mm])
A4 (210 × 297 mm)
3 × 3.5 inches (89 × 127 mm)
4 x 6 inches (113.6 × 175.4 mm)
5 × 7 inches (127 × 178 mm)
8 x 10 inches (203 × 254 mm)
Paper types Plain bond paper, special paper distributed by
Epson
Thickness
(plain bond paper)
0.003 to 0.005 inch (0.08 to 0.13 mm)
Weight
(plain bond paper)
17 lb (64 g/m²) to 24 lb (90 g/m²)
Envelopes
Size No. 10 (104.8 × 241 mm)
Paper types Plain bond paper
Thickness 0.016 to 0.02 inch (0.40 to 0.52 mm)
Weight 20 lb (75 g/m²) to 24 lb (90 g/m²)
Epson Stylus Photo R800
4 - Epson Stylus Photo R800 1/04
Printable area
Single sheets and index cards
Envelopes
Roll paper
CD/DVD
Caution: Do not set the inner diameter at 21 mm, although
Epson Print CD allows you to. Printing inside of 43 mm may
damage your CD/DVD drive.
Normal Borderless
(4
x 6, 5 x 7, 8 x 10, and
roll panorama only)
A: The minimum top margin is 0.12 inch (3.0 mm).
B-L: The minimum left margin is 0.12 inch (3.0 mm).
B-R: The minimum right margin is 0.12 inch (3.0 mm).
C: The minimum bottom margin is 0.12 inch (3.0 mm).
A: The minimum top margin is 0.12 inch (3.0 mm).
B-L: The minimum left margin is 0.12 inch (3.0 mm).
B-R: The minimum right margin is 0.12 inch (3.0 mm).
C: The minimum bottom margin is 0.78 inch (20 mm) for
Windows and Mac OS 8.6 to 9.X.
The minimum bottom margin is 0.12 inch (3.0 mm) for
Mac OS X.
A
C
B-L B-R
A
B-R
B-L
C
Standard margins
Pressing the z roll paper button after printing prints
the cutting guideline.
If you press the z roll paper button again and send
print data, the margin between the printouts is about
65 mm.
If you send a print job that has multiple pages, or
send print jobs continuously, there will be no margin
between the printouts.
Borderless
Pressing the z roll paper button after printing prints
the cutting guideline.
If you press the z roll paper button again and send
print data, the margin between the printouts is about
65 mm.
If you send a print job that has multiple pages, or
send print jobs continuously, there will be no margin
between the printouts.
12-cm CD/DVD 8-cm CD/DVD
Epson Stylus Photo R800
1/04 Epson Stylus Photo R800 - 5
Control Panel
To diagnose printer problems, check the printer’s lights
(see below) or run a printer check (see below).
Running a Printer Check
You can run a printer check to determine whether a problem
comes from the printer or some other source.
1. Turn off your printer and computer, then disconnect the
printer’s interface cable.
2. Load letter-size paper in the sheet feeder.
3. Hold down the ) paper button, then press and release the
P power button. Hold down the ) paper button until the
P power light flashes.
4. A test page prints the printer’s ROM version number and a
nozzle check pattern.
If the check page prints, the problem probably lies in
your software settings, interface cable, or computer, or
your software may not be installed correctly.
If the check page doesn’t print, you may have a problem
with your printer.
Try the suggestions in “Problems and Solutions” in the
User’s Guide.
5. Turn off the printer and connect the interface cable, then
turn on your printer and computer.
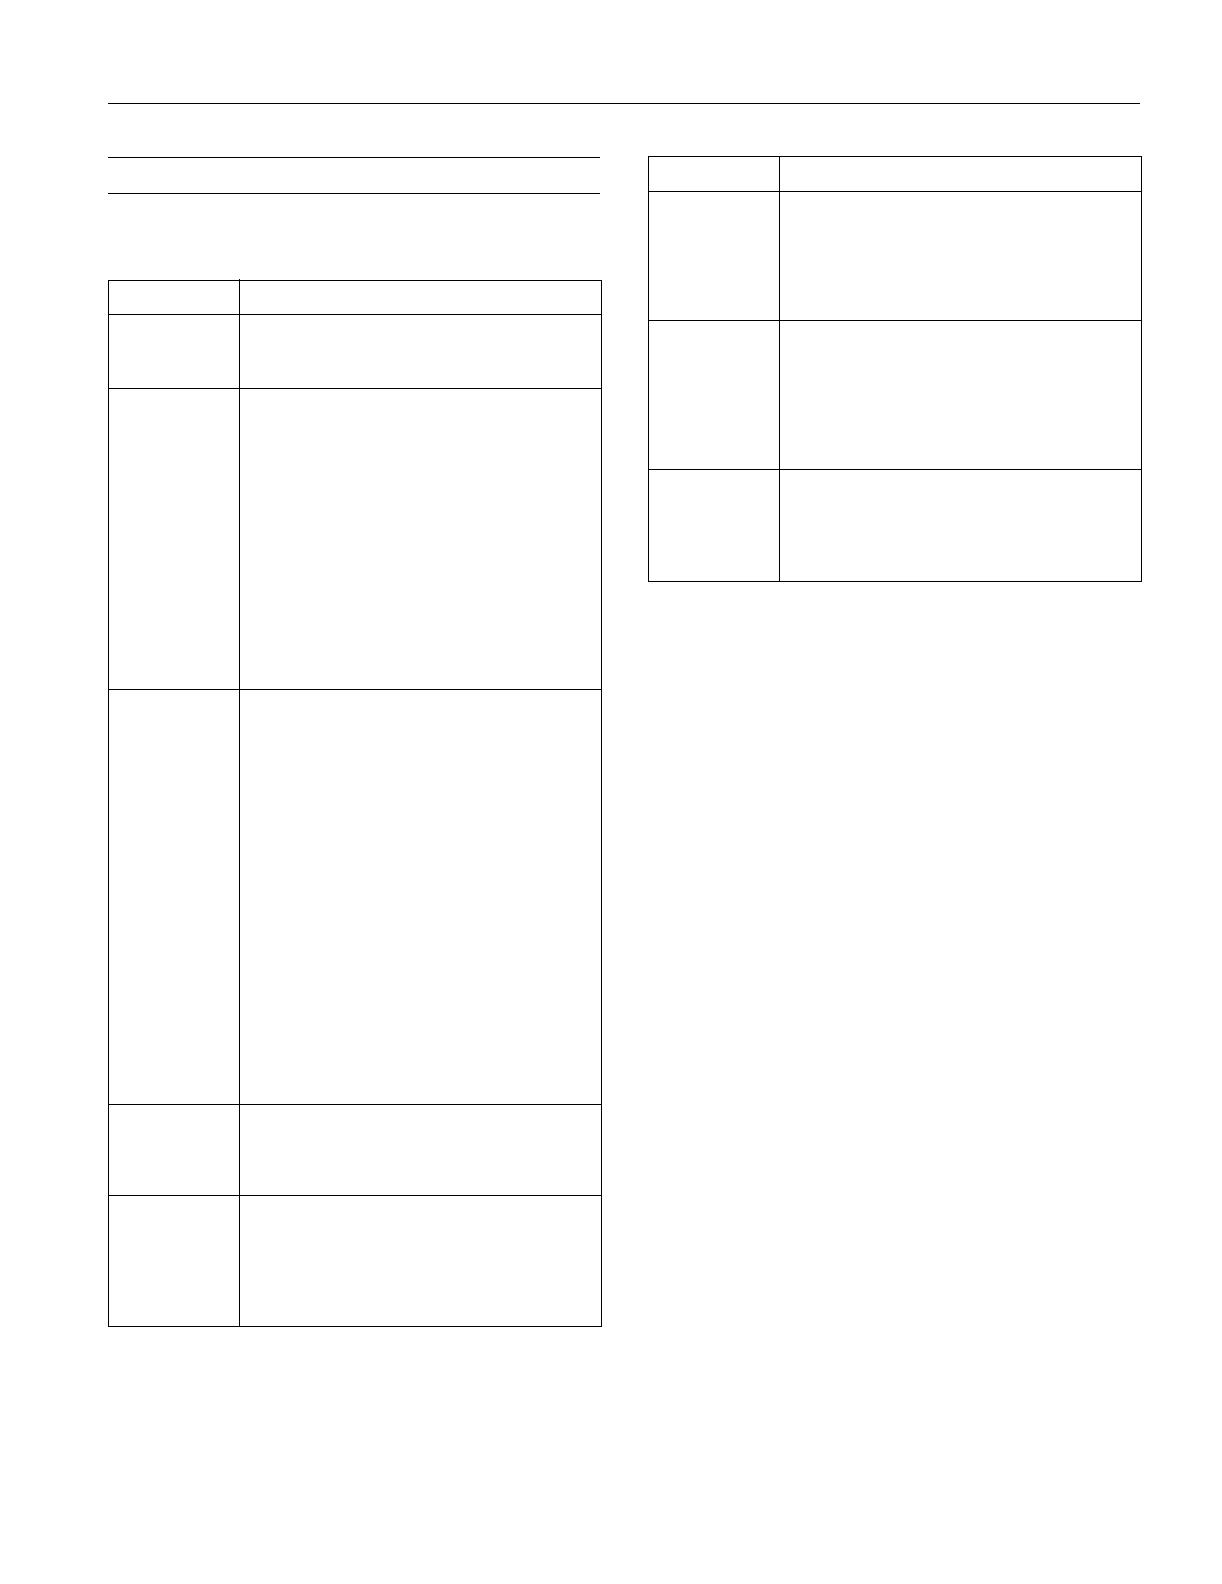
Lights Explanation
Green
P power
light flashes
The printer is receiving a print job, printing, replacing
an ink cartridge, charging ink, or cleaning the print
head.
Red
) paper
light on
Your paper ran out, multiple sheets fed, or the
wrong size sheet fed, or the CD/DVD tray is not
inserted completely or no CD/DVD is on the tray.
Sheet Feeder: If paper is out, load more paper and
press the
) paper button. If multiple sheets or the
wrong size sheet fed, press the
) paper button to
eject the paper, then turn your printer off and then
on. For loading instructions, see page 7.
Roll Paper: See page 8 for instructions on loading
or reloading roll paper.
CD/DVD: See page 10 for instructions on inserting
the CD/DVD tray correctly.
Red
) paper
light flashes
Jammed paper or the CD/DVD tray is blocking print
head movement, or you’re trying to print on paper or
a CD/DVD with the wrong media loaded.
If you suspect a paper jam, turn off the printer and
pull out the jammed paper. Open the cover and
remove any jammed or torn paper. Then do one of
the following:
Sheet Feeder: Turn on the printer, reload paper,
and press the
) paper button.
Roll Paper: Cut off the printed portion, then remove
the paper and reload it (see page 8).
CD/DVD: Gently pull out the CD/DVD tray and press
the
) paper button. See page 10 for instructions
on inserting the CD/DVD tray correctly.
If you suspect that you sent a print job to the wrong
paper path, load the correct paper or a CD/DVD.
Red
H ink light
flashes
An ink cartridge is low on ink.
Make sure you have a replacement cartridge, then
follow the steps on page 11 to install it.
Red
H ink light
on
An ink cartridge is out of ink, not installed, not
installed correctly, or is not compatible with the
printer.
Follow the steps on page 11 to install or reinstall the
cartridge correctly.
Green P power
light and red
) paper light
flash and red
H inklight
flashes rapidly
The printer cover is open while printing with plain
paper in Economy mode.
Close the printer cover.
Green
P power
light is off
and
red
) paper
light and red
H inklight flash
rapidly
Jammed paper or a foreign object is preventing the
print head from returning to home position.
Turn off the printer, open the printer cover, and
remove any jammed or torn paper, or foreign object.
Then turn the printer back on. If the error persists,
contact your dealer or Epson.
Green
P power
light, red
) paper light,
and red
H ink
light flash
An unknown printer error has occurred.
Turn off the printer, wait a few seconds, and turn it
on again. If the lights are still flashing, contact your
dealer or Epson.
Lights Explanation
Epson Stylus Photo R800
6 - Epson Stylus Photo R800 1/04
Installing the First Ink Cartridges
1. Open the output tray, pull out its extensions, and open the
printer cover.
2. Release and open the cartridge cover, then remove the
protective sheet inside.
3. Shake the ink cartridge packages 4 or 5 times before
opening them. (Don’t shake them after they’re unpacked.)
4. Remove the ink cartridges from their packages.
5. Slide each cartridge individually into its slot with the green
part facing the front.
Make sure the colors on the cartridges match the labels
inside the cartridge cover.
Then push each one down until it clicks into place.
6. Close the cartridge cover and press it down until it clicks
into place.
7. Close the printer cover, then press the H ink button.
8. The green P power and red H ink lights flash as your
printer charges ink for about 2 1/2 minutes.
Caution: Don’t turn off the printer or interrupt charging, or you’ll
waste ink. If the
P power and H ink lights don’t turn off after 5
minutes, and the printer isn’t making any noise, you can turn it off.
Don’t touch
the green part
Epson Stylus Photo R800
1/04 Epson Stylus Photo R800 - 7
Loading Paper
Follow these steps to load plain paper and certain special
papers in the sheet feeder:
1. Open the paper support and slide out its extension.
2. Make sure the output tray is in the lower position. If it isn’t,
lift the tray as shown below, then place one hand on the top
of the printer and ease the tray down into the lower
position.
3. Pull out the output tray extensions.
4. Place your paper in the printer on the right side of the sheet
feeder.
5. Adjust the left edge guide to fit lightly against the paper.
Check the following as you load paper:
Always load the short edge first, even for printing landscape-
oriented documents.
Load the printable side face up. It’s usually whiter or
brighter than the other side.
Load letterhead or preprinted paper into the printer top
edge first.
Don’t load paper above the arrow on the left edge guide.
Loading Special Paper
You can load the following number of sheets of Epson special
media:
If the special paper has a cut corner, load the paper so the cut
corner is positioned as shown here.
Check the paper package for additional handling instructions.
Paper type Loading capacity
Epson Enhanced Matte Paper
Epson Matte Paper Heavyweight
Epson Premium Glossy Photo Paper
Epson Premium Semigloss Photo Paper
Epson Premium Luster Photo Paper
20 sheets
Epson Photo Quality Ink Jet Paper 100 sheets
Epson Premium Bright White Paper 80 sheets
Epson Photo Quality Self Adhesive Sheets
PremierArt Matte Scrapbook Photo Paper
for Epson
1 sheet at a time
Epson Photo Quality Ink Jet Cards 50 sheets
Cut corner
Epson Stylus Photo R800
8 - Epson Stylus Photo R800 1/04
Loading Envelopes
You can load up to 10 envelopes at a time, as described below.
For best results, press each envelope flat before loading it, or
load one envelope at a time.
1. Open the paper support and slide out the support extension
2. Open the output tray and its extensions. Make sure the tray
is in the lower position.
3. Load envelopes short edge first as shown, with the flap side
down and the flap edge facing left.
4. Slide the left edge guide against the envelopes.
5. Choose these settings in your printer software:
Plain Paper as the Type (Windows) or Media Type
(Macintosh) setting
The envelope size as the Size (Windows) or Paper Size
(Macintosh) setting
Landscape as the Orientation setting
If printing is smeared on your envelope or on other thick
paper, select the
Thick paper and envelopes checkbox in
your printer software.
Loading Roll Paper
You can load 4-inch and 8.3-inch wide roll paper for printing
multiple photos or panoramics, with or without borders.
Its a good idea to check and make sure your ink cartridges are
not low before loading and printing on roll paper. If you need
to replace a cartridge with roll paper loaded, you should
remove the paper or marks may appear in your printout.
1. Turn on the printer and remove any paper loaded in the
sheet feeder at the top of the printer.
2. Open the output tray, but don’t pull out the extension. Also
make sure the tray is in the lower position.
3. Place the roll paper on the holders as shown, then remove
any tape and protective paper from the end of the roll.
4. Make sure the end of the paper is cut straight across, with
90° corners. If the end is cut diagonally, you may have
problems feeding the paper.
Epson Stylus Photo R800
1/04 Epson Stylus Photo R800 - 9
5. If the paper curls at the end, roll it backwards between a
folded sheet of paper to uncurl it.
Avoid touching the printable surface of the roll paper.
6. Insert the left roll paper holder with the orange triangle into
the far left slot, also marked with an orange triangle. Then
insert the other holder into the corresponding slot on the
right.
7. Load the paper part of the way into the roll paper feeder,
then slide the right roll paper edge guide to fit lightly
against the paper.
Caution: Don’t load roll paper into the sheet feeder at the top of
the printer.
8. Push the paper into the feeder as far as it will go; the printer
feeds the paper automatically.
9. To verify that the paper is loaded straight, open the printer
cover and look into the printer.
If the paper is crooked, press the z roll paper button for
three seconds to back the paper all the way out. Then turn
the roll paper holder knobs to roll up the paper. Press the
z roll paper button to clear the paper out error. Repeat
steps 7 through 9 to reload the paper.
Loading and Printing CDs and DVDs
Caution: Use only ink jet-printable CDs or DVDs for printing. Do not
use thermal-printable or regular CDs or DVDs.
Cleaning the Roller
Before you print on CDs or DVDs, you need to clean the
roller inside the printer. You can do this by feeding and
ejecting several sheets of plain paper.
1. Make sure the output tray is in the lower position. If it isn’t,
lift the tray as shown below, then place one hand on the top
of the printer and ease the tray down into the lower
position.
2. Pull out the output tray extensions.
3. Open the paper support and slide up the support extension.
4. Turn on the printer and load several sheets of letter-size
paper.
If crooked, press
z button for
three seconds
Epson Stylus Photo R800
10 - Epson Stylus Photo R800 1/04
5. Press the ) paper button to feed the paper.
6. Press the ) paper button again to eject the paper.
7. Repeat steps 5 and 6 several times to completely clean the
roller.
Inserting a CD or DVD
Make sure the data, music, or video is burned on your ink-jet
printable CDs or DVDs before you print. Otherwise, dirt or
scratches on the surface may cause errors when you burn the
data. If you plan to print large numbers of CDs or DVDs, it’s
a good idea to print a small sample, then wait a day and check
the quality to make sure it is satisfactory.
Caution: Use only ink jet-printable CDs or DVDs for printing. Do not
use thermal-printable or regular CDs or DVDs.
If you want to check the print position or color before
printing on your actual CD or DVD, see the instructions in
the User’s Guide.
1. Turn on the printer.
Caution: Before you insert a CD or DVD, make sure the printer is
turned on. Otherwise, the disc may not be positioned correctly.
2. Remove any paper from the sheet feeder, then push in the
paper support extension and close the paper support.
3. Push in the output tray extensions, but leave the tray open.
4. Lift the output tray as shown below, then place one hand on
the top of the printer and pull up on the output tray until it
stops. Lay the tray down in the upper position.
5. Place the CD or DVD on the CD tray with the white or
printable side face-up.
To print on a small CD (8 cm), place the small CD ring on
the tray first, then place the CD inside the ring.
Caution: Make sure you always use the small CD ring when
printing 8-cm CDs and that the CD and ring lay flat on the tray;
otherwise the printer may be damaged.
6. Slide the tray into the tray guides in the output tray. Push in
the guide until the arrows on the tray and the tray guide are
next to each other, as shown below.
7. Press the ) paper button to load the CD or DVD into
printing position. It is loaded when the P power button
stops flashing.
8. Follow the instructions in the User’s Guide to design and
print the CD or DVD using Epson Print CD.
Always use this
piece with 8-cm
CDs
Push in only until the
arrows are next to
each other
Epson Stylus Photo R800
1/04 Epson Stylus Photo R800 - 11
Selecting the Media Type Setting
Select the correct Type or Media Type setting so your printer
knows what kind of paper you’re using and adjusts the ink
coverage accordingly.
Printing Borderless Cut Sheets
You can print your photos with no margins, extending the
image all the way to the edges of the page. Although borderless
printing is a bit slower, you get beautiful portraits and
enlargements, without trimming, on the papers and sizes listed
below. See the User’s Guide for details.
Cleaning the Print Head
If your printouts are unexpectedly light, or dots or lines are
missing, you may need to clean the print head. This unclogs
the nozzles so they can deliver ink properly. Print head
cleaning uses ink, so clean it only if quality declines.
Caution: When you don’t turn on your printer for a long time, print
quality can decline, so turn it on at least once a month to maintain
good print quality.
This section explains how to clean the print head using the
Auto Nozzle Check and Cleaning utility and the Head
Cleaning utility.
You can also clean the print head by holding down the H ink
button on the printer for three seconds (when the red H ink
light is off).
Automatically Checking and Cleaning the
Print Head
The Auto Nozzle Check and Cleaning utility prints a nozzle
check pattern that the printer then reads to see if you have any
clogged nozzles. If cleaning is needed, the printer
automatically cleans the print head.
1. Make sure the printer is turned on but not printing, and the
red
H ink light is off. (If the H ink light is flashing or on, you
need to replace a cartridge; see page 11.)
2. Load several sheets of plain, letter-size paper in the printer’s
sheet feeder.
3. Do one of the following:
Windows: Right-click the icon on your taskbar (in the
lower right corner of your screen). Select
Auto Head
Cleaning
.
Mac OS X: Open the
Applications folder and select
EPSON Printer Utility. Select SP R800, click OK, and
select
Auto Nozzle Check and Cleaning.
Mac OS 8.6 to 9.x: Choose
File > Page Setup or Print.
Click the utility icon, then click
Auto Nozzle Check
and Cleaning
.
Paper or other media loaded Type or Media Type setting
Plain paper sheets
Envelopes
Epson Premium Bright White Paper
Plain Paper
Epson Photo Quality Ink Jet Paper
Epson Photo Quality Ink Jet Cards
Epson Photo Quality Self Adhesive
Sheets
Photo Quality Ink Jet Paper
Epson Enhanced Matte Paper Enhanced Matte Paper
Epson Matte Paper Heavyweight
PremierArt Matte Scrapbook Photo
Paper for Epson
Matte Paper - Heavyweight
Epson Premium Glossy Photo Paper Premium Glossy Photo Paper
Epson Premium Luster Photo Paper Premium Luster Photo Paper
Epson Premium Semigloss Photo
Paper
Premium Semigloss Photo
Paper
Ink-jet printable CDs or DVDs CD/DVD
Ink-jet printable CDs or DVDs with a
premium surface
CD/DVD Premium Surface
Paper name Sizes Media Type setting
Premium Glossy Photo
Paper
4 × 6, 5 × 7,
8 × 10
Premium Glossy Photo
Paper
Matte Paper
Heavyweight
8 × 10 Matte Paper -
Heavyweight
Epson Stylus Photo R800
12 - Epson Stylus Photo R800 1/04
4. Follow the instructions on the screen. The printer prints
and examines the nozzle check pattern shown below. If
cleaning is necessary, it then cleans the print head and prints
and checks another nozzle check pattern.
5. The utility prints and checks up to five times. If some print
head nozzles are still clogged, it displays an on-screen
message telling you to manually clean the print head.
Follow the instructions below to clean the print head using
the Head Cleaning utility, if necessary.
If you still have print quality problems, check the solutions in
the User’s Guide. You can also turn the printer off and wait
overnight—this allows any dried ink to soften—and then try
cleaning the print head again.
Running the Head Cleaning Utility
1. Make sure the printer is turned on but not printing, and the
red
H ink light is off. (If the H ink light is flashing or on, you
need to replace a cartridge; see page 11.)
2. Do one of the following:
Windows: Right-click the icon on your taskbar (in the
lower right corner of your screen). Select
Head Cleaning.
Mac OS X: Open the
Applications folder and select
EPSON Printer Utility. Select SP R800 in the printer list,
click
OK, and select Head Cleaning.
Mac OS 8.6 to 9.x: Choose
File > Page Setup or Print.
Click the utility icon, then click
Head Cleaning.
3. Follow the instructions on the screen to clean the print
head.
Cleaning takes about two minutes, during which the printer
makes noise and the green P power light flashes.
Caution: Never turn off the printer while the green P power light
is flashing, unless the printer hasn’t moved or made noise for more
than 5 minutes.
4. When the green P power light stops flashing, make sure
paper is loaded in the printer. Click
Print nozzle check
pattern
, then click Print (Windows) or click
Confirmation, then click Next (Macintosh). The nozzle
check pattern prints.
5. If the nozzle check pattern has no gaps or lines (as shown
below), click
Finish.
If the pattern has white lines or gaps (as shown below), click
Clean to clean the print head again.
If you don’t see any improvement after cleaning three or four
times, check the solutions in the User’s Guide. You can also
turn the printer off and wait overnight—this allows any dried
ink to soften—and then clean the print head again.
Epson Stylus Photo R800
1/04 Epson Stylus Photo R800 - 13
Replacing an Ink Cartridge
When the red H ink light flashes, an ink cartridge is low on
ink.
When the red H ink light stays on, you need to replace a
cartridge.
When a cartridge is more than six months old, you may need
to replace it if printouts don’t look their best. If the quality
doesn’t improve after cleaning and aligning the print head,
you can replace the cartridge even if the red H ink light is off.
Caution: Don’t open Epson Status Monitor or respond to any
on-screen, low ink messages when your printer is in the middle
of a print job. This may cause your printer to pause and leave an
uneven surface on your printout. If your ink is running low, wait
until printing finishes before checking ink levels or attempting to
replace a cartridge. If you must replace an ink cartridge in the
middle of a print job, the quality of your printout may decline.
For best results, check your ink levels and replace ink cartridges,
if necessary, before printing.
Checking the Ink Supply
To check your ink supply, do one of the following:
Windows: Double-click the icon on the Windows
taskbar. You see a window like this:
Macintosh:
OS X: Choose
Applications > EPSON Printer Utility >
SP R800 > EPSON StatusMonitor
.
OS 8.6 to 9.x: Choose
File > Print, then click the ink
icon.
You see a window like the one shown below. Click a
cartridge image to display information about the cartridge.
Purchasing Ink Cartridges
Use these Epson ink cartridges within six months of installing
them and before the expiration date on the package:
Caution: To ensure good results, use genuine Epson ink cartridges
and do not refill them. Other products may cause damage to your
printer not covered by Epson’s warranty.
Ink Cartridge Precautions
WARNING: Keep ink cartridges out of the reach of children.
If ink gets on your hands, wash them thoroughly with soap and
water. If ink gets in your eyes, flush them thoroughly with water.
Caution: To avoid damaging the printer, never move the print head
by hand.
You cannot print if an ink cartridge is empty. Leave the empty
cartridge installed in the printer until you have obtained a
replacement. Otherwise the ink remaining in the print head nozzles
may dry out.
Red ink light
Cartridge Part number
Yellow T054420
Magenta T054320
Cyan T054220
Matte Black T054820
Photo Black T054120
Red T054720
Blue T054920
Gloss Optimizer (2-pack) T054020
Epson Stylus Photo R800
14 - Epson Stylus Photo R800 1/04
Removing and Installing Ink Cartridges
Be sure you have a new ink cartridge before you begin. Once
you start replacing a cartridge, you must complete all the steps
in one session.
You can replace a cartridge whether the red H ink light is off,
flashing, or on.
1. Make sure the printer is turned on (the green P power light
should be on, but not flashing). Then open the printer
cover.
2. Press the H ink button.
The print head moves and the green P power light flashes.
3. If the red H ink light is off, the print head moves to the
replacement position. Go to step 5.
If the red H ink light is flashing or on (indicated a low or
empty cartridge), the print head moves to the _ position on
the printer. The cartridge directly beneath the _ mark
needs to be replaced. Make a note of which cartridge it is.
4. Press the H button again. If another cartridge is low or
empty, the print head moves it to the _ mark again. Make a
note of this cartridge too and repeat this step.
If no other cartridges are low or empty, the print head
moves to the replacement position when you press the
H button.
5. Lift up the cartridge cover.
6. Press in the tab on the back of the cartridge, lift it out of the
printer, and dispose of it carefully.
7. Shake the new cartridge four or five times before opening its
package. (Don’t shake it after it’s unwrapped.)
8. Remove the new cartridge from its package.
Caution: Don’t touch the green circuit board on the front of the
cartridge; you may inhibit normal operation and printing.
9. Slide the new cartridge into its slot. The side with the green
circuit board goes in the front of the slot.
10. Press the cartridge down until it clicks into place.
11. If you need to replace any other ink cartridges, repeat
steps 6 through 10 before continuing with step 12.
12. Close the cartridge cover, then close the printer cover.
Epson Stylus Photo R800
1/04 Epson Stylus Photo R800 - 15
13. Press the H ink button. The printer begins charging the ink
delivery system.
The green P power light and red H ink lights flash and the
printer makes noise. Charging takes about 90 seconds.
When it’s finished, the green P power light stops flashing
and stays on, and the red H ink light goes out.
Caution: Never turn off the printer while the green P power light
is flashing, unless the printer hasn’t moved or made noise for more
than 5 minutes.
Aligning the Print Head
If your printouts contain misaligned vertical lines, or you see
light or dark horizontal banding, you may need to align the
print head. You can have the printer automatically check and
align the print head or you can check and adjust the alignment
yourself.
Automatically Aligning the Print Head
1. Turn on the printer.
2. Load plain, letter-size paper.
3. Do one of the following:
Windows: Right-click the icon on your taskbar (in the
lower right corner of your screen). Select
Print Head
Alignment
.
Mac OS X: Open the
Applications folder and select
EPSON Printer Utility. Select SP R800 in the printer list,
click
OK, and select Print Head Alignment.
Mac OS 8.6 to 9.x: Choose
File > Page Setup or Print.
Click the utility icon, then select
Print Head
Alignment
.
You see a screen like this:
4. Click the
Automatic button, if necessary, then click OK.
5. On the next screen, click
Start. The printer then prints and
checks an alignment pattern. It then prints and checks two
more patterns.
6. When alignment is finished, click
Finish on the last screen.
Manually Aligning the Print Head
1. Turn on the printer.
2. Load plain, letter-size paper.
3. Do one of the following:
Windows: Right-click the icon on your taskbar (in the
lower right corner of your screen). Select
Print Head
Alignment
.
Mac OS X: Open the
Applications folder and select
EPSON Printer Utility. Select SP R800 in the printer list,
click
OK, and select Print Head Alignment.
Mac OS 8.6 to 9.x: Choose
File > Page Setup or Print.
Click the utility icon, then select
Print Head
Alignment
.
4. Click the
Manual button, then click OK.
You see a screen like this as the printer prints an alignment
check pattern:
5. On the check page, select the box in each pattern that has
the least noticeable lines in it. You may need to use a
magnifying glass or loupe.
Select one box each for pattern numbered 1 through 3.
Then enter the box number for each pattern in the boxes on
the screen.
If box #5 is not the best-aligned box in each pattern, click
Realignment to print another test page and repeat this
step.
6. When box #5 is the best-aligned in all the patterns, click
Finish.
Epson Stylus Photo R800
16 - Epson Stylus Photo R800 1/04
Cleaning the Printer
To keep your printer working at its best, you should clean it
several times a year.
1. Turn off the printer, unplug the power cord, and
disconnect the interface cable.
2. Remove all the paper, then use a soft brush to clean the
paper feeders.
3. Clean the exterior of the printer with a soft, damp cloth.
Keep the paper support and printer cover closed as you
clean the printer.
4. If you need to clean ink out of the inside of the printer, use
a soft cloth to clean only the black plastic area shown below:
WARNING: Don’t touch the gears or rollers inside the printer.
Caution: Never use a hard or abrasive brush, or benzine, alcohol, or
thinner for cleaning; they can damage the printer components and
case.
Don’t get water on the printer components and don’t spray or apply
lubricants or oils inside the printer.
Transporting the Printer
If you move your printer some distance, you need to prepare it
for transportation in its original box or a similar one. Follow
these steps:
1. If your printer will be transported and set up again within
5 days, you need to remove the ink cartridges. Follow the
steps on page 14 to remove all of the cartridges. Pack each
cartridge separately in a sealable plastic bag. Close the
cartridge cover and press the H ink button. The red H ink
light comes on. Wait until the ink cartridge holder locks in
the far right position
If your printer will be packed longer that 5 days, leave in the
ink cartridges. Go to step 2.
2. Turn off the printer and unplug the power cord from the
electrical outlet. Then disconnect the printer cable from the
printer.
3. Open the printer cover and tape the ink cartridge holder to
the printer case using packing tape. Then close the printer
cover.
Caution: Be sure to remove the tape after installing the printer in
its new location.
4. Close the output tray and the paper support.
5. Repack the printer and its attachments in the original box
using the protective materials that came with them.
6. Keep the printer level as you transport it.
7. After transporting the printer, remove all the tape and
packing materials.
8. If you removed your ink cartridges, replace them as soon as
possible, as described on page 6. Then clean the print head
(see page 11) and let the printer sit for 24 hours to soften
any dried ink in the print head.
9. Test your printer. If you notice a decline in print quality,
clean the print head (see page 11); if output is misaligned,
align the print head (see page 15).
Related Documentation
Epson Stylus Photo R800 Start Here sheet CPD-17408
Epson Stylus Photo R800 User’s Guide CPD-17409
Epson Stylus Photo R800 CD-ROM CPD-17410
Epson Stylus Photo R800 Reference Guide
(on CD-ROM)
Clean here
only
Tape the ink
cartridge holder to
the printer case
  • Page 1 1
  • Page 2 2
  • Page 3 3
  • Page 4 4
  • Page 5 5
  • Page 6 6
  • Page 7 7
  • Page 8 8
  • Page 9 9
  • Page 10 10
  • Page 11 11
  • Page 12 12
  • Page 13 13
  • Page 14 14
  • Page 15 15
  • Page 16 16

Epson R800 User guide

Category
Photo printers
Type
User guide
This manual is also suitable for

Ask a question and I''ll find the answer in the document

Finding information in a document is now easier with AI