Page is loading ...

Converto
Shower Unit
INSTALLATION INSTRUCTIONS
P 847•244•1234 www.barclayproducts.com
12/4/07
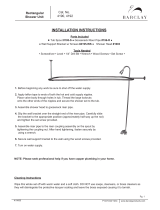
Package Contains: Tub Spout #185-S
Gooseneck Riser Pipe #185-R
Wall Support Bracket w/ Screws #185-WS
Shower Head #1003
1. Before beginning any work be sure to shut off the water supply.
2. Remove your present tub spout by using an open end wrench and turning counter-clockwise. You will see a
pipe protruding from the wall which is either half inch or three quarter inch. If it is a half inch
pipe then installation will require the use of the 3/4” X 1/2” face bushing that is already attached to the spout.
If the pipe is three quarter inch, then the face bushing should be removed from the spout.
3. Thread the new tub spout on the pipe. Turn clockwise as far as you can by hand. Then carefully use a
wrench and turn once more. Be sure to pad the chrome before using the wrench to prevent damage to the
finish. NOTE: It might be desirable to shorten the pipe nipple protruding from the wall so the
new spout is flush to the wall.
4. Assemble shower head to gooseneck riser pipe.
5. Slip the wall bracket over the straight end of the riser pipe. Carefully slide the bracket to the appropriate
position (approximately half-way up the rod) and tighten the set screw provided.
6. Assemble riser pipe to the riser coupling assembly on the spout by tightening the coupling nut. After hand
tightening, fasten securely by using a wrench.
7. Secure wall support bracket to the wall using the wood screws provided.
8. Turn on water supply.
Tools Needed
• Phillips Screwdriver • Level • 1/4” Drill Bit •
• Wrench • Wood Screws • Set Screw •
Cat. No.
4185
/
