Page is loading ...

INSULATION TESTER
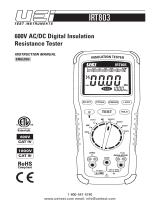
IT365
Instruction Manual

Contents
P. 1
1. Safety Information
2. Description of the Instrument
2.1. Front and Rear
2.2. Rotary Switch
2.3. Button and Indicators
2.4. LCD Display
3. Specifications
4. Making Measurements
4.1. Measuring Volts
4.2. Measuring Ohms / Continuity
4.3. Measuring Low Resistance
4.4.Measuring Insulation Resistance
4.5. Measuring PI / DAR
5. Testing Fuse
6. Replacing Batteries & Fuse
7. Maintenance & Cleaning
....................................................... 2 - 4
............................................................. 5
.............................................................. 6
................................................ 7 - 8
................................................................. 9
......................................................... 10 - 13
.......................................................... 14
.......................................... 14
............................................. 15
....................................... 16
...................................................... 17
................................................................. 18
............................................... 19
.................................................. 20

1. Safety Information
P. 2
• Read all safety information carefully before attempting to operate or service
the meter.
• Do not use the Tester around explosive gas, vapor, or in damp or wet
environments.
• Keep ngers behind the nger guards on the probes.
• The circuit under test must be de-energized and isolated before connections
are made except for voltage measurement.
• Circuit connections must not be touched during a test.
• After insulation test, capacitive circuits must be allowed to discharge before
disconnecting the test leads.
• To avoid damage to the instrument, do not apply signals which exceed the
maximum limits shown in the technical specication tables.
• Do not use the meter or test leads if they look damaged. Use extreme caution
when working around bare conductors or bus bars.
• Use the meter only as specied in this manual; otherwise, the protection
provided by the meter may be impaired.
• Caution when working with voltages above 30 Vac rms, 42 Vac peak, or 60 Vdc.
Such voltages pose a shock hazard.
• Before taking resistance measurements or testing continuity, disconnect the
main power supply and all loads from the circuit.
• Remove all probes, test leads, and accessories before the battery door is
opened.
• Replace the batteries when the low battery indicator shows to prevent
incorrect measurements. False readings can lead to electric shock and injury.
• Replace all batteries with fresh batteries of the same manufacturer and type to
prevent battery leakage.
• Remove the batteries if the Tester is not used for an extended period of time,
or if stored in temperatures above 50 °C. If the batteries are not removed,
battery leakage may result.

• Disconnect the test leads from the test points before changing the position
of the function rotary switch.
• Never connect a source of voltage with the function rotary switch in Ω, LoΩ,
50V, 100V, 250V, 500V, 1000V position.
1. Safety Information
P. 3
CAUTION!
• Installation categories CAT IV 600 V
• Pollution degree 2
• Altitude up to 2000 meters
• Indoors use only
• Relatively humidity 80% max. (Noncondensing)
• Operation temperature 040°C
Environment conditions:
Symbols:
Symbol Description
WARNING. RISK OF DANGER. Attention refer to operation
Instructions.
WARNING. HAZARDOUS VOLTAGE. Risk of electric shock
Double Insulated
Fuse
Battery
Earth

1. Safety Information
P. 4
Symbol Description
WARNING. Do not use in distribution systems with
voltages > 660 V.
Conform to European Union directives.
Do not discard this product or throw away.
Measurement Category IV is applicable to test and measuring
circuits connected at the source of the building’s low-voltage
MAINS installation.
Hazardous voltage warning:
When the Tester detects a voltage > 30 V in insulation test, > 2 V in Low Ω, or a
voltage >30V during voltage measurement function, the red LED will be on
and the symbol on LCD will display.

P. 5
2.1. Front and Rear:
2. Description of the Instrument
LCD display
TEST button
Warring light
PI / DAR function select button
Blue button
Backlight button
LOCK button
1
2
3
4
5
6
7
Measurement function
selection switch
COM input terminal
Positive input terminal
Battery cabinet
Foldable stand
Holster
8
9
10
11
12
13

2. Description of the Instrument
P. 6
2.2. Rotary Switch:
Rotary switch selections:
Switch Position Measurement Function
Measuring low resistance from 0.01 to 60.0Ω
(Open voltage ≥ 4V, short current ≥ 200mA)
Measuring resistance or continuity
Measuring AC or DC voltage
Turn o the tester
Perform insulation tests with 50, 100, 250, 500, 1000 V
test voltage.

2. Description of the Instrument
P. 7
2.3. Button and Indicators:
Button / Indicator Description
Cong the Tester for a polarization index or dielectric
absorption ratio test.
Press the blue button to select alternate measurement
functions.
(1) Initiate an insulation test when the rotary switch is in
INSULATION( ) position. Causes the Tester to source
(output) a high voltage and measure insulation resistance.
(2) Initiate a resistance test when the rotary switch is in the
LoΩ position.

2. Description of the Instrument
P. 8
Button / Indicator Description
Backlight ON/OFF
(1)To turn on Backlight:
Press Backlight button once to turn on the Backlight. And it
will automatically turn o after 30 seconds.
Press and hold Backlight button for 2 seconds and it will
sound “beep” to keep “Backlight always ON” until Auto
power o.
(2)To turn o Backlight:
Press Backlight button once to turn o Backlight when it is
under “Backlight always ON” or “Backlight ON”.
Test lock. When pressed before the button, the
test remains active until you press the lock or test button
again to release the lock.
Hazardous voltage warning LED will be on when:
(1) > 2V or > 30 V (ac or dc depending on the rotary switch
position) is detected on the input.
(2) Insulation test is active.
(3) The “ ” symbol appears on the display

2. Description of the Instrument
P. 9
Symbol Description
Battery indication. The “ ” symbol appears when low battery.
Auto Power OFF indication.
Polarization index or dielectric absorption ratio test is selected.
Lo Ω lead zero is active.
Alternative or Direct source indication
Unsafe voltage warning.
Continuity measurement.
Greater than symbol.
Minus symbol
Measuring unit indication
Insulation test or LoΩ resistance measurement indicator.
Appears when test voltage is present.
Indicate an insulation or LoΩ resistance test is locked on.
Primary display
Secondary display
2.4. LCD Display:

3. Specifications
P.10
Auto power off: Approx. 10 minutes.
The 10-minute timer is disabled during any insulation resistance or Low
resistance measurement.
Battery life:
Insulation test use: Tester can perform at least 1200 insulation tests with fresh
alkaline batteries at room temperature. Test conditions are 1000 V into 1 MΩ
with a duty cycle of 5 seconds on and 25 seconds o.
LoΩ Resistance Measurements: Tester can perform at least 2600 LoΩ resistance
measurements with fresh alkaline batteries at room temperature. Test
conditions are 1 Ω with a duty cycle of 5 seconds on and 25 seconds o.
Accessories:
Test lead, large jaw alligator clips, batteries, holster, carrying case, instruction
manual.
Operating temperature and Humidity:
0°C to 40°C (32°F to 104°F), below 80% RH
Storage temperature: -10°C to 60°C (14°F to 140°F), below 80% RH
Batteries: Size AA batteries (IEC LR6) X 4pcs
Dimension: 206(L) x 90(W) x 51(H) mm
Weight: Approx. 510g (With holster and battery)
Approvals: EN61010 600V CAT IV
Low battery indication:
The symbol “ ” and message “ ” will be shown when the batteries need
to be replaced.

3. Specifications
P.11
Range Resolution Accuracy
60.00V
600.00V
0.01V
0.1V ±2%rdg+5dgts(45~500Hz)
Protection
600Vrms
AC voltage:
Range Resolution Accuracy
60.00V
600.00V
0.01V
0.1V ±2%rdg+5dgts
Protection
600Vrms
DC voltage:
Range Resolution Accuracy
600.0Ω 0.1Ω < 4Ω (ON)
> 14Ω (OFF)
Protection
600Vrms
Continuity:
Range Resolution Accuracy
600.0Ω
6.000KΩ
60.00KΩ
600.0KΩ
0.1Ω
0.001KΩ
0.01KΩ
0.1KΩ
2%rdg+5dgts
Protection
600Vrms
Resistance:
Note: When measured resistance between 4Ω to 14Ω the buzzer maybe sound
or o either.

3. Specifications
P.12
Range Resolution Accuracy
6.00Ω
60.0Ω
0.01Ω
0.1Ω 2%rdg+3dgts
LoΩ:
Test Voltage Range Accuracy
50V 300KΩ / 3.00MΩ / 30.0MΩ
300MΩ / 1.00GΩ
±(3%rdg+5dgts)
(30KΩ~1.00GΩ)
100V 600KΩ / 6.00MΩ / 60.0MΩ
600MΩ / 2.00GΩ
±(3%rdg+5dgts)
(60KΩ~2.00GΩ)
250V 1.50MΩ / 15.0MΩ / 150MΩ / 1.50GΩ
5.0GΩ
±(3%rdg+5dgts)
(0.15KΩ~1.50GΩ)
±(10%rdg+3dgts)
500V 3.00MΩ / 30.0MΩ / 300MΩ / 3.00GΩ
10.0GΩ
±(3%rdg+5dgts)
(0.30MΩ~3.00GΩ)
±(10%rdg+3dgts)
1000V 6.00MΩ / 60.0MΩ / 600MΩ / 6.00GΩ
20.0GΩ
±(3%rdg+5dgts)
(0.60MΩ~6.00GΩ)
±(10%rdg+3dgts)
Insulation resistance measurement:
Open circuit test voltage: > 4.0V, < 8V
Short circuit current : > 200.0mA
Live circuit detection: Inhibit test if terminal voltage > 2V prior to initialization
of test.

3. Specifications
P.13
Test voltage accuracy: 0% to +20%
Test voltage vs. Maximum resistance range:
50V/1.00GΩ, 100V/2.00GΩ, 250V/5.0Ω, 500V/10.0GΩ and 1000V/20.0GΩ.
Test voltage vs. Minimum resistance (with test current=1mA):
50V/50KΩ, 100V/100KΩ, 250V/250KΩ, 500V/500KΩ and 1000V/1MΩ.
Short circuit test current: 1mA(nominal)
Live circuit detection: Inhibit test if terminal voltage > 30 V prior to initialization
of test

4. Making Measurements
P.14
4.1. Measuring Volts:
Press the blue button to
switch ACV or DCV
measurement.
4.2. Measuring Ohms / Continuity:
Press the blue button to
select the measuring function.
Fig.1
Fig. 2

4. Making Measurements
P.15
4.3. Measuring Low Resistance:
The circuit under test must be completely de-energized.
Check the fuse before testing. See Testing the fuse section later in this manual.
Connecting the tester to an energized circuit while the test is active will blow
the fuse.
If you press button to enter the Lock
Mode, and then press button to start
the test. The“ ” symbol appears on
the LCD display and the test voltage will
continue to be applied until the or
button is pressed again.
When resistance is higher than the
maximum measuring range, the Tester
displays the “ ” symbol and the
maximum resistance for the range.
1. Short the end of probes together and press the blue button to
compensate the probe resistance for 2Ω, the “ ” symbol will be
displayed when the compensating is nished. The range of compensation
needs to be less than 2Ω. The value of compensation will be kept next time
you use this function.
2. Connect the probes to the circuit to be measured. The Tester automatically
detects if the circuit is energized. If the detected voltage is above 2V, " > 2V "
and “ ” will appear on the LCD display. In this condition, the test is
inhibited. Disconnect the Tester and remove power before proceeding.
3. Push and hold button to start the test. The “ ” symbol appears on
the LCD display until you release the button. The resistance reading
appears on the primary display until a new test is started or a dierent
function or range is selected. If it beeps 4 times, means the tester has not
nished the terminal voltage test. You need to start the test again.
Fig.3

Fig. 4
4. Making Measurements
P.16
4.4. Measuring Insulation Resistance:
The circuit under test must be completely de-energized before testing.
1. Turn the rotary switch to the desired test voltage.
2. Connect the probes to the circuit to be measured. The Tester automatically
detects if the circuit is energized. If the detected voltage is above 30V, " >
30V " and “ ” will appear on the LCD display. In this condition, the test is
inhibited. Disconnect the Tester and remove power before proceeding.
3. Push and hold button to start the test. The “ ” symbol appears on
the LCD display until you release the button. The resistance reading
appears on the primary display until a new test is started or a dierent
function or range is selected. The secondary display shows the test voltage
applied to circuit under test. If it beeps 4 times, means the tester has not
nished the terminal voltage test. You need to start the test again.
If you press button to enter the Lock mode, before pressing button
to start the test. The“ ” symbol appears on the LCD display and the test
voltage will be continuously applied and the voltage be shown on secondary
display until another or button is pressed.

4. Making Measurements
P.17
4.5. Measuring PI / DAR:
Polarization Index (PI) is the ratio of the 10-minute insulation resistance to the
1 -minute insulation resistance.
Dielectric Absorption Ratio (DAR) is the ratio of the 1-minute insulation
resistance to the 30 second insulation resistance.
1. Turn the rotary switch to the desired test voltage.
2. Press the button to select polarization index or dielectric absorption
ratio.
3. Press button to start the test. During testing, the primary display
shows the measured resistance and the secondary display shows the test
voltage applied to the circuit under test.
When the test is completed, the PI or DAR value is displayed on the primary
display. If either value used to calculate PI or DAR was greater than the
maximum measuring range, the primary display will show “ Err ” for PI or DAR
value.
Because of the time required to perform the PI and DAR tests, use of test clips
is recommended.
To interrupt a PI or DAR test before it is completed, momentarily press .

5. Testing Fuse
P.18
Warring!
To avoid electrical shock or injury, remove the test leads and any input signals
before replacing the fuse.
1. Turn the rotary switch to the position.
2. Press and hold . If the display reading is “ ”, the fuse is bad and
should be replaced.
Fig. 5

6. Replacing Batteries & Fuse
P.19
Fuse rating: Fast 315mA, 1000V, Min Interrupt Rating 10000 A
Battery: 1.5 V AA alkaline (NEDA 15A, IEC LR6) x 4 pcs
Warring!
To avoid shock, injury, or damage to the Tester:
• To avoid false readings, which could lead to possible electric shock or
personal injury, replace the batteries as soon as the battery indicator
“ ”appears.
• Use ONLY fuses with the amperage, interrupt, voltage, and speed ratings
specied.
• Turn the rotary switch to OFF and remove the test leads from the terminals.
Fig. 6
/