86722

SkyScan 86722 User manual

  • Hello! I am an AI chatbot trained to assist you with the SkyScan 86722 User manual. I’ve already reviewed the document and can help you find the information you need or explain it in simple terms. Just ask your questions, and providing more details will help me assist you more effectively!
SKYSCAN
86722 ATOMIC CLOCK
WITH OUTDOOR
WIRELESS
TEMPERATURE
USER MANUAL
INTRODUCTION
Congratulations on purchasing this state-of-the-art Skyscan Atomic Clock as an example of superior
design and engineering. Providing WWVB radio-controlled time, date, time zone, indoor and
outdoor temperature display, this innovative clock is ideal for home or office use. Operation of this
product is simple and straightforward. By reading this operating manual, the user will however
receive a better understanding of the Skyscan Atomic Clock together with the optimum benefit of all
its features.
The Skyscan 86722 Atomic Clock with Outdoor Wireless Temperature is a sophisticated
timekeeping device that combines precise atomic clock technology with convenient wireless
temperature monitoring. This innovative clock offers accurate timekeeping synchronized with atomic
clocks, ensuring that you always have the correct time.
The clock's atomic timekeeping feature means it receives regular radio signals from atomic clocks
located around the world. These signals provide the clock with extremely accurate time updates,
keeping it in sync with the global time standard. This ensures that you never have to worry about
manually adjusting the time or dealing with time discrepancies.
FEATURES
ATOMIC CLOCK:
WWVB Radio controlled time with manual
time setting 12/24 hour time display
Time display: hour, minute, second
Alarm setting with snooze function
Calendar display
Weekday display (3 languages to choose
from: English, French and Spanish)
Time zone setting
Daylight savings time ON/OFF option
(DST) ºC or ºF temperature display
selectable
Indoor temperature display
Outdoor temperature display via 433MHz
transmission
Wall mounting or freestanding
OUTDOOR TEMPERATURE TRANSMITTER:
Remote transmission of outdoor
temperature to Temperature Station by
433 MHz signals
Wall mounting case
TO INSTALL AND REPLACE BATTERIES IN THE ATOMIC CLOCK
1. Insert finger or other solid object in the
space at the bottom center of the battery
compartment and lift up to remove the
cover.
2. Insert batteries observing the correct
polarity (see marking).
3. Replace compartment cover.
DESCRIPTION
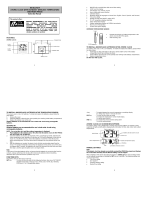
ATOMIC CLOCK LCD SCREEN DESCRIPTIONS
The Atomic Clocks LCD is divided into 2 sections and once the batteries are inserted, all the
segments will light up briefly before displaying the information for time, date, indoor and outdoor
temperatures.
DESCRIPTION
POSITIONING THE ATOMIC CLOCK:
There are two possible ways to mount the Atomic Clock:
use of the foldout table stands, or
wall mounting
FOLD OUT TABLE STANDS
The fold out table stand legs are located on the backside, at the lower corners, and
on both sides of the battery cover. The hinges are towards the edges of the
SkyScan Atomic Clock, and the ends (with no hinge) need to be folded out towards
the edge. Once the foldout table stands are extended, place the Atomic Clock in an
appropriate location.
WALL MOUNTING
Using a straightedge, horizontally space at 3-15/16 of an inch (100.58mm)
three screw positions on a wall.
Install three mounting screws (not included) into a wall within transmission
range—leaving approximately 3/16 of an inch (5mm) extended from the wall.
Place the SkyScan Atomic Clock onto the screws, using the hanging holes on
the backside. Gently pull the Atomic Clock down to lock the screws into place.
Always ensure that the SkyScan Atomic Clock locks onto the screws before
releasing.
MOUNTING WITH SCREWS
1. Remove the mounting bracket from the Outdoor Temperature Transmitter.
2. Place the mounting bracket over the desired location. Through the three
screw holes of the bracket, mark the mounting surface with a pencil.
3. Where marked, start the screw holes into mounting surface.
4. Screw mounting bracket onto the mounting surface. Ensure that the screws
are flush with the bracket.
MOUNTING WITH ADHESIVE TAPE
With a nonabrasive solution, clean and dry the back of the mounting bracket and
the mounting surface to ensure a secure hold. The mounting surface should be
smooth and flat.
Remove the protective strip from one side of the tape. Adhere the tape to the designated area
on the back of the mounting bracket.
Remove the protective strip from the other side of the tape. Position the Outdoor Temperature
transmitter in the desired location, ensuring that the Skyscan Atomic Clock can receive the
signal.
What batteries does the Atomic Clock use?
The Atomic Clock uses 2 x AA, 1.5V batteries.
How do I install and replace batteries in the Atomic Clock?
To install and replace batteries in the Atomic Clock, insert a finger or other solid object in the space at the
bottom center of the battery compartment and lift up to remove the cover. Insert batteries observing the
correct polarity (see marking). Replace compartment cover.
Manuals.plus
How do I change the display mode on the Atomic Clock?
To change the display mode on the Atomic Clock, press the + key. The display should now show the month &
date/weekday/seconds/ outdoor temperature. Press the + key a second time and the display will now show
the month & date/seconds/indoor temperature/outdoor temperature. Press the + key third time and the
display will return to the normal display.
How do I set the time zone on the Atomic Clock?
To set the time zone on the Atomic Clock, enter manual setting mode by pressing the SET key. The time zone
(LCD2) will start flashing. Select the desired time zone by use of the + key.
How do I turn on/off daylight saving time on the Atomic Clock?
To turn on/off daylight saving time on the Atomic Clock, enter manual setting mode by pressing the SET key.
The ON digit will start flashing on LCD1. Set the DST ON or OFF by pressing the + key.
Manuals.plus
How do I manually set the time on the Atomic Clock?
To manually set the time on the Atomic Clock, enter manual setting mode by pressing the SET key. Select
manual time setting and then set the year, month, date, weekday, hour, and minute using the + key.
/