CHAINBRAKE
_b'WARNING: If the brake band is
worn too thin it may break when the
chain brake is triggered. With a broken
brake band, the chain brake will not
stop the chain. The chain brake must
be replaced if any part is worn to tess
than 0.020" (0.5 ram) thick. Repairs on
a chain brake should be made by your
Sears Service Center. Take your unit
to the piace of purchase or to the near-
est Sears Service Center.
• This saw is equipped with a chain
brake. The brake is designed to stop
the chain if kickback occurs.
• The inertia-activated chain brake is
activated if the front hand guard is
pushed forward, either manually (by
hand) or automatically (by sudden
movement).
• Ifthe brake is already activated, it is
disengaged by putting the front hand
guard back toward the front handle
as far as possible.
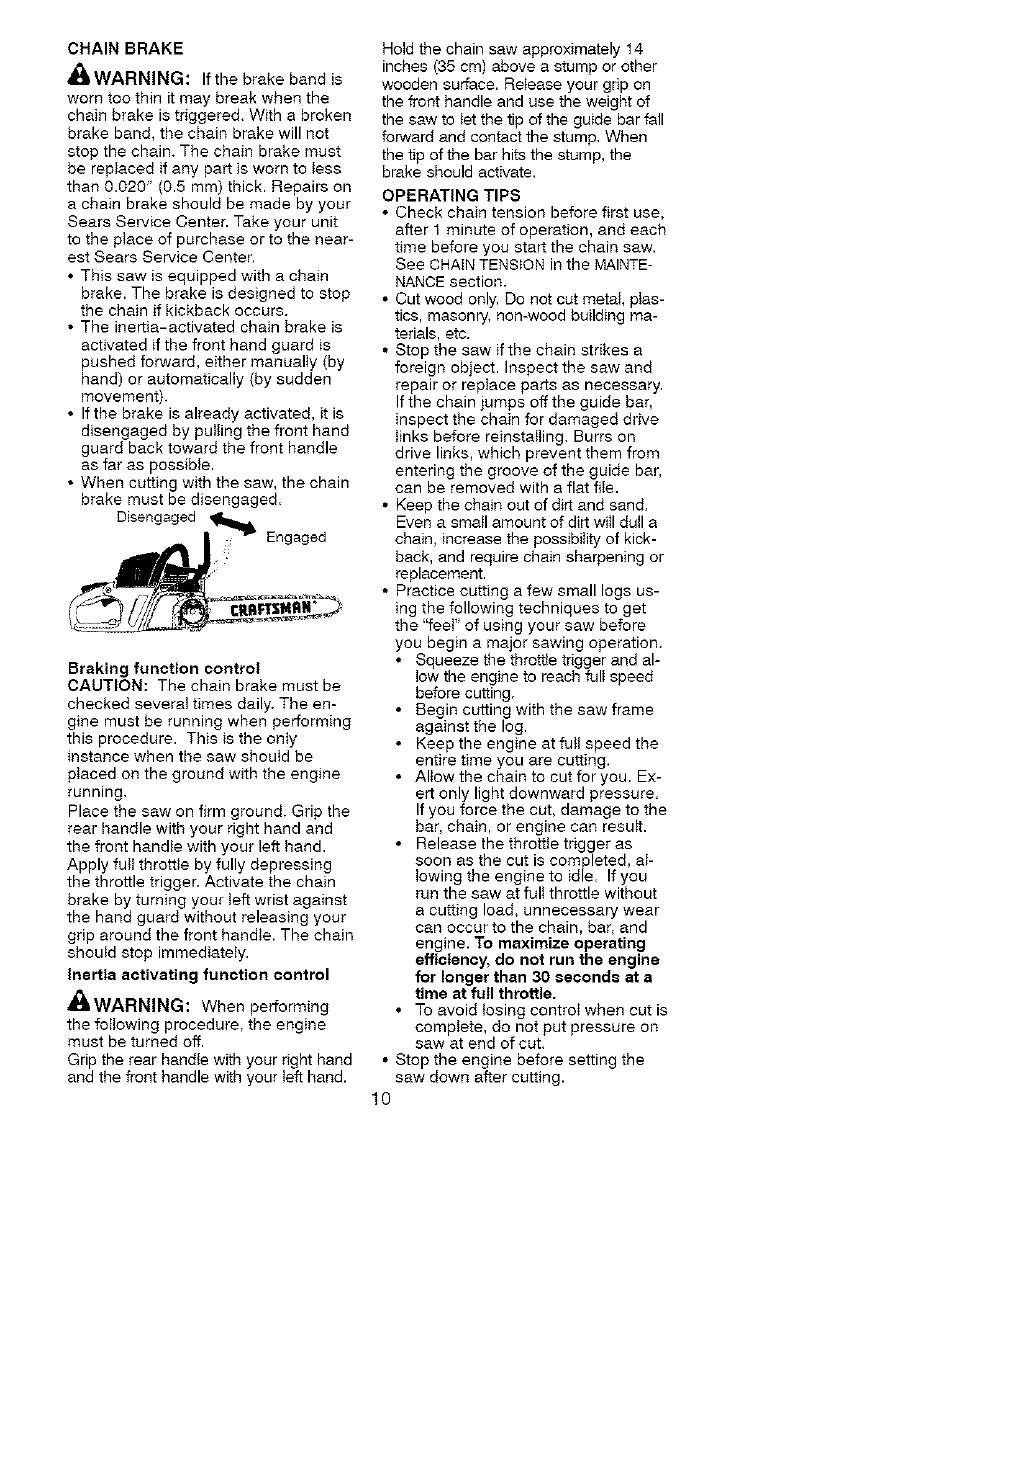
• When cutting with the saw, the chain
brake must be disengaged.
Braking function control
CAUTION: The chain brake must be
checked severat times daily. The en-
gine must be running when performing
this procedure. This is the onty
instance when the saw should be
placed on the ground with the engine
running.
Place the saw on firm ground. Grip the
rear handle with your right hand and
the front handie with your left hand.
Apply futt throttte by fully depressing
the throttle trigger. Activate the chain
brake by turning your Ieft wrist against
the hand guard without releasing your
grip around the front handle. The chain
should stop immediately.
Inertia activating function control
_[LWARNING: When performing
the following procedure, the engine
must be turned off,
Grip the rear handie with your right hand
and the front handle with your teft hand.
Hotd the chain saw approximately 14
inches (35 cm) above a stump or other
wooden surface. Reiease your grip on
the front handle and use the weight of
the saw to let the tip of the guide bar fall
forward and contact the stump, When
the tip of the bar hits the stump, the
brake should activate.
OPERATING TIPS
• Check chain tension before first use,
after 1 minute of operation, and each
time before you start the chain saw.
See CHAIN TENSION in the MAINTE-
NANCE section.
• Cut wood only. Do not cut metal, plas-
tics, masonry, non-wood building ma-
terials, etc.
• Stop the saw if the chain strikes a
foreign object. Inspect the saw and
repair or replace parts as necessary,
If the chain jumps off the guide bar,
inspect the chain for damaged drive
tinks before reinstalling. Burrs on
drive links, which prevent them from
entering the groove of the guide bar,
can be removed with a flat fiIe.
• Keep the chain out of dirt and sand.
Even a small amount of dirt will dull a
chain, increase the possibility of kick-
back, and require chain sharpening or
replacement.
• Practice cutting a few small logs us-
ing the following techniques to get
the "feeF of using your saw before
you begin a major sawing operation.
• Squeeze the throttte trigger and al-
Iow the engine to reach fuli speed
before cutting.
• Begin cutting with the saw frame
against the log.
• Keep the engine at fuji speed the
entire time you are cutting.
•AlIow the chain to cut for you. Ex-
ert only light downward pressure.
If you force the cut, damage to the
bar, chain, or engine can result.
• Release the throttie trigger as
soon as the cut is completed, at-
towing the engine to idle. If you
run the saw at full throttle without
a cutting load, unnecessary wear
can occur to the chain, bar, and
engine. To maximize operating
efficiency, do not run the engine
for longer than 30 _econd8 at a
time at full throttle.
• To avoid losing control when cut is
complete, do not put pressure on
saw at end of cut.
• Stop the engine before setting the
saw down after cutting.
10


