Frigidaire FFHP094CS1 Owner's manual

Category
Split-system air conditioners
Type
Owner's manual

This manual is also suitable for

Frigidaire FFHP094CS1 is a split type room air conditioner with a range of features for cooling, heating, and dehumidifying your living space. It features an energy-saving Eco mode, a Sleep mode for maintaining a comfortable temperature while you sleep, and a Timer function for scheduling operation. The unit also includes a remote control for convenient operation from anywhere in the room.

Frigidaire FFHP094CS1 is a split type room air conditioner with a range of features for cooling, heating, and dehumidifying your living space. It features an energy-saving Eco mode, a Sleep mode for maintaining a comfortable temperature while you sleep, and a Timer function for scheduling operation. The unit also includes a remote control for convenient operation from anywhere in the room.

Refer to Page 2 for table of contents.
ac.eriadigirf.www moc.eriadigirf.www
All about the
Use&Care
of your
Split Type Room Air Conditioner
7651-249-668-1adanaC7651-249-668-1ASU
Welcome
01
Welcome to the world of
simple handling and no worries
Environmental advices
Attention!!
Thank you for choosing Frigidaire. This manual contains all of the information
required to guarantee your safety and the appropriate use of your air
conditioner.
Please read all of the instructions before using the air conditioner and keep
this manual for future reference.
We know you will enjoy your new air conditioner and thank you for choosing
our product.
We hope you will consider us for future purchases.
The packaging material used is recyclable. We
recommend that you separate plastic, paper and
cardboard and give them to recycling companies.
do NOT throw it away with the rest of your
domestic If you need to dispose of this appliance
in the future, garbage.
The air conditioner that you have bought may be slightly different from
the one illustrated in this manual. Please refer to the information related
to the model you have.
This air conditioner is for domestic use only. It is not recommended for
heavy commercial or industrial use.
02
Contents
Contents
01. Welcome..........................................................................................01
02. Environmental advices........................................................................01
03. Contents...........................................................................................02
04. Safety precautions.............................................................................
03
05. Operation:
5.1 Preparing the device for operation.........................................06
5.2 Product description..............................................................
08
5.3 Remote control....................................................................
09
- Remote control operation
- Remote control specifications
- Remote control battery
- When should the batteries be replaced
- To replace batteries
- Remote control instructions
5.4 Remote control description....................................................
11
5.5 Special functions..................................................................12
5.6 How the air conditioner works...............................................13
- Automatic operation
- Cool/heat and fan only operation
- Dry operation
- Airflow direction adjustment
- Eco/Sleep mode
- Timer operation
- Optimal operation
5.7 How to use the indoor unit....................................................17
- Adjusting air flow direction
- Adjusting the vertical air flow direction (up/down)
- To set the horizontal air flow direction (left/right)
- To automatically swing the air flow direction (up/down)
5.8 Manual operation................................................................
19
06. Maintenance.....................................................................................20
07. Operation tips...................................................................................22
08. Solution for problems.........................................................................
24
09. Warranty..........................................................................................26
Satety precautions
03
Safety precautions
This appliance must be installed by a qualified licensed HVAC
technician in accordance with all applicable codes. All electrical
connections should be performed by a licensed electrician.
Manufacturer's warranty will be voided with failure to comply.
Incorrect Handling could result in Serious Injury or Death!
1. Do not attempt to install the split air
conditioner by yourself.
2. This air conditioner contains no
user-serviceable parts. Always call
an authorized Electrolux servicer
for repairs.
3. When moving the air conditioner,
always call an authorized Frigidaire
servicer for disconnection and re-
installation.
4. Do not insert fingers or place
objects into the discharge area in
the front of the indoor unit.
5. Do not insert fingers or place
objects into the discharge area in
the front of the outdoor unit.
6. Do not start or stop the air
conditioner by turning off the power
at the electrical box.
7. In the event of a malfunction (sparks,
burning smell, etc.) immediately
power off unit and call an
authorized Frigidaire servicer.
8. Do not operate the air conditioner
with wet hands.
9. Do not drink any water or
condensation that is drained from
the air conditioner.
10
.Provide occasional ventilation
during use. Do not direct airflow
at fire places or other heat related
sources as this could cause flare
ups or make units run excessively.
11. Do not climb on or place objects
on the outdoor unit.
12. Do not hang objects off the indoor
unit.
13. Do not place objects containing
water on the indoor and/or
outdoor units.
14. Turn off the air conditioner at the
power source when it will not be
used for an extended period of
time.
15. Periodically check the condition of
the outdoor unit’s installation base
for any damage.
16. Do not apply heavy pressure to
the coil fins of the indoor and/or
outdoor units.
17. Operate the indoor unit with air
filters in place.
18. Do not block or cover the intake
grille, discharge area and outlet
ports.
19. Ensure that any electrical/
electronic equipment is 36” away
from the indoor unit and outdoor
unit.
20. Do not use or store flammable
gases near the indoor and/or
outdoor units.
Safety precautions
04
To prevent injury to the user or other people and property
damage, the following instructions must be followed.
Incorrect operation due to ignoring of instructions may cause
harm or damage. The seriousness is classified by the following
indications.
1. Connect with the power properly
(confirm voltage upon installation).
Otherwise, it may cause electric
shock or fire due to excess heat
generation.
2. Always ensure effective grounding.
No grounding may cause electric
shock.
3. Disconnect the power if strange
sounds, smell, or smoke comes from
it. It may cause fire and electric
shock.
4. Do not operate or stop the unit by
switching the power off and on. It
may cause electric shock or fire due
to heat generation.
5. Do not operate with wet hands or
in damp environment. It may cause
electric shock.
6. Do not allow water to run into
electric parts. It may cause
component failure, electric shock or
fire.
7. Do not use the power cord near
flammable gas or combustibles,
such as gasoline, benzene,
thinner,etc. It may cause an
explosion or fire.
8. Do not use the power cord close to
heating appliances. It may cause
fire and electric shock.
9. Do not damage or use an
unspecified power cord. It may
cause electric shock or fire.
10.Do not place heavy objects on the
power cord and ensure that the
cord will not be compressed. There
is danger of fire or electric shock.
05
Safety precautions
11. Do not open the unit during
operation. It may cause electric
shock or injury.
12. Do not drink water drained from
air conditioner. It may contain
contaminates that could make you
sick.
13. Do not disassemble or modify unit.
It may cause failure of appliance,
electric shock and void the
warranty.
14. When the air filter is to be
removed, do not touch the metal
parts of the unit. It may cause an
injury.
15. When the unit is to be cleaned,
power off, and turn off the circuit
breaker. Do not clean unit when
power is on as it may cause fire,
electric shock or injury.
16. Avoid direct exposure of
occupants to air flow.
17. Turn off the main power switch
when not using the unit for a long
time.
18. The air conditioner may be dusted
with an oil free cloth or washed
with a cloth dampened in a
solution of warm water and mild
dishwashing detergent. Rinse
thoroughly and wipe dry. Wring
excess water from cloth before
wiping around controls.
19. Always insert the filters securely.
Clean filter once every two weeks.
Operation without filters may
cause failure.
20. Always install circuit breaker and
a dedicated power circuit. No
installation may cause fire and
electric shock.
21. Do not place obstacles around
air-inlets or inside of air-outlet. It
may cause failure of appliance or
accident.
06
Preparing the device for operation
1. Contact a licensed specialist to install the device.
2. Guarantee that the unit is appropriately fastened and complies with all of the
aforementioned safety norms.
3. Before operating the air conditioner, ensure that the air filter is installed
correctly.
4. If the unit has been out of use for a long period of time, it is recommended
that the air filter be cleaned before use. During continuous use, clean the air
filter every two weeks.
5. This air conditioner was designed for use under the following conditions:
Cool
MODE
Indoor Indoor Outdoor Indoor Outdoor
Dehumidifier
Temperature Temperature Temperature
Heat
*
61°F~86°F 61°F~86°F 61°F~86°F 0°F~115°F
* only for models with heating function
Outdoor
0°F~110°F -5°F~75°F
Attention!!
If air conditioner is used outside of the above conditions, certain safety
protection features may come into operation and cause the unit to
function abnormally. Room relative humidity should be less than 80%. If
the air conditioner operates in excess of this figure, the surface of the air
conditioner may attract condensation. Please set the horizontal louver to
its maximum angle (vertically to the floor), and set HIGH fan mode.
Optimum performance will be achieved within these operating
temperature.
Product description
07
Attention!!
All the pictures in this manual are for explanation purpose only. They
maybe slightly different from the airconditioner you purchased.
Product description
3 4
5 6
7
8
13
1
12
11
10
14
2
9
Air inlet
Air Outlet
Air inlet (side)
Air inlet (rear)
Air outlet
1 Front panel
2 Digital display
3 Air filter
4 Pre-dust filter
5 Horizontal air flow grille
6 Vertical air flow louver (inside)
7 Manual control button
8 Cold plasma generator (if applicable)
9 Remote controller
10 Refregerant pipe
11 Drain hose
12 Power cable
13 Mounting plate
14 Connecting cable
08
Product description
Attention!!
The description of the control is based on a typical model.The functions
are the same in your air conditioner, even if there are some differences
in the appearance.
Display panel (indoor unit)
15
16
17
18
I Feel indicator:
Lights up when I Feel feature is
activated.
Turbo indicator:
Lights up when Turbo feature is
activated.
DIGITAL SCREEN:
• Displays the temperature
settings when the air conditioner
is operational.
• Displays the malfunction code
when fault occurs.
ECO indicator:
Lights up when Eco feature is
activated.
15 16 1817
09
Remote control
Remote control operation
1. Operation mode: Cool, Heat (Only
for models with heating function),
DRY, FAN, and AUTO (Automatic).
2. 24 hrs Timer.
3. Internal temperature range selection:
61ºF - 86ºF
4. LCD
1. The air conditioner will not operate when curtains, doors or other
materials block the signals between the remote control and the indoor
unit.
2. Avoid spilling any liquid in the remote control. Do not expose to
sunlight or any heat source.
3. If the infrared signal receiver in the indoor unit is exposed to sunlight,
the air conditioner unit might not work properly. Use curtains or
shades to avoid having sunlight directly to the receiver.
4. If other electrical equipments react to the signals sent by the remote
control, change their position or consult with you local dealer.
Attention!!
Remote control
Remote control battery: To use the remote control, it is necessary
to install two alkaline AAA batteries.
Rated voltage
Transmission distance
Environment
3 V
Lowest voltage of CPU emiting signal
2.4 V
REMOTE CONTROL SPECIFICATIONS
32-4/5'*
23ºF ~ 140ºF
* With 3 V, reaches 40'
Cover of battery box
Remove
Reinstall
battery
Remote control
10
When should the batteries be
replaced
To replace batteries
Remote control instructions
1. There is not a "beep" anymore
from the indoor unit when using the
control remote or the signal light
indicator does not light.
2. The indoor unit does not respond
to the remote control commands to
activate the programs.
1. Slide out the battery compartment
cover ( located at the front of the
remote control).
2. Install two AAA batteries in
the compartment (indicated in
the drawing located inside the
compartment).
3. Slide on the battery component
cover.
4. If the remote control is not operated
for long period of times, batteries
should be discarded.
1. The signal reach distance of the
remote control to the receiver that
is inside the indoor unit of the
air conditioner is 32 feet. Any
obstruction placed between the
receiver and the remote control
can cause interference, limiting the
capacity of the programming.
2. Any time when a button is pressed
on the remote control, the air
conditioner emits a "beep" that
indicates that a command has been
received and transmitted to the
indoor unit.
3. When selecting the function of timer,
the remote control (automatically)
sends a signal to the indoor unit at
the specific period. If the remote
control is left in a position that the
signal is blocked, a 15 minute
delay can be produced.
1. When replacing batteries, do not
use old batteries or a different
type battery. This may cause the
remote control to malfunction.
2. If you do not use the remote
controller for several weeks,
remove the batteries. Otherwise
battery leakage may damage
the remote controller.
3. The average battery life under
normal use is about 6 months.
4. Replace the batteries when there
is no answering beep from the
indoor unit or if the transmission
indicator fails to light.
Attention!!
Remote control description
11
Remote control description
1
2
5
6
3
4
ON/OFF: Press this button to start
the unit operation. Push the button
again to stop the unit operation.
UP/DOWN: Press the button to
increase/decrease the temperature.
Keep the button pressed for two
seconds to accelerate the process.
Release the button to set the
temperature and the °C/°F icon will
be displayed constantly.
In Timer-On/Off or Clock functions,
use the button to set the clock or
timer adjustment.
TIMER ON: Press the button to set
the timer function for switching on
the unit. If the TIMER ON symbol
” blinks, press the UP or
DOWN button to set the time.
Keep the button pressed for two
seconds to accelerate the process.
Press the button to set the timer.
TIMER OFF: Press the button
to set the timer function for
switching off the unit. If the
TIMER OFF symbol ”
blinks, press the UP or DOWN
button to set the time. Keep the
button pressed for two seconds
to accelerate the process. Press
the button to set the timer.
Default setting: 17:00 (24-hour
mode). Press the button again
to cancel the timer function.
MODE: Press the button to set the
operation mode: AUTO, DRY, FAN,
COOl and HEAT*. Default setting:
AUTO.
* Note: Only for models with Heat
function.
SWING: Press this button, the
louver will swing up and down
automatically. Press again to
cancel it and the louver will stay
at its last position.
9
10
8
12
11
13
14
1
3
2
4
5
6
7
AUTO COOLDRY HEAT*FAN
Default setting: 8:00 (24-hour
mode). Press the button again
to cancel the timer function.
Remote control description
12
10
11
12
13
14
8
9
7
ClOCK: Press the button to set
the clock. If the clock symbol
” blinks, press the UP
or DOWN button to set the
time. Keep the button pressed
for two seconds to accelerate
TEMP: Press this button
to change the Indoor Unit
temperature Display between
Set temperature and Room
temperature. After display
Room temperature 5s, it will
turn into set temperature.
When the symbol ”
” is
shown, the indoor unit displays
the Set temperature.
When the symbol ”
” is
shown, the indoor unit displays
the Room temperature.
LIGHT: Press the button to
switch the display of the indoor
unit on or off. When switch on,
the light symbol ”
” will be
showed. Default setting: ON.
X-FAN: In COOl or DRY mode,
press the button to enable or
disable the X-FAN function. If
the X-FAN function is enabled,
the X-FAN symbol ”
” will be
shown. Default setting: OFF.
ECO: In COOl or DRY mode,
press this button to enable or
disable Eco operation. If the
ECO function is enabled, the
ECO symbol ”
” will be
shown. Default setting: OFF.
This is ideal for the users to
use while sleeping.
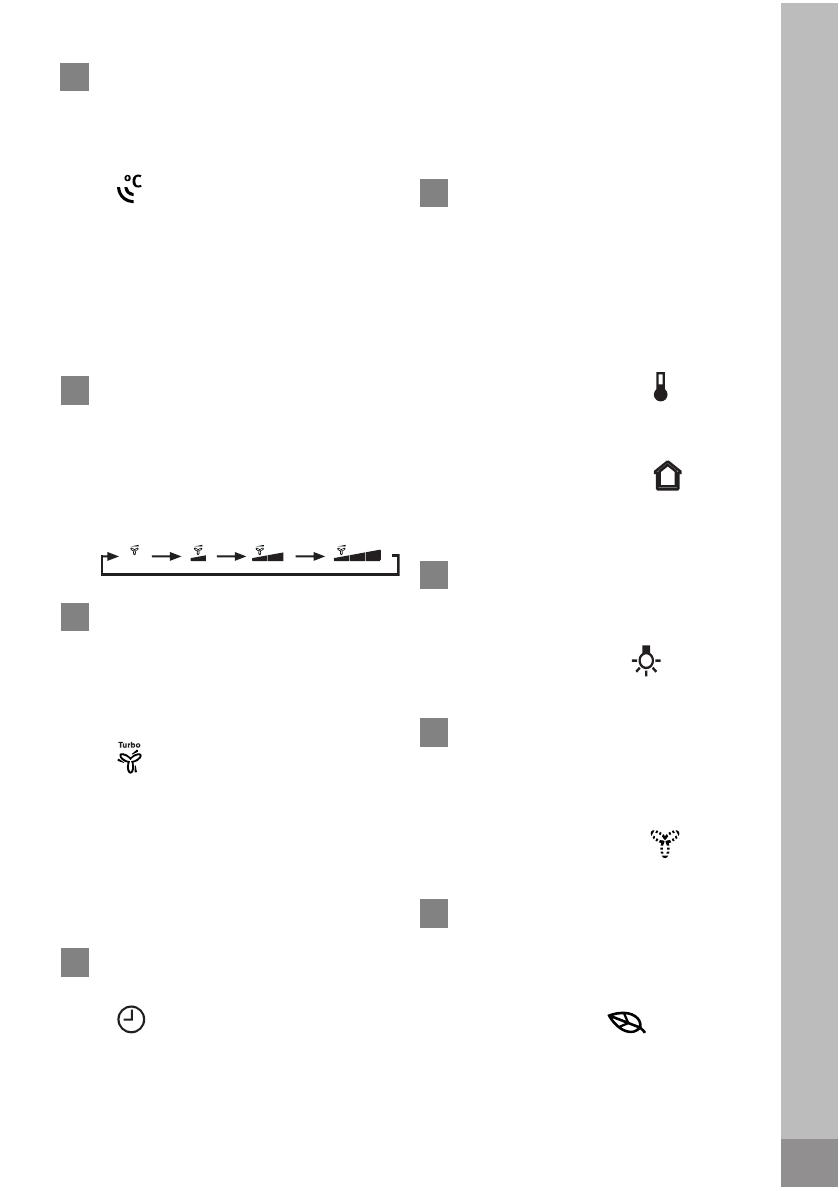
FAN SPEED: Press the button
to set the fan speed: AUTO,
lOW, MEDIUM and HIGH.
Default setting: AUTO. In the
DRY mode, only lOW can be
set.
TURBO: In COOl or HEAT
mode, press the button to
enable or disable the turbo
function. If the turbo function is
enabled, the turbo symbol
” will be shown.
If the turbo function is enabled,
the unit will operate at turbo
speed to cool or heat rapidly so
that the ambient temperature
approaches the set temperature
as soon as possible.
I FEEL: Press the button to
enable or disable the I FEEl
function. If the I FEEl function
is enabled, the I FEEl symbol
” will be shown.
If the I FEEl symbol is
enabled, the remote control
will send the ambient
temperature to the main unit
every 10 minutes or when
you press one of the buttons.
AUTO HIGHLOW MEDIUM
the process. Press the ClOCK
button again to set the clock.
The clock symbol stops
blinking.
How the air conditioner works
13
How the air conditioner works
1. Use the MODE button to select AUTO.
2. Use the "MODE" button to select Auto. The unit will automatically select Cool,
Fan, Heat and Dehumidifying operation depending on the difference ambient
temperature and system difference temperature. The temperature can be set
within a range of 16ºC/61ºF~30ºC/86ºF in 1ºC/1ºF increments. Keep the
button pressed for two seconds to accelerate the process.
3. Press the ON/OFF button again to stop the unit operation.
1. If the AUTO mode is not comfortable, you may manually override the settings
by using COOL, HEAT*, DEHUMIDIFICATION or FAN ONLY** mode.
2. Press the "
^
"/"
v
" button to set the desired room temperature. When in COOL
mode, the most comfortable settings are 70 ºF or above. When in HEAT
mode, the most comfortable settings are 82 ºF or below.
3. Press the FAN to select the FAN mode of AUTO, , or .
When the Air Conditioner is ready for use, switch on the power and the
OPERATION indicator lamp on the display panel of the indoor unit starts
illuminating.
Automatic operation
COOL / HEAT / DRY (DEHUMIDIFICATION) and FAN ONLY operation
1. In the AUTO mode, the air conditioner can logically choose the
mode of Cooling, Fan, Heating and Dehumidifying by sensing the
difference between the actual ambient room temperature and the set
temperature on the remote controller.
2. In the AUTO mode, the fan speed can be switched.
3. If the AUTO mode is uncomfortable, you can select desired conditions
manually.
Attention!!
Special functions
To switch between Fahrenheit
and Celsius: Turn the remote
controller off and the °C/°F can
be switched by pressing Mode
and DOWN buttons at the same
time with keeping for 3 seconds.
About LOCK: Press Mode and
Fan buttons at the same time,
you can lock and unlock the
remote controller. The icon "
"
will display when Lock function is
eabled.
How the air conditioner works
14
The dry mode will automatically select
the drying operation based on the
difference between the set temperature
and the actual room temperature.
The temperature is regulated while
dehumidifying by repeatedly turning
on and off of the cooling operation or
fan only. In the Dehumidifying mode,
you can not switch the fan speed. It
has already been automatically set at
low speed.
1. Press the MODE button to select
DRY.
2. Press the "
^
"/"
v
" button to set the
desired temperature from 61 ºF to
86 ºF.
3. Press the ON/OFF button, the
operation lamp lights and the air
conditioner starts to operate in the
DRY mode. FAN SPEED is Low.
Push the ON/OFF button again to
stop this unit operation.
DRY (DEHUMIDIFICATION) operation
Due to the difference between the
set temperature of the unit and
the actual indoor temperature, the
Air Conditioner in DRY mode will
automatically switch the operation
modes between COOL and FAN
ONLY many times.
If the louver oscillates or moves
in a position that could affect the
cooling or heating (only for models
with heating function) of the air
conditioner, the direction of the
oscillation/movement would alter
automatically.
Attention!!
Attention!!
Time
DRY FUNCTION
Room
Temperature
Set temperature
Cooling
Cooling
Cooling
n ylnoaF
n ylnoaF
4. Press the ON/OFF button, the operation lamp lights and the air conditioner
start to operate as your settings. Press the ON/OFF button again to stop this
unit operation.
* Note: Only for models with heating function.
**Note: The FAN ONLY mode can not be used to control the temperature. While
in this mode, only steps 1,3 and 4 may be performed.
Press the SWING button
"
" once and quickly, the air
flow direction setting feature of the
louver is activated. The horizontal
louver would swing up/down
automatically. Press it again to stop
at its last place.
Air flow direction adjustment
How the air conditioner works
15
Press the Eco/Sleep button to activate
the sleep mode. To deactivate, press
the button again.
TIMER button can set the auto-on time
of the unit.
In cooling mode:
• The fan speed will be automatically
controlled.
• The air conditioner will automatically
increase 1
o
F per hour in a 2 hour
period(The indoor unit always
displays the set temperature). The set
temperature will be steady for the
next 5 hours, then this mode will be
terminated.
In heating mode (only for models with
heating function)
• The fan speed will be automatically
controlled.
• The air conditioner will automatically
decrease 1
o
F per hour in a 2 hour
period.(The indoor unit always
displays the set temperature). The set
temperature will be steady for the
next 5 hours, then this mode will be
terminated.
To set the starting time:
1. Press the "TIMER ON" button to activate the auto start timer function.Auto start
can be set from 0~24 hours. After pressing "TIMER ON" button, "ON" on the
display will blink, and during 5 seconds blinking, the value can be adjusted
by pressing "
^
"/"
v
" button. Every press of this button,1 minute will be
increased or decreased, but continuously press the "
^
"/"
v
" button, 2 seconds
later the value will be increased or decreased automalically, and after 10
minutes increase or decreased, the value will be changed 10 minutes every 0.5
second; Press the "TIMER ON" button to conform the time.
2. when repressing the "TIMER ON" button, the "TIMER ON" setting will be
canceled.
Eco(Sleep) mode
TIMER Operation
Set
temperature
SLEEP FUNCTION (Cooling mode)
1 °F
1 °F
1 hour1 hour
7 hours
1 hour 1 hour
SLEEP FUNCTION (Heating mode)
7 hours
Set
temperature
1 °F
1 °F
16
How the air conditioner works
To set the stopping time
Optimal operation
1. Press the "TIMER OFF" button to activate the auto stop timer function.
2. The method of setting is the same as above of"TIMER ON".
Examples:
6h
(Timer On)
OFF
ON
6h
(Timer Off)
ON
OFF
12h
(Timer Off)
ON
OFF
ON
14h
(Timer On)
20h
(Timer On)
OFF
23h
(Timer Off)
OFF
ON
To achieve optimal performance, please note the following:
1. Adjust the air flow direction correctly so that it is not directed on people.
2. Adjust the temperature to achieve the highest comfort level. Do not adjust the
unit to excessive temperature levels.
3. Close doors and windows on COOL or HEAT (only for models with heating
function) mode, or performance may be reduced.
4. Use TIMER ON button on the remote controller to select a time you want to
start your air conditioner.
5. Do not put any object near air inlet or air outlet, as the efficiency of the air
conditioner may be reduced and the air conditioner may stop running.
6. Clean the air filter periodically, otherwise cooling or heating (only for models
with heating function) performance may be reduced.
7. Do not operate unit with horizontal airflow grille in closed position.
How to use the indoor unit
17
How to use the indoor unit
Adjusting air flow direction
To set the horizontal air flow
direction (left/ right)
To automatically swing the air flow
direction (up/down)
Adjust the air flow direction properly,
otherwise it might cause discomfort
or uneven room temperatures. Adjust
the vertical louver using the remote
controller. Adjust the horizontal louver
manually.
Adjust the horizontal louver manually
using the lever on the left or right side
of the vertical louver arm (Depending
on the specific model you choose),
or move the lever at the left (or right,
or middle which is only for 21400-
36000 Btu's, depending on the
specific model you choose) end of
the air outlet to the desired position.
Perform these adjustments before you
start the unit because once it has been
started, there is risk of your fingers
getting caught on the fan.
Perform this function while the air
conditioner is in operation.
Press the "
" button on the remote
controller.
To stop the function, press the "
"
button again.
Press "
" to lock louver in desired
position.
Lever
How to use the indoor unit
18
The" " button will be disabled when
the air conditioner is not in operation
(including when the TIMER ON is set).
Do not operate the air conditioner for
long periods with the air flow direction
set downward in cooling or dry
mode. Otherwise, condensation may
occur on the surface of the horizontal
louver and drop on to the floor or on
furnishings.
Do not move the horizontal louver
manually. Always use the "
" button.
If youmove this louver manually, it
may malfunction during operation.
If the louver malfunctions, stop the
airconditioner and restart it.
Open angle of the horizontal
louver should not be set too small,
as COOLING or HEATING (only
for models with heating function)
performance may be impaired due to
too restricted air flow area.
Do not operate unit with horizontal
louver in closed position.
When the air conditioner is connected
to power (initial operation), the
horizontal louver may generate a
sound for 10 seconds, this is a normal
operation.
Manual operation
19
Manual operation can be used
temporarily in case you can not find
the remote controller or its batteries
are exhausted.
1. Open and lift the front panel up to
an angle until it remains fixed with
a clicking sound.
2. One press of the manual control
button will lead to the forced AUTO
operation.
3. Close the panel firmly to its original
position.
Manual operation (without remote control)
Manual control
button
Auto/OFF
Once you press the manual button, the operation mode is shifted in an
order as: AUTO and OFF.
The manual operation is mainly used for testing purpose. Do not choose
it unless it is necessary. To return to the remote controller operation, use
the remote controller.
Attention!!
  • Page 1 1
  • Page 2 2
  • Page 3 3
  • Page 4 4
  • Page 5 5
  • Page 6 6
  • Page 7 7
  • Page 8 8
  • Page 9 9
  • Page 10 10
  • Page 11 11
  • Page 12 12
  • Page 13 13
  • Page 14 14
  • Page 15 15
  • Page 16 16
  • Page 17 17
  • Page 18 18
  • Page 19 19
  • Page 20 20
  • Page 21 21
  • Page 22 22
  • Page 23 23
  • Page 24 24
  • Page 25 25
  • Page 26 26
  • Page 27 27

Frigidaire FFHP094CS1 Owner's manual

Category
Split-system air conditioners
Type
Owner's manual
This manual is also suitable for

Frigidaire FFHP094CS1 is a split type room air conditioner with a range of features for cooling, heating, and dehumidifying your living space. It features an energy-saving Eco mode, a Sleep mode for maintaining a comfortable temperature while you sleep, and a Timer function for scheduling operation. The unit also includes a remote control for convenient operation from anywhere in the room.

Ask a question and I''ll find the answer in the document

Finding information in a document is now easier with AI