Performing Advanced Settings/Adjustments
Advanced adjustments for the screen or color and various
settings are available using the Adjustment menu. For details
of each adjustment function, refer to the User’s Manual on the
EIZO LCD Utility Disk (CD-ROM).
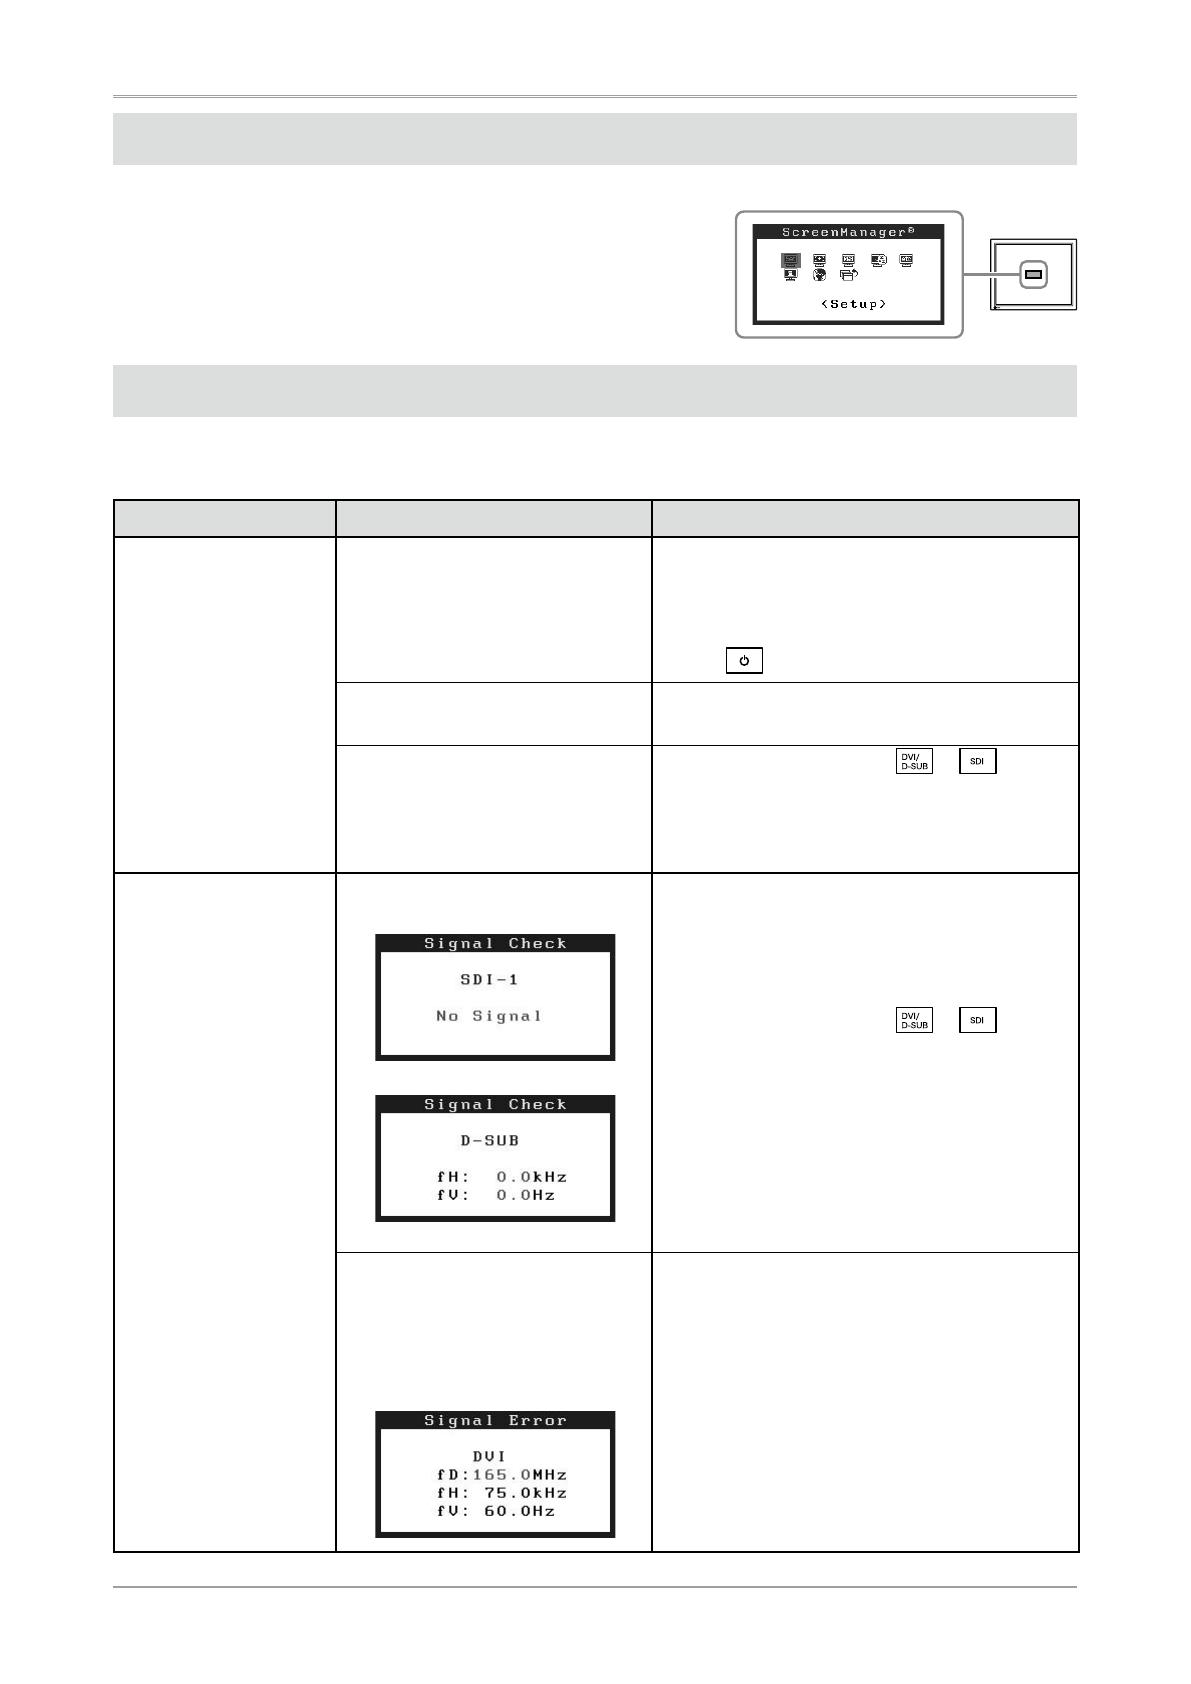
No-Picture Problem
If no picture is displayed on the monitor even after the following remedial action is taken, contact your local
dealer.
Symptom Status Possible cause and remedy
No picture Power indicator does not light.
•
Check whether the power cord is connected cor-
rectly. If the problem persists, turn on the main
power, and then turn it on again a few minutes
later.
•
Turn the main power switch on.
•
Press .
Power indicator is lighting blue.
•
Set each adjusting value in [Brightness] and
[Gain] to higher level.
Power indicator is lighting orange.
•
Switch the input signal with
or .
•
Operate the mouse or keyboard.
•
Check whether the PC is turned on.
•
Check whether the signal cable is connected
properly.
The message appears. This message appears when no
signal is input.
At SDI signal input
At analog signal input
•
The message shown left may appear, because
some PCs do not output the signal soon after
power-on.
•
Check whether the PC is turned on.
•
Check whether the signal cable is connected
properly.
•
Switch the input signal with
or .
The message shows that the input
signal is out of the specied
frequency range.
(Such signal frequency is displayed
in red.)
Example:
•
Check whether the signal setting of your PC
matches the resolution and the vertical frequency
settings for the monitor.
•
Reboot the PC.
•
Select an appropriate display mode using the
graphics board’s utility. Refer to the manual of the
graphics board for details.
f
D: Dot Clock
(Displayed only when the digital signal inputs)
f
H: Horizontal Frequency
f
V: Vertical Frequency
Adjustment menu
8


