Canon RF 600mm F11 IS STM Owner's manual

Category
Camera lenses
Type
Owner's manual

This manual is also suitable for

ENG
Instructions
ENG-1
Thank you for purchasing a Canon product.
Canon RF600mm F11 IS STM and RF800mm
F11 IS STM are super-telephoto lenses for
use with EOS R series cameras.
z
“IS” stands for Image Stabilizer.
z
“STM” stands for Stepping Motor.
Camera Firmware
Please use the latest version of firmware with the
camera in use. For details on whether the firmware is
the latest version or not, and for details on updating the
firmware, please check the Canon website.
Conventions used in these instructions
Warning to prevent lens or camera malfunction
or damage.
Supplementary notes on using the lens and
taking pictures.
ENG-2
Precautions to ensure that the camera is used
safely. Read these precautions thoroughly. Make
sure all details are observed in order to prevent
risks and injury to the user and other people.
Warning
Details pertaining to risks that may
result in death or serious injury.
z
Do not look directly at the sun or other strong
light sources through a lens. This may result in
loss of sight.
z
Do not point the lens or camera at the sun
or photograph it. This is because the lens
concentrates the sun’s rays even when the sun
is outside the image area or when shooting with
backlight, which could cause malfunction or fire.
z
Do not leave a lens in the sun without the lens
cap attached. The lens may concentrate entering
sunlight and cause a malfunction or fire.
Caution
Details pertaining to risks that may
result in injury or damage to other
objects.
z
Do not leave the product in places exposed to
extremely high or low temperatures. The product
may cause burns or injury when touched.
z
Do not insert your hand or fingers into the
product. This may result in injury.
z
Attach a tripod or monopod that is sufficiently
sturdy to the tripod mount on the lens.
Safety Precautions
ENG-3
Handling Precautions
z
Do not leave the product in excessive heat such as
in a car in direct sunlight. High temperatures can
cause the product to malfunction.
z
If the lens is taken from a cold environment into a
warm one, condensation may develop on the lens
surface and internal parts. To prevent condensation
in this case, first put the lens into an airtight
plastic bag before taking it from a cold to warm
environment. Then take out the lens after it has
warmed gradually. Do the same when taking the
lens from a warm environment into a cold one.
z
The interior of the lens may appear to shake, but
this is not a malfunction and will not cause any
problems.
z
Please also read any lens related handling
precautions listed in your camera’s instruction
manual.
General Precautions
Shooting Precautions
The lens uses a DO* lens. Colored flare might appear
around the light source depending on shooting
conditions, which is due to DO lens characteristics.
z
For scenes where a light source is inside the
screen, colored flare may occasionally appear as
a halo of light around the light source.
z
For scenes where a light source is outside the
screen, colored flare may occasionally appear
partially inside the screen. You can reduce or
prevent these issues with the following steps
according to the scene you are shooting.
Use your hand or paneling, an umbrella, etc.
to block the light source and placed so that
they do not appear in the screen.
* “DO” stands for Diffractive Optics.
Use of a DO lens provides favorable correction of
chromatic aberration that occurs easily in super-telephoto
lenses, achieving a more compact and lightweight design
while providing good rendering capabilities.
ENG-4
General Precautions
Shooting Precautions
The aperture setting is fixed at f/11 on this lens, and cannot be adjusted.
Adjust exposure using the shutter speed and ISO speed.
z
Be aware of the following when selecting a shooting mode.
If [P] mode is selected, shutter speed is adjusted while the aperture setting remains fixed at f/11, and so actually it is
the same as if selecting [Av] mode.
If [Av] mode is selected, the aperture setting cannot be adjusted.
If [Tv] mode is selected, the aperture setting is not adjusted, and so actually it is the same as if selecting [M] mode.
If [Fv] mode is selected, it is actually the same as if selecting [Av] or [M] mode, depending on the shutter speed and
ISO speed settings.
z
Also be aware of the following when shooting.
Since the aperture setting cannot be changed, the effect gained from stopping down (depth of field) cannot be
adjusted.
When using safety shift and the camera automatically changes the manual settings to allow shooting at standard
exposure, the aperture setting is not adjusted.
During AEB (auto exposure bracketing), the aperture setting is fixed at f/11 and does not change.
When using Portrait mode in the Special Scene Modes (on EOS RP cameras), the depth of field cannot be adjusted
for a shallower depth, since the aperture setting cannot be adjusted.
ENG-5
This device complies with Part
15 of the FCC Rules.
Operation is subject to the following two conditions: (1) This
device may not cause harmful interference, and (2) this
device must accept any interference received, including
interference that may cause undesired operation.
Do not make any changes or modifications to the equipment
unless otherwise specified in the instructions. If such
changes or modifications should be made, you could be
required to stop operation of the equipment.
This equipment has been tested and found to comply with
the limits for a class B digital device, pursuant to part 15
of the FCC Rules. These limits are designed to provide
reasonable protection against harmful interference in a
residential installation. This equipment generates, uses and
can radiate radio frequency energy and, if not installed and
used in accordance with the instructions, may cause harmful
interference to radio communications.
However, there is no guarantee that interference will not
occur in a particular installation. If this equipment does
cause harmful interference to radio or television reception,
which can be determined by turning the equipment off and
on, the user is encouraged to try to correct the interference
by one or more of the following measures:
• Reorient or relocate the receiving antenna.
Increase the separation between the equipment and
receiver.
Connect the equipment into an outlet on a circuit different
from that to which the receiver is connected.
Consult the dealer or an experienced radio/TV technician
for help.
CAN ICES-3 (B) / NMB-3 (B)
ENG-6
Filter mounting thread
(→ 14)
Control ring (→ 10)
Focusing ring(→ 9)
Lock ring (→ 8)
Image stabilizer switch (→ 11)
Hood mount (→ 12)
Lens mount index (→ 7)
Focusing distance range selector switch (→ 10)
Tripod mount (→ 14)
Focus mode switch (→ 9)
Contacts
(→ 7)
Lens mount (→ 7)
z
The illustrations used in the explanations in this manual show the RF600mm F11 IS STM, but the
RF800mm F11 IS STM is used in the same way.
z
For detailed information, reference page numbers are provided in parentheses (→ **).
Nomenclature
ENG-7
Lens mount index
Lens release button Dust cap
Attaching the Lens
Align the lens mount indexes of the lens and
camera, and turn the lens clockwise until you
hear a click.
Detaching the Lens
Turn the lens counterclockwise while pressing
the camera’s lens release button. Detach the
lens once it has stopped turning.
Please refer to the camera’s instructions for
details.
z
Set the camera’s power switch to OFF when
attaching or detaching the lens.
z
Attach the lens cap before detaching the lens
from the camera.
z
After detaching the lens, place the lens with the
rear end up and attach the dust cap to prevent
the lens surface and contacts from getting
scratched. Make sure the lens and dust cap
mount indexes are aligned when attaching the
dust cap.
z
Contacts that are scratched, soiled, or have
fingerprints on them may result in faulty
connections or corrosion, which may lead to
malfunctions. If the contacts get soiled, clean
them with a soft cloth.
1.
Attaching and Detaching the Lens
ENG-8
2.
Preparing to Shoot (Extending/Retracting the Lens)
Extend the lens barrel
frontward.
Turn the lock ring toward
“UNLOCK” all the way until
you hear a click.
z
The lock ring clicks when you
turn it all the way in either
direction.
Before shooting, extend the lens barrel to the shooting position and lock it as follows. You cannot
shoot while the lens is retracted.
With the lens barrel extended,
turn the lock ring toward
“LOCK” all the way until you
hear a click.
The lens barrel is locked.
z
The lens barrel can only be extended or retracted when the lock ring is at “UNLOCK”.
z
Note that when the lock ring is at “UNLOCK”, the lens barrel may sometimes become extended or retracted
unintentionally. Always hold the camera and lens securely when at “UNLOCK” and you are extending or
retracting the lens barrel.
z
To retract the lens barrel, follow the same steps, this time retracting the lens barrel and then turning the lock
ring toward “LOCK” all the way until you hear a click.
z
The lock ring can only be turned when the lens barrel is extended or retracted all the way.
ENG-9
Focus mode switch
Focusing ring
To shoot in autofocus (AF) mode, set the focus
mode switch to AF.
To use only manual focusing (MF), set the focus
mode switch to MF, and focus by turning the
focusing ring.
3.
Setting the Focus Mode
z
Be sure to update the camera’s firmware so it is
compatible with this lens.
z
The range-finding area with the camera* after
updating the firmware is an area of the image
plane of approx. 40% horizontal x approx. 60%
vertical.
This remains constant even if an extender is
attached.
z
Quickly turning the focusing ring may result in
delayed focus.
* As of March 2020: EOS R, EOS Ra, EOS RP
z
The lens’ focusing ring is electronic.
z
When AF operation is set to [ONE SHOT],
manual focus is possible after autofocusing
has been completed by continuing to press the
shutter button halfway. (Full-time manual focus)
However, the camera settings need to be
changed. Please refer to the camera’s
instructions for details.
ENG-10
The control ring can be assigned the functions
that are commonly used with cameras, such as
shutter speed and ISO speed.
Control ring
The click action of the control ring allows you to
have a sense of how much it is being turned.
Please refer to the camera's instructions for
details on how to use the control ring.
z
There are cases in which the sound of control
ring operations may be recorded when shooting
movies.
z
The clicking sensation of the control ring can
be removed by the Canon Service Center.
(chargeable)
5.
Control Ring
4.
Setting the Focusing
Distance Range
Focusing distance range selector switch
You can set the focusing distance range with a
switch. By setting a suitable focusing distance
range, the actual autofocusing time will be
shorter.
Focusing distance range
Lens Range
RF600mm F11 IS STM
Full (4.5m-)
12m-
RF800mm F11 IS STM
Full (6m-)
20m-
ENG-11
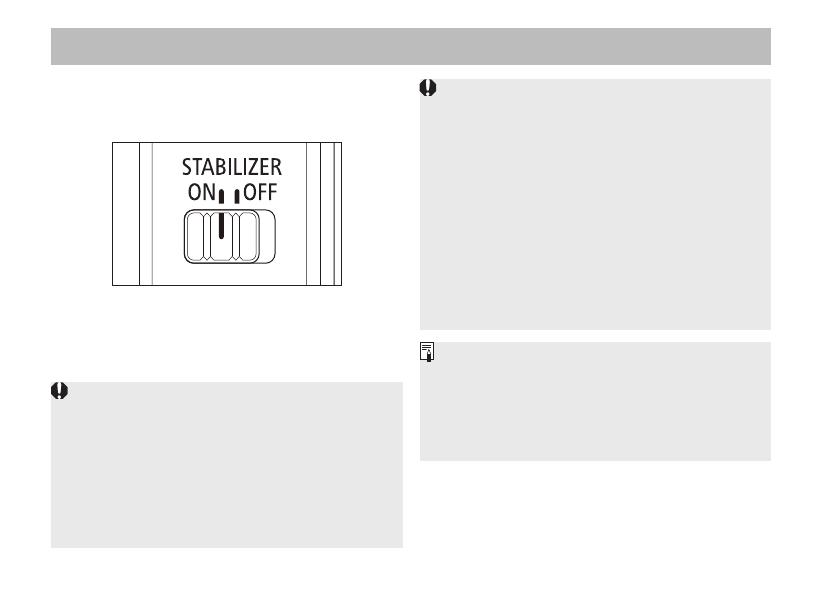
This function provides image stabilization
appropriate for shooting conditions (such as
shooting still subjects and panning shots).
Set the image stabilizer switch to ON when you
want to use the Image Stabilizer.
z
Set the image stabilizer switch to OFF when
you are not going to use the Image Stabilizer.
z
The Image Stabilizer cannot compensate for a
blurred shot caused by a subject that moved.
z
The Image Stabilizer may not be fully effective
if you shoot from a violently shaking vehicle or
other transportation.
z
If using a camera that allows you to change
the shutter type setting, it is recommended to
use the electronic shutter for the first curtain* to
allow the Image Stabilizer to be fully effective.
6.
Image Stabilizer
z
When using a tripod, the Image Stabilizer might
not be fully effective or it might be better to set
the image stabilizer switch to OFF, depending
on the type of tripod and where the tripod is
located, as well as on the camera’s settings
such as shutter speed.
z
Even with a monopod, the Image Stabilizer will
be as effective as during hand-held shooting.
However, depending on the shooting conditions,
there are cases in which the Image Stabilizer
effect may be less effective.
*
For cameras where this change is possible with
a Silent Live View Shooting setting, use Mode 1
(default setting) or Mode 2
z
When shooting a still subject, it compensates for
camera shake in all directions.
z
It compensates for vertical camera shake during
panning shots in a horizontal direction, and
compensates for horizontal camera shake during
panning shots in a vertical direction.
ENG-12
The custom lens hood cuts out unwanted light and protects the front of the lens from rain, snow, and
dust.
7.
Hood (Sold Separately)
Attachment position mark
Stop position markAttachment position mark
Red dot
Red dot
Red dot
●Attaching the Hood
Align the red attachment position mark on the
hood with the red dot on the front of the lens,
and then turn the hood in the direction of the
arrow until you hear a click.
Button
●Detaching the Hood
Keep your finger pressed down on the button
located on the side of the hood, and then turn
the hood in the direction of the arrow until the
attachment position mark on the hood is aligned
with the red dot on the front of the lens to detach
it.
The hood can be reverse-mounted on the lens
for storage.
z
If the hood is not attached properly, vignetting (darkening of the perimeter of the picture) may occur.
z
Grasp and turn the base of the hood when attaching and detaching it. There are cases in which it may
become deformed if the hood is turned with it grasped near to the rim.
ENG-13
8.
Extenders (Sold Separately)
Use an extender RF1.4× or RF2× to shoot a larger image of a subject. Lens specifications when
using an extender are as follows.
Lens RF600mm F11 IS STM RF800mm F11 IS STM
Extender
RF1.4× RF2× RF1.4× RF2×
Focal length (mm) 840 1200 1120 1600
Aperture f/16 f/22 f/16 f/22
Angle of view
Horizontal 2° 30’ 40’ 1° 50’ 20’
Vertical 1° 40’ 10’ 1° 10’ 50’
Diagonal 2° 10’ 30’
Maximum magnification (
×
)
0.19 0.28 0.19 0.28
z
Attach the extender to the lens, and then attach the camera. To detach it, reverse the order. Errors may
occur if you attach the extender to the camera first.
z
Extenders cannot be used more than one at a time.
z
When an extender is attached, the AF speed will become slower to retain proper control.
ENG-14
9.
Tripod Mount
A tripod or monopod attaches to the tripod mount
on the lens.
Tripod mount
10.
Filters (Sold separately)
You can attach filters to the filter mounting thread
on the front of the lens.
z
Only one filter may be attached.
z
If you need a polarizing filter, use the Canon
Circular Polarizing Filter PL-C B.
z
Detach the hood when adjusting the polarizing
filter.
ENG-15
Specifications
RF600mm F11 IS STM RF800mm F11 IS STM
Focal Length/Aperture 600mm f/11 800mm f/11
Lens Construction 7 groups, 10 elements 8 groups, 11 elements
Minimum Aperture f/11 f/11
Angle of View
Horizontal: 3° 30’,
Vertical: 2° 20’,
Diagonal: 4° 10’
Horizontal: 2° 35’,
Vertical: 1° 40’,
Diagonal: 3° 5’
Min. Focusing Distance 4.5 m/14.76 ft. 6.0 m/19.69 ft.
Max. Magnification 0.14× 0.14×
Field of View Approx. 254 × 169 mm Approx. 261 × 174 mm
Filter Diameter 82 mm 95 mm
Max. Diameter Approx. 93 mm Approx. 101.6 mm
Length
Approx. 199.5 mm (retracted) Approx. 281.8 mm (retracted)
Approx. 269.5 mm (shooting) Approx. 351.8 mm (shooting)
Weight Approx. 930 g/32.8 oz. Approx. 1260 g/44.4 oz.
Hood ET-88B (sold separately) ET-101 (sold separately)
Lens Cap E-82 II E-95
Case LZ1328 (sold separately) LZ1435 (sold separately)
z
The lens length is measured from the lens mount surface to the front end of the lens.
z
The maximum diameter, length and weight listed are for the lens itself only.
z
Close-up Lens cannot be attached because there is no size that fits the lens.
z
All data listed is measured according to Canon standards.
z
Product specifications and appearance are subject to change without notice.
CT1-D135-B 0320SZ © CANON INC. 2020
  • Page 1 1
  • Page 2 2
  • Page 3 3
  • Page 4 4
  • Page 5 5
  • Page 6 6
  • Page 7 7
  • Page 8 8
  • Page 9 9
  • Page 10 10
  • Page 11 11
  • Page 12 12
  • Page 13 13
  • Page 14 14
  • Page 15 15
  • Page 16 16
  • Page 17 17

Canon RF 600mm F11 IS STM Owner's manual

Category
Camera lenses
Type
Owner's manual
This manual is also suitable for

Ask a question and I''ll find the answer in the document

Finding information in a document is now easier with AI