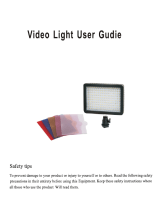
Sigma DP1 User manual

Category
Bridge cameras
Type
User manual
111
This manual explains how to use the SIGMA DP1 digital camera.
Please refer to the SIGMA Photo Pro User Guide, which is available in the
PDF format of the supplied CD-ROM, to get information about installation of
SIGMA Photo Pro software to your computer, connection between camera
and computer and for detailed explanation of SIGMA Photo Pro software.
C70EN07Z1
E ENGLISH
USER’S MANUAL
1
Thank you for purchasing the
Sigma DP1 Digital Compact Camera
You will get the greatest performance and enjoyment from your new DP1
camera’s features by reading this instruction manual carefully before
operating it. Enjoy your new Sigma camera!
x Please keep this instruction booklet handy for future reference. Doing so will
allow you to understand and take advantage of the camera’s unique features
at any time.
x The warranty of this product is one year from the date of purchase. Warranty
terms and warranty card are on a separate sheet, attached. Please refer to
these materials for details.
NOTES ON COPYRIGHT
This camera is intended only for personal use and should never be used in
a way that infringes upon or contravenes international or domestic copyright
laws and regulations. In addition, although it is intended purely for personal
use, some restrictions may be applied to the photographing of
demonstrations, performances, shows, exhibitions, or commercial
properties, etc. Copyright or other legal rights should not be contravened.
ŠFOVEON is a registered trademark of Foveon, Inc. X3, and the X3 Logos are
trademarks of Foveon, Inc.
ŠIBM PC/AT series computer is a trademark or registered trademark of
International Business Machines Corporation (IBM) in the U.S.A.
ŠMicrosoft and Windows are either registered trademarks or trademarks of
Microsoft Corporation in the United States and/or other countries.
ŠMacintosh and MAC OS are registered trademarks or trademarks of Apple Inc.
in the U.S.A. and /or other countries.
ŠAdobe and Photoshop are trademarks of Adobe Systems Incorporated.
ŠAll other company or product names used in documents are trademarks or
registered trademarks of their respective holders.
2
Disposal of Electric and Electronic Equipment in Private Households
Disposal of used Electrical & Electronic Equipment (Applicable in the European
Union and other European countries with separate collection systems)
This symbol indicates that this product shall not be treated as household waste.
Instead it shall be collected separately for the recycling of electrical and
electronic equipment.
If the new products are purchased, this product might be handed over to the
distributor or the collection system of waste electrical and electronic equipment
eventually.
By ensuring this product is disposed of correctly, you will help prevent potential
negative consequences for the environment and human health, which could
otherwise be caused by inappropriate waste handling of this product or
components of this product.
If this product is disposed illegally, it might cause a possibility of penalties.
For more detailed information about recycling of this product, please contact your
local city office, your household waste disposal service or the shop where you
have purchased the product.
PACKAGE CONTENTS / ACCESSORIES
Please make sure that following standard accessories are included with your camera. If
any of them is missing, contact the retailer from which you purchased your camera
immediately.
1.
Camera Body (DP1)
2. Lens Cap (on the camera)
3. Hot Shoe Cover (on the camera)
4. Soft Case
5. Strap
6. Li-ion Battery BP-31
7. Battery Charger BC-31
8. Battery Charger Cable
9. USB Cable
10. Audio Video Cable
11. SIGMA Photo Pro Disc
12. Instruction Manual
13. Warranty Card
14. SIGMA Limited Warranty & Service Network
x No memory card is included with this camera. Please purchase this separately.
3
TABLE OF CONTENTS
PACKAGE CONTENTS / ACCESSORIES..............................................2
TABLE OF CONTENTS ..........................................................................3
SAFETY PRECAUTIONS .......................................................................6
HANDLING PRECAUTIONS...................................................................9
DESCRIPTION OF THE PARTS...........................................................11
COLOR LCD MONITOR INDICATION..................................................13
BASIC OPERATION AND QUICK REFERENCE..................................14
PREPARATION 17
ATTACHING THE CARRY STRAP .......................................................17
LENS CAP ............................................................................................18
LOADING THE BATTERY.....................................................................19
CHECKING THE BATTERY STATUS ...................................................22
USING A HOME POWER SUPPLY (SOLD SEPARATELY) ..................23
SETTING THE LANGUAGE .................................................................24
SETTING THE TIME AND DATE ..........................................................25
CAMERA SET-UP MENU .....................................................................26
LIST OF MENU FUNCTIONS ...............................................................28
CHANGING THE COLOR LCD MONITOR DISPLAY ...........................32
INSERTING AND REMOVING THE CARD...........................................33
FORMATTING THE CARD ...................................................................35
SHUTTER BUTTON .............................................................................36
BASIC OPERATION 37
SELECTING THE EXPOSURE MODE 37
AUTO MODE ..................................................................................37
P
PROGRAM AE................................................................................39
A
APERTURE PRIORITY AE .............................................................40
S
SHUTTER SPEED PRIORITY AE ..................................................41
M
MANUAL EXPOSURE ....................................................................42
USING THE BUILT-IN FLASH
43
USING THE BUILT-IN FLASH...............................................................43
4
FOCUSING 45
HOW TO USE AUTOFOCUS................................................................45
AF AREA SELECTION..........................................................................46
FOCUS LOCK.......................................................................................46
MANUAL FOCUS..................................................................................47
OPERATION OF THE DRIVE MODE 48
SINGLE FRAME SHOOTING ...............................................................48
CONTINUOUS SHOOTING..................................................................49
SELF TIMER.........................................................................................49
ADVANCED OPERATION 50
SETTING THE WHITE BALANCEWB ...........................................50
SETTING THE SENSITIVITYISO EQUIVALENCY ........................53
IMAGE FILE SETTING .........................................................................54
IMAGE PARAMETER AND COLOR SPACE.........................................55
SELECTING THE METERING MODE ..................................................57
AE LOCK ..............................................................................................58
EXPOSURE COMPENSATION ............................................................60
AUTO BRACKETING............................................................................61
COLOR SETTINGS ..............................................................................63
DIGITAL ZOOM.....................................................................................64
IMAGE WITH SOUND ..........................................................................65
USING THE EXTERNAL FLASH ..........................................................66
REVIEWING AND DELETING IMAGES 67
QUICK PREVIEW 67
CHANGING THE QUICK PREVIEW DURATION .................................67
REVIEWING IMAGES 69
VIEWING ONE IMAGE AT A TIME........................................................70
MAGNIFYING IMAGES
(ZOOMED-IN VIEW)
....................................71
VIEWING NINE IMAGES AT A TIME
(CONTACT SHEET VIEW)
.........72
VIEWING IMAGES A PAGE AT A TIME
(JUMP MODE)
........................73
VIEWING IMAGES WITH SOUND........................................................74
VIEWING IMAGE INFORMATION ........................................................75
5
HISTOGRAM ........................................................................................77
VIEWING IMAGES ON A TV.................................................................78
DELETING FILES 79
DELETING A SINGLE FILE ..................................................................80
DELETING MULTIPLE FILES...............................................................81
OTHER REVIEWING FEATURES 82
LOCKING FILES...................................................................................82
MARKING IMAGES ..............................................................................85
ROTATING IMAGES .............................................................................88
RECORDING SOUND MEMO ..............................................................89
SHOWING A SLIDESHOW ...................................................................91
RECORDING AND PLAYING BACK MOVIES 93
RECORDING MOVIES .........................................................................93
PLAYING BACK MOVIES .....................................................................94
RECORDING AND PLAYING BACK SOUND 96
RECORDING SOUND (VOICE RECORD MODE)................................96
PLAYING BACK SOUND ......................................................................97
PRINTING IMAGES 98
PRINTING IMAGES WITH PICTBRIDGE COMPATIBLE PRINTERS
........98
DPOF (DIGITAL PRINT ORDER FORMAT)........................................101
REFERENCE 102
OPTIONAL ACCESSORIES ...............................................................102
MAINTENANCE ..................................................................................102
EXPLANATION OF TERMS................................................................103
FILE NUMBERING SYSTEM..............................................................105
LCD SLEEP AND AUTO POWER OFF...............................................106
TROUBLESHOOTING........................................................................107
SPECIFICATIONS ..............................................................................109
CONNECTING YOUR CAMERA TO A COMPUTER ..........................110
6
SAFETY PRECAUTIONS
WARNING (BATTERY, BATTERY CHARGER AND AC ADAPTER)
Keep batteries in a safe place out of children’s reach. If a battery is
swallowed, call for emergency medical aid immediately.
Do not use any battery other than the designated battery types. Doing so
may cause battery explosion, battery leakage, camera damage, injury o
r
fire.
Do not use any battery other than that specified in this booklet.
Otherwise, it might cause battery explosion, battery leakage, camera
damage, injury or fire.
A
void any shock, shake and drop. Ignoring this warning may cause
battery explosion, or battery leakage, resulting in injury or fire.
Never disassemble, short circuit, heat, or put batteries into fire. Ignoring
this warning may cause battery explosion, battery leakage, injury or fire.
Please only use charger with the dedicated battery. Charging othe
r
battery types causes battery explosion, battery leakage, camera damage,
injury or fire.
If for some reason, the camera or batteries emit smoke, or if overheating
or the smell of burning is detected, remove the batteries, taking care to
avoid being burned. Take the camera to the retailer where you bought it,
or to an authorized Sigma service station.
Please follow all guidelines, rules and regulations of your community
regarding the disposal of batteries.
If you do not use the camera for a long period of time, remove the battery.
Do not use any AC adapter other than the one provided with your camera.
Using other brands may cause electrical shock and fire
To avoid causing damage or injury, please read this instruction manual
carefully, before using the camera.
Please take special note of the following two cautionary symbols.
Warning !!
Caution !!
Using the product and disregarding this warning sign ma
y
cause serious injury or other dangerous results.
Using the product disregarding this caution sign may cause
injury or damage.
This symbol denotes a warning or point, where caution is required.
This Symbol contains information regarding the actions that must be avoided.
7
SAFETY PRECAUTIONS
WARNING (CAMERA)
Never use your camera in an environment where flammable or burnable,
gas, liquids or chemicals, such as Propane, Gasoline, etc., are present.
Keep the camera in a safe place that children cannot reach. Playing with
the camera strap around one’s neck can cause strangulation.
Do not disassemble the camera; Doing so can cause electric shocks and
burns.
Do not touch internal parts of the camera that become exposed as a
result of damage, it could cause fire or electric shock. Remove the
batteries and contact an authorized Sigma service station.
Keep the camera away from moisture or water. If you drop you
r
camera/lens in water, please contact the retailer where you purchased the
camera, or a service station immediately. If you use the camera with this
condition it can cause electric shock or fire.
Prevent water, or metallic and other conductive objects from coming into
contact with the terminals of the camera body. This can result in electric
shock, overheating and fire.
Do not fire the flash close to eyes, otherwise the bright light could
damage the eye. Keep at least 1m/3feet distance between the face and
the camera when taking a picture with flash.
Do not cover the flash with your finger or hand, it can cause skin burn.
The AC Adapter is designed for use with this product only. Do not use it
with any other appliance. Doing so may cause overheating, fire, electric
shock or injury.
If the adapter is emitting smoke, generating a strange odor or making an
abnormal noise, while in use, disconnect the power plug from the outlet
immediately. Otherwise, fire or electric shock may result.
If water or a foreign object gets into the adapter, unplug from the AC outlet
immediately. It could cause fire or electric shock.
Do not attempt to modify or disassemble this product. Doing so can cause
fire or electric shock.
Do not place any heavy objects on the power cord, or pull it, bend it
unduly, or heat it. It could damage the cord, and could cause fire o
r
electric shock.
Do not use this product with AC voltage other than the specified powe
r
supply voltage (AC100V - 240V). Doing so could cause fire or electric
shock.
Use a safety approved AC power cord as is specified by each country.
8
SAFETY PRECAUTIONS
CAUTION (CAMERA)
Do not leave the camera without the lens cap in place. Light entering
through the lens for long periods of time could cause damage to the
camera.
Please do not carry your camera while a tripod is attached, as this could
result in injury or a fall.
Please do not grasp the camera with wet hand, as it might cause electric
shock
Do not leave the camera in a hot place or in a car parked in the sun. If the
camera becomes hot, it might cause burns to the skin.
If the liquid crystal display (LCD) monitor becomes damaged, be careful
of the fragments of glass, which can cause injury. If the liquid inside the
LCD monitor leaks out, and you are faced with the following situations,
please do as follows.
If the liquid adheres to clothes or the skin, wash it away with soap
immediately.
If the liquid enters the eye, flush the affected eye with clean wate
r
immediately for 15 minutes, and seek medical assistance.
If the liquid is swallowed, drink a large quantity of water, induce
vomiting and seek medical assistance.
CAUTION (BATTERY CHARGER AND AC ADAPTER)
Do not pull the Battery Charger o
r
the AC power cord, when disconnecting
the AC adapter from the AC outlet. It could cause fire or electric shock due
to damaged cord. Always take hold of the molded AC plug, when
unplugging it from the outlet.
Do not coverthe Battery Charger orthe AC adapter with cloth, cushions,
etc. It could cause excessive heat, deform the case, and cause fire.
WhenBattery Charger is not used unplug it from the outlet.
9
HANDLING PRECAUTIONS
ENVIRONMENT
ŠYour camera is a precision instrument. Do not drop it or subject it to physical
shock.
ŠThis camera is not waterproof, and cannot be used underwater. Wipe off any
water droplets with a dry cloth as soon as possible. If the camera gets really
wet, promptly consult your nearest Sigma Service Center.
ŠDo not leave the camera in a dusty, hot, or highly humid environment for a
long period of time.
ŠIf the camera is moved from a cold place to a warm room, water droplets may
appear on the camera. Please keep the camera in a bag until it is acclimatized
to the ambient room temperature.
ŠThe camera will work within a temperature range between 0˚C/32˚F and
+40˚C/104˚F and humidity less than 80% (no condensation). However, in cold
temperatures below 0˚C, the power performance of the battery is reduced.
Please carry a spare battery in these circumstances, and keep the batteries
warm.
ŠStatic electricity or magnetic fields, may effect the operation of the camera. If
such exposure occurs, please remove the battery from the camera and
re-insert it, to reset the camera’s microprocessors.
HOW TO STORE THE CAMERA
ŠIf you intend to store the camera for a long time, remove the battery.
ŠTo avoid growth of fungus, store the camera and lens in a dry, cool and
ventilated place, with a drying agent such as silica gel. Keep your equipment
away from chemicals.
Please read this section before using the camera.
Study and familiarize yourself with the functions of your camera before
using it. No compensation or guarantee is provided for unsatisfactory
pictures or loss of profit, etc.
Carry spare batteries when you use the camera in a cold environment,
on a field trip, or when taking many pictures at one time.
10
HANDLING PRECAUTIONS
NOTE ON THE TFT COLOR LCD MONITOR
ŠA few pixels may always be lit or may never light on the LCD monitor. This is
not a failure or malfunction. Images recorded with the camera will not be
affected.
ŠBecause of the normal physical characteristics of the liquid crystal, the
reaction of the display may become slow at low temperatures. At high
temperatures, the display may become dark, but it will return to normal at
room temperature.
SD MEMORY CARD AND MULTIMDEIA CARD
(SOLD SEPARATELY)
The DP1 camera uses a SD memory card, SDHC memory card and
multimedia card.
x In this instruction manual, SD memory card, SDHC memory card and
Multimedia card are referred to as the ‘Card’.
x We recommend SDHC memory card or high speed SD memory card to store
images.
x SD memory card or SDHC memory card incorporate
the write protection switch, which prevents writing or
formatting the card accidentally. If the switch is
placed in the ‘LOCK’ position, it is not possible to
overwrite or erase your data accidentally.
ŠWe do not recommend using a multimedia card in continuous shooting or
Movie mode due to the slow writing speed.
ŠDo not leave the card in direct sunlight or near a heating device.
ŠAvoid storing cards in environments of high temperature and humidity or
where static electricity or electromagnetic fields may be generated
ŠFor proper usage of the card, please refer to their instruction manuals.
ŠThe “Delete” feature of the Camera and PC may not delete the data in the
memory card completely. Some data might still remain. If you wish to remove
all data from card securely, please use third party software.
11
DESCRIPTION OF THE PARTS
12
1.
MICROPHONE
2.
BATTERY / CARD COVER
20.
(AE LOCK) BUTTON
3.
TRIPOD SOCKET
4.
LENS
21.
/
(EXPOSURE / DELETE) BUTTON
5.
FLASH
6.
LENS CAP MOUNT
22.
4-WAY CONTROLLER
7.
CAMERA STRAP EYELET
8.
SPEAKER
23.
(VIEW) BUTTON
9.
HOT SHOE COVER
10.
HOT SHOE
24.
BUTTON
BUTTON
11.
FLASH POP-UP LEVER
12.
COLOR LCD MONITOR
25.
(FOCUS MODE) BUTTON
13.
AUTO FOCUS LAMP
14.
POWER SWITCH
26.
(MENU / OK) BUTTON
15.
MODE DIAL
16.
SHUTTER BUTTON
27.
(DISPLAY) BUTTON
17.
CONNECTOR COVER
18.
MF DIAL
28.
(FLASH MODE) BUTTON
19.
BUSY LAMP
13
COLOR LCD MONITOR INDICATION
Explanation of the icons displayed in still image shooting.
1
Battery Level Indicator
15
Contrast *
2
Flash Mode *
16
Sharpness *
3 Drive Mode* 17 Saturation *
4
White Balance*
18
Focusing Frame
5 ISO Setting* 19 Focus Mode *
6
Image Size
20
MF Enlarged Display *
7
Image Quality
21
MF Scale Bar *
8 Number of shots remaining 22 Auto Bracket *
9
Flash Exposure Compensation
value *
23 Exposure Mode
10
AE Lock *
24
Shutter Speed
11 Camera Shake Warning 25 F Number
12 Remaining Recording Time * 26
Exposure Compensation Value
/ Exposure Meter *
13
Color Settings*
27
Metering Mode
14 Image With Sound *
* Displayed only during setting.
This mark shows that the image is being processed in camera after
shooting. While this mark is displayed, it is not possible to operate
the camera.
This mark shows that the camera is still shooting with a slow shutter
speed.
14
BASIC OPERATION AND QUICK REFERENCE
The DP1 camera has many advanced features. This section, describes
basic camera operation. You can find more details in later sections.
PREPARATION
Charging the battery (P.19)
Charge the supplied lithium-ion battery with
the provided battery charger.
To insert the battery (P.20)
Insert the battery into the chamber in
accordance with the diagram.
Set the language (P.24)
15
Set the date and time (P.27)
Loading the card (P.28)
TAKING THE PICTURE
Turn the camera body on.
Remove the lens cap and press the Power
switch.
Select the exposure mode
P. 3 7
Put the ‘Mode’ dial switch in (Auto)
position
16
Focus
P. 4 5
Compose your image with the color LCD
monitor and press the shutter button
“half-way” to activate exposure metering
and autofocus.
Take a picture
Fully press the shutter button to take the
picture.
Review the image.
P. 6 7 - 6 8
The image is displayed for 2 seconds on the
LCD monitor.
17
PREPARATION
This section describes necessary preparations before using the
camera.
ATTACHING THE CARRY STRAP
1
Undo the end of the strap.
2
Attach the camera strap to camera strap eyelet on both sides as shown.
3
Reassemble the camera strap as shown.
1
2
18
LENS CAP
To preserve the lens, the lens cap is attached. If you do not use the camera,
please keep the lens cap attached.
HOW TO REMOVE THE LENS CAP
Remove the lens cap as shown.
ATTACHING THE LENS CAP
Fit the lens cap keeping the SIGMA logo
horizontal.
CAUTION!!
x If you turn camera body on with the lens cap, the camera will stop the lens
from zooming. Please remove the lens cap and then turn on once again.
x It is not possible to attach the lens cap when the lens is zoomed out. Please
turn the camera off to return the lens to its original position and fit the lens
cap.
19
LOADING THE BATTERY
A lithium-ion battery, BP-31, is provided with the DP1 camera. Charge the
battery before using the camera for the first time. Charge the battery by the
supplied battery charger, BC-31, when the battery is empty.
TO CHARGE THE BATTERY
1
Connect the power cable to the charger and
insert the plug into the wall outlet.
2
Attach the battery by sliding it in the
direction of the arrow, as shown in the
diagram.
Ɣ Charge lamp will turn red during charging.
Ɣ It takes about 120 minutes to recharge the
battery.
Ɣ Required time for recharging the battery
depends on the ambient temperature and
status of recharge level.
3
When the charge lamp turns green,
charging is completed. Remove the battery
from the charger and remove the power
cable plug from the wall outlet.
Ɣ We recommend charging the battery before using the camera again. If it is not
used for several days, the battery performance decreases.
Ɣ If the number of possible images from one charge of the battery considerably
decreases, it may indicate the end of battery’s life. In this case, please
purchase a new battery.
  • Page 1 1
  • Page 2 2
  • Page 3 3
  • Page 4 4
  • Page 5 5
  • Page 6 6
  • Page 7 7
  • Page 8 8
  • Page 9 9
  • Page 10 10
  • Page 11 11
  • Page 12 12
  • Page 13 13
  • Page 14 14
  • Page 15 15
  • Page 16 16
  • Page 17 17
  • Page 18 18
  • Page 19 19
  • Page 20 20
  • Page 21 21
  • Page 22 22
  • Page 23 23
  • Page 24 24
  • Page 25 25
  • Page 26 26
  • Page 27 27
  • Page 28 28
  • Page 29 29
  • Page 30 30
  • Page 31 31
  • Page 32 32
  • Page 33 33
  • Page 34 34
  • Page 35 35
  • Page 36 36
  • Page 37 37
  • Page 38 38
  • Page 39 39
  • Page 40 40
  • Page 41 41
  • Page 42 42
  • Page 43 43
  • Page 44 44
  • Page 45 45
  • Page 46 46
  • Page 47 47
  • Page 48 48
  • Page 49 49
  • Page 50 50
  • Page 51 51
  • Page 52 52
  • Page 53 53
  • Page 54 54
  • Page 55 55
  • Page 56 56
  • Page 57 57
  • Page 58 58
  • Page 59 59
  • Page 60 60
  • Page 61 61
  • Page 62 62
  • Page 63 63
  • Page 64 64
  • Page 65 65
  • Page 66 66
  • Page 67 67
  • Page 68 68
  • Page 69 69
  • Page 70 70
  • Page 71 71
  • Page 72 72
  • Page 73 73
  • Page 74 74
  • Page 75 75
  • Page 76 76
  • Page 77 77
  • Page 78 78
  • Page 79 79
  • Page 80 80
  • Page 81 81
  • Page 82 82
  • Page 83 83
  • Page 84 84
  • Page 85 85
  • Page 86 86
  • Page 87 87
  • Page 88 88
  • Page 89 89
  • Page 90 90
  • Page 91 91
  • Page 92 92
  • Page 93 93
  • Page 94 94
  • Page 95 95
  • Page 96 96
  • Page 97 97
  • Page 98 98
  • Page 99 99
  • Page 100 100
  • Page 101 101
  • Page 102 102
  • Page 103 103
  • Page 104 104
  • Page 105 105
  • Page 106 106
  • Page 107 107
  • Page 108 108
  • Page 109 109
  • Page 110 110
  • Page 111 111
  • Page 112 112

Sigma DP1 User manual

Category
Bridge cameras
Type
User manual

Ask a question and I''ll find the answer in the document

Finding information in a document is now easier with AI