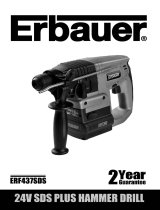
Total TRHLI20228 Owner's manual

Category
Power drills
Type
Owner's manual

This manual is also suitable for

EN
1
v
SDS PLUS BATTERY HAMMER
EN
2
Security instructions
Caution
Read all safety warnings and all instructions. Failure to follow all warnings and
instructions may result in electrical shock, fire, and/or serious injury.
The term “power tool” in the warnings refers to your mains-operated (corded) power tool
or battery-operated (cordless) power tool.
Note: Save all warnings and instructions for future reference. Due to our ongoing R&D&I program,
this document is subject to change without notice.
1) Work area safety
a. Keep the work area clean and well lit to prevent accidents.
b. Do not use power tools in explosive atmospheres, such as in the presence
of flammable liquids, gases, or dust that can cause fires.
c. Keep children and other unauthorized persons away while using a power
tool. Distractions can cause you to lose control of the tool.
2) Electrical safety
a. Power tool plugs must match the outlet. Never modify the plug in any way.
Using a suitable plug reduces the risk of electric shock.
b. Avoid bodily contact with grounded surfaces such as pipes, radiators,
ranges, and refrigerators. There is an increased risk of electric shock if
your body is grounded.
c. Do not expose power tools to rain or wet conditions. Water entering a
power tool will increase the risk of electrical shock.
d. Never use the cord to carry, pull or unplug the power tool. Keep the cable
away from heat or oil.
e. When using a power tool outdoors, use an extension cord suitable for
outdoor use.
f. If using the tool in a damp location is unavoidable, use a Residual Current
Device (RCD) protected supply to reduce the risk of electric shock.
3) Personal security
a. Always stay alert, watch what you are doing and use common sense
when using the tool.
b. Do not use a power tool if you are tired or under the influence of
medication or other substances.
c. Wear personal protective equipment. Always wear eye protection.
Protective equipment such as a dust mask, non-slip safety shoes, hard
hat, or hearing protection used in the proper conditions will reduce
personal injury. Also don't wear loose clothing or jewelry.
d. Prevent the tool from turning on unintentionally. Make sure the switch is
in the off position before connecting to power source and moving.
e. Remove any adjusting wrenches or wrenches before turning on the power
tool. An adjustable wrench or wrench placed in a rotating part of the power
tool can cause serious injury.
f. If devices are used for dust extraction and collection, make sure they are
properly connected. Properly use these devices and you will reduce dust-
related hazards.
EN
3
Safety rules for correct use
4) Use and care of battery tools
a. Recharge the battery only with the charger specified by the
manufacturer. An unsuitable charger can create a fire hazard.
b. Use power tools only with specifically designated batteries. Use of other
batteries may create a risk of injury or fire.
c. When the batteries are not in use, keep it away from other metal objects,
such as paper clips, coins, keys, nails, screws, or other small metal
objects, that can make a connection from one terminal to another.
Shorting the battery terminals can cause burns or fire.
d. Abusive conditions can cause expulsion of liquid from the battery; avoid
contact. If accidentally contacted, rinse immediately with water. If the
liquid comes into contact with the eyes, also seek medical help. Liquid
expelled from the battery can cause irritation or burns.
e. Do not use a battery or tool that is damaged or modified. They may
exhibit unpredictable behavior resulting in fire, explosion, or risk of injury.
f. Do not expose a battery or tool to fire or excessive heat. Exposure to fire
or temperature above 130°C may cause an explosion.
g. Follow all charging instructions. Do not charge the battery or tool outside
the temperature range specified in the instructions. Improper charging
or charging at temperatures outside the specified range may damage
the battery or increase the risk of fire.
5) Service
a. Have your power tool serviced by a qualified person and use replacement
parts recommended by the manufacturer. This will ensure that the safety
of the power tool is maintained.
b. Never use damaged batteries. Battery packs should only be serviced by
the manufacturer or authorized service providers.
Security alert. Use only accessories supported by the manufacturer.
Please read the instruction manual before use.
CE conformity.
Wear safety glasses, hearing protection and a dust mask.
Waste electrical products and batteries must not be disposed of with
household waste. Please recycle at the appropriate facilities. Check with
your local authority or retailer for recycling advice.
Do not expose to rain or water.
Do not burn or expose to high temperatures
EN
4
Additional security warnings
Additional safety rules for hammer
Wear ear protectors. Exposure to noise can cause hearing loss.
Use auxiliary handles, if supplied with the tool. Loss of control can cause personal
injury.
Hold power tool by insulated gripping surfaces when performing an operation
where the cutting accessory may contact hidden wiring or its own cord.
The accessory coming into contact with a live wire could cause an electric shock
to the operator.
Always direct the charger cable away from the machine.
When working with the machine, always hold it firmly with both hands and stand
firm.
Always wear a dust protection mask.
During work breaks or when not using the tool (for example, changing work tools,
repairs, cleaning, adjustment), disconnect the tool from the battery pack.
Unqualified people cannot use this tool.
Keep tool accessories out of the reach of children.
Use only original accessories recommended by the manufacturer.
Battery Pack Safety Warnings
Do not disassemble, open, or crush the cells or battery pack.
Do not short circuit a battery pack. Do not store random battery packs in a box
where they can short-circuit each other or be caused by conductive materials.
When the battery pack is not in use, keep it away from other metal objects, such
as paper clips, coins, keys, nails, screws, or other small metal objects, that can
make a connection from one terminal to another.
Do not expose the battery to heat or fire. Avoid storage in direct sunlight.
Do not subject the battery pack to mechanical shock.
In the event of battery leakage, do not allow the liquid to come into contact with
skin or eyes. If contact has been made, flush affected area with plenty of water
and seek medical advice.
Keep the battery pack clean and dry.
Wipe the battery pack terminals with a clean, dry cloth if they become dirty.
The battery pack must be charged before use. Always refer to these instructions
and use the correct charging procedure.
Do not keep the battery pack on charge when not in use.
After extended periods of storage, it may be necessary to charge and discharge
the battery pack several times for maximum performance.
The battery pack performs best when operating at normal room temperature
(20°C ± 5°C).
When disposing of battery packs, keep battery packs from different
electrochemical systems separate.
Recharge only with the charger specified by the manufacturer. A charger that is
not suitable for one type of battery pack may create a risk of fire when used with
another battery pack.
Do not use any battery pack that is not approved by the manufacturer.
Keep the battery pack out of the reach of children.
Remove the battery from the equipment when not in use.
EN
5
Dispose of the battery pack at the end of its useful life in an appropriate manner.
Do not remove the battery pack from its original packaging until you need it for
use.
Look at the plus (+) and minus () marks on the battery and make sure you use
them correctly.
Other risks
Even when the power tool is used as prescribed, it is not possible to eliminate all residual
risk factors:
a. Health defects resulting from vibration emission if the power tool is used for a
longer period of time or if it is not managed and maintained properly.
b. Injuries and property damage due to broken fixtures breaking suddenly.
Caution
This power tool produces an electromagnetic field during operation. This field can, in
some circumstances, interfere with active or passive medical implants.
To reduce the risk of serious injury, we recommend that persons with medical implants
consult their physician before using this power tool.
The machine must not be damp and must not be used in a humid environment.
Attention
Safe operation of this machine is only possible when the operating or safety
information is fully read and the instructions contained therein are strictly
followed.
Technical data
Data sheet
Voltage
20V
No load speed
0-1100rpm
Impact frequency
0-5000rpm
Energy
2.0J
Maximum
drilling
capacity
Steel
13mm
Wood
26mm
Concrete
22mm
EN
6
Product description
1. Depth stop
2. Dust protection cap
3. Tool holder locking sleeve
4. Mode/function selection switch
5.ON/OFF switch
6. Rotation control (forward/reverse)
The machine is designed for hammer drilling and chiseling in concrete or brick. It is also
suitable for non-impact drilling in wood, metal, ceramics and plastic.
Note: Not all accessories illustrated or described need to be included in the standard delivery.
Set up
Before using
Battery charge
Total's battery pack charger matches the lithium-ion battery installed in the
machine. Do not use any other battery charger.
EN
7
The lithium-ion battery pack is protected against deep discharge. When the
battery pack is empty, the machine is switched off by a protection circuit: the
chuck no longer rotates.
In a hot environment or after heavy use, the battery may become too hot to allow
charging.
Allow the battery to cool down before recharging after long storage.
To remove or install the battery pack (See Fig. A)
Press the battery pack release button (9) to release and slide the battery pack
out of your tool.
After reloading, slide it back into your tool.
Set up
Insertion and extraction of the drill in SDS
Take care that the dust protection cap (2) is not damaged when changing bits.
Insertion
Clean and lightly oil the bit before inserting it.
Insert the dust free tip into the chuck with a twisting motion until it clicks into place.
The bit locks itself.
Check the lock by pulling the bit away from the tool.
Extraction
Retract the chuck locking sleeve (3) back and remove the bit.
Caveat
Your tool generates extreme forces to get the job done quickly and efficiently. These
forces can cause inferior quality SDS bits to break and jam in the chuck. Therefore, we
recommend that only high quality SDS bits be used with this tool.
Auxiliary handle (See Fig. B)
Slide handle over hammer and rotate to desired working position.
To hold the auxiliary handle, turn the handle clockwise.
To loosen the auxiliary handle, turn it counterclockwise.
Note: Always use the auxiliary handle for safety.
Adjustable depth stop (See Fig. B)
Loosen the depth stop by turning the handle counterclockwise.
Slide the depth stop or gauge until the distance between the end of the depth
stop and the end of the bit is equal to the depth of the hole/screw you wish to
make.
Then hold the depth gauge by turning the handle clockwise.
On/off switch (See Fig. C)
Press the on/off switch (5) to turn on and release it to stop your tool.
This tool has an ON/OFF switch with variable speed control (5).
Offers higher speeds with increased trigger pull or lower speeds with reduced
trigger pull; speed is controlled by varying the pressure applied to the switch.
Switch lock (See Fig. C)
The switch trigger can be locked in the OFF position. This helps reduce the chance of
accidental starting when not in use.
EN
8
To lock the switch trigger, place the direction of rotation control (6) in the center position.
Forward and reverse rotation control (See Fig. C)
forward rotation: Push the rotation control back and forth to the left to drill.
reverse rotation: Push the rotation control back and forth to the right to
remove the bits.
Caveat
Never change the direction of rotation while the tool is rotating, wait until it stops.
Function mode selection (See Fig. D)
The operation of the gearbox for each application is adjusted with the function selector
(4). To switch between functions, press the unlock button (a) and turn the dial to the
desired operating mode.
Caveat
The operating mode selector can only be activated when stopped.
overload protection
When overloaded, the motor stops. Immediately unload the load from the machine and
allow it to cool down for approx. 30 seconds at full speed without load.
Temperature dependent overload protection
When used as intended, the power tool cannot be subjected to overload. When the load
is too high or the permissible battery temperature of 75°C is exceeded, the electronic
For simultaneous drilling and impact of concrete, masonry
MODE
For drilling steel, wood and plastics
MODE
for chiselling
MODE
To adjust the angle of the chiseling chuck.
Note: Select this function mode first, adjust the angle of the chuck in
the desired direction. Then select the function mode to “ ”, use the
chiseling work mode.
EN
9
control turns off the power tool until the temperature is back in the optimum temperature
range.
Deep discharge protection
The lithium-ion battery is protected against deep discharge by the "Discharge Protection
System". When the battery is empty, the machine is switched off by means of a protection
circuit: the inserted bit no longer rotates.
work tips
If your power tool overheats, set the speed to maximum and let it run without load for 2-
3 minutes to cool down the motor. Quality, undamaged SDS plus drill bits should always
be used for concrete and masonry.
When drilling in metal, use only HSS drill bits in good condition. Whenever possible, use
a pilot hole before drilling a large diameter hole.
Troubleshooting and Maintenance
Maintenance and cleaning
Remove the battery pack from the tool before performing any adjustments, service, or
maintenance.
Your power tool requires no additional lubrication or maintenance.
There are no user-serviceable parts in your power tool.
Keep the motor ventilation slots clean. Never use water or chemical cleaners to
clean your power tool. Clean with a dry towel.
Always store your power tool in a dry place.
Keep all work controls free of dust.
You may occasionally see small sparks through the ventilation slots. This is
normal and will not damage your power tool.
Problem solving
Reasons for different charging times
Your charging time can be affected for many reasons other than defects in your product.
If the battery pack is partially discharged, it can be recharged in less than 1 hour.
If the battery and ambient temperature are very low, recharging may take 1 to 1.5
hours.
If the battery pack is too hot, it will not recharge because the internal temperature
safety switch will prevent it.
If the battery pack is very hot, you should remove the battery pack from the
charger and let it cool down to room temperature first, then recharging can start.
If you charge a second battery immediately after the first, the charger may
overheat. Always allow at least 15 minutes of rest between charging the battery.
Reasons for different battery pack working times
Charging time issues or not using a battery for a long time will reduce the battery's
operating time. This can be corrected after several loading and unloading operations by
loading and working with your drill.
Heavy duty conditions, such as large screws into hardwood, will consume battery pack
power faster than lighter duty conditions. Do not recharge your battery below 0ºC above
30ºC as this will affect performance.
EN
10
Environment
Do not dispose of electrical appliances as unsorted municipal waste, use
separate collection facilities.
Contact your local authority for information on available collection systems.
If electrical appliances are disposed of in landfills, hazardous substances can
seep into the groundwater and enter the food chain, harming your health and
well-being.
Recycle raw materials instead of disposing of them as waste.
The machine, accessories and packaging must be sorted for environmentally
friendly recycling.
Plastic components are labeled for categorized recycling.
Exploded view
EN
11
SDS PLUS BATTERY HAMMER
  • Page 1 1
  • Page 2 2
  • Page 3 3
  • Page 4 4
  • Page 5 5
  • Page 6 6
  • Page 7 7
  • Page 8 8
  • Page 9 9
  • Page 10 10
  • Page 11 11

Total TRHLI20228 Owner's manual

Category
Power drills
Type
Owner's manual
This manual is also suitable for

Ask a question and I''ll find the answer in the document

Finding information in a document is now easier with AI