Page is loading ...

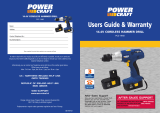
14.4 VOLT
CORDLESS HAMMER DRILL
User Guide & Warranty
After Sales Support
Now you have purchased a Power Craft
product you can rest assured in the
knowledge that as well as your 3 year
parts and labour warranty you have
the added peace of mind of dedicated
helplines and web support.
AFTER SALES SUPPORT
UK HELP LINE: 0905-1460005
IRELAND HELP LINE: 1520-932626
WEB SUPPORT:www.heltec.eu
Name:
Address
Contact Telephone No.:
Fault Description:
Please complete this section before sending in your warranty certificate.
In order to deal with your enquiry as quickly and efficiently as possible, we ask you to send your
enquiry by email ([email protected]). Do not forget to include your name, address and a
daytime telephone number.
Alternatively, you can contact our service hot-line on the number given below.
Office hours areas follows:
Mon - Fri: 8 am - 6 pm, Sat: 10 am - 2 pm, Sun: 10 am - 4 pm
UK Helpline
Heltec Ltd.
Circuit Tech Ltd.
Units 1/9 Stanley Mill • Kirkebrok Road • Deane, Bolton Lancs, England • BL3 4JE
Service Center
0905-1460005 - £ 0,06 / min.
Ireland Helpline
Heltec Ltd.
Circuit Tech Ltd.
Units 1/9 Stanley Mill • Kirkebrok Road • Deane, Bolton Lancs, England • BL3 4JE
Service Center
1520-932626 - E 0,15 / min.
WEB SUPPORT
www.heltec.eu
Replacements or repairs under guarantee regulations are free of charge.
GB-0803-14
14.4V CORDLESS HAMMER DRILL
PCC-1440

HELPLINE No. U K 0905-1460005 • IRELAND 1520-932626
WEB SUPPORT:www.heltec.eu
23
Warranty
HELPLINE No. U K 0905-1460005 • IRELAND 1520-932626
WEB SUPPORT:www.heltec.eu
02
Contents
03 Introduction
04 Machine data
05 Safety instructions
11 Mounting accessories
13 Operation
17 Charging the battery
19 Maintenance
21 Parts list
22 Exploded view
23 Warranty
WARRANTY CERTIFICATE
Year of manufacture: 03/2007 CORDLESS HAMMER DRILL PCC-1440
Congratulations! You have made an excellent choice with the purchase of this Quality
product. Our commitment to quality also includes our service. Should you, contrary to
expectations, experience defects due to material or manufacturing faults during private use
within 36 months of the date of purchase we shall be liable for warranty in accordance with
statutory warranty regulations, provided that: - The device was not put to any use other than the intended.-
Was not overloaded. - Was not used with the wrong accessories. - Repairs where not carried out by any
other than the authorised workshop. The warranty certificate is only valid in connection with the receipt.
Please keep both in a safe place. The warranty does not affect your statutory rights.
The product is guaranteed for a period of three years beginning on the day of purchase. Keep your purchase
receipt safe as proof of the date of purchase. The guarantee period can only be extended for the duration of
any repair required.
During the warranty period, defective devices can be sent FREIGHT PREPAID to the service address stated at
the end of this booklet. We will, at our discretion either repair or exchange the device in accordance with
warranty legislation.
Please include the following when sending in your product for repair:
1. The receipt (proof of purchase)
2. This warranty certificate with your name, address, contact details and a fault description
completed overleaf.
If the original receipt is not enclosed the repair will be charged for in all cases. After the warranty has
expired you can still send defective devices for repairs FREIGHT PREPAID to the address at the end of this
booklet. Quotes as well as repairs after warranty period are to be paid for in all cases. Ensure the product is
sent well packed as no responsibility can be accepted for items lost or damaged in transit. This warranty
does not affect your statutory rights.
EC DECLARATION OF CONFORMITY
We Ferm B.V.
Lingenstraat 6, 8028 PM Zwolle, The Netherlands
declare that the design and construction of the following machine, in the form supplied by us, comply with
the requirements of the appropriate EC directives.
Product Description: CORDLESS HAMMER DRILL
Model: PCC-1440
Appropriate EC directives: 98/37/EC, 73/23/EEC, 89/336/EEC, 2002/95/EC, 2002/96/EC
Applicable harmonised norms: EN60745-1, EN60745-2-1, EN60335-1, EN60335-2-29, EN55014-1, EN55014-2,
Applicable harmonised norms: EN61000-3-2, EN61000-3-3.
J.A. Bakker - van Ingen J. Lodewijk
CEO Ferm B.V. Quality Manager Ferm Global 03/2007

HELPLINE No. U K 0905-1460005 • IRELAND 1520-932626
WEB SUPPORT:www.heltec.eu
03
Introduction
Congratulations on choosing to buy a
Powercraft Product
By doing so you now have the assurance and peace of mind that comes with
purchasing a product made by one of Europe’s leading manufacturers.
All products brought to you by PowerCraft are manufactured to the highest
standards of performances and safety, and, as part of our philosophy for
customer service and satisfaction, are backed by our comprehensive
3Year Warranty.
We hope you will enjoy using your purchase for many years to come.
CORDLESS HAMMER DRILL
For your own safety and that of others, we recommend that you
read this instruction manual carefully before using this machine.
Keep this instruction manual and the documentation provided
with the machine for future reference.
Contents of packing
1Cordless hammer drill
1Battery
1Battery charger
2Double-sided bits (Philips / slotted)
1Users manual
1After sales support card
1 Quick set-up guide
Check the appliance, any loose parts and accessories for damage caused
during transport.
HELPLINE No. U K 0905-1460005 • IRELAND 1520-932626
WEB SUPPORT:www.heltec.eu
22
Exploded view

HELPLINE No. U K 0905-1460005 • IRELAND 1520-932626
WEB SUPPORT:www.heltec.eu
21
Parts list
HELPLINE No. U K 0905-1460005 • IRELAND 1520-932626
WEB SUPPORT:www.heltec.eu
04
Machine information
Technical specifications
Product information
Fig. A
1. Drill chuck
2. Hammer action adjustment
3. Torque adjustment ring
4. Speed selection switch
5. Direction switch
6. On/Off switch
7. Battery
4
5
6
7
1
7
2
3
Voltage 14.4 V —
---
Charger voltage 230 V
Charger frequency 50 Hz
Battery output 1.5 Ah
Charging time 1 - 2 hour
Drill speeds 2
Max. torque (low speed) 15 Nm
No-load speed 0 - 400/0 - 1150/min
Impact rate 0 - 6400/0 - 18400/min
Chuck capacity 0.8 - 10 mm
Weight (incl. battery) 1.84 kg
Lpa (sound pressure) 91 dB(A)
Vibration 3.39 m/s2
Position Description Specification
1 Bolt left for chuck 502060
2 Chuck 502061
39 Left/right switch 406656
42 Switch 406654
43 Battery CDA6031
- Charger CDA6017

HELPLINE No. U K 0905-1460005 • IRELAND 1520-932626
WEB SUPPORT:www.heltec.eu
05
Safety instructions
Explanation of the symbols
Read instructions carefully.
In accordance with essential applicable safety standards of
European directives.
Class II machine – Double insulation – You don’t need any earthed
plug.
Denotes risk of personal injury, loss of life or damage to the tool in
case of non-observance of the instructions in this manual.
Indicates electrical shock hazard.
Adjustable speed regulator.
Do not use in rain.
Indoor use only.
In the event of a disruption in power, the transformer is not
dangerous.
Never throw batteries into an open fire.
Never throw batteries into water.
HELPLINE No. U K 0905-1460005 • IRELAND 1520-932626
WEB SUPPORT:www.heltec.eu
20

HELPLINE No. U K 0905-1460005 • IRELAND 1520-932626
WEB SUPPORT:www.heltec.eu
19
Maintenance
Make sure that the machine is not live when carrying out
maintenance work on the motor.
The machines have been designed to operate over a long period of time with
aminimum of maintenance. Continuous satisfactory operation depends upon
proper machine care and regular cleaning.
Cleaning
Keep the ventilation slots of the machine clean to prevent overheating of the
engine. Regularly clean the machine housing with a soft cloth, preferably
after each use. Keep the ventilation slots free from dust and dirt. If the dirt
does not come off use a soft cloth moistened with soapy water. Never use
solvents such as petrol, alcohol, ammonia water, etc. These solvents may
damage the plastic parts.
Lubrication
The machine requires no additional lubrication.
Faults
Should a fault occur, e.g. after wear of a part, please contact the service
address on the warranty card. In the back of this manual you will find an
exploded view showing the parts that can be ordered.
Environment
Toprevent damage during transport, the appliance is delivered in a solid
packaging which consists largely of reusable material. Therefore please make
use of options for recycling the packaging. NiCd cells are recyclable.
HELPLINE No. U K 0905-1460005 • IRELAND 1520-932626
WEB SUPPORT:www.heltec.eu
06
Safety instructions
Always recycle batteries.
Wear ear and eye protection.
Faulty and/or discarded electrical or electronic apparatus have to
be collected at the appropriate recycling locations.
General safety instructions
Warning! Read all instructions. Failure to follow all instructions listed below
may result in electric shock, fire and/or serious injury. The term “power tool”
in all of the warnings listed below refers to your mains operated (corded)
power tool or battery operated (cordless) power tool. Save these instructions!
1) Work area
a. Keep work area clean and well lit. Cluttered and dark areas invite accidents.
b. Do not operate power tools in explosive atmospheres, such as in the
presence of flammable liquids, gasses or dust. Power tools create sparks
which may ignite the dust of fumes.
c. Keep children and bystanders away while operating a power tool.
Distractions can cause you to lose control.
2) Electrical safety
a. Power tool plugs must match the outlet. Never modify the plug in any
way.Do not use any adapter plugs which earthed (grounded) power tools.
Unmodified plugs and matching outlets will reduce risk of electric shock.
b. Avoid body contact with earthed or grounded surfaces such as pipes,
radiators, ranges and refrigerators. There is an increased risk of electric
shock if your body is earthed or grounded.
c. Do not expose power tools to rain or wet conditions. Water entering a
power tool will increase the risk of electric shock.
d. Do not abuse the cord. Never use the cord for carrying, pulling or
unplugging the power tool. Keep cord away from heat, oil, sharp edges or
moving parts. Damaged or entangled cords increase the risk of electric shock.

HELPLINE No. U K 0905-1460005 • IRELAND 1520-932626
WEB SUPPORT:www.heltec.eu
07
Safety instructions
3) Personal safety
a. Stay alert, watch what you are doing and use common sense when
operating a power tool. Do not use a power tool while you are tired or
under the influence of drugs, alcohol or medication. A moment of
carelessness while operating power tools may result in serious personal
injury.
b. Use safety equipment. Always wear eye protection. Safety equipment such
as dust mask, non-skid safety shoes, hard hat, or hearing protection used
for appropriate conditions will reduce personal injuries.
c. Avoid accidental starting. Ensure the switch is in the off position before
plugging in. Carrying power tools with your finger on the switch or
plugging in power tools that have the switch on invites accidents.
d. Remove any adjusting key or wrench before turning the power tool on. A
wrench or a key left attached to a rotating part of the power tool may
result in personal injury.
e. Do not overreach. Keep proper footing and balance at all times. This
enables better control of the power tool in unexpected situations.
f. Dress properly. Do not wear loose clothing or jewellery. Keep your hair,
clothing and gloves away from moving parts. Loose clothes, jewellery or
long hair can be caught in moving parts.
g. Use clamps or a vice to hold work. It’s safer than using your hand and it
frees both hands to operate tool.
4) Power tool use and care
a. Do not force the power tool. Use the correct power tool for your
application. The correct power tool will do the job better and safer at the
rate for which it was designed.
b. Do not use the power tool if the switch does not turnit on and off. Any
power tool that cannot be controlled with the switch is dangerous and
must be repaired.
c. Disconnect the plug from the power source before making any
adjustments, changing accessories, or storing power tools. Such preventive
safety measures reduce the risk of starting the power tool accidentally.
d. Storeidle power tools out of the reach of children and do not allow
persons unfamiliar with the power tool or these instructions to operate the
power tool. Power tools are dangerous in the hands of untrained users.
e. Maintain power tools. Check for misalignment or binding of moving parts,
breakage of parts and any other condition that may affect the power
tools operation. If damaged, have the power tool repaired before use.
Many accidents are caused by poorly maintained power tools.
HELPLINE No. U K 0905-1460005 • IRELAND 1520-932626
WEB SUPPORT:www.heltec.eu
18
Charging battery
The battery provided is not charged. Before using it for the first time leave it
to charge for 1 - 2 hours in order for it to reach its full capacity. The total
capacity of the battery will be reached after it has been charged 4 - 5 times.
If the cordless hammer drill is not going to be used for a long
period of time, recharge the battery before storing. From time to
time recharge the battery for a short period of time, to prevent it
from running down. Store the battery separately in the plastic case.
Recharging
Batteries must be fully used before charging
• When the battery is charged the cordless hammer drill has to be used
until you start noticing that the power of the drill is diminishing and that
the maximum rotational speed is not reached.
•Now the battery is almost discharged, start recharging it.
• If you charge the battery while it is still only one third used, the ’memory
effect’ can occur. During charging only the used part of the battery is
charged. Crystallization can occur on the one third that is still charged,
causing permanent damage. This will result in reduced use time from a
fully charged battery.
• Do not use up the batterycompletely.As soon as you notice that the
power or the maximum rotational speed is diminishing, you must charge
the battery.If when using the drill the batterybecomes fully used, a
‘switch of poles effect’ can occur. Once this has occurred, the damage to
the batteryis irreparable.
When the cordless hammer drill is not being used over a long
period of time, the battery must be charged fully before storing.

HELPLINE No. U K 0905-1460005 • IRELAND 1520-932626
WEB SUPPORT:www.heltec.eu
17
Charging the battery
Charging
Fig. G
The enclosed battery charger has been exclusively designed for loading
batteries of the PCC-1440.
•Insert the battery (5) into the charger (11) as shown in the drawing. Take care
to observe the + and – polarity markings.
• Plug the charger power plug into the power socket. The red quick-charge
lamp (12) illuminates.
•Charging is completed once the green maintenance charge lamp (13) on the
other side of the charger illuminates. The battery is now ready for use.
• The energy display (8) on the battery case provides information on the charge
level of the battery. Press the push button (14).
The coloured display has the following meanings:
• All coloured bars illuminate (red-yellow-green): the battery is fully charged
•The red and yellow coloured bars illuminate: the battery is partially charged
•The red coloured bar illuminates: the battery is discharged and must be
recharged.
Only use the battery charger in a dry environment at a
temperature between 5 °C and 40 °C.
HELPLINE No. U K 0905-1460005 • IRELAND 1520-932626
WEB SUPPORT:www.heltec.eu
08
Safety instructions
f. Use the power tool, accessories and tool bits etc., in accordance with these
instructions and in the manner intended for the particular type of power
tool, taking into account the working conditions and the work to be
performed.
g. Damaged switches must be replaced at a customer service repair centre.
Do not use power tools that cannot be switched on and off.
h. Do not leave power tools unattended while they are switched on. Always
switch off the tool and wait until it has come to a full standstill before leaving.
i. If the mains cable has been damaged, it must be replaced with a special
mains cable. These can be obtained from the manufacturer or the
manufacturer's customer service department.
5) Battery use and care
a. Ensure the switch is in the off position before inserting battery pack.
b. Recharge only with the charger provided by the manufacturer. A charger
that is suitable for one type of battery pack may create a risk of fire when
used with another battery pack.
c. Take care that there are no metal objects (nails, paper clips, coins, etc.) in
contact with the surface of the battery.
d. If you come into contact with acid from the battery, rinse it off with water
immediately. If acid gets into your eyes, rinse out your eyes at once with
water and contact a doctor immediately!
6) Service
a. Please use a qualified expert who uses original replacement parts to repair
your power tool.
b. Caution! The use of any accessories or additional tools other than those
recommended in this manual may lead to an increased risk of injury.Only
use original replacement parts.

HELPLINE No. U K 0905-1460005 • IRELAND 1520-932626
WEB SUPPORT:www.heltec.eu
09
Safety instructions
Important safety notes on charger and battery
If you come into contact with acid from the battery, rinse it off
with water immediately.If acid gets into your eyes, rinse out your
eyes at once with water and contact a doctor immediately!
1. Please read the manual before using the battery and charger.
2. NB! Only use the charger and battery provided by the manufacturer.
3. Protect the charger, battery and power tool from moisture, e.g. rain or
snow.
4. Always check that all cables are connected correctly before using the charger.
5. If you discover that a cable is damaged, you should not use the charger
again. Have the damaged cable replaced immediately.
6. When the charger is not in use, the mains plug should be removed from
the power socket. Do not pull out the plug by tugging the cable.
7. If the charger has been dropped or has otherwise been exposed to high
mechanical stresses, you should have it checked for damage by an
authorised dealer before using it again. Damaged parts should be
repaired immediately.
8. Never attempt to repair the charger or battery yourself. Repairs must
always be carried out by an authorised dealer.
9. Before cleaning or servicing the charger or battery, unplug the drill from
socket.
10. Never charge the batterywhen the ambient temperature is below
5°C or above 40°C.
11. The air vents in the charger must never be blocked.
Ashort-circuit will cause a high current to flow. This may result in
overheating, the danger of fire or explosion of the battery. This
may damage the batteryor the user may risk an accident.
Therefore:
•Take care that there are no metal objects (nails, paper clips, coins, etc.)
in contact with the surface of the battery .
• Do not expose the battery to water or rain.
• Only use the battery supplied in combination with this cordless
hammer drill/screwdriver so as to avoid faults and/or risks to persons.
HELPLINE No. U K 0905-1460005 • IRELAND 1520-932626
WEB SUPPORT:www.heltec.eu
16
Operation
Tips
• Use only bits that fit properly in the head of the screw.
• When driving larger and/or longer screws into hard materials, it is
advisable to drill a pilot hole first.
• For drilling in metal, use only perfectly sharpened HSS drills.

HELPLINE No. U K 0905-1460005 • IRELAND 1520-932626
WEB SUPPORT:www.heltec.eu
15
Operation
Hammer drilling
Fig. F
Insert an undamaged drill bit into the clamping chuck. For drilling in soft
materials, such as plastic or wood, use a metal drill bit and turn the changeover
switch (2) to the right until the indicating mark points to 'Drill bit' (drilling). For
hammer drilling in hard materials, such as stone and concrete, turn the
changeover switch to the left until the indicator mark points to 'Hammer'
(hammer drilling).
Regularly check the clamping chuck for damage. If necessary, use
coolant when drilling. When drilling in walls, bear in mind that
electrical lines and water pipes may be located inside the walls.
Switching the device on and off
Fig. A
• Depress the On/Off switch (6, see page 4). It regulates the speed of the
appliance by transmitting power to the switch.
•Release the On/Off switch (6, see page 4) to stop the drill chuck
immediately.
• Move the direction switch (5, see page 14) to the centre in order to lock
the appliance into a disabled state.
Only set down the appliance when it has stopped running completely. Do not
place it on a dusty surface as particles of dust could get into the mechanism.
2
HELPLINE No. U K 0905-1460005 • IRELAND 1520-932626
WEB SUPPORT:www.heltec.eu
10
Safety instructions
12. A damaged battery or one that can no longer be charged must be
disposed of as special waste. Do not discard it with household waste.
13. Never throw the battery onto a fire or into water. This can cause
explosions!
Electrical safety
Always check that the voltage on the battery pack corresponds to
the voltage on the rating plate. Also check that your mains voltage
corresponds to the input voltage of the battery charger.
The battery charger is double insulated; therefore no earth wire is
required.
• Remove the battery. When the power tool is not being used, prior to
maintenance and when changing tools such as the clamping chuck, and
drill bit.
•The tool is suitable for use as a screwdriver and drill only.

HELPLINE No. U K 0905-1460005 • IRELAND 1520-932626
WEB SUPPORT:www.heltec.eu
11
Mounting accessories
Prior to mounting an accessory always remove the battery.
Attaching and removing drill bits
Fig. B
In addition to drilling, the device can also function as a screwdriver and
accommodate bits with hexagonal shafts.
•Loosen the drill chuck (1) by turning it by the flanging (B).
•Insertthe shaft of the drill bit into the receptacle of the drill chuck.
• Tighten the drill chuck until the shaft of the drill bit is firmly in place and you
hear a click noise.
• Loosen the drill chuck if you want to change the drill bit.
•Beforeconnecting the charger, ensure that the outer surface of the battery or
tool is clean and dry.
• Only use single bits in combination with the bit extension piece. The extension
piece is not suitable for double sided bits.
1
B
HELPLINE No. U K 0905-1460005 • IRELAND 1520-932626
WEB SUPPORT:www.heltec.eu
14
Operation
Adjusting the torque
Fig. E
The appliance has 16 different torque settings with which to set the power
for driving and removing screws.
•Set the torque adjustment ring (3) to the desired position. The available
torque settings are indicated on the adjustment ring by the numbers 1 to 16.
• You should preferably choose as low a setting as possible when using the
screwdriver.Select a higher speed setting for drilling.
Driving and removing screws
•Set the direction reversing switch (5) to position 'R' in order to drive
screws.
•Set the direction reversing switch to position 'L' in order to remove screws.
Drilling
• Rotate the torque adjustment ring (3) to the drilling position.
Ensure that the direction reversing switch (5) is always set to 'R'
during drilling.

HELPLINE No. U K 0905-1460005 • IRELAND 1520-932626
WEB SUPPORT:www.heltec.eu
13
Operation
Adjusting the speed
Fig. D
The appliance has two drill speeds.
•For slow drilling or for driving or removing screws, set the speed selection
switch (4) to '1'.
• For fast drilling set the speed selection switch to '2'.
Never switch speeds when the motor is running!
4
1
2
HELPLINE No. U K 0905-1460005 • IRELAND 1520-932626
WEB SUPPORT:www.heltec.eu
12
Mounting accessories
Connecting and removing the battery
Fig. C
Ensure that the exterior of the battery or tool is clean and dry
before connecting the charger.
• Ensure that the direction reversing switch (5, see page 14) is in the central
position in order to prevent the appliance from being switched on
unexpectedly.
•Insert the battery into the base of the appliance, as shown on the
illustration above. Push the batteryuntil it latches in.
• Press the locking buttons (10) on both sides to remove the battery.
Always follow the safety notes and the relevant safety code.
Hold the appliance firmly and press the drill steadily onto the workpiece. Do
not overload the appliance.
7
10
/