Page is loading ...

EN FOOD DEHYDRATOR
Translation of the original manual
SFD 7750SS

SFD 7750SS

A
2
3
4
5
6
1
B
8888
TEMPTIME
234
57
61

- 1 - 12/2022
2022, .
EN Food Dehydrator
Important safety instructions
READ CAREFULLY AND STORE FOR FUTURE USE.
• This appliance may be used by children 8 years of age
and older and by persons with physical, sensory or mental
impairments or by inexperienced persons, if they are
properly supervised or have been informed about how
to use the product in asafe manner and understand the
potential dangers.
• Children must not play with the appliance. Cleaning
and maintenance performed by the user must not be
performed by children unless they are older than 8 years
of age and under supervision.
• In the event that the power cable is damaged, have it
repaired at aprofessional service centre to prevent causing
adangerous situation. It is forbidden to use the appliance if
it has adamaged power cable.
• Children younger than 8 years of age must be kept away
from the appliance and its power cord.
• The surfaces of the appliance that come into contact with
food must always be cleaned according to the instructions
in this user'smanual.

- 2 - 12/2022
2022, .
Warning:
This appliance is not designed to be controlled
using aprogrammed device, external timer switch or
remote control.
Electrical safety
• Before connecting this appliance to an electrical power socket, make sure that the voltage stated on its rating label corresponds to the voltage in
your power socket.
• Connect the appliance only to aproperly grounded socket. Do not use an extension cord.
• Fully unwind the power cord before use.
• Do not connect and disconnect the appliance'spower cord to and from the power socket with wet hands.
• Ensure that the power plug contacts do not come into contact with water or any other liquid. If precisely this happens, carefully dry the power plug
before using it again.
• Do not disconnect the appliance from the power socket by pulling on the power cord. This could damage the cord or the el. power socket.
Disconnect the power cord from the power socket by pulling on the plug.
• Do not place heavy items on the power cord. Make sure the power cord does not hang over the edge of atable and that it is not touching ahot
surface or sharp objects.
• Keep the power cord dry.
• Do not repair the appliance yourself or make any adjustments to it. Have all repairs or adjustments of the appliance performed at an authorised
service centre. Tampering with the appliance during the warranty period may void the warranty.
• To prevent the risk of injury by electrical shock, never submerge the power cord in water or any other liquid, or wash it under running water.
• Do not use the appliance if it is not working correctly, if it has been damaged or has been submerged in water.
• This appliance is designed for household use. Do not use it for commercial purposes or for other purposes for which it is not intended.
Safety during use
• This appliance is designed for use in households, offices and similar types of areas. Do not use it in industrial surroundings or outdoors or in rooms
with high humidity, i.e. laundries or bathrooms.
• Do not use the appliance in an industrial environment or outdoors. Do not use it for any other purposes than those intended.
• Only use the appliance with the original accessories from the manufacturer. Never use accessories, which have not been supplied with this
appliance or which have not been explicitly recommended by the manufacturer.
• Use the appliance and its accessories in accordance with the instructions contained in this user'smanual.
• Only use the appliance with the original accessories that came with it.
• Before every use, check the selected accessory for damage. Never use the appliance with adamaged accessory.
• Do not place the appliance or its accessories on an electric or gas stove or in its vicinity, on the edge of atable or on an unstable surface. Only place
the appliance on an even, dry and stable surface.
• Do not expose the appliance and its accessories to the outdoor environment, extreme temperatures, direct sunlight, excessive humidity or
excessively dusty environments.
• Do not place the appliance and its accessories near heaters, open fires or other sources of heat.
• Protect the appliance and its accessories against being dropped on the floor or table, even from low heights and against items falling on them.
• Do not insert any objects into the ventilation openings of the appliance. Do not cover the ventilation openings of the appliance, this creates arisk of
overheating.
• When the appliance is running, watch out for children and household pets.
• Never leave the appliance in operation without supervision. Keep it under supervision during the entire food dehydration process.
• If the appliance is used in the vicinity of children, be especially careful and select an installation location that is out of their reach.
• Do not use sprays in the vicinity of the appliance.
• Do not place any paper or plastic items inside the appliance. Do not store anything inside the appliance.
• When handling the appliance and the trays, proceed carefully, they may be hot!
• The temperature of accessible surfaces may be higher if the appliance is in operation.
• Do not carry the appliance when it is hot.
• Keep the trays clean because they come into contact with food.
• Never wash the appliance under running water or submerge it in water or another liquid. Except for the trays, no other part of the appliance is
intended for washing in adishwasher.
• Do not turn on the appliance when it is empty. Incorrect use of the appliance may negatively affect its lifetime.
• Do not use the appliance when it is not functioning properly or showing signs of damage.
• In order to prevent ahazardous situation arising, do not repair the appliance yourself or modify it in any way. Have all repairs performed at an
authorised service centre. By tampering with the appliance, you risk voiding your legal rights arising from unsatisfactory performance or quality
warranty.
• Store the appliance in adry environment.

- 3 - 12/2022
2022, .
• Thank you for purchasing aSENCOR brand product and we hope that
you will be happy with it.
• Prior to using this appliance, please read the user'smanual
thoroughly, even in cases, when one has already familiarised
themselves with previous use of similar types of appliances. Only use
the appliance in the manner described in this user’smanual. Keep this
user'smanual in asafe place where it can be easily retrieved for future
use. In the event that you hand this appliance over to somebody else,
make sure to also include this user'smanual.
• Carefully unpack the appliance and take care not to throw away any
part of the packaging before you find all its parts. We recommend
saving the original cardboard box, packaging material, purchase
receipt and responsibility statement of the vendor or warranty card for
at least the duration of the legal liability for unsatisfactory performance
or quality. In the event of transportation, we recommend that you pack
the appliance in the original box from the manufacturer.
. . . . . . . . . . . . . . . . . . . . . . . . . . . . . . . . . . . . . . . . . . . . . . . . . . . . . . . . . . . . . . . . . . . . . .
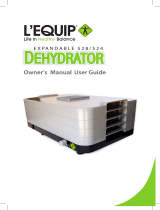
DESCRIPTION OF THE APPLIANCE
A1 Control panel
A2 Transparent door
A3 Dehydrating area
A4 Removable stainless steel
trays (7×)
A5 Plastic mesh (1×)
A6 Drip tray (1×)
. . . . . . . . . . . . . . . . . . . . . . . . . . . . . . . . . . . . . . . . . . . . . . . . . . . . . . . . . . . . . . . . . . . . . .
B1 Illumination of the internal
area
B2 Time setting
B3 Decrease value button
B4 Display
B5 Increase value button
B6 Temperature setting
B7 Food dehydrator On/Off
button
. . . . . . . . . . . . . . . . . . . . . . . . . . . . . . . . . . . . . . . . . . . . . . . . . . . . . . . . . . . . . . . . . . . . . .
PURPOSE OF USE
• The food dehydrator is intended for dehydrating food such as fruit,
vegetables, fruits of the forest, meat, seeds, beans, nuts, mushrooms,
etc. It is also suitable for drying herbs, medicinals, spices or even
flowers for decorating or for making aromatic mixtures.
• The food dehydrator comprises of acabinet with adrying area with
levels for the removable trays. The heating element, motor with fan
and thermostat are located at the back of the cabinet.
• The food dehydrator functions on the basis of Horizontal Air Flow
technology, which ensures even heat distribution. It enables heat to
be evenly distributed to all levels of the drying area and eliminates the
need to rotate the trays during the dehydration process.
WHY USE AFOOD DEHYDRATOR?
• Drying (dehydration) is one of the oldest methods of food preservation
during which food is heated to evaporate its moisture content. Unlike
standard long-term food storage (e.g. canning, freezing), gentle
dehydration retains up to 80% of vitamins, minerals and trace
elements, while concentrating aromatic compounds, which makes
dehydrated foods all the more tasty. With correct storage, it is then
possible to use dehydrated foods all year round.
• Foods that are heated during standard cooking or canning procedures
over alonger period of time at atemperature higher than 48°C start
to lose their nutritional value and enzyme content. Food enzymes
are important because they aid the body'sdigestive enzymes in
breaking up food into digestible proteins. Asuitable food dehydrator
such as this one, is able to maintain asufficiently low temperature
at which enzymes do not lose their effect, while at the same time
generate sufficiently hot air for fast dehydration of food and prevent
the development of moulds and bacteria.
. . . . . . . . . . . . . . . . . . . . . . . . . . . . . . . . . . . . . . . . . . . . . . . . . . . . . . . . . . . . . . . . . . . . . .
BEFORE FIRST USE
• Before first using the food dehydrator, thoroughly wash the removable
trays in hot water using neutral kitchen detergent. Then rinse all these
parts with clean water and dry them thoroughly with afine wiping
cloth. Trays can also be washed in adishwasher.
• Also clean out the inside of the cabinet using alightly dampened
wiping cloth and then wipe everything dry. When cleaning, take care
not to wet the heating elements or the fan of the food dehydrator.
Never submerge the cabinet of the food dehydrator in water or any
other liquid.
• Before first use, we recommend running the food dehydrator empty
for at least 4 hours. After turning off the food dehydrator, allow it and
all its accessories to cool down and air out to rid them of potential
odours.
• Only clean the power cord of the motor base unit using dry wiping
cloth, never wash it with water.
. . . . . . . . . . . . . . . . . . . . . . . . . . . . . . . . . . . . . . . . . . . . . . . . . . . . . . . . . . . . . . . . . . . . . .
LOCATION OF THE FOOD DEHYDRATOR
• Locate the food dehydrator in awell-ventilated, warm and dry room
with minimal dustiness. To ensure proper air circulation, there must be
aclearance of at least 15 cm around to the food dehydrator.
• The surface on which the food dehydrator is placed must be stable,
heat resistant and sufficiently far from other sources of heat. The
load bearing capacity of the selected surface must correspond to the
combined weight of your food dehydrator and its contents.
• Also select alocation respecting the fact that it is not appropriate to
move the food dehydrator while it is running. Likewise, also take into
consideration the fact that the aroma of the dehydrated food will be
released into the room during the dehydration process, which may not
be pleasant for everyone.
. . . . . . . . . . . . . . . . . . . . . . . . . . . . . . . . . . . . . . . . . . . . . . . . . . . . . . . . . . . . . . . . . . . . . .
SELECTING APPROPRIATE FOODS
• Correctly selecting and preparing foods for dehydration will result in
their better appearance and taste, faster drying and termination of the
ripening process, and it will also extend the food'sshelf life.
• The best results are only achieved when good quality ingredients are
used. Practically any type of fruit or vegetable may be dehydrated.
Only select ripe fruits and vegetables, not over-ripened, and free of
bruising, rot and moulds. It is possible to dehydrate sour and mildly
sweet fruits and vegetables.
• When intending to dehydrate meat, it must be fresh and lean.
PREPARING INGREDIENTS
Note:
It is highly probable that fruits and vegetables bought
in ordinary stores are waxed or treated with aspray.
Most sprays or waxes can be washed off using bio-
degradable cleaning products or in vinegar water, after
which it is necessary to rinse the food using clean
water. If the attempt to remove the wax or spray is
unsuccessful, we recommend to peel the food prior to
dehydrating it.
FRUIT
• Thoroughly wash the fruit and dry it well. Prepare only an amount of
fruit that you will be able to dry within asingle cycle. Remove any soft
or damaged parts. Remove any pits, stones, stems or roots, and any
other unusable parts.
• Cut the fruit into pieces of equal thickness, ideally 2 to 4 mm. Pieces of
varying thickness unnecessarily extend the dehydration time. Cutting
EN Food Dehydrator
User'smanual

- 4 - 12/2022
2022, .
it into smaller pieces will speed up the dehydration process, whilst
improving the quality of the product.
• Small fruits such as various types of berries (strawberries, bilberries,
cranberries, etc.) do not need to be cut up. However, larger fruits
should be cut in half or cut into slices or cubes.
• Dry the cut up fruit using aclean wiping cloth or paper towel.
• To prevent certain types of fruit from browning (apples, pears or
apricots), soak the fruit slices in asolution made from 250 ml of water
and 1 tablespoons of lemon or pineapple juice prior to dehydrating
them. To achieve interesting flavours, you can put honey, sugar,
cinnamon or coconut on it. Then allow the pieces of fruit to drip off
any excess and then they can be immediately dehydrated. Fruit that
is treated with this solution will remain light coloured and will not turn
brown during the dehydration process nor during storage.
• Fruits with naturally tough peels (grapes, plums or even figs) may be
blanched in boiling water for 1- 2 minutes to speed up the dehydration
process. Then immediately submerge them in cold water, cool them
down, dry them and cut them up into slices.
• Place unpeeled fruit with the peel facing downwards and the cut
surface upwards. Always place non-straight shapes on the edge with
the peel, not on the straight surface.
VEGETABLES
• Clean the vegetables thoroughly and wash them.
• Cut out any surface defects.
• It is advisable to steam vegetables that require long cooking times,
e.g. root vegetables, pea pods, beetroot, broccoli, carrot, celery, corn,
potato and cauliflower prior to dehydrating them. To prevent it from
losing colour and vitamins, it is sufficient to cook the given vegetable
over steam for approximately five minutes.
• It is good to peel tomatoes.
• Cut up vegetables can be dipped in salty water.
MEAT
• Beef, game, poultry or fish meat is suitable for dehydration. Select
lean meat containing as little fat as possible. The leaner the meat, the
faster it will be dehydrated. The higher the fat content in the meat, the
shorter will be its shelf life after dehydration.
• Thoroughly dry the meat and trim off any fatty parts. To ensure even
dehydration, then slice it into very thin strips approximately 2 to 5 mm
thick and 2.5 cm wide. Select the length as required.
• Season the finished strips according to taste using salt, marinating
it, applying barbecue spices, etc. Leave the seasoned meat to rest,
ideally overnight in arefrigerator.
• After inserting meat into the food dehydrator, we recommend to
inspect the dehydration process 1x per hour. Well dehydrated meat is
determined by pushing both its ends towards each other and seeing
whether it snaps in the middle.
HERBS, SPICES AND FLOWERS
• Dehydrate herbs very gently. Only remove the stems, and do not cut
them up any further. Leafy herbs need to be turned over during the
dehydration process to prevent them from sticking.
• Leaves appropriate for dehydration are young and brittle, harvest
pea pods before they open up. Pick flowers that are young and
half-opened.
PET FOOD SNACKS
• To make snacks for household pets, use healthy and fresh ingredients
free of any additives or preservatives. It is important to take into
consideration the size of the animal. For example, small dog breeds
have small mouths and tiny teeth and need small snacks that are not
too crunchy. On the other hand, large dog breeds can handle big and
crunchy snacks. You can test their hardness by crushing afew snacks
in your hand.
• Mix all the ingredients in alarge bowl and form aloaf. On afloured
cutting board, roll out the dough to aheight of approx. 6 mm. Then cut
out your dog'sfavourite shapes.
PLACING FOOD ON THE TRAYS
• Arrange the cut pieces evenly on the trays, do not overlap the pieces,
remembering to leave gaps between the individual pieces. To ensure
sufficient air circulation, utilize approximately 85% of each tray.
• Underneath juicier foods it is better to put the drying insert in order
to prevent juices from dripping down on to the trays and to make
subsequent maintenance easier.
. . . . . . . . . . . . . . . . . . . . . . . . . . . . . . . . . . . . . . . . . . . . . . . . . . . . . . . . . . . . . . . . . . . . . .
TURNING ON
• Place the food dehydrator in alocation according to the instructions in
chapter LOCATION OF THE FOOD DEHYDRATOR.
• Insert the trays with the prepared food into the food dehydrator and
properly close the door.
• Insert the power cord of the food dehydrator into apower socket. The
buttons and the display will flash for amoment, the unit will beep and
button B7 will be lit. The food dehydrator is thus in stand-by mode.
• Pressing button B7 will set the food dehydrator into active mode. The
display and the buttons will be lit and the food dehydrator is ready
for use. If you do not press any button within 5 minutes, the food
dehydrator will re-enter the stand-by mode.
CHANGING TEMPERATURE UNITS
• The food dehydrator enables temperature to be shown in°C or °F. If
you wish to change the temperature units, press and hold down the
TEMP (B6) button for 3 seconds. The unit will switch from°C to°F. In
the same way, change the unit back to°C.
SETTING THE TEMPERATURE AND TIME
• To set the time, press the TEMP (B6) button. Using buttons B3 or B5
adjust the value on the display. Each time the button is pressed, the
temperature will increase or decrease by 5°C. Press and hold down
the buttons to speed up the temperature setting process. You can set
the temperature in the range from 30 to 75°C.
• To set the time, press the TIME (B2) button. Using buttons B3 or B5
adjust the value on the display. Each time the button is pressed, the
time will increase or decrease by 30 minutes. Pressing and holding
down button B3 or B5 the time setting will be sped up. You can set the
time in the range 01:00 – 24:00 hours.
• The temperature and time value can be changed at any time, even
during the dehydration process.
START DEHYDRATING
• Pressing button B7 will start the dehydration process. The set time will
start gradually counting down on the display.
ILLUMINATION OF THE DEHYDRATION AREA
• If it is necessary to have abetter view of the dehydration process
without having to open the door of the food dehydrator, it is possible to
turn on the illumination of the dehydration area by pressing button B1.
Press button B1 again to turn the illumination off.
CHECKING FOOD DURING THE DEHYDRATION PROCESS
• If you wish to slide out any of the trays during the dehydration process
to check the condition of the food on it, simply open the door, slide
out the tray and close the door. The countdown of time on the display
will continue.
• Due to the temperature inside, use kitchen gloves to slide out the tray
with the food. Take out afood sample, allow it to cool down for awhile
and check it.
• After checking it, re-insert the tray.
. . . . . . . . . . . . . . . . . . . . . . . . . . . . . . . . . . . . . . . . . . . . . . . . . . . . . . . . . . . . . . . . . . . . . .
FOOD DEHYDRATION TIPS
• Experiment with the dehydration time to your own taste. Somebody
prefers drier and crunchier results, while somebody else gives
preference to less dry product with atougher consistency. We

- 5 - 12/2022
2022, .
recommend that you record the dehydration time for individual types
of foods.
• When you wish to check the degree of dehydration, take out ahandful
of food and allow it to cool down for afew minutes. Hot food appears
to be softer, more moist and more flexible than in its cooled state.
• Before removing food from the trays, check that each and every piece
is completely dehydrated. When unsure, slice apiece in half and
check the degree of dehydration.
• Leave the dehydrated fruit, vegetables or mushrooms to cool for about
1 hour, if you prefer inside the turned off food dehydrator. However, to
not extend this cooling time as dehydrated food may absorb moisture
from the ambient air and thus require further dehydration.
• The food must be sufficiently dehydrated to prevent micro-organism
from multiplying and spoilage. Dehydrated vegetables must be
hard and brittle, dried fruit should be soft and flexible. For long term
storage, home-grown fruit should be drier than commercially bought
dehydrated fruit.
• We recommend inspecting the food every hour and in the event of
uneven dehydration, to rearrange the position of the food on the trays.
. . . . . . . . . . . . . . . . . . . . . . . . . . . . . . . . . . . . . . . . . . . . . . . . . . . . . . . . . . . . . . . . . . . . . .
TABLE OF RECOMMENDED DEHYDRATION TIMES
Note:
Dehydration times in the following tables are only indicative
in nature. Actual times depend on room temperature,
ambient humidity, moisture content of the food being
dehydrated, and on how thinly the food is sliced. Natural
juiciness of food varies. The fructose contained in certain
types of fruit requires longer dehydration times.
Fruit Preparation Temperature
(°C)
Final
State
Time
(hours)
Apricots
Cut in half and remove
the stones. Cut in half
and turn the dry side
downwards.
60–65 Until soft 18–20
Bananas Peel and cut into 3
mm thick slices. 65–70 Until
crispy 12–14
Figs
Wash, remove spots
and cut into quarters.
Dry side down.
60–65 Until soft 18–20
Kiwi fruit Wash and cut into 6
mm thick slices. 60–65 Until soft 8–11
Peaches
Wash, peel and
remove the stones,
and cut into halves
or slices.
60–65 Until soft 8–17
Pears
Wash, remove the
core, peel and cut into
rings.
60–65 Until soft 4–8
Pineapples
Peel, remove the
fibrous part and core.
Cut into 6 mm thick
slices.
60–65 Until soft 11–18
Rhubarb Wash and cut to
alength of 25 mm. 60–65 Until soft 6–10
Strawberries Wash and cut into 6
mm thick slices. 60–65 Until soft 7–15
Water melon
Peel and cut into
wedges and remove
the pits. Cut into 10
mm thick slices.
60–65
Until
soft and
sticky
8–10
Pitaya Peel and cut into 3
mm thick slices. 65–70 Until
crispy 10–14
Apples
Wash, remove the
core, peel and cut into
rings.
60–65 Until soft 7–15
Vegetables Preparation Temperature
(°C)
Final
State
Time
(hours)
Artichokes
Cut into 8 mm wide
strips and cook for
approx. 10 minutes.
50–55 Until
brittle 6–14
Beans
Cut and cook in steam
until translucent and
even, lay them out on
afine mesh mat.
45–55 Hard /
brittle 10–18
Savoy
cabbage
Clean leaves without
butts 50–55 Until
brittle 8–30
Cauliflower Stewed until soft,
sliced 50–55 Hard 6–16
Celery Cut into 7 mm thick
slices. 50–55 Until
brittle 6–14
Garlic chives Cut them up 50–55 Until
brittle 6–10
Garlic Peeled and sliced 50–55 Until
brittle 6–16
Black
pepper Whole 65–70 Until
brittle 8–14
Onion Sliced 50–55 Until
brittle 8–14
Peas Cook in steam for 3–5
minutes. 65–70 Until
brittle 8–14
Spinach Steam until wilted. 50–55 Until
brittle 6–16
Asparagus After washing, cut into
25 cm pieces. 50–55 Until
crispy 4–6
Beetroot
Cook, allow to cool
down, remove roots
and heads. Cut into
25 cm pieces.
50–55 Until
crispy 9–12
Beetroot
Remove 10 mm of the
top part, thoroughly
peel it and then slice
into 5 mm slices.
50–55 Until soft 9–12
Broccoli
Cut in half and cook
until soft, slice into 10
mm pieces.
50–55 Until
crispy 10–14
Cabbage Wash and cut to 3
mm strips. 50–55 Until
crispy 8–11
Carrot
Cut off the top and
bottom part, clean the
surface thoroughly.
Cook until soft and
cut into 3 mm thick
slices.
50–55 Flexible 7–11
Corn
Cut the corn kernels
from the corn cob and
spread them out on
amesh mat.
50–55 Until
crispy 7–10
Cucumbers Wash and cut into 3
mm thick slices. 50–55 Flexible 4–8
Eggplant Wash, peel and cut
into 6 mm thick slices. 50–55 Flexible 4–8
Mushrooms Wash and cut into 8
mm thick slices. 50–55 Flexible 4–7
Radish
Clean, cook in steam
(if necessary) and cut
into 8 mm slices.
50–55 Soft /
Flexible 7–11
Hot chilli
peppers
Wash and remove the
seeds and white parts.
Slice into long 6 mm
strips or into rings.
50–55 Flexible 4–8
Potatoes
Wash and peel.
Cook for approx. 4–6
minutes until soft. Cut
into 6 mm thick slices.
50–55 Crispy /
Soft 7–13
Pumpkin Wash and cut into 6
mm thick slices. 50–55 Flexible 10–14

- 6 - 12/2022
2022, .
Tomatoes After washing, cut into
6 mm thick rings. 50–55 Flexible 10–14
Squash Wash and cut into 5
mm thick slices. 50–55 Until
crispy 7–11
Sweet
potatoes
Wash and peel. Cook
in steam for 4–6
minutes. Cut into 6
mm thick slices.
50–55
Until
crispy /
soft
7–13
Meat and
other Preparation Temperature
(°C)
Final
State
Time
(hours)
Pulled meat
Use lean meat to
eliminate as much fat
as possible, because
fat spoils after atime.
Cut into 6 mm thick
slices and place on
adrying tray.
60–70 Flexible 7–8
Nuts and
dried fruit
Spread out evenly on
amesh mat. 50–55 Hard /
Brittle 8–14
Vanilla,
herbs
Lay out the
ingredients loosely
on atray instead of
stacking them on top
of each other.
40–50 Soft /
Brittle 8–12
Aromatic
teas
Lay out the aromatic
teas loosely on the
tray, do not place
them on top of each
other.
30–40 Flexible 10–18
. . . . . . . . . . . . . . . . . . . . . . . . . . . . . . . . . . . . . . . . . . . . . . . . . . . . . . . . . . . . . . . . . . . . . .
OVERHEATING PROTECTION
• The food dehydrator is equipped with an overheating protection fuse.
If due to the effect of, for example, incorrectly arranged ingredients the
temperature has risen too high, the display will show the error code
"E1" or "E2" and the unit will beep (3×) and the food dehydrator will
turn off within 10 seconds.
• If this happens, pull the power cord out of the power socket and allow
the food dehydrator to cool down. Then you can put into operation
again.
. . . . . . . . . . . . . . . . . . . . . . . . . . . . . . . . . . . . . . . . . . . . . . . . . . . . . . . . . . . . . . . . . . . . . .
TURNING OFF
• To turn off the food dehydrator, press button B7.
• Disconnect the power cord of the food dehydrator from the power
socket. If you wish to move the food dehydrator to another location,
first allow it to cool down completely.
. . . . . . . . . . . . . . . . . . . . . . . . . . . . . . . . . . . . . . . . . . . . . . . . . . . . . . . . . . . . . . . . . . . . . .
STORING DEHYDRATED FOOD
• Before wrapping or storing dehydrated food, allow it to cool down
first. Only use suitable packaging for storage, for example glass
canning jars, air-tight containers, food-grade plastic bags or
packaging, that are resistant against ingression of moisture. Do not
use plastic or aluminium containers. Metal cans with flip open lids
may be used only if the dehydrated food is placed in plastic bags.
• Store dehydrated meat at room temperature in aclosed container in
adry, dark location. Stored in this way it will remain tasty and edible
for several weeks or even months.
• Package dehydrated food in smaller amounts as tightly together as
possible, but do not push it against itself.
• Do not store herbs and spices in paper bags because the oils
contained in them will be absorbed by the paper, which will ruin
them. The best type of storage container is again aglass jar with
afirm locking mechanism, and in the case of flowers glass jars with
awide neck for easy handling.
• Place dried flowers, leaves and blossom petals into glass jars with
awide neck. When necessary, add 3-4 drops of an aromatic oil to
rejuvenate the fragrance and close the container. Shake the contents
and store them in acool place. In this way, the aromatic contents will
always be available.
• Ideally, store the containers in adry, dark place at room temperature
or lower. At temperatures below 10 °C, their shelf life is extended by
2–3 times. Dried fruits have ashelf life of at least 1-2 years.
• Consume the entire contents after opening, ideally all at once.
Inspect the stored dehydrated food at least once per month.
• Inspect dehydrated food regularly once per month. If you find mould
on the surface of the food, separate it from the remainder and dispose
of it. Pasteurise the remaining pieces that were not attacked by mould.
To pasteurise the contents, arrange the food on acake baking tray
and bake in an oven for approximately 15 minutes at atemperature
of 80°C. Then allow the food to cool down and repack into aclean
airtight package.
. . . . . . . . . . . . . . . . . . . . . . . . . . . . . . . . . . . . . . . . . . . . . . . . . . . . . . . . . . . . . . . . . . . . . .
REHYDRATION
• Rehydration serves to reconstitute food to its initial state. However, not
all dehydrated food must be reconstituted. Especially fruit is better in
the dehydrated state. On the other hand, most types of vegetables are
tastier when reconstituted to their initial state.
• Through rehydration, food is returned practically to its initial size,
shape and appearance. If handled correctly, it retains most of its
aroma and taste, as well as minerals and asignificant amount of
vitamins.
• To reconstitute vegetables for cooking, simply wash them in clean
water and then place them in cold, unsalted water and cover. If
possible, allow them to soak for approximately 2–8 hours, then cook
them in the water that you used for soaking. If necessary, add more
water. Bring to aboil, then reduce the temperature and gently cook
until ready. At the end of the cooking process, you may also add
salt, which will slow down the reconstitution process. As far as fresh
products are concerned, overcooking them will reduce their aroma.
To reconstitute vegetables, e.g. carrot, use cold water for soaking.
Dehydrated food may be reconstituted by soaking, cooking or
acombinations of both these methods and after reconstitution will look
similar to the fresh state.
Attention:
Dehydration does not rid food of bacteria, yeasts and
moulds. If you extend the soaking process at room
temperature, this will risk spoilage. Therefore, when
soaking fruit or vegetables for longer than 1–2 hours,
place the container into arefrigerator.
• To prevent food from losing its nutritional value, use the water from
the soaking solution when preparing various recipes. The volume
of one cup of dried vegetables is equivalent to approx. 2 cups after
reconstitution. To replace the moisture that was removed during
dehydration, pour cold water over the vegetables and soak them from
20 minutes to 2 hours. Then pour boiling water over the vegetables.
When cooking, bring the vegetables to aboil and then leave them to
simmer.
• The volume of one cup of dried fruit is equivalent to approx. 1 1/2
cups after reconstitution. Add just enough water to cover the fruit – its
possible to add more water later if necessary. 1–8 hours is sufficient
for reconstituting the majority of fruits. It depends on the type of fruit,
size of pieces and water temperature (the process is shorter in hot
water). If the soaking time is too long, the fruit will lose aroma. To cook
reconstituted fruit, cover the container and simmer it in the water in
which you soaked it.
• Dehydrated or reconstituted fruit and vegetables may be used in
various ways.
• Dehydrated fruit is suitable for preparing refreshments both at
home and on trips. Fruit pieces can be added to bread products or
confectionery.
• Reconstituted fruits can be served as compotes or sauces. They may
also be used as ingredients in recipes for making bread, jelly salads,
omelettes, gugelhupf, stuffing, milkshakes, ice creams and cooked
cereals.
• Dehydrated vegetables can be used in soups, stewed meat dishes,
made into vegetables platers, or used as dry refreshments.
• Reconstituted vegetables can be use in your favourite recipes like
meat cakes and other main dishes, in jellies or vegetable salads.

- 7 - 12/2022
2022, .
• Crushed dehydrated vegetables are an excellent ingredient for meat
bouillon, soups and sauces.
• For optimal retention of nutritional values, we recommend:
- adhere to the correct pre-cooking time.
- package dehydrated food correctly and store in containers in acool,
dry and dark place.
- regularly inspect stored foods, checking for absorption of moisture.
- consume dehydrated foods as soon as possible.
- when cooking reconstituted food, use the soaking solution.
. . . . . . . . . . . . . . . . . . . . . . . . . . . . . . . . . . . . . . . . . . . . . . . . . . . . . . . . . . . . . . . . . . . . . .
TROUBLESHOOTING
Problem Possible cause Solution
The food
dehydrator
cannot be
turned on
• Power cord is not
connected to the
electrical power grid.
• Button B7 is not
pressed.
• Connect the food
dehydrator to the
power grid.
• Press button B7.
The fan turns
but the food
dehydrator
does not
generate heat.
• Malfunction of food
dehydrator.
• Turn off the food
dehydrator, disconnect
it from the mains and
contact an authorised
service centre.
Food is not well
dehydrated
• Too much food was
placed on the trays.
• Food pieces are too
close together or are
overlapping each other.
• Reduce the amount
of food.
• Rearrange the food on
the tray.
Water drops
or humidity is
forming on the
door.
• Too much food was
placed on the trays.
• The food contains too
much moisture.
• Reduce the amount
of food.
• Increase the
dehydration time.
The food
dehydrator is
overheating or
alternatively
not producing
heat.
• The temperature
control system is not
working correctly.
• Turn off the food
dehydrator, disconnect
it from the mains and
contact an authorised
service centre.
The food
dehydrator
turned itself
off during the
dehydration
process.
• The temperature
monitoring system
detected atemperature
that was too high
and the food
dehydrator turned off
automatically.
• Unplug the food
dehydrator from mains
power and allow it to
cool down. Then you
can put into operation
again.
The ingredients
are not evenly
dehydrated
• The thickness of the
food slices is not
uniform
• Too much food was
placed on the trays.
• Rearrange the food
pieces with great gaps
between them or adjust
their thickness.
• Reduce the amount
of food.
. . . . . . . . . . . . . . . . . . . . . . . . . . . . . . . . . . . . . . . . . . . . . . . . . . . . . . . . . . . . . . . . . . . . . .
CLEANING AND MAINTENANCE
Warning:
Prior to cleaning or maintenance, always disconnect
the food dehydrator from the power supply and allow
it to cool down completely.
Do not use solvents, abrasive cleaning products, etc.
for cleaning the appliance. Otherwise the surface coat
of the appliance may be damaged.
Neither the food dehydrator nor the power cord may
be submerged in water.
• Clean the surface of the food dehydrator with alightly dampened cloth
and then dry it.
• To clean the individual food trays, use acloth dipped in ordinary
dishwashing detergent. In the event of greater soiling, you may wash
the individual trays under lukewarm running water. Trays can also be
washed in adishwasher.
• The air inlet (grille) on the motor part must unconditionally be clean,
with free access for air. In the event that avent becomes dirty or
clogged with dust, clean it using abrush or vacuum out the dirt with
avacuum cleaner.
. . . . . . . . . . . . . . . . . . . . . . . . . . . . . . . . . . . . . . . . . . . . . . . . . . . . . . . . . . . . . . . . . . . . . .
STORAGE
• When you have finished using the appliance and have cleaned it,
place it and its accessories in aclean, dry place out of children'sreach.
Keep the stored appliance and its accessories away from extreme
temperatures, direct sunlight and excessive humidity and do not store
it in an overly dusty environment.
. . . . . . . . . . . . . . . . . . . . . . . . . . . . . . . . . . . . . . . . . . . . . . . . . . . . . . . . . . . . . . . . . . . . . .
TECHNICAL SPECIFICATIONS
Rated voltage range ............................................................................................230 V
Rated frequency ...................................................................................................50 Hz
Rated power input .............................................................................................600 W
Weight .....................................................................................................................9.5 kg
Electrical shock protection class ................................................................................ I
Noise level ....................................................................................................... 65 dB(A)
The declared noise emission level of the appliance is 65 dB(A), which
represents alevel Aof acoustic power with respect to areference acoustic
power of 1 pW.
Explanation of technical terminology
Safety class for electrical shock protection:
Class I– Protection against injury by electrical shock is provided
by basic insulation and the connection of the non-live parts of
the appliance to the protective mains conduit.
Changes to text and technical parameters are reserved.
. . . . . . . . . . . . . . . . . . . . . . . . . . . . . . . . . . . . . . . . . . . . . . . . . . . . . . . . . . . . . . . . . . . .
INSTRUCTIONS AND INFORMATION REGARDING THE DISPOSAL OF
USED PACKAGING MATERIALS
Dispose of used packaging material at asite designated for waste in your
municipality.
DISPOSAL OF USED ELECTRICAL AND ELECTRONIC EQUIPMENT
This symbol on products or original documents means that
used electric or electronic products must not be added to
ordinary municipal waste. For proper disposal, renewal and
recycling, hand these appliances over to determined
collection points. Alternatively, in some European Union
states or other European countries you may return your
appliances to the local retailer when buying an equivalent
new appliance. Correct disposal of this product helps save
valuable natural resources and prevents potential negative effects on the
environment and human health, which could result from improper waste
disposal. Ask your local authorities or collection facility for more details. In
accordance with national regulations penalties may be imposed for the
incorrect disposal of this type of waste.
For business entities in European Union states
–If you want to dispose of electrical or electronic equipment, ask your
retailer or supplier for the necessary information.
Disposal in other countries outside the European Union.
This symbol is valid in the European Union. If you wish to dispose of this
product, request the necessary information about the correct disposal
method from the local council or from your retailer.
This product meets all the basic requirements of EU
directives related to it.

FAST ČR, a.s.
U Sanitasu 1621
CZ-251 01 Říčany
www.sencor.eu
/