Page is loading ...

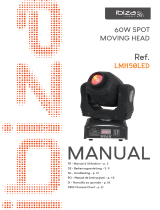
MANUAL
Ref.
FR - Manuel d'Utilisation - p. 6
NL - Handleiding - p. 10
DE - Bedienungsanleitung - S. 14
SI - Navodila za uporabo - p. 17
RO - Manual de utilizare - p. 21
ES - Manual de instrucciones - p. 24
FXBAR70
Code: 16-2102
3-IN-1 WARM WHITE BLINDER / ANIMATION BAR
WITH BEAM-STROBE-EFFECT LEDs
BARRE D'ANIMATION 3-EN-1
AVEC EFFET BLINDER BLANC CHAUD, EFFET BEAM & STROBO
3-IN-1 WARM WITTE BLINDER / ANIMATION BAR
MET BEAM-STROBE-EFFECT LEDs
3-IN-1 WARMWEISSER BLINDER / ANIMATION BAR
MIT BEAM-STROBE-EFFECT LEDs
3-V-1 TOPLA BELA BLINDER / ANIMACIJSKI BAR
Z LED BEAM STROBE EFFEKTOM
BARĂ CU SISTEM DE ANIMAȚIE 3-IN-1 ALB CALD BLINDER
CU LED
-
URI CU EFECT BEAM
-
STROBE
BARRA DE ANIMACION 3-EN-1
CON EFECTO BLINDER BLANCO CALIDO,
EFECTO BEAM Y ESTROBO

MANUAL - FXBAR70
2
©Copyright LOTRONIC 2019
3-IN-1 WARM WHITE BLINDER / ANIMATION BAR
WITH BEAM-STROBE-EFFECT LEDS
INSTRUCTION MANUAL
UNPACKING INSTRUCTIONS
Immediately upon receiving a xture, carefully unpack the carton, check the contents to ensure that all parts
are present and have been received in good condition. Notify the freight company immediately and retain
packing material for inspection if any parts appear to be damaged from shipping or the carton itself shows
signs of mishandling. Keep the carton and all packing materials. In the event that a xture must be returned to
the factory, it is important that the xture be returned in the original factory box and packing.
CONTENTS OF THE CARTON
• 1 pc. FXBAR70
• 1 pc. user manual
• 1 pc. powercon cable
EXPLANATION OF SYMBOLS ON THE SILKSCREEN
The triangle containing a lightning symbol is used to indicate whenever your health is at risk (due to
electrocution, for example).
An exclamation mark in a triangle indicates particular risks in handling or operating the appliance.
The unit complies with CE standards
For indoor use only
0.5m
Minimum distance between the appliance and other objects
CAUTION
DO NOT OPEN THE HOUSING
SHOCK HAZARD
Please read this manual carefully before operating this product.
SAFETY RECOMMENDATIONS
• Please read these instructions carefully, they include important information about the installation, usage and
maintenance of this product.
• Please keep this User Guide for future reference. If you sell the unit to another user, be sure that he also
receives this instruction booklet.
• The appliance is part of class I and must exclusively connected to an earthed mains outlet.
• This product is intended for indoor use only!
• To prevent risk of re or shock, do not expose xture to rain or moisture. Make sure there are no ammable
materials close to the unit during operation.
• The unit must be installed in a location with adequate ventilation, at least 20in (50cm) from adjacent sur-
faces. Be sure that no ventilation slots are blocked.
• The minimum distance luminaire from that part of the luminaire or lamp to the lighted object is 0.5m.
0.5m
• •Maximum ambient temperature (Ta) is 104° F (40°C). Do not operate the xture at temperatures higher
than this.
• In the event of a serious operating problem, stop using the unit immediately. Never try to repair the unit
by yourself. Repairs carried out by unskilled people can lead to damage or malfunction. Please contact the
nearest authorized technical assistance center. Always use the same type of spare parts.
EN

MANUAL - FXBAR70
3
www.ibiza-light.com
• Make sure the power cord is never crimped or damaged.
• Never disconnect the power cord by pulling or tugging on the cord.
• Avoid direct eye exposure to the light source while it is on as sensitive persons may suer an epileptic shock
(especially meant for epileptics)!.
• The product is for decorative purposes only and not suitable as a household room illumination.
• If the external exible cable or cord of this luminaire is damaged, it shall be exclusively replaced by the manu-
facturer or his service agent or a similar qualied person in order to avoid a hazard.
• The light source of this luminaire is not replaceable. When it reaches the end of its life time, the whole unit
must be discarded..
DISCONNECT DEVICE
Where the MAINS plug or an appliance coupler is used as the disconnect device, the disconnect device shall
remain readily operable.
INSTALLATION
The unit should be mounted via its screw holes on the bracket. Always ensure that the unit is rmly xed to
avoid vibration and slipping while operating. Always ensure that the structure to which you are attaching the
unit is secure and is able to support a weight of 10 times of the unit’s weight.
Never stand directly below the device when mounting, removing or servicing the xture.
FIXTURE LINKING
You will need a serial data link to run light shows of one or more xtures using a DMX-512 controller or to run
synchronized shows on two or more xtures set to a master/slave operating mode. The combined number of
channels required by all xtures on a serial data link determines the number of xtures that the data link can
support.
Important: Fixtures on a serial/data link must be daisy chained in one single line. Maximum recommended
serial data link distance: 100 meters (1640 ft.) Maximum recommended number of xtures on a serial data link:
16 xtures
DATA CABLING
To link xtures together you must use data cables. If you choose to create your own cable, please use da-
ta-grade cables that can carry a high quality signal and are less prone to electromagnetic interference.
CABLE CONNECTORS
Cabling must have a male XLR connector on one end and a female XLR connector on the other end.
DMX connector conguration
Termination reduces signal errors. To avoid signal transmission problems and interference, it is always advisable
to connect a DMX signal terminator.
CAUTION
Do not allow contact between the common and the xture’s chassis ground. Groun-
ding the common can cause a ground loop, and your xture may perform erratically.
Test cables with an ohm meter to check correct polarity and to make sure the pins
are not grounded or shorted to the shield or each other.
POWER LINK
The unit is tted with POWERCON IN and OUT connectors. Up to 6 units can be daisy-chained and powered via
the rst unit that is connected to the mains. The maximum allowable power is 900W.
LED DISPLAY
The LED display has 4 buttons: MENU / UP / DOWN / ENTER

MANUAL - FXBAR70
4
©Copyright LOTRONIC 2019
CONTROL MENU MAP
Mode Programming Description
DMX mode Addr
26CH d001-d487
23CH d001-d492
6 CH d001-d507
2 CH d001-d511
Static colors StAt CL00-CL20 RGB static color
Show Shou
Sh 1-7 Program Show 1-7
Sp 1-9 Program Speed 1-9 (slow->fast)
St 0-9 Program Flash 0-9 (slow->fast)
Sound Mode Soud
So 1-4 Sound Program show 1-4
Sen1-9 Mic Sensitivity
Edit color Colo
r000-255 Red (0-100%)
g000-255 Green (0-100%)
b000-255 Blue (0-100%)
U000-255 7cree LED (0-100%)
S000-255 5730 SMD (0-100%)
St 0 – St 9 LED Strobe (slow->fast)
Slave SLAV Slave Slave
Information Info ver VVxx Soft version
Direction set dir
---> Set to the right
<--- Set to the left
OPERATION
PROJECTOR DMX STARTING ADDRESS SELECTION
All xtures should be given a DMX starting address when using a DMX signal, so that the correct xture res-
ponds to the correct control signals. This digital starting address is the channel number from which the xture
starts to receive the digital control information sent out from the DMX controller. The allocation of this starting
address is achieved by setting the correct number on the display located on the base of the device.
You can set the same starting address for all xtures or a group of xtures, or allocate a dierent address to
every xture individually.
If you set the same address, all the units will react to the same control signal from the same channel number.
In other words, changing the settings of one channel will aect all xtures simultaneously.
If you allocate dierent addresses to the units, each unit will react to the channel number that you have set,
based on the quantity of control channels of the unit. That means changing the settings of one channel will
aect only the selected xture.
CONTROL BOARD
The Control Board oers several features: you can simply set the starting address, run the pre-programmed
programs or make a reset.
The main menu is accessed by pressing the Mode-button until the display starts ashing. Browse through the
menu by pressing the UP/DOWN buttons. Press the Enter button in order to select the desired menu. You can
change the selection by pressing the UP/DOWN buttons. Conrm every selection by pressing the Enter button.
You can leave every mode by pressing the Mode button. The functions provided are described in the following
sections.
SET DMX ADDRESS
Display the DMX 512 value of each channel. With this function you can display the DMX 512 value of each
channel. The display automatically shows the channel with a value changing.

MANUAL - FXBAR70
5
www.ibiza-light.com
AUTO PROGRAM
With this function, you can run the internal programs. You can select the desired program number. You can set
the number of steps. You can edit the individual scenes. With this function, you can run the individual scenes
also automatically, i.e. with the adjusted Step-Time.
DMX CHANNEL CHART PLEASE REFER TO THE END OF THE MANUAL
CARE
Before cleaning the unit, disconnect it if from the mains. Do not use aggressive cleaning agents. Use a clean
cloth to wipe any dust or dirt from the product. We are not liable for damage arising from incorrect handing,
improper use or wear and tear. We reserve the right to make technical modications.
SPECIFICATIONS
Power supply 100-220Vac 50/60Hz
Consumption 50W
Light sources 7x 3W warm white CREE LEDs
72x 5050 RGB LEDs
96x 5730 SMD LEDs
IP rating IP20
Dimensions 500 x 66 x 125mm
Weight 2.2kg
Correct Disposal of this product
This marking indicates that this product should not be disposed with other household wastes throughout the EU. To
prevent possible harm to the environment or human health from uncontrolled waste disposal, recycle it responsibly
to promote the sustainable reuse of material resources. To return your used device, please use the return and collec-
tion systems or contact the retailer where the product was purchased. They can take this product for environmental
safe recycling.

MANUAL - FXBAR70
28
©Copyright LOTRONIC 2019
26-CHANNEL MODE
26 Channel mode Function Function Control
CH1 0-255 CREE-LED1 (0-100%)
CH2 0-255 CREE-LED2 (0-100%)
CH3 0-255 CREE-LED3 (0-100%)
CH4 0-255 CREE-LED4 (0-100%)
CH5 0-255 CREE-LED5 (0-100%)
CH6 0-255 CREE-LED6 (0-100%)
CH7 0-255 CREE-LED7 (0-100%)
CH8 0-255 5050-RGB Red1 (0-100%)
CH9 0-255 5050-RGB Green1 (0-100%)
CH10 0-255 5050-RGB Blue1 (0-100%)
CH11 0-255 5050-RGB Red2 (0-100%)
CH12 0-255 5050-RGB Green2 (0-100%)
CH13 0-255 5050-RGB Blue2 (0-100%)
CH14 0-255 5050-RGB Red3 (0-100%)
CH15 0-255 5050-RGB Green3 (0-100%)
CH16 0-255 5050-RGB Blue3 (0-100%)
CH17 0-255 5050-RGB Red4 (0-100%)
CH18 0-255 5050-RGB Green4 (0-100%)
CH19 0-255 5050-RGB Blue4 (0-100%)
CH20 0-255 5730-SMD1 (0-100%)
CH21 0-255 5730-SMD2 (0-100%)
CH22 0-255 5730-SMD3 (0-100%)
CH23 0-255 5730-SMD4 (0-100%)
CH24
0-9 No Function
10-44 DMX Auto program1 (Random)
45-79 DMX Auto program2 (14-W+5050-RGB)
80-114 DMX Auto program3 (14-W+5730-SMD)
115-149 DMX Auto program4 (5050-RGB+5730-SMD)
150-184 DMX Auto program5 (14-W)
185-219 DMX Auto program6 (5050-RGB)
220-254 DMX Auto program7 (5730-RGB)
255 DMX Sound program
CH25 0-255 DMX Auto Program Speed(Slow->fast)
CH26
0-9 No Function
Strobe
10-255 Slow->Fast
23-CHANNEL MODE
23 Channel mode Function Function Control
CH1 0-255 CREE-LED1 (0-100%)
CH2 0-255 CREE-LED2 (0-100%)
CH3 0-255 CREE-LED3 (0-100%)
CH4 0-255 CREE-LED4 (0-100%)
CH5 0-255 CREE-LED5 (0-100%)
CH6 0-255 CREE-LED6 (0-100%)
CH7 0-255 CREE-LED7 (0-100%)

MANUAL - FXBAR70
29
www.ibiza-light.com
CH8 0-255 5050-RGB Red1 (0-100%)
CH9 0-255 5050-RGB Green1 (0-100%)
CH10 0-255 5050-RGB Blue1 (0-100%)
CH11 0-255 5050-RGB Red2 (0-100%)
CH12 0-255 5050-RGB Green2 (0-100%)
CH13 0-255 5050-RGB Blue2 (0-100%)
CH14 0-255 5050-RGB Red3 (0-100%)
CH15 0-255 5050-RGB Green3 (0-100%)
CH16 0-255 5050-RGB Blue3 (0-100%)
CH17 0-255 5050-RGB Red4 (0-100%)
CH18 0-255 5050-RGB Green4 (0-100%)
CH19 0-255 5050-RGB Blue4 (0-100%)
CH20 0-255 5730-SMD1 (0-100%)
CH21 0-255 5730-SMD2 (0-100%)
CH22 0-255 5730-SMD3 (0-100%)
CH23 0-255 5730-SMD4 (0-100%)
6-CHANNEL MODE
6 Channel mode Function Function Control
CH1 0-255 All LED Dimmer
CH2
0-9 Cree LED OFF
Cree 7PCS Led program
10-19 (ALL LED ON) CH1 Dimmer(0-100%)
20-29 Cree Led program1
30-39 Cree Led program2
40-49 Cree Led program3
50-59 Cree Led program4
60-69 Cree Led program5
70-79 Cree Led program6
80-89 Cree Led program7
90-99 Cree Led program8
100-109 Cree Led program9
110-119 Cree Led program10
120-129 Cree Led program11
130-139 Cree Led program12
140-149 Cree Led program13
150-159 Cree Led program14
160-169 Cree Led program15
170-179 Cree Led program16
180-189 Cree Led program17
190-199 Cree Led program18
200-209 Cree Led program19
210-219 Cree Led program20
220-229 Cree Led program21
230-239 Cree Led program22
240-255 Cree Led program23

MANUAL - FXBAR70
30
©Copyright LOTRONIC 2019
CH3
0-9 5050-RGB OFF
5050-RGB program
10-21 Fixed color 1 Red
22-33 Fixed color 2 Green
34-45 Fixed color 3 Blue
46-57 Fixed color 4 Yellow
58-69 Fixed color 5 Cyan
70-81 Fixed color 6 Purple
82-93 Fixed color 7 Deep Yellow
94-105 Fixed color 8 Bluish Green
106-117 Fixed color 9 Wine Red
118-129 Fixed color 10 White
130—141 5050-SMD RGB program 1
142—153 5050-SMD RGB program 2
154-165 5050-SMD RGB program 3
166-177 5050-SMD RGB program 4
178-189 5050-SMD RGB program 5
190-201 5050-SMD RGB program 6
202-213 5050-SMD RGB program 7
214-225 5050-SMD RGB program 8
226-237 5050-SMD RGB program 9
238-249 5050-SMD RGB program 10
250-255 5050-SMD RGB program 11
CH4
0-9 5730-SMD OFF
5730-SMD program
10-27 (All 5730-smd On) CH1 Dimmer(0-100%)
28-45 5730-SMD program1
46-63 5730-SMD program2
64-81 5730-SMD program3
82-99 5730-SMD program4
100-117 5730-SMD program5
118-135 5730-SMD program6
136-153 5730-SMD program7
154-171 5730-SMD program8
172-189 5730-SMD program9
190-207 5730-SMD program10
208-225 5730-SMD program11
226-243 5730-SMD program12
244-255 5730-SMD program13
CH5 0-255 Program speed(Slow->Fast)
CH6
0-9 No Function
strobe
10-255 Slow->Fast

MANUAL - FXBAR70
31
www.ibiza-light.com
2-CHANNEL MODE
2 Channel mode Function Function Control
CH1
0-9 Blackout
10-44 DMX Auto program1 (Random)
45-79 DMX Auto program2 (14-W+5050-RGB)
80-114 DMX Auto program3 (14-W+5730-SMD)
115-149 DMX Auto program4 (5050-RGB+5730-SMD)
150-184 DMX Auto program5 (14-W)
185-219 DMX Auto program6 (5050-RGB)
220-254 DMX Auto program7 (5730-RGB)
255 DMX Sound program
CH2 0-255 DMX Auto Program Speed (Slow->fast)

©Copyright LOTRONIC 2019
View the product on our website
Imported from China by LOTRONIC S.A.
Avenue Zénobe Gramme 9
B-1480 Saintes
www.ibiza-light.com
FXBAR70
/