Page is loading ...

Safety Guidelines
Failure to fol-
low any
warnings/ cautions can result
in personal injury, pump dam-
age, and/or property damage.
This manual contains infor-
mation that is very important
to know and understand.
This information is provided
for SAFETY and to PREVENT
EQUIPMENT PROBLEMS. To
help recognize this informa-
tion, observe the following
symbols:
Danger indi-
cates an
imminently hazardous situa-
tion which, if not avoided,
WILL result in death or serious
injury.
Warning
indicates
a potentially hazardous situa-
tion which, if not avoided,
COULD result in death or seri-
ous injury.
Caution
indicates
a potentially hazardous situa-
tion which, if not avoided,
MAY result in minor or moder-
ate injury.
NOTE: Indicates important
information that, if not
followed, may cause dam-
age to equipment.
Unpacking
After unpacking the unit,
inspect carefully for any
damage that may have
occurred during transit. Make
sure to tighten fittings, bolts,
etc., before putting unit into
service.
Do not
operate
unit if damaged during ship-
ping, handling or use. Damage
may cause injury or property
damage.
General Safety
Information
1. Know the pump applica-
tion, limitations, and
potential hazards. Read all
manuals included with this
product carefully. Be thor-
oughly familiar with the
pump and the proper use
of the equipment.
Do not use
to pump
flammable or
explosive fluids
such as gasoline,
fuel oil,
kerosene, etc. Do not use in
flammable and/or explosive
atmospheres. Pump should
only be used with liquids com-
patible with pump component
materials. Failure to follow
this warning can result in
death, serious personal injury
and/or property damage.
2. Make certain that the
power source (gas engine)
conforms to the require-
ments of your equipment.
3. Provide adequate protec-
tion and guarding around
moving parts.
4. Release all pressure within
the system before servicing
any component.
5. Drain all liquids from the
system before servicing.
6. Secure the discharge line
before starting the pump.
An unsecured discharge
line will whip, possibly
causing personal injury
and/or property damage.
7. Check hoses for weak or
worn condition before
each use, making certain
that all connections are
secure.
8. Periodically inspect pump
and system components.
Perform routine mainte-
nance as required (See
Maintenance section).
9. Provide a means of pres-
sure relief for pumps
whose discharge line can
be shut-off or obstructed.
10. Personal Safety:
a. Wear safety glasses at all
times when working
with pumps.
b. Wear a face shield and
proper apparel when
pumping hazardous
chemicals.
c. Keep work area clean,
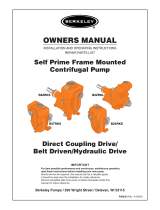
Self-Priming Engine-Driven
Centrifugal Pumps
Operating Instructions & Maintenance Manual
Please read and save these instructions. Read carefully before attempting to assemble, install,
operate or maintain the product described. Protect yourself and others by observing all safety
information. Failure to comply with instructions could result in personal injury and/or property
damage! Retain instructions for future reference.
1808-633-00
5/2001
Refer to Specifications Information and Repair Parts Manual for product specific information
Description
These self-priming engine driven pumps are equipped with
precision mechanical seals to prevent leakage. Units are cou-
pled to gasoline engines. For use with non-flammable liquids
that are compatible with pump component materials.

Operating Instructions and Parts Manual
Self-Priming Engine-Driven
Centrifugal Pumps
2
General Safety
Information (continued)
uncluttered and prop-
erly lighted; replace all
unused tools and
equipment.
d. Keep visitors at a safe
distance from the work
area.
e. Make workshop child-
proof – with padlocks,
master switches, and
by removing starter
keys.
11. Carefully read instruction
manuals supplied by
engine manufacturer
before attempting to
assemble, operate, or ser-
vice the engine or any
part. The WARNING
statements indicate
potentially hazardous
conditions for operator
or equipment. TAKE NEC-
ESSARY STEPS TO PRO-
TECT PERSONNEL AND
EQUIP-
MENT.
Gasoline is a highly com-
bustible fuel. The improper
use, handling, or storage of
gasoline can be dangerous.
Prevent accidents by follow-
ing these safety rules:
a. Use gasoline only as
fuel, never as a cleaning
fluid.
b. Use only an approved
container to hold or
store gasoline. Never
store gasoline in famil-
iar containers such as
milk containers or soda
pop bottles.
c. Store gasoline in a cool
location, out of reach of
children. Never store
gasoline near heat or an
open flame.
d. Add gasoline to a cool
engine only. Spilled
gasoline on a hot
engine may cause fire
or an explosion. Fill
gasoline tank out-of-
doors and wipe up any
spills.
e. Provide a fire extin-
guisher nearby when
working with gasoline.
Be sure extinguisher is
in operating condition
– check the pressure
gauge or indicator. Be
familiar with its proper
use. Consult local fire
department for the
correct type of extin-
guisher for your appli-
cation. Extinguishers
rated ABC by the
National Fire
Protection Association
are appropriate for
most applications.
IMPORTANT: Positively no
smoking!
12.DO NOT RUN THE ENGINE
IN AN ENCLOSED AREA!!
Exhaust fumes contain
carbon monoxide which is
an odorless and poisonous
gas. If equipment is locat-
ed in an enclosed area,
use an exhaust line to the
outside and regularly
check the exhaust system
for leaks. Be sure the area
is well ventilated.
13.Check engine oil and fuel
levels before initial start
up each day. Stay away
from moving parts. Avoid
wearing loose jackets,
shirts, and ties. Make sure
all nuts and bolts are
secure. Keep power
shields and guards in
place. If adjustments must
be made while the unit is
running, use extreme cau-
tion around hot mani-
folds, moving parts, etc.
14.Do not operate this equip-
ment when mentally or
physically
fatigued.
Be careful not to touch the
exterior of the engine, espe-
cially the muffler and the sur-
rounding area. The engine is
hot enough to be painful or
cause injury!
15.Prevent accidental start-
ing by always removing
spark plug or by discon-
necting and grounding
spark plug wire before
working on engine or the
equipment driven by
engine.
16.Familiarize yourself with
all controls. Learn how to
stop an engine quickly in
an emergency.
17.Keep the equipment and
surrounding area clean.
Remove all oil deposits
from equipment and sur-
rounding area.
Accumulations of grease
and oil may present a fire
hazard and can cause
engine damage. Cleaning
rags and other flammable
waste materials must be
stored in approved metal
containers.
18.All visitors should be kept
at a safe distance from
the working area. Keep
children away from power
equipment. Keep work
area clean. Cluttered
areas invite accidents.
19.When shutting off a gaso-
line engine, be sure it is
completely stopped
before leaving the work
area.

Installation
IMPORTANT: For installa-
tions where property
damage might result
from an inoperative or
leaking pump due to
power outages, discharge
line blockage or any other
reason, a back-up sys-
tem(s) and/or warning sys-
tem(s) should be used.
1. Locate pump as close to
the fluid source as possi-
ble, making the suction
line as short and direct as
possible.
The unit
should be
placed where the
pump/engine is protected
from the weather and
extremes of heat, cold and
humidity.
2. Mount the unit on a solid
foundation. On fixed
installation, install both a
union and a gate valve
(not furnished) on the dis-
charge side of the pump
for service convenience.
Do not
use a
globe or other restricting
type of valve at the dis-
charge, as this would serious-
ly restrict the capacity of the
pump.
3. Attach suction line piping
to the suction inlet and
discharge line piping to
the discharge outlet. The
suction line should be
positioned such that there
is a continual upward
slope from the fluid source
to the pump. Avoid using
loops or sections of pipe or
fittings which might per-
mit air to become trapped.
IMPORTANT: If plastic or
fabric hose is used for the
suction piping, it should
be of a reinforced type so
as not to collapse under
suction. The discharge
piping should be at least
the same size as the dis-
charge connection.
Suction piping should be
the same size as the dis-
charge piping or one size
larger. Unless long hori-
zontal runs are involved,
discharge piping should
not be larger than suction
piping. Avoid using
looped sections of pipe
which might permit air to
become entrapped.
Assure air-tight pipe con-
nections with the use of a
pipe joint sealant.
4. A foot-valve may be used
on the suction line to assist
in faster pumping. The
foot-valve should be
installed when the suction
lift is over 10 feet or when
the suction line is over 10
feet long.
5. A suitable suction strainer
should be attached to the
suction line so that large
pieces of foreign material
are not drawn into the
pump. The maximum
opening in the suction
strainer should not be
greater than 25% of the
suction inlet size for solid
handling pumps and 50%
of the suction inlet size for
trash pumps.
Operation
1. 4 CYCLE: Fill the engine
crankcase with oil as speci-
fied in the engine manual.
If the engine has no dip-
stick, then fill the
crankcase with oil until the
oil overflows (starts
spilling out of the
crankcase). Periodically
check oil level thereafter.
2 CYCLE: Mix 2 cycle oil
with gasoline as specified
by the manufacturer.
Refer to mixing instruc-
tions provided in the
engine instruction booklet
and plates on the engines.
2. Fill the gasoline tank as
required for 4 cycle or 2
cycle engines. Refer to
engine instruction book-
let.
Never
add gaso-
line to a hot engine! See
General Safety Information
for proper handling of gaso-
line.
3. Fill the pump with liquid
through the pump dis-
charge or the priming port
supplied with these units.
It may be convenient to
screw in a service tee or a
tee with a nipple into the
discharge, so that the
pump can be filled (using
the upper leg of the tee)
without disconnecting the
discharge hose or pipe.
The vertical leg must be
closed with a pipe plug
during pumping.
Remember, the pump is
self-priming only when the
pump casing has been
filled. The pump should
prime and re-prime with-
out refilling. Refilling is
necessary occasionally if an
unusual siphoning has
occurred, if the fluid has
been lost by evaporation,
and when the unit is
moved to a new location.
Operating Instructions and Parts Manual
Self-Priming Engine-Driven
Centrifugal Pumps
3

Operation (continuned)
Do not
run pump
dry, as permanent damage to
the mechanical seal will
result.
4. Start the engine, following
instructions in the engine
manual.
5. With a suction lift of 5 to
10 feet, the pump should
discharge liquid within
one or two minutes. A suc-
tion lift of 20 feet can take
5 minutes running time to
pick up a prime. If pump-
ing does not start within
this time, shut off the
engine, let unit cool down
about 5 minutes, refill
pump casing and retry. If
engine does not start,
refer to Engine Manual. If
pump does not prime after
2 tries, refer to
“Troubleshooting Chart”
in this manual.
6. Properly fueled and lubri-
cated, the pump/engine
unit will run automatically
without attention to the
controls. The gasoline
engine has a built-in gov-
ernor and will adjust the
speed of the engine auto-
matically depending on
the volume of water being
delivered.
Even
though
this unit will operate with
minimal supervision, it should
not be left operating by itself.
Depending on the application
and area unit is operating
(high traffic, people in area,
etc.) will dictate the necessity
of having someone watching
over the unit.
Maintenance
1. If the pump is located in
an area subject to freezing
temperature, the pump
should be drained when
not in operation. Also, the
pump should be flushed
after each use.
2. Clean the suction line
strainer at regular inter-
vals.
3. If the gas engine is
equipped with a spark
arrestor screen in the muf-
fler, it should be inspected
for wear periodically, and
replaced when necessary.
NOTE: For information
pertaining to the engine
and engine parts, consult
the Engine Manual or
contact the nearest
authorized service repre-
sentative or the manufac-
turer.
4. Periodically check nuts and
bolts on engine, mounting
frame and pump. Since
this is a gas engine pump,
vibration levels tend to
loosen nuts and bolts
faster than normal. Use
Loctite (thread sealant) on
threads or lockwashers if
necessary.
Operating Instructions and Parts Manual
Self-Priming Engine-Driven
Centrifugal Pumps
4

Dayton Operating Instructions and Parts Manual
Self-Priming Engine-Driven
Centrifugal Pumps
5
Symptom Possible Cause(s) Corrective Action
Troubleshooting Chart
1. Fill pump casing. Using a
foot-valve will extend
pump life and facilitate
immediate priming.
2. Shorten suction lift
and/or discharge head
3. Shorten suction line
and/or vertical distance
from liquid to pump,
install foot-valve and
prime
4. Disassemble pump and
clean out impeller
5. Repair or replace suction
line
6. Match foot-valve to pip-
ing or install one size
larger foot-valve
7. Disassemble pump and
replace impeller
8. Submerge lower in
water
9. Increase outlet pressure
by adding more water to
tank or increasing back
pressure by turning
gate-valve on discharge
line to partially closed
position
10. Increase pipe size to
pump inlet size or larger
11. Replace
12. Open
1. Repair or replace suction
line
2. Refill (reprime) pump
casing before restarting
1. Casing not filled with
water
2. Total head too high.
3. Suction head exceeds
that for which pump is
designed
4. Impeller partially or
completely plugged
5. Hole or air leak in suc-
tion line
6. Foot-valve too small
7. Impeller damaged
8. Foot-valve or suction
line not submerged
deep enough in water,
pulling air
9. Insufficient inlet pres-
sure or suction head
10. Suction piping too
small
11. Casing gasket leaking
12. Suction or discharge
line valves closed
1. Air leak in suction line
2. When unit was last
turned off, water
syphoned out of pump
casing
Little or no discharge and
unit will not prime
Loss of suction after
satisfactory operation

Operating Instructions and Parts Manual
Self-Priming Engine-Driven
Centrifugal Pumps
6
Symptom Possible Cause(s) Corrective Action
Troubleshooting Chart (continued)
3. Shorten suction line
and/or vertical distance
from liquid to pump,
install foot-valve and
prime
4. Increase inlet pressure
by adding more water
to tank or increasing
back pressure by turning
gate valve on discharge
line to partially closed
position
5. Unclog, clean or replace
as necessary
1. Increase back pressure
on pump by turning
gate valve on discharge
line to partially closed
position that will not
overload motor
2. Pump is designed for
water, use only for liq-
uids which have similar
characteristics.
3. Check and correct, lower
speed
1. Reinforce
2. Disassemble pump and
remove
3. Replace impeller
4. Check suction line for
proper size and check
valve in suction line if
completely open,
remove any sharp bends
before pump and short-
en suction line
Loss of suction after
satisfactory operation
(continued)
Pump overloads driver
(gas engine shuts off
before complete hose
fill)
Pump vibrates and/or
makes excessive noise
3. Suction head exceeds
that for which pump
was designed
4. Insufficient inlet pres-
sure or suction head
5. Clogged foot-valve,
strainer or pump
1. Total head lower than
pump rating. Unit deliv-
ering too much water
2. Specific gravity and vis-
cosity of liquid being
pumped different than
the pump rating
3. Speed too high
1. Mounting plate or
foundation not rigid
enough
2. Foreign matter in pump
causing unbalance
3. Impeller bent
4. Cavitation present

7
Operating Instructions and Parts Manual
Self-Priming Engine-Driven
Centrifugal Pumps
Symptom Possible Cause(s) Corrective Action
Troubleshooting Chart (continued)
Pump runs but no fluid
Pump Leaks at shaft
Engine will not start or
run (or when you pull
rope to start, it will not
move)
1. Faulty suction piping
(air leak)
2. Pump located too far
from fluid source
3. Gate valve closed
4. Clogged strainer
5. Fouled foot-valve
6. Discharge height too
great
Worn mechanical seal
1. Stone or foreign object
lodged in impeller
2. No oil in crank case
1. Replace
2. Relocate
3. Open
4. Clean or replace
5. Clean or replace
6. Lower the height
Replace
1. Disassemble pump and
remove stone or for-
eign object
2. Fill oil to overflowing,
or check dipstick. See
engine manual

Operating Instructions and Parts Manual
Notes
/