Arcam A39 User manual

Category
Audio amplifiers
Type
User manual
HANDBOOK Integrated amplier
MANUEL Amplicateur intégré
HANDBUCH Integrierter Verstärker
HANDLEIDING Geïntegreerde versterker
MANUAL Amplicador integrado
РУКОВОДС Т ВО Встроенный усилитель
MANUALE Amplicatore integrato
手册 集成式放大器
A39
MUTE DISPLAY BALANCE
PHONO
AUX CD TUNER
SAT
BD PVR AV SP1
SP2
AUX
PHONES
POWER
POWER / STANDBY
A39
English
A39
MUTE DISPLAY BALANCE
PHONO
AUX CD TUNER
SAT
BD PVR AV SP1
SP2
AUX
PHONES
POWER
POWER / STANDBY
HANDBOOK Integrated amplier
A39
E-3E-2
English
safety
guidelines
CAUTION: To reduce the risk of electric shock, do not remove cover (or back). No user serviceable parts inside. Refer servicing to qualified
service personnel.
WARNING: To reduce the risk of fire or electric shock, do not expose this apparatus to rain or moisture.
The lightning flash with an arrowhead symbol within an equilateral triangle, is intended to alert the user to the presence of
uninsulated ‘dangerous voltage’ within the product’s enclosure that may be of sufficient magnitude to constitute a risk of electric
shock to persons.
The exclamation point within an equilateral triangle is intended to alert the user to the presence of important operating and
maintenance (servicing) instructions in the literature accompanying the product.
CAUTION: In Canada and the USA, to prevent electric shock, match the wide blade of the plug to the wide slot in the socket and insert the
plug fully into the socket.
Class II product
is equipment is a Class II or double
insulated electrical appliance. It has been
designed in such a way that it does not
require a safety connection to electrical earth
(‘ground’ in the U.S.).
Warning
Mains plug/appliance coupler is used to disconnect
device and it shall remain readily operable.
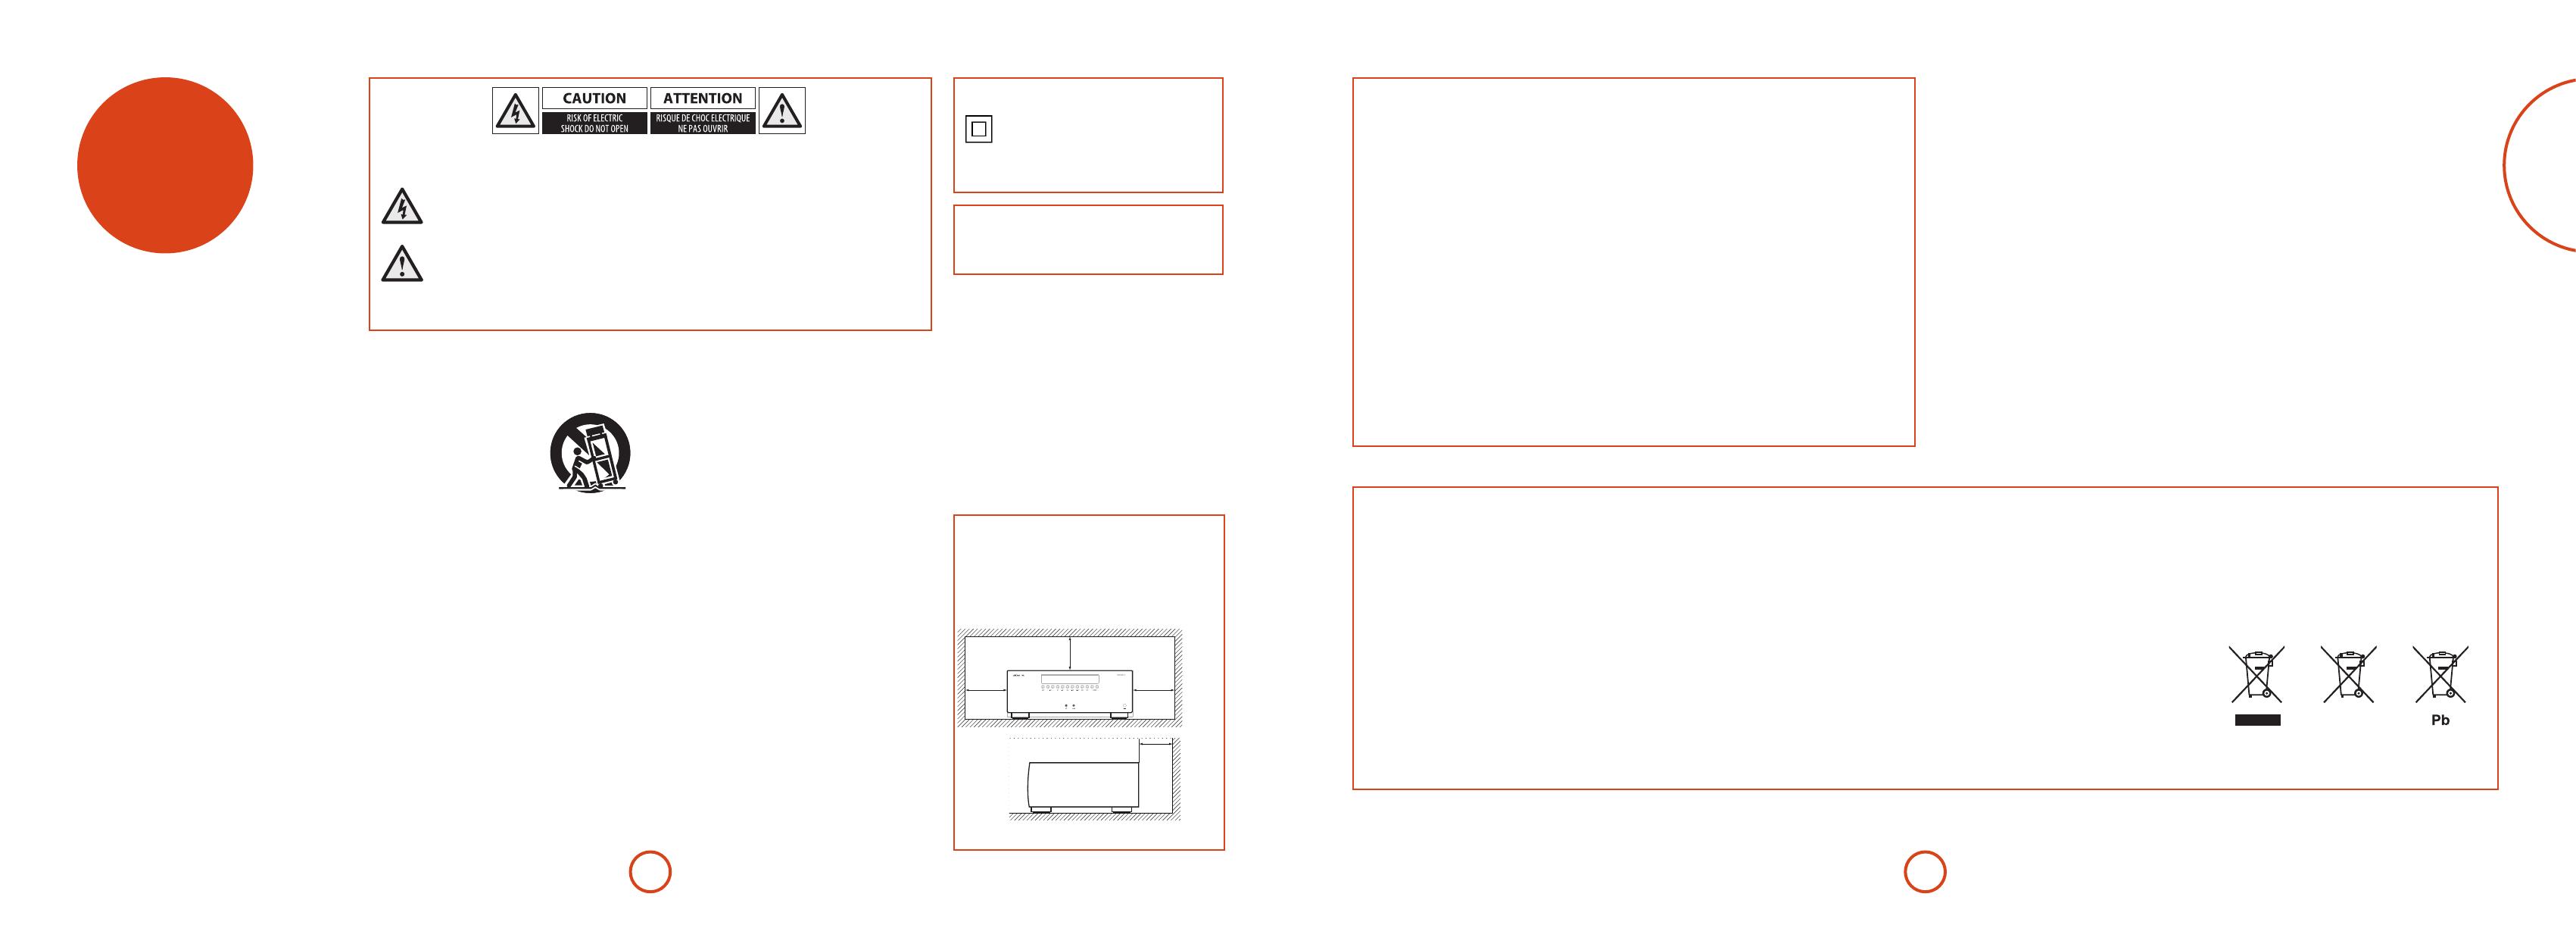
CAUTIONS ON INSTALLATION
For proper heat dispersal, do not install this unit
in a conned space, such as a bookcase or similar
enclosure.
More than 0.3 m (12 in.) is recommended.
Do not place any other equipment on this unit.
zz
z
Wall
z
Wall
Important safety instructions
1. Read these instructions.
2. Keep these instructions.
3. Heed all warnings.
4. Follow all instructions.
5. Do not use this apparatus near water.
6. Clean only with a dry cloth.
Unplug the unit from the mains supply before cleaning.
e case should normally only require a wipe with a so,
lint-free cloth. Do not use chemical solvents for cleaning.
We do not advise the use of furniture cleaning sprays or
polishes as they can cause permanent white marks.
7. Do not block any of the ventilation openings.
Install in accordance with the manufacturer’s
instructions.
8. Do not install near any heat sources such as
radiators, heat registers, stoves, or other apparatus
(including ampliers) that produce heat.
9. Do not defeat the safety purpose of the polarized
or grounding type plug.
A polarized plug has two blades with one wider than the
other. A grounding type plug has two blades and a third
grounding prong. e wide blade or the third prong
is provided for your safety. When the provided plug
does not t into your outlet, consult an electrician for
replacement of the obsolete outlet.
10. Protect the power cord from being walked on or
pinched particularly at plugs, convenient receptacles,
and the point where they exit from the apparatus.
11. Only use the attachments/accessories specied by
the manufacturer.
12. Use only with a cart, stand, tripod, bracket, or
table specied by the manufacturer, or sold with the
apparatus.
When a cart is used, use caution
when moving the cart/apparatus
combination to avoid injury from
tip-over.
13. Unplug this apparatus during
lightning storms or when unused for long periods of
time.
14. Refer all servicing to qualied service personnel.
Servicing is required when the apparatus has been
damaged in any way, such as power supply cord or plug
is damaged, liquid has been spilled or objects have fallen
into the apparatus, the apparatus has been exposed to
rain or moisture, does not operate normally, or has been
dropped.
15. Object or liquid entry
WARNING – Take care that objects do not fall and
liquids are not spilled into the enclosure through any
openings. e equipment shall not be exposed to
dripping or splashing. Liquid-lled objects such as vases
should not be placed on the equipment.
16. Service Instructions
CAUTION – ese servicing instructions are for use by
qualied service personnel only. To reduce the risk of
electric shock, do not perform any servicing other than
that contained in the operating instructions unless you
are qualied to do so.
17. Climate
e equipment has been designed for use in moderate
climates and in domestic situations. Unplug this
equipment during lightning storms to prevent possible
damage from a strike or mains surge.
18. Power sources
Only connect the equipment to a power supply of
the type described in the operating instructions or as
marked on the equipment.
e primary method of isolating the equipment from
the mains supply is to remove the mains plug. e
equipment must be installed in a manner that makes
disconnection possible.
19. Power-cord protection
Power supply cords should be routed so that they are not
likely to be walked on or pinched by items placed upon
or against them. Pay particular attention to the point
where they exit from the equipment.
20. Power lines
Locate any outdoor antenna/aerial away from power
lines.
21. Speaker connections
Any speakers must be connected to the A39 using class
II wire (i.e. no connection to Earth should be made).
Failure to observe this precaution may cause the unit to
become damaged.
22. Non-use periods
If the equipment is not being used for an extended
period, we recommend that you unplug the power cord
of the equipment from the outlet, to save power.
23. Abnormal smell
If an abnormal smell or smoke is detected from the
equipment, turn the power o immediately and unplug
the equipment from the wall outlet. Contact your dealer
and do not reconnect the equipment.
FCC INFORMATION (FOR US CUSTOMERS)
1. PRODUCT
is product complies with Part 15 of the FCC Rules.
Operation is subject to the following two conditions:
(1) is device may not cause harmful interference,
and (2) this device must accept any interference
received, including interference that may cause
undesired operation.
2. IMPORTANT NOTICE: DO NOT MODIFY
THIS PRODUCT
is product, when installed as indicated in the
instructions contained in this manual, meets FCC
requirements. Modication not expressly approved
by ARCAM may void your authority, granted by the
FCC, to use the product.
3. NOTE
is product has been tested and found to comply
with the limits for a Class B digital device, persuant
to Part 15 of the FCC Rules. ese limits are designed
to provide reasonable protection against harmful
interference in a residential installation.
is product generates, uses and can radiate radio
frequency energy and, if not installed and used in
accordance with the instructions, may cause harmful
interference to radio communications. However,
there is no guarantee that interference will not occur
in a particular installation. If this product does cause
harmful interference to radio or television reception,
which can be determined by turning the product
OFF and ON, the user is encouraged to try to correct
the interference by one or more of the following
measures:
Reorient or relocate the receiving antenna.
Increase the separation between the equipment
and receiver.
Connect the product into an outlet on a circuit
dierent from that to which the receiver is
connected.
Consult the local retailer authorized to distribute
this type of product or an experienced radio/TV
technician for help.
SAFETY INFORMATION (FOR EUROPEAN
CUSTOMERS)
Avoid high temperatures. Allow for sucient heat
dispersion when installed in a rack.
Handle the power cord carefully. Hold the plug
when unplugging the cord.
Keep the unit free from moisture, water, and dust.
Unplug the power cord when not using the unit
for long periods of time.
Do not obstruct the ventilation holes.
Do not let foreign objects into the unit.
Do not let insecticides, benzene, and thinner
come in contact with the unit.
Never disassemble or modify the unit in any way.
Ventilation should not be impeded by covering
the ventilation openings with items, such as
newspapers, tablecloths or curtains.
Naked ame sources such as lighted candles
should not be placed on the unit.
Observe and follow local regulations regarding
battery disposal.
Do not expose the unit to dripping or splashing
uids.
Do not place objects lled with liquids, such as
vases, on the unit.
Do not handle the mains cord with wet hands.
When the switch is in the OFF position, the
equipment is not completely switched o from
MAINS.
e equipment shall be installed near the power
supply so that the power supply is easily accessible.
A NOTE ABOUT RECYCLING:
is product’s packaging materials are recyclable and can be reused. Please dispose of any materials in accordance
with the local recycling regulations.When discarding the unit, comply with local rules or regulations.
Batteries should never be thrown away or incinerated but disposed of in accordance with the local regulations
concerning battery disposal.
is product and the supplied accessories, excluding the batteries, constitute the applicable product according to
the WEEE directive.
CORRECT DISPOSAL OF THIS PRODUCT
ese markings indicate that this product should not be
disposed with other household waste throughout the EU.
To prevent possible harm to the environment or human
health from uncontrolled waste disposal and to conserve
material resources, this product should be recycled
responsibly.
To dispose of your product, please use your local return and collection systems or contact the retailer where the
product was purchased.
E-5E-4
English
welcome…
ank you and congratulations for purchasing your Arcam FMJ Amplier.
Arcam has been producing specialist audio products of remarkable quality for over three
decades and the new A39 integrated amplier is the latest in a long line of award winning
Hi-Fi. e design of the FMJ range draws upon all of Arcams experience as one of the UKs most
respected audio companies, to produce Arcams best performing range of stereo ampliers yet –
designed and built to give you years of listening enjoyment.
is handbook is a guide to installing and using the A39 and includes information on its more
advanced features. Use the contents list on the next page to guide you to the section of interest.
We hope that your FMJ product will give you years of trouble-free operation. In the unlikely
event of any fault, or if you simply require further information about Arcam products, our
network of dealers will be happy to help you. Further information can also be found on the
Arcam website at www.arcam.co.uk.
e FMJ development team
contents
Contents
safety guidelines ...................................................................................................................................E-2
Important safety instructions .......................................................................................................................................................E-2
welcome ............................................................................................................................................. E-4
overview ................................................................................................................................................. E-6
Placing the unit .................................................................................................................................................................................E-6
Power .....................................................................................................................................................................................................E-6
Interconnect cables .......................................................................................................................................................................... E-6
A39 connections ................................................................................................................................... E-7
loudspeakers .........................................................................................................................................E-8
Normal single wiring........................................................................................................................................................................E-8
Bi-wiring ................................................................................................................................................................................................ E-8
Connecting loudspeakers ..............................................................................................................................................................E-8
A39 operation ........................................................................................................................................E-9
Switching on .......................................................................................................................................................................................E-9
Selecting an audio source .............................................................................................................................................................E-9
Audio inputs ........................................................................................................................................................................................ E-9
Phono input .........................................................................................................................................................................................E-9
Connecting to an additional power amplier ....................................................................................................................E-10
Recording an audio source ........................................................................................................................................................E-10
Adjusting the balance .................................................................................................................................................................. E-10
Speaker Control ..............................................................................................................................................................................E-10
Listening ............................................................................................................................................................................................ E-10
CR902 remote control ........................................................................................................................ E-11
AMP Device Mode ......................................................................................................................................................................... E-12
TUN Device Mode .......................................................................................................................................................................... E-12
CD Device Mode ............................................................................................................................................................................. E-12
BD Device Mode ............................................................................................................................................................................. E-12
troubleshooting ..................................................................................................................................E-13
No sound ........................................................................................................................................................................................... E-13
Sound cuts-out unexpectedly .................................................................................................................................................. E-13
A39 specications ............................................................................................................................... E-14
product guarantee .............................................................................................................................E-15
Worldwide Guarantee .................................................................................................................................................................. E-15
Claims under guarantee ..............................................................................................................................................................E-15
Problems? ..........................................................................................................................................................................................E-15
On-line registration ....................................................................................................................................................................... E-15
E-7E-6
English
Placing the unit
< Place the amplier on a level, rm surface, avoiding
direct sunlight and sources of heat or damp.
< Do not place the A39 on top of a power amplier or
other source of heat.
< Do not place the amplier in an enclosed space
such as a bookcase or closed cabinet unless there is
good provision for ventilation. e A39 is designed
to run warm during normal operation.
< Do not place any other component or item on top
of the amplier as this may obstruct airow around
the heat-sink, causing the amplier to run hot. (e
unit placed on top of the amplier would become
hot, too.)
< Make sure the remote-control receiver to the right
of the front panel display is unobstructed, otherwise
this will impair the use of the remote-control.
< Do not place your record deck on top of this
unit. Record decks are very sensitive to the noise
generated by mains power supplies which will be
heard as a background ‘hum’ if the record deck is
too close.
< e normal function of the unit may be disturbed
by strong electromagnetic interference. If this
occurs, simply reset the unit with the power button,
or move the unit to another location.
Power
e amplier is supplied with a moulded mains plug
already tted to the lead. Check that the plug supplied
ts your supply – should you require a new mains lead,
please contact your Arcam dealer.
If your mains supply voltage or mains plug is dierent,
please contact your Arcam dealer immediately
Push the IEC plug end of the power cable into the power
socket on the back of the amplier, making sure that it
is pushed in rmly. Plug the other end of the cable into
your mains socket and switch the socket on.
Interconnect cables
We recommend the use of high-quality screened cables
that are designed for the particular application. Other
cables will have dierent impedance characteristics
that will degrade the performance of your system (for
example, do not use cabling intended for video use to
carry audio signals). All cables should be kept as short as
is practically possible.
It is good practice when connecting your equipment to
make sure that the mains power-supply cabling is kept
as far away as possible from your audio cables. Failure to
do so may result in unwanted noise in the audio signals.
Arcams A39 integrated amplier provides class leading
sound quality for the best reproduction of your music.
Drawing on the many years of amplier design
experience at Arcam, this product uses the best quality
components and engineering practice to produce a
product that will give many years of musical pleasure
and reliable service.
With a class G amplier, toroidal based power supply,
acoustically damped chassis and exceptionally low
levels of distortion and noise the A39 is capable of
reproducing music with all its original authority and
detail. Rest assured you will be hearing the music just as
the artist intended.
e A39 is designed to produce a level of performance
that will truly bring your music to life.
A39
MUTE
DISPLAY BALANCE
PHONO
AUX CD TUNER
SAT
BD PVR AV SP1
SP2
AUX
PHONES
POWER
POWER / STANDBY
overview
A39 connections
Note
Please read the ‘Placing the unit’, ‘Power’ and
‘Interconnect cables’ sections on page 6 before
connecting up your A39 integrated amplier!
PHONO
GROUND
ONLY
PHONO
(MM)
CD TUNER SAT BD PVR AV
RECORD
OUT
PRE
OUT
R
4–16 OHMS. CLASS 2 WIRING
SPEAKER 1 SPEAKER 2
L
4–16 OHMS. CLASS 2 WIRING
SPEAKER 2 SPEAKER 1
USB 5V / 0.1A
6V 500mA
ACCESSORY
POWER
12V 100mA
TRIGGER
OUT
SUPPLY
VOLTAGE
SWITCH POSITIONS
115 = 110 - 120V~
230 = 220 - 240V~
1kW MAX
110-120V/220-240V ~ 50-60 Hz
POWER INLET
A39
MUTE
DISPLAY BALANCE
PHONO
AUX CD TUNER
SAT
BD PVR AV SP1
SP2
AUX
PHONES
POWER
POWER / STANDBY
Voltage select
Ensure that the voltage selected matches
your local power supply.
Auxillary Input
3.5 mm line level analogue stereo
input located on the front panel
for easy access
Power inlet
Connect the correct
mains cable here.
Accessory power
6V 3.5mm mono jack socket for
accessory cable (supplied). Cable
provides two 2.1mm DC jacks to
power 6V r series accessories.
Phones
3.5 mm stereo jack socket,
intended for use with a set of
headphones. See page 9 for
more information.
Speaker terminals
e A39 is equipped with two
pairs of speaker terminals.
See page 7 for information on
connecting loudspeakers.
Phono earth terminal
For connecting your turntable
earth lead, if required.
Note that this terminal must
not be used as a safety earth.
USB
USB type A socket may be used to
power 5v accessories (0.1A max)
and for soware updates.
Trigger output
TRIGGER OUT allows the A39 to control the
power state of any connected equipment.
In normal use there is no need to make any
connections to these outputs.
Audio inputs
AUX, TUNER, SAT, BD, PVR
and AV are all line-level
inputs. PHONO (MM) has
dierent characteristics.
See page 8 for more
information.
Pre-amplier output
PRE OUT provides the pre-amp output for use
in a bi-amplied system (for example, with
a P49 power amplier). See page 9 for more
information.
Record output
RECORD OUT is a line level output for
use in recording from other sources.
See page 9 for more information.
E-9E-8
English
loudspeakers
Normal single wiring
For single wiring, we recommend that you use the
SPEAKER 1 set of terminals on your amplier. If each
speaker has more than one pair of connecting terminals,
use the terminals labelled LF or ‘Low Frequency’.
Connect the red positive terminal of the right speaker
connection on the amplier (labelled R+) to the positive
terminal of your right speaker. Similarly, connect the
black negative terminal of the right speaker connection
on the amplier (labelled R) to the negative terminal
of your speaker. Repeat the process for the le speaker,
using the terminals labelled L+ and L on the amplier.
WARNING: If your speakers support bi-wiring, there will be a
strip of conductive metal connecting the low-frequency (LF)
terminals to the high-frequency (HF) terminals; this MUST NOT
BE REMOVED in a single-wired system.
Notes on making speaker connections
< Do not make any connections to any amplier while it is switched on. We recommend that your
amplier is completely disconnected from the mains supply before starting.
< Before switching your amplier(s) on for the rst time aer connecting to speakers, please check all
connections thoroughly. Ensure that bare wires or cables are not touching each other or the amplier’s
chassis (which could cause short circuits), and that you have connected positive (+) to positive and
negative (–) to negative. Be sure to check the wiring for both the amplier and the speaker.
< Aer making connections: switch the amplier on, select a source signal, then gradually increase the
volume to the required listening level.
< If you are unsure as to how your system should be connected, please contact your Arcam dealer who will
be happy to help you.
Connecting
loudspeakers
ere are many dierent ways of connecting
loudspeakers to your A39. e following section
describes how to connect the speakers and amplier for
the most common congurations.
PHONO
GROUND
ONLY
PHONO
(MM)
CD TUNER SAT BD PVR AV
RECORD
OUT
PRE
OUT
R
4–16 OHMS. CLASS 2 WIRING
SPEAKER 1 SPEAKER 2
L
4–16 OHMS. CLASS 2 WIRING
SPEAKER 2 SPEAKER 1
USB 5V / 0.1A
6V 500mA
ACCESSORY
POWER
12V 100mA
TRIGGER
OUT
SUPPLY
VOLTAGE
SWITCH POSITIONS
115 = 110 - 120V~
230 = 220 - 240V~
1kW MAX
110-120V/220-240V ~ 50-60 Hz
POWER INLET
LF
HF
LF
HF
R L
Bi-wiring
Bi-wiring is performed in the same way as single wiring
except that, a pair of cables are used to connect the
amplier to each speaker.
Follow the instructions given for single wiring; then
perform the same actions, this time connecting the
SPEAKER 2 set of terminals on your amplier to the
terminals labelled HF or ‘High Frequency’ for each
speaker.
WARNING: Speakers that support bi-wiring have a strip of
metal that connects the low frequency (LF) terminals to the
high frequency (HF) terminals. This MUST BE REMOVED in a
bi-wired system.
PHONO
GROUND
ONLY
PHONO
(MM)
CD TUNER SAT BD PVR AV
RECORD
OUT
PRE
OUT
R
4–16 OHMS. CLASS 2 WIRING
SPEAKER 1 SPEAKER 2
L
4–16 OHMS. CLASS 2 WIRING
SPEAKER 2 SPEAKER 1
USB 5V / 0.1A
6V 500mA
ACCESSORY
POWER
12V 100mA
TRIGGER
OUT
SUPPLY
VOLTAGE
SWITCH POSITIONS
115 = 110 - 120V~
230 = 220 - 240V~
1kW MAX
110-120V/220-240V ~ 50-60 Hz
POWER INLET
LF
HF
LF
HF
R L
Remove metal
strip
Remove metal
strip
Switching on
e POWER button switches the unit on and o.
e power light (next to the ‘POWER/STANDBY’ text)
indicates the state of the amplier: it changes from red
to orange then green if mains power is connected and
the unit is switched on.
If the unit is le unused for an extended period of time
it will go into standby to reduce power consumption.
Press AUX and BALANCE to adjust the time of this feature.
Display
e DISPLAY button (or DISP on the remote control)
changes the display brightness between ‘on, ‘dimmed’
and ‘o. If the A39 is powered o with the display
brightness set to ‘o, the display resumes to ‘dimmed
when the unit is powered on again.
SAT
Intended for the analogue outputs from a satellite TV
receiver or cable TV box.
BD
Intended for the analogue outputs from a Blu-ray or
DVD-player.
PVR
Intended for the analogue outputs from a Personal
Video Recorder, or similar device.
AV
Intended for the analogue outputs from general audio-
visual equipment, such as a VCR or digital TV/satellite
receiver.
CD
Intended for the analogue outputs from a CD player.
Selecting an audio source
Audio sources may be selected from the front panel
buttons PHONO, AUX, CD, TUNER, SAT, BD, PVR, AV, or the
remote control PHONO, AUX, CD, TUN, SAT, BD, PVR, AV.
In each case, the source is selected from the input
sockets with the corresponding name.
Audio inputs
Although the inputs are labelled for specic devices,
all have the same characteristics and each may be
used with any line-level product. e exception is the
PHONO (MM) input (see page 13 for the specication).
AUX
is is a 3.5mm analogue input on the front panel
intended for use with devices such as MP3 players. To
connect an MP3 player (or other portable audio device)
you will need a 3.5mm to 3.5mm cable connected
between the AUX input and the headphone output socket
of the player.
TUNER
Intended for the analogue outputs from an FM, AM or
DAB radio tuner.
Phono input
Phono-level input
e A39 provides a pre-amplication stage to treat
the low-voltage output from a MM (moving magnet)
cartridge. Input specications are given on page 13.
Output volume is shown on the front display as
PHONO 20, for example.
Line-level phono input
e phono input may be changed from phono-level to
line-level. Press the front panel PHONO and BALANCE
buttons simultaneously and use the control knob to
change the setting. e front panel display shows
LINE- OFF (i.e. phono) or LINE- ON respectively.
If you wish to use an external phono amplier, connect
its output to the PHONO MM input, but make sure that
LINE- ON is selected, since a phono amplier produces
line-level input.
With the input dened in this way, output volume is
shown on the front display as LINE- 20, for example.
WARNING: NEVER play a standard line-level source into the
phono input when set to LINE-OFF. This would result in serious
damage to both your amplifier and speakers due to the extra
gain that is applied and would not be covered under warranty.
A39 operation
A39
MUTE
DISPLAY BALANCE
PHONO
AUX CD TUNER
SAT
BD PVR AV SP1
SP2
AUX
PHONES
POWER
POWER / STANDBY
E-11E-10
English
Connecting to an additional
power amplifier
e A39 provides a pair of unbalanced pre-outs on
standard RCA phono connectors, allowing connection
to an additional power amplier to create a bi-amplied
setup. Most audio ampliers, including the Arcam P49,
will connect to the pre amp outputs of the A39 using
standard interconnect cables.
Recording an audio source
e A39 allows you to record and monitor the sound
from any connected source.
e back panel REC OUT socket can be connected to the
input sockets of your recording device (these are usually
labelled RECORD or IN).
To record from a particular source, press the appropriate
source button (for example, TUNER).
Adjusting the balance
e balance setting allows you to increase the volume of
one channel (le or right) relative to the other. Altering
the balance may help to restore the stereo image for an
o-centre listening position.
Balance can be adjusted from the front panel or from the
remote control. Press the BALANCE button (or BAL on the
CR902) to view the current setting, then use the control
knob (or the +/ buttons on the remote) to change the
setting – from L12 to R12, via the neutral value 0.
Speaker Control
e SP1 and SP2 switches enable and disable the
respective speaker outputs. e LED will be lit if the
speakers are enabled.
Listening
Volume control
Use the control knob (or the +/ buttons on the remote)
to change the volume. Turn the knob clockwise to
increase the volume, anti-clockwise to reduce it.
Listening using headphones
e headphones socket (PHONES) accepts headphones
with an impedance rating between 16Ω and 2k, tted
with a 3.5mm stereo jack plug.
e pre-amp outputs and speakers are muted when
headphones are plugged in and the front panel display
shows Headphone.
e headphones socket is always active, unless output
has been muted.
Muting output
e output of the A39 can be silenced by pressing MUTE
on the front panel (or
-
on the remote control). If the
unit is muted, the power light changes to orange and
the source is shown on the front display panel (e.g. PVR
MUTE).
Press MUTE/
-
for a second time (or change the volume)
to cancel mute.
A39
MUTE
DISPLAY BALANCE
PHONO
AUX CD TUNER
SAT
BD PVR AV SP1
SP2
AUX
PHONES
POWER
POWER / STANDBY
CR902 remote
control
e CR902 is pre-programmed for use with the
A39. Make sure the two AAA batteries supplied
are installed before attempting to use the remote
control.
A. With the CR902 remote face-down, press down
on the non-slip indentations of the battery
compartment cover and slide the cover o.
B. Insert the two ‘AAA’ batteries supplied. Take
care to insert the batteries in the right direction
by following the ‘+’ and ‘’ marks in the battery
compartment.
C. Slide the battery compartment cover back and
lock it in place with a click.
e CR902 requires a clear line of sight to the front
panel display of A39 to ensure reliable operation.
AUDIO
SACD
MENU
FM MONO P/TUNE
STORE
INFO
BD
CR902
RTN
E-13E-12
English
AMP Device Mode
e
A
Device Mode button congures the CR902 to
control your Arcam amplier. Pressing this button does
not aect the currently selected input on the amplier.
P
Toggles power between standby and on
DISP
Cycles through the front panel display’s
brightness options
MODE
Cycles through the display modes on the
front panel
MENU
Displays the amplier setup menu on the
front panel
Navigate menus
O
conrms a selection
@
Toggles the mute function of the amplier
Vol-
Vol+
Decrease () and increase (+) amplier
volume
SP1
Toggles Speaker 1 output
SP2
Toggles Speaker 2 output
TUN Device Mode
e
T
Device Mode button congures the CR902 to
control the tuner functions of Arcam tuners.
P
Toggles power between standby and on
0
9
e numeric keys are used to store and
recall presets
DISP
Cycles through the front panel display’s
brightness options
BAND
Cycles through tuner sources
)
Rewind iPod
(
Fast forward iPod
]
Preset down/Sirius category down/iPod
track back
[
Preset up/Sirius category up/iPod track
forward
#
Stop iPod
$
Play/pause iPod
&
Play/pause iPod
SHUFF
Cycle through iPod shue modes
MENU
Displays the tuner setup menu on the front
panel
' ,
Preset up/down, iPod track back/forward
< >
Decrement/increment tuning frequency
O
Conrm a selection
RPT
Cycle through iPod repeat modes
FM MONO
Toggle FM mode between mono and stereo
reception
P/TUNE
Enter/Exit Preset recall mode
STORE
Enter/Exit Preset store mode
INFO
Cycle through dierent information display
modes
CD Device Mode
e
c
Device Mode button congures the CR902 to
control the CD functions of Arcam CD players.
P
Toggles power between standby and on
!
Open/close disc tray
0
9
e numeric keys allow direct access to
individual tracks on a disc. To select a track
press the corresponding keypad button.
For tracks greater than 9, enter the digits
in sequence. For example, to play track 15,
press
1
, then press
5
.
DISP
Cycles through the front panel display’s
brightness options
MODE
Changes the available display modes on the
CD player
)
Fast rewind
(
Fast forward
]
Skip back to the start of the current/
previous track
[
Skip forwards to the start of the next track
#
Stop playback
$
Play
&
Toggles pause of playback
SHUFF
Toggles random (‘shue’) play on and o
MENU
Enter a track in a programmed track list
Navigates track listings if supported by the
player
O
selects the currently highlighted
track if supported by the player
RPT
Repeat playback of the disc or pre-
programmed selection of tracks. To repeat a
particular track, select that track and press
RPT twice. To cancel, press RPT a third time.
SETUP
Toggles between Programme and Normal
play
AUDIO
A-B repeat function
SUBT
Toggles between selecting the HD and CD
layer of SACD disc
BD Device Mode
e
B
Device Mode button congures the CR902 to
control the BD functions of Arcam BD players.
P
Toggles power between standby and on
!
Open/close disc tray
0
9
e numeric keys allow direct access to
individual tracks on a disc. To select a track
press the corresponding keypad button.
For tracks greater than 9, enter the digits
in sequence. For example, to play track 15,
press
1
, then press
5
.
DISP
Cycles through the front panel display’s
brightness options
MODE
Changes the available display modes on the
BD player
)
Fast rewind
(
Fast forward
]
Skip back to the start of the current/
previous track
[
Skip forwards to the start of the next track
#
Stop playback
$
Play
&
Toggles pause of playback
AUDIO
Changes audio decode format (Dolby
Digital, DTS, etc.).
MENU
Activates BD player menu.
Navigates track listings if supported by the
player
O
selects the currently highlighted
track if supported by the player
.
Returns navigation to the top level of the
menu (‘Home’).
RTN
When navigating a menu, press this key to
return to the previous screen or selection
SHUFF
Toggles random (‘shue’) play on and o
RPT
Repeat playback of the disc or pre-
programmed selection of tracks. To repeat a
particular track, select that track and press
RPT twice. To cancel, press RPT a third time.
SACD
Toggles between selecting the HD and CD
layer of SACD disc
troubleshooting
Sound cuts-out unexpectedly
If the temperature of the internal heatsink rises above
a safe level, then a thermal cut-out inside the amplier
operates to protect the unit and the protection system
temporarily removes power to the speakers. e system
will reset itself as the heatsink cools down.
< With two pairs of low-impedance speakers
connected (6Ω or less), overloads are more likely.
Overloading the amplier may cause it to shut
down because of overheating.
< Note that, due to the high output voltage from some
CD players, it is possible to drive your amplier
at full power even though the volume is not set at
maximum.
If you are having trouble with your amplier, check the
following items.
No sound
Check the following:
< e amplier is switched on.
< e A39 is not muted (i.e. MUTE (mute) is not
shown on the display panel; the power LED is
showing green, not orange or red).
< e selected source going in to the A39 is
generating audio (e.g., if CD is selected, then the
CD is playing).
< e speaker outputs on the A39 are active and the
appropriate speaker LED is showing green.
E-15E-14
English
Continuous power output (20Hz—20kHz at 0.5% THD), per channel
Both channels, 8Ω, 20Hz—20kHz 120W
Single channel, 4Ω, at 1kHz 240W
Harmonic distortion, 80% power, 8Ω at 1kHz 0.001%
Inputs
Phono (MM) cartridge:
Input sensitivity at 1kHz 5mV
Input impedance 47kΩ + 270pF
Frequency response (ref. RIAA curve) 20Hz—20kHz ± 1dB
Signal/Noise ratio (Awtd) 50W, ref. 5mV input 80dB
Overload margin, ref. 5mV at 1kHz 20dB
Inputs:
Nominal sensitivity 1V
Input impedance
10kΩ
Maximum input 4.6V
Frequency response 20Hz—20kHz ± 0.2dB
Signal/noise ratio (Awtd) 50W, ref. 1V input 105dB
Preamplier output
Nominal output level 900mV
Output impedance 240Ω
Headphone output
Maximum output level into 600Ω 4V
Output impedance
Load range 16Ω—2kΩ
Accessory power output
2.1mm DC connector 6V, 500mA
General
Mains voltage 110–120V~ or 220–240V~
Power consumption (maximum) 1kW
Dimensions W x D x H (including feet) 433 x 425 x 100mm
Weight (net) 11.5kg
Weight (packed) 13.2kg
Supplied accessories Mains lead
CR902 remote control
2 x AAA batteries
Accessory power cable
E&OE
NOTE: All specication values are typical unless otherwise stated.
A39
specications
Continual improvement policy
Arcam has a policy of continual improvement for its
products. is means that designs and specications
are subject to change without notice.
product
guarantee
Correct disposal of this product
is marking indicates that this
product should not be disposed
with other household waste
throughout the EU.
To prevent possible harm to the
environment or human health from
uncontrolled waste disposal and to
conserve material resources, this product should be
recycled responsibly.
To dispose of your product, please use your local
return and collection systems or contact the retailer
where the product was purchased.
Worldwide Guarantee
is entitles you to have the unit repaired free of charge, during the rst two years aer
purchase, provided that it was originally purchased from an authorised Arcam dealer.
e Arcam dealer is responsible for all aer-sales service. e manufacturer can take no
responsibility for defects arising from accident, misuse, abuse, wear and tear, neglect or
through unauthorised adjustment and/or repair, neither can they accept responsibility
for damage or loss occurring during transit to or from the person claiming under the
guarantee.
The warranty covers:
Parts and labour costs for two years from the purchase date. Aer two years you must pay
for both parts and labour costs. e warranty does not cover transportation costs at any
time.
Claims under guarantee
is equipment should be packed in the original packing and returned to the dealer from
whom it was purchased. It should be sent carriage prepaid by a reputable carrier – not
by post. No responsibility can be accepted for the unit whilst in transit to the dealer or
distributor and customers are therefore advised to insure the unit against loss or damage
whilst in transit.
For further details contact Arcam at:
Arcam Customer Support Department, Unit 15, Pembroke Avenue, Waterbeach,
CAMBRIDGE, CB25 9QP, England or via www.arcam.co.uk.
Problems?
If your Arcam dealer is unable to answer any query regarding this or any other Arcam
product please contact Arcam Customer Support at the above address and we will do our
best to help you.
On-line registration
You can register your product on-line at www.arcam.co.uk.
16
WWW.ARCAM.CO.UK
WATERBEACH, CAMBRIDGE, CB25 9PB, ENGLAND
SH268 Issue 2
  • Page 1 1
  • Page 2 2
  • Page 3 3
  • Page 4 4
  • Page 5 5
  • Page 6 6
  • Page 7 7
  • Page 8 8
  • Page 9 9
  • Page 10 10
  • Page 11 11
  • Page 12 12
  • Page 13 13
  • Page 14 14
  • Page 15 15
  • Page 16 16
  • Page 17 17
  • Page 18 18
  • Page 19 19
  • Page 20 20
  • Page 21 21
  • Page 22 22
  • Page 23 23
  • Page 24 24
  • Page 25 25
  • Page 26 26
  • Page 27 27
  • Page 28 28
  • Page 29 29
  • Page 30 30
  • Page 31 31
  • Page 32 32
  • Page 33 33
  • Page 34 34
  • Page 35 35
  • Page 36 36
  • Page 37 37
  • Page 38 38
  • Page 39 39
  • Page 40 40
  • Page 41 41
  • Page 42 42
  • Page 43 43
  • Page 44 44
  • Page 45 45
  • Page 46 46
  • Page 47 47
  • Page 48 48
  • Page 49 49
  • Page 50 50
  • Page 51 51
  • Page 52 52
  • Page 53 53
  • Page 54 54
  • Page 55 55
  • Page 56 56
  • Page 57 57
  • Page 58 58
  • Page 59 59
  • Page 60 60
  • Page 61 61
  • Page 62 62
  • Page 63 63
  • Page 64 64
  • Page 65 65
  • Page 66 66
  • Page 67 67

Arcam A39 User manual

Category
Audio amplifiers
Type
User manual

Ask a question and I''ll find the answer in the document

Finding information in a document is now easier with AI