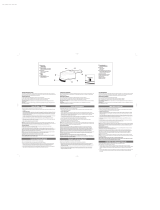
GC300 Steam & Go Handheld Garment Steamer

Philips GC300 Steam & Go Handheld Garment Steamer User manual

  • Hello! I am an AI chatbot trained to assist you with the Philips GC300 Steam & Go Handheld Garment Steamer User manual. I’ve already reviewed the document and can help you find the information you need or explain it in simple terms. Just ask your questions, and providing more details will help me assist you more effectively!
4
EN
a Steamer head
b Steam ready light
c Water tank
d Power cord
e Brush
f Filling cup (GC300,
GC301)
g Steam trigger button
IT
a Bocchetta del sistema di
stiratura a vapore
b Spia "Steam ready"
(vapore pronto)
c Serbatoio dell'acqua
d Cavo di alimentazione
e Spazzola
f Misurino di riempimento
(GC300, GC301)
g Pulsante del vapore
ES
a Cabezal del vaporizador
b Piloto indicador de vapor
listo
c Depósito de agua
d Cable de alimentación
e Cepillo
f Vaso de llenado (GC300,
GC301)
g Botón de vapor
FR
a Tête du défroisseur
b Voyant de vapeur
c Réservoir d'eau
d Cordon d'alimentation
e Brosse
f Gobelet de remplissage
(GC300, GC301)
g Bouton de gâchette vapeur
PT
a Cabeça do vaporizador
b Luz indicadora de vapor
pronto a utilizar
c Depósito de água
d Cabo de alimentação
e Escova
f Recipiente de
enchimento (GC300,
GC301)
g Botão do vapor
11
NO Når du damper, trykker du damphodet mot plagget
mens du strekker plagget ved å trekke i sidene.
EN For garments with buttons such as shirts, jackets and
pants, close the rst button to help straighten the fabric.
For shirt pockets, move the steamer head upwards
while pressing against the fabric.
To steam sleeves, start from the shoulder area and
move the steamer head downwards. Steam while you
pull the sleeve diagonally down with the other hand.
For garment with collar, move the steamer horizontally
along the collar.
Note: The appliance can be used for creating a natural
look and for quick touch-ups. For garments with tough
wrinkles and for a more formal look, it is recommended
to use an iron in addition.
IT In caso di capi con bottoni come camicie, giacche e
pantaloni, chiudere il primo bottone anché il tessuto
sia ben teso.
In caso di maglie con tasche, muovere la bocchetta del
sistema di stiratura a vapore verso l’alto mentre la si
preme sul tessuto.
38
Problem Possible cause Solution
EN
The steamer
does not
heat up.
The steamer is
not plugged in
properly or not
switched on.
Check if the mains plug
is inserted properly
and its wall socket is
working.
Check if the steamer is
switched on.
The steamer
does not
produce any
steam.
The steamer is
not plugged in
properly or not
switched on.
Check if the mains plug
is inserted properly
and its wall socket is
working.
Check if the steamer is
switched on.
The steamer has
not heated up
suciently.
Let the steamer heat
up for 45 seconds
(steam-ready lights
up). The steamer is
ready to be used when
the light goes o.
You have not
pressed the
steam trigger
fully.
Press the steam trigger
fully for a few seconds.
The water level in
the water tank is
too low.
Unplug the steamer
and rell the water
tank.
39
Problem Possible cause Solution
Water
droplets
drip from
the steamer
head.
The steamer has
not heated up
suciently.
Let the steamer heat
up for 45 seconds
(steam-ready lights
up). The steamer is
ready to be used when
the light goes o.
The steamer
produces
a pumping
sound/
the handle
vibrates.
Water is pumped
to the steamer
head to be
converted into
steam.
This is normal.
Water inside the
tank has all been
used up.
Rell the water tank.
Water leaks
around the
steam trigger
and gripping
area.
Water tank
lling door is not
closed properly
Ensure that lling door
is closed properly.
Steam leaves
stains on the
garment or
impurities
come out of
the steamer
head
Apart from
tap water, you
have lled
other liquids /
additives or
descaling agents
into the water
tank.
Use only tap,
demineralized or
ltered water when
lling up the water
tank.
/