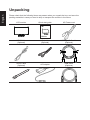
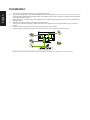
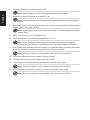
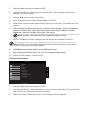
Acer UT241Y is a monitor designed for video and visual display of information obtained from electronic devices. It features a 23.8-inch Full HD (1920 x 1080) IPS display with a 16:9 aspect ratio, providing clear and sharp visuals. The monitor has a response time of 4ms, making it suitable for gaming and fast-paced video content. Additionally, the Acer UT241Y comes with built-in speakers, allowing users to enjoy multimedia without the need for external speakers.
Acer UT241Y is a monitor designed for video and visual display of information obtained from electronic devices. It features a 23.8-inch Full HD (1920 x 1080) IPS display with a 16:9 aspect ratio, providing clear and sharp visuals. The monitor has a response time of 4ms, making it suitable for gaming and fast-paced video content. Additionally, the Acer UT241Y comes with built-in speakers, allowing users to enjoy multimedia without the need for external speakers.


-
 1
1
-
 2
2
-
 3
3
-
 4
4
-
 5
5
-
 6
6
-
 7
7
-
 8
8
-
 9
9
-
 10
10
-
 11
11
-
 12
12
-
 13
13
-
 14
14
-
 15
15
-
 16
16
-
 17
17
-
 18
18
-
 19
19
-
 20
20
-
 21
21
-
 22
22
-
 23
23
-
 24
24
-
 25
25
-
 26
26
-
 27
27


Acer UT241Y is a monitor designed for video and visual display of information obtained from electronic devices. It features a 23.8-inch Full HD (1920 x 1080) IPS display with a 16:9 aspect ratio, providing clear and sharp visuals. The monitor has a response time of 4ms, making it suitable for gaming and fast-paced video content. Additionally, the Acer UT241Y comes with built-in speakers, allowing users to enjoy multimedia without the need for external speakers.
Ask a question and I''ll find the answer in the document
Finding information in a document is now easier with AI
