Page is loading ...

M
2
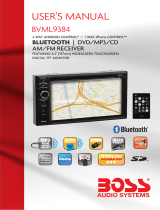
2-Din AM/FM DVD
Multimedia Receiver


1
Safety Precautions
Do not change the fuse on the power
cord without professional guidance. Using
an improper fuse may cause damage to
this unit or even cause re.
Please contact your nearest dealer if one
of the following is experienced:
(a). Water or other objects enter the unit.
(b). There is smoke.
(c). Peculiar smell.
To ensure safe driving, please adjust the
volume to a safe and comfortable level in
case of emergency situations.
Thank you for purchasing this product.
Please read through these operating
instructions so you will know how to
operate your model properly. Please keep
this manual in a safe place for future
reference.
Only connect the unit to a 12-volt power
supply with negative grounding.
Never install this unit where operating it
may impair safe driving conditions.
Never use the front video display function
when driving, so as to prevent violating
trafc regulations or causing an accident.
Never expose this unit, amplifier, and
speakers to moisture or water to prevent
electric sparks or re.

2
Safety Precautions
1. Never disassemble or adjust the unit without
any professional guidance.
For details, please consult any professional
car shop / dealer for inquiry.
2. If the front panel or TFT monitor is dirty,
please use a clean silicone cloth and neutral
detergent to wipe off the spot. Using a rough
cloth and non-neutral detergent such as
alcohol for cleaning may result in scratching
or decoloration to the monitor.
3. If any abnormal behavior of the unit is
found, please refer to trouble shooting guide
of this manual. If no relevant information is
found, please press the [RESET] key on the
front panel to resume factory default.
4. If you have parked the car in hot or cold
weather for a long time, please wait until
the temperature in the car becomes normal
before operating the unit.
5. Using the car heater in low temperature
environment may result in moisture inside
the unit, DO NOT use the unit in this
situation. Eject the disc and wipe off the
moisture on the disc. If the unit still doesn't
work after a few hours, please contact the
service center.
6. Do not impact the LCD monitor which could
cause damage.
7. To prevent damage to the screen, avoid
touching it with sharp objects.
8. To provide a clear demonstration and an
alternative for easy understanding to the
operation of this unit, graphic illustrations
are used.
However, some illustrations are different
from the actual images displayed on the
screen.
9. Operate the unit correctly according to this
manual to prevent unnecessary problem.
The guarantee won't be valid if the problem
is caused by inappropriate operation.

3
Contents
Safety Precautions ...................................1
Before Using .............................................4
Front Panel .............................................4
Remote Control.......................................5
Notes on Remote Control Usage ............6
Replacing the lithium battery ..................6
Basic Operations ......................................7
Power On / Off ........................................7
Playing Source Selection ........................7
Mute ........................................................7
Volume Adjustment.................................7
.....................7
Parking Brake Inhibit...............................7
Adjusting Equalizer Controls...................7
Adjusting the Fader and Balance ...........8
Settings .....................................................9
System Settings ......................................9
General Settings .....................................9
Calibration...............................................9
SWC Programing ....................................9
Audio Settings.......................................10
Time Settings ........................................10
Language Settings ................................11
Video Settings.......................................11
Adjust Volume Settings.........................11
Radio Mode .............................................12
Select Radio as Playing Source ...........12
Select One Radio Band ........................12
Tune......................................................12
Preset Station .......................................12
Local radio station seeking ...................13
EQ Selection .........................................13
Playback Mode........................................14
Basic information ..................................14
Insert a disc ..........................................14
Eject a Disc ...........................................14
Touch Screen Controls .........................14
Controlling Playback .............................14
Connecting the USB Device .................14
Removing the USB Device ...................14
Inserting the SD card ............................14
Removing the SD card..........................15
DVD movie playback ............................15
Audio playback from DVD/CD, USB or SD ....15
Video playback from DVD/CD, USB or SD ....16
Image playback from DVD/CD, USB or SD ...17
BT Mode ...................................................18
Pairing BT Enabled Devices .................18
Disconnecting a BT Device .................. 18
Make a Call ...........................................18
Receiving a Call ....................................19
Adjust BT Settings................................ 19
BT Music Function ................................19
Other Modes ............................................2
Aux 1 / Aux 2 Controls ..........................20
Reset ....................................................20
Replace a Fuse.....................................20
Rear Camera Operation .......................20
Specifications .........................................2
Troubleshooting .....................................2
Wire Connections ...................................2

4
Front Panel
Before Using
1. Disc slot
2. [
] Button
Press to eject a disc.
3. Microphone
Built in microphone for BT handsfree.
4. [MENU] Button
Press to display the main menu
5. [
] Button
Adjust the brightness of screen.
6. Power/Volume/Mute Knob
Rotate to adjust volume.
Press briefly to activate the MUTE function. Press again to resume normal sound.
Press and hold to turn the unit OFF.
7. Reset Button
8. USB Socket
9. SD card reader for media.
10. A/V IN Socket
Notice:
The graphics in this manual are for reference purposes only and
may differ somewhat from the actual unit.
3 1
4
2
6
5
8
7
9
10

5
Before Using
Remote Control
1. Power & Mute On/Off
2. Fast forward / Station up
3. Eject the disc
4. Previous / Seek down
5. Play / Pause
6. Stop
7. Fast backward / Station down
8. Preset station 1.
9. Repeat play / Preset station 2.
10. DVD/VCD audio stream change / Preset station 5.
11. DVD subtitle/ Preset station 6.
12. Show main menu.
13. CD/MP3 Random play / Preset station 3.
14. DVD/VCD root menu/ Preset station 4.
15. DVD title.
16. Adjust volume level.
17. Next / Seek up
18. Scan play / Preset scan
Auto memory store (long press)
19. Select tuner band.
1
2
3
4
5
6
7
8
9
10
11
12
13
14
15
16
17
18
19

6
Notes on Remote Control Usage
1. Aim the remote control at the remote sensor on the unit.
2. Replace the battery from the remote control or insert a battery insulator if the battery has not
been used for a month or longer.
3. DO NOT store the remote control in direct sunlight or in a high temperature environment, as it
may not function properly.
4. The battery can last up to for 6 months in normal conditions. If the remote control does not
work, please change the battery.
5. Use“button shaped” lithium battery“CR2025”(3V) only.
6. DO NOT recharge, disassemble, heat or expose the battery to re.
7. Insert the battery in the proper direction according to the ( + ) and ( - ) poles.
8. Store the battery in a place where it cannot be reached by children to avoid the risk of accident.
Replacing the lithium battery
When the range of operation of the card
remote control becomes short or no function, replace the lithium battery with a new one. Make
sure the battery polarity replacement is correct.
1. Pull out the battery holder while pressing the stopper.
2. Insert the button-type lithium battery with the (+) mark facing upward. Insert the battery holder into
the remote control.
Before Using
12
(CR2025)

7
Power On / Off
Press the Power/Volume knob on the unit or
[
] on the remote control to turn the unit ON.
The buttons on the front panel light up for a
moment and the current mode status appears
on LCD.
Press and hold the knob or [
] on the remote
control to turn OFF the unit.
Playing Source Selection
Press the [ MENU ] button on the front panel
or [ SRC ] on the remote control to display the
playing source menu.
1
3
4
1 2
1.
or : Touch to view the previous or next
page of playing sources.
P .2 laying source icon: touch to access
corresponding work mode.
3. Time status.
4. Date.
Mute
Press the Power/Volume knob on the front
panel or press [ MUTE ] on the remote control
to mute the volume from the unit. Press again
to restore the volume. Adjusting the volume or
using any of the audio setup features cancels
the mute function.
Basic Operations
Volume Adjustment
To increase or decrease the volume level, turn
the knob on the front panel or press [ + ]/[ - ]
on the remote control. The volume range is
from “0” to “40”. The TFT screen displays the
volume level for 3 seconds.
An audible beep tone confirms each function
selection. The Beep tone can be disabled
through the Setup menu.
Parking Brake Inhibit
eht ot detcennoc si eriw ”EKARB“ eht nehW •
brake switch, the TFT monitor will display
video only when the vehicle is parked.
• Parking brake function is overridden when
the video source is set to REVERSE.
eht ,evitca si tibihni ekarb gnikrap eht nehW •
front monitor displays Warning information,
preventing the driver from watching content
while driving. Rear video screens are not
affected.
Adjusting Equalizer Controls
The Equalizer adjustment screen allows
the user t
o easily adjust the audio system
to meet the acoustical characteristics of the
vehicle depending on vehicle type and cabin
dimensions.
For example: proper setting of the audio
controls can improve the speakers frequency
response.
The Balance/Fade levels also adjusted through
the Equalizer adjustment screen.
Equalizer (EQ)
Touch the Equalizer [
] icon to view and
select a desired acoustical preset level
( Optimal / Classic / Rock / Jazz / Techno / Pop
or User).

8
Basic Operations
NOTE:
The equalizer will automatically change to
“USER” when individual audio functions are
adjusted.
Adjusting the Fader and Balance
,sgnittes redaf raer/tnorf tsujda nac resu ehT
L/R balance settings, and subwoofer levels
here.
1. Enter the EQ setup mode.
2. Touch the [
] icon in the EQ interface
menu.
Balance
This feature is used to balance the audio
output levels between the left and right side
of the vehicle. Touch the [
] / [ ] icons to
change the balance control settings -14 (Left)
to +14 (Right).The setting can also be changed
by touching screen within the grid to move the
blue sphere.
Fader
This feature is used to fade the audio output
levels between the front and rear of the vehicle.
Touch the [
] / [ ] icons to change the
fade control settings -14 (Rear) to +14 (Front).
The setting can also be changed by touching
screen within the grid to move the blue sphere.
Subwoofer
This feature is used to reduce or increase the
subwoofer sound level. Touch the [
] / [ ]
icons to adjust the subwoofer volume from -8
to +8. This setting will vary depending on the
To exit the Balance/Fader touch the return icon
on the top left corner of the screen.
NOTE:
T he EQ mode will c hange t o ‘Us er’
automatically when you adjust the frequency
value in all modes besides ‘User’.

9
System Settings
1. Press the [ MENU ] button on the front panel or [ SRC ] on the remote control to display the
playing source menu.
2. Touch the Settings icon [
] and the settings menu is displayed.
General Settings
1. Touch [ ], if necessary.
2. Touch to highlight a setting to display/select an option.
General Settings Options Description
Radio Region
USA/Asia/Japan/Europe/Europe
LW/Oirt
Select one that matches your location.
Radio Range
Distance
Select Local to receive only stations with extremely
strong signal.
Local
Beep
On
Turn-ON the beep sound. Each time you press a button,
the unit beeps.
Off Turn-OFF the beep sound.
Key Color Choose the backlight color of the buttons.
Calibration Start Calibrate the touch screen.
Shortcut Set the shortcut.
SWC Enter to SWC interface
Load Factory Restore to default settings.
Calibration
When the touch operation is not sensitive or valid, you should
calibrate the touch screen using the calibration setting function.
Adjust the response positions of the touch panel as followings:
1. Touch [ Start ] to enter.
2. Touch [ Cancel ] to exit.
3. Press and hold the center of [ + ] for 2 seconds, the [ + ] will
move automatically.
4. Aim at center of [ +
Once steps 1-5 are complete, touch [ OK ] to exit calibrating
mode.
SWC Programing
The following controls are available for most vehicles:
1 2 3 4 5 6
Volume + Volume - Mute Next Prev Play
7 8 9 10 11 12
Home Preset + Preset - Band Source Answer
Touch [ Enter ], the SWC menu will display.
Up t o 12 steering wheel c ontrol f unct ions can be
programmed via the built-in SWC interface. Not all functions
may be supported for each vehicle.
Settings

10
1. Popular OE steering wheel functions are already pre-programmed from the factory. If your
vehicle does not support the exact same functions already pre-programmed, you will need to
clear / reset the SWC interface and program in the exact functions of your vehicle. To clear /
reset the SWC interface, touch [ Reset ] icon.
2. To begin programming the SWC interface after it has been cleared / reset, press a number
1 ~ 12, then press a function. A check mark should appear corresponding to the number
and function. Continue programming in this manner until all of the OE steering wheel control
functions are completed.
NOTE:
Functions 1 ~ 12 must be assigned to a function on the OE steering wheel. For example, if
the OE steering wheel does not support Preset + and Preset -, then these functions must be
cleared / reset in order for the other functions to work correctly.
3. To “learn” the programming completed in step 2 above, touch the [ Program ] icon. You will
then be prompted to push each button on the OE steering wheel (for 1 second), so the unit can
learn the corresponding function.
4. SWC learning / programming is now complete.
5. Touch [ ] to exit.
Audio Settings
1. Touch [ ].
2. Touch an option repeatedly to select.
Audio Settings Options Description
Subwoofer
On Turn On the subwoofer.
Off Turn Off the subwoofer
Subwoofer Filter
80Hz
Select a crossover frequency to set a cut-off frequency for the subwoofer’s LPF
(low-pass lter).
120Hz
160Hz
Loudness
On Turn On the loudness
Off Turn Off the loudness
Time Settings
1. Touch [ ].
2. Touch an option repeatedly to select.
Time Settings Options Description
Date Y/M/D Touch
[ ]
or
[ ]
to set year, month and day.
Clock Format 24Hr/12Hr Touch [ 24Hr ] or [ 12Hr ] to switch clock mode.
Time H/M Touch
[ ]
or
[ ]
to set hour and minutes.
NOTE:
When date/time is set, touch [ Save ] to conrm or [ Cancel ] to exit.
Settings

11
Settings
Language Settings
1. Touch [ ].
2. Touch an option repeatedly to select.
Language Settings Description
OSD Language Select on-screen display language.
DVD Audio Select DVD audio language. Options available depending on DVD disc.
DVD Subtitle Select DVD subtitle language. Options available depending on DVD disc.
DVD Menu Select DVD menu language. Options available depending on DVD disc.
Video Settings
1. Touch [ ].
2. Touch an option repeatedly to select.
Video Settings Options Description
Aspect Ratio
Full
Adjust aspect ratio.
Normal
Password Set password to restrict the play of discs. The default password is 0000.
Rating
1 Kid Safe Acceptable for children.
2 G Acceptable for general viewers.
3 PG Parental guidance suggested.
4 PG13 Unsuitable for children under age 13.
5 PG-R Recommend parents to restrict viewing for children under 17.
6 R Restricted re-parental guidance is advised for children under the age of 17.
7 NC-17 Unsuitable for children under age 17.
8 Adult Acceptable for adults only.
Adjust Enter Touch [ + ] or [ - ] to adjust brightness, contrast and saturation.
Version Info Enter Display the current version information
Adjust Volume Settings
You can set different volumes for different sources.
1. Touch the [
] icon to display and access the volume setting sub-menu
2. Touch the source to be adjusted.
3. The volume range is from “00” to “06”
When switching to the source, the volume increases automatically.
4. Touch blank area to close the sub-menu and touch the upper left corner icon [
] to exit setting
menu.

12
Radio Mode
Select Radio as Playing Source
Open the Source Menu and then touch [Radio].
1
4
3
2
5
6 7 8 109
12
13
10
11
1. Current radio band indicator.
2. Return to home menu.
3. Current station frequency.
4. Preset stations list.
5. Shortcut.
6. Band switch.
7. Seek backward
Tune backward(long press)
8. Auto searching.
9. Seek forward
Tune forward(long press)
10. Opening/closing the options menu.
11. Enter EQ menu.
12. Choose local or distant seeking mode.
13. Enter frequency directly.
Select One Radio Band
Touch the [ Band ] icon on the user interface
to select one radio band among FM1, FM2,
FM3, AM1 and AM2.
Tune
Auto Tuning
Press [ ] / [ ] on the remote control or
touch [
] / [ ] icons on the user interface to
seek a higher / lower station.
To stop searching, repeat the operation above
or press other keys having radio functions.
NOTE:
When a station is received, searching stops
and the station is played.
Manual Tuning
Method 1:
Press the [
] / [ ] on the remote control or
touch [
] / [ ] icon on the user interface for
more than 1 second to enter Manual Tuning
mode.
During manual tuning, the frequency will be
changed in steps.
Method 2:
1. Touch the numeric keypad icon [
].
Numeric keyboard is displayed, touch
numbers to input frequency.
2. Touch [
] to delete the input numbers
step by step.
3. Touch [ OK ] to enter.
Preset Station
The unit has 5 bands, such as FM1, FM2,
FM3, AM1, AM2, and each band can store 6
stations; hence the unit can store 30 stations in
total.
Search Stations Automatically
Touch the search icon [
] to search stations
and store the 6 strongest stations in the current
band automatically.
Manual Store
1. Tune to a desired station.
2. Touch and hold one of the presets (1 to 6)
to save the selected station.

13
Radio Mode
Recalling a Station
1. Select a band.
2. Touch an on-screen preset button to select
the corresponding stored station.
Local radio station seeking
When the Local function is on, only radio
stations with a strong local radio signal are
played. To activate the Local function in the
AM/FM tuner mode, touch [ ] on the screen.
The Options tab is revealed. Touch [
]
icon and choose the Radio Local or Distance.
When the Local function is active, the “Local”
indicator on the screen is illuminated. When
the Distant function is active, the “Distance”
indicator on the screen is illuminated.
EQ Selection
Press the [ ] icon and enter the EQ setup.

14
Basic information
This system will play the following types of
discs:
The car sound system can be used to play
audio DVDs/CDs and DVD/CD-R/RWs with
audio or MP3 files as well as MP3 or WMA
les on USB stick and SD cards.
In addition, you can view movies and images
from DVDs/VCDs/CDs, USB stick and SD
cards on the display.
For safety reasons, the playback of movies and
images on the integrated monitor is allowed
only while the vehicle is standing and the hand
brake is applied. The “PARKING” cable must
be connected with the hand brake connection
of the vehicle (see Connection diagram at the
end of these instructions).
NOTE:
This unit is designed to play pre-recorded
(original) DVDs/VCDs/CDs. Some burned
DVDs/VCDs/CDs may not play due to different
recording formats.
Insert a disc
Upon inserting a disc, the unit will switch to
[Disc] mode automatically.
Eject a Disc
Press the [ ] key on the front panel or [EJECT]
on the remote control to eject the disc.
Touch Screen Controls
The touch key areas for DVD playback are
outlined below:
AB C
E
D
A: Return to the main menu
B: Disc type
C: Play the video and display playback
information
Playback Mode
D: Time display
E: Display onscreen control menu
Controlling Playback
To access the on-screen controls, touch the
screen anywhere except for the upper left
corner and touch again to cancel display.
Touch [ ] to view all function icons.
Connecting the USB Device
1. Open the USB door.
2. Connect an USB device into the USB
connector.
Play starts automatically.
NOTES:
1. If there are audio files supported on the
USB stick, the system will enter the audio
les menu automatically.
If there are no audio files, but there are
video files supported on the USB stick,
the system will enter the video files menu
automatically.
If there are no audio or video les, but there
are picture les supported on the USB stick,
the system will enter the picture les menu
automatically.
If there no above audio/video/picture files
supported in the USB stick, the screen will
display “Load Error!”.
2. Not all USB devices are compatible with the
unit.
Removing the USB Device
1. Select another source in the main menu.
2. Remove the USB device.
Inserting the SD card
1. Open SD card cover.
2. Insert the SD card into the SD card slot.
Play starts automatically.
NOTES:
1. If there are audio les supported on the SD
card, the system will enter the audio files
menu automatically.
If there are no audio files, but there are
video files supported on the SD card, the
system will enter the video files menu

15
Playback Mode
automatically.
automatically.
If there no above audio/video/picture files
supported in the SD card, the screen will
display “Load Error!”.
2. Not all SD cards are compatible with the
unit.
Removing the SD card
1. Select another source in the main menu.
2. Press the card until you hear a click sound.
3. Remove the SD card.
DVD movie playback
The car sound system can play video DVDs
and VCDs. After inserting the DVD, the
playback starts automatically.
The DVD menu is displayed.
You can navigate in the DVD menu b y
touching the corresponding buttons in the DVD
menu on the screen.
After starting the movie via the menu of the
DVD, the movie is displayed. The playback
menu for DVDs is hidden.
NOTE:
Briefly touch the screen once to display the
playback menu again.
The playback menu is shown.
1
1. Shortcut.
2. Stop playback, call up home menu.
3. Select previous chapter.
4. Pause playback and continue playback.
5. Select next chapter.
Tap on [
] to display additional operating
options of the playback menu.
6. Select playback language (only if supported
by the DVD).
7. Display equalizer.
8. Return to menu.
9. Start and end REPEAT function.
Repeat mode:
Repeat Chapter
→
Repeat Title
→
Repeat
All
→
Repeat Off
10. Return to title.
11. Adjust the brightness, contrast, and
saturation.
12. Call up keypad for direct selection of titles
or chapters.
13. Select playback audio channel (only if
supported by the DVD).
Audio playback from DVD/CD, USB
or SD
The principles of audio playback (MP3/WMA)
from data carriers are identical for all sources.
Select the desired source via the main menu.
The device changes to the desired source and
the playback starts.
If the playback does not start with the audio
playback, touch the [
] icon to change to
Touch the [
] icon to display all the folders
- Or -
Press the [
] icon to display all the audio

16
Playback Mode
After starting a title, the playback menu is
displayed.
1
1. Shortcut.
2.
3. Short press: Previous track.
Long press: Fast backward.
4. Pause playback and continue playback.
5. Short press: Next track.
Long press: Fast forward.
Tap on [
] to display additional operating
options of the playback menu.
6. Display equalizer.
7. Start and end REPEAT function.
Repeat mode:
Repeat One
→
Repeat Folder
→
Repeat All
→
Repeat Off
8.
k.
9. Display keypad to directly enter the number
of the desired title.
Video playback from DVD/CD, USB
or SD
Select the desired source via the main menu.
The device changes to the desired source and
the playback starts.
If the playback does not start with the video
playback, touch the [
] icon to change to
Touch the [
] icon to display all the folders
- Or -
Touch the [
] icon to display all the audio
If you selected a movie, the playback is started.
During the movie playback, the playback menu
is hidden.
Briefly touch the screen once to display the
playback menu again.
The playback menu is shown.
1
1. Shortcut.
2.
3. Short press: Previous movie.
Long press: Fast backward.
4. Pause playback and continue playback.
5. Short press: Next movie.
Long press: Fast forward.

17
Playback Mode
Tap on [ ] to display additional operating
options of the playback menu.
6. Select playback language.
7. Display equalizer.
8. Start and end REPEAT function.
Repeat mode:
Repeat One
→
Repeat Folder
→
Repeat All
→
Repeat Off
9. Adjust t he brightness, contrast, and
saturation.
10. Display keypad to directly enter the
number of the desired title.
11. Select playback audio channel.
Image playback from DVD/CD, USB
or SD
Select the desired source via the main menu.
The device changes to the desired source and
the playback starts.
If the playback does not start with the image
playback, touch the [
] icon to change to
Touch the [
] icon to display all the folders
- Or -
Touch the [
] icon to display all the images
of the data carrier.
If you selected a image, the playback is
started. During the playback, the playback
menu is hidden.
Briefly touch the screen once to display the
playback menu again.
The playback menu is shown.
1
1. Shortcut.
2.
3. Previous image.
4. Pause playback and continue playback.
5. Next image.
Tap on [
] to display additional operating
options of the playback menu.
6. Zoom in/out.
7. Rotate images .
8. Adjust the bright ness, cont rast, and
saturation.
9. Display keypad to directly enter the number
of the desired title.

18
The user can make or receive phone calls
with BT enabled phones through the unit.
The user can also listen to music from a BT
enabled device.
Pairing BT Enabled Devices
To connect your BT phone to the unit, the
user needs to pair the phone to the unit.
Pairing needs only to be done once. The user
can pair up to five phones.
The user can search for BT head units by
mobile phone.
Turn ON the BT function on the device.
Search for BT devices by mobile phone.
Select the BT device "MAG-M2" in the
pairing list.
Enter default password “0000” if necessary.
NOTES:
• The operational range between this unit
and a BT device is approximately 5
meters.
• Before you connect a BT device to this
unit, familiarize yourself with the BT
capabilities of the device.
• Compatibility with all BT device is not
guaranteed.
• Any obstacle between this unit and a
BT device can reduce the operational range.
• Keep this unit away from any other
electronic device that may cause
interference.
Disconnecting a BT Device
To disconnect one device, touch [ ]. After
pressed, the unit will display a screen listing
paired devices. Pressing the Green “Plug” icon
will reconnect a previously paired phone to the
BT Mode
BT radio. Pressing the “Wastebin” icon next to
a device’s name will unpair the phone from the
unit.
NOTES
• The device will be disconnected when the
device is moved beyond the operational
range.
• If you want to reconnect the device to the
unit, place it within the operational range.
• If you do not want to reconnect the device to
the unit automatically, touch [ ], then set
[ Auto Connect ] to [ OFF ].
F or details, see the “Adjust
Settings” section.
• Touch and hold [
] to clear all the inputs.
Make a Call
1.
2.
Select BT function in the home menu. On
Option page, see the “Phone Synch”
item, and press “Synch” to synchronize the
phone book with the BT. If you have many
contacts, this may take up to 3-4 minutes.
3. Search for phone number from the following
list:
[Phone Book]
[Call History]
[Missed calls]
[Received calls]
[Dialed calls]
hcuo t neh t , y l t ce r i d dap r ebmun eh t hcuo t rO
[
] to dial.
/