Sagitta, Sagitta SI
2023-07
Assembly and adjustments
Installation manual
12
EN
NL
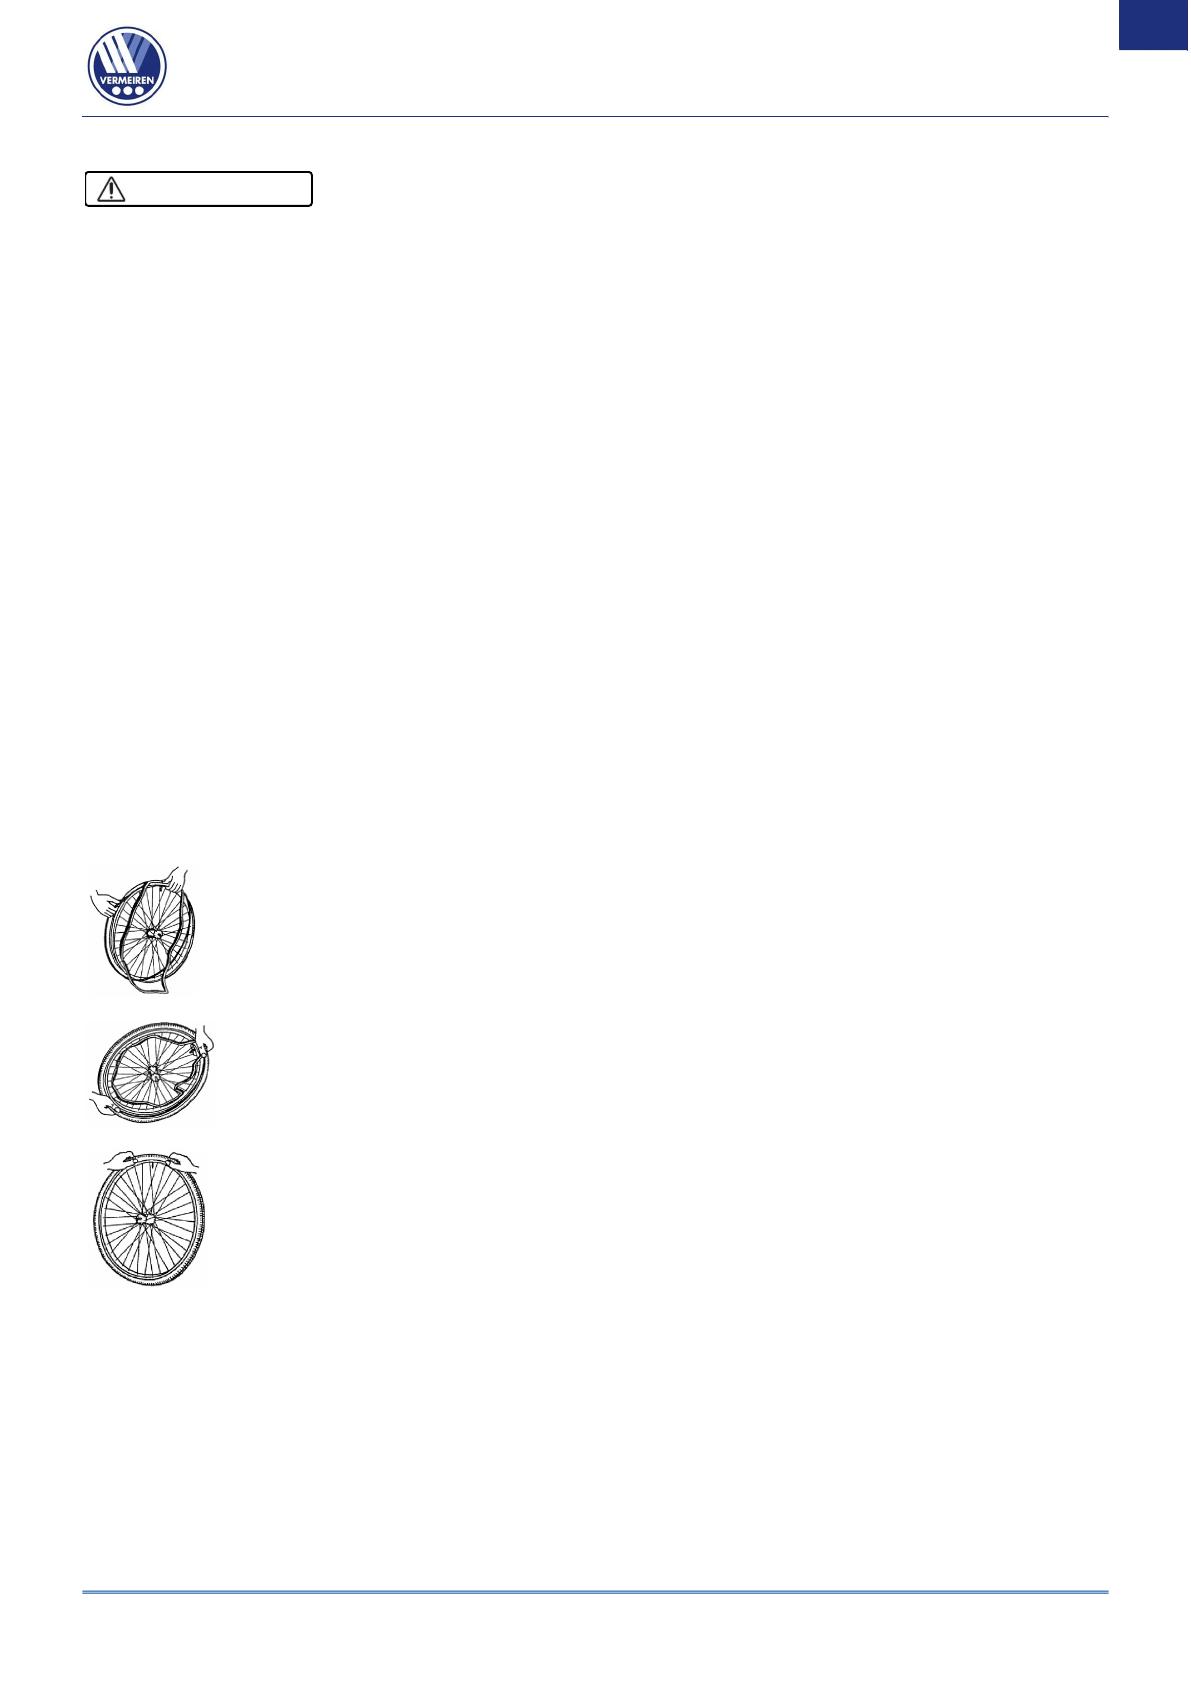
4.9 Pneumatic tyre changing
Risk of injuries and damage
Make sure all air is released from the tyre, before removing it.
Make sure that no body parts, the inner tube nor any other objects are pinched between tyre
and rim.
Make sure all screws are firmly secured by hand before driving with the wheelchair.
Make sure that the pressure is correct, see the pressure indication on the tyres.
Inflate the tyre using inflating equipment which complies to regulations and with a pressure
indication in “bar”.
Only use replacement parts approved by Vermeiren.
If you want to change the tyres or inner tubes, you should note the following:
1. Let all the air out of the inner tube.
2. Insert a tyre lever between the tyre and the rim.
3. Slowly and gently push the tyre lever downwards. This will pull the tyre over the edge of the
rim.
4. Then move the lever along the rim, the tyre will jump out.
5. Now carefully remove the tyre from the rim and then remove the tube.
Note the following before inserting the new inner tube:
Check the rim bed and the inside wall of the tyre for foreign matter and clean these properly if
necessary. Check the condition of the rim bed, especially around the position of the air valve.
Please use only genuine original replacement parts. We do not accept any liability for damage
caused by non-genuine parts. Kindly contact your specialist dealer.
Place the rim belt in position over the air valve before inserting it into the rim.
Then the rim belt can be pulled over easily. Check that all spoke heads are
covered (a rim belt is not required in the case of a plastic rim).
Push the tyre over the edge of the rim, starting behind the air valve. Inflate the
tube slightly until it is round, and place it inside the tyre.
If the tube fits snugly inside the tyre without any folds (in the case of folds: let
out some air), then the upper side of the tyre can be pressed lightly onto the rim
with both hands, starting at the air valve.
Check all around on both sides that the tube is not pinched between the rim and the edge of the
tyre. Lightly push the air valve inwards and pull it out again to make sure that the tyre is positioned
properly in the region of the air valve.
To ensure that the wheel inflated correctly, admit only so much air initially that the tyre can still be
easily pushed inwards by using your thumbs. If the check-lines are equidistant from the edge of
the rim on both sides of the tyre, then the tyre is centered properly. If not - let out the air and
position the tyre afresh.
Now the tyre can be inflated to its full operating pressure (note the maximum!!) and the valve cap
should be replaced.
CAUTION


