+1
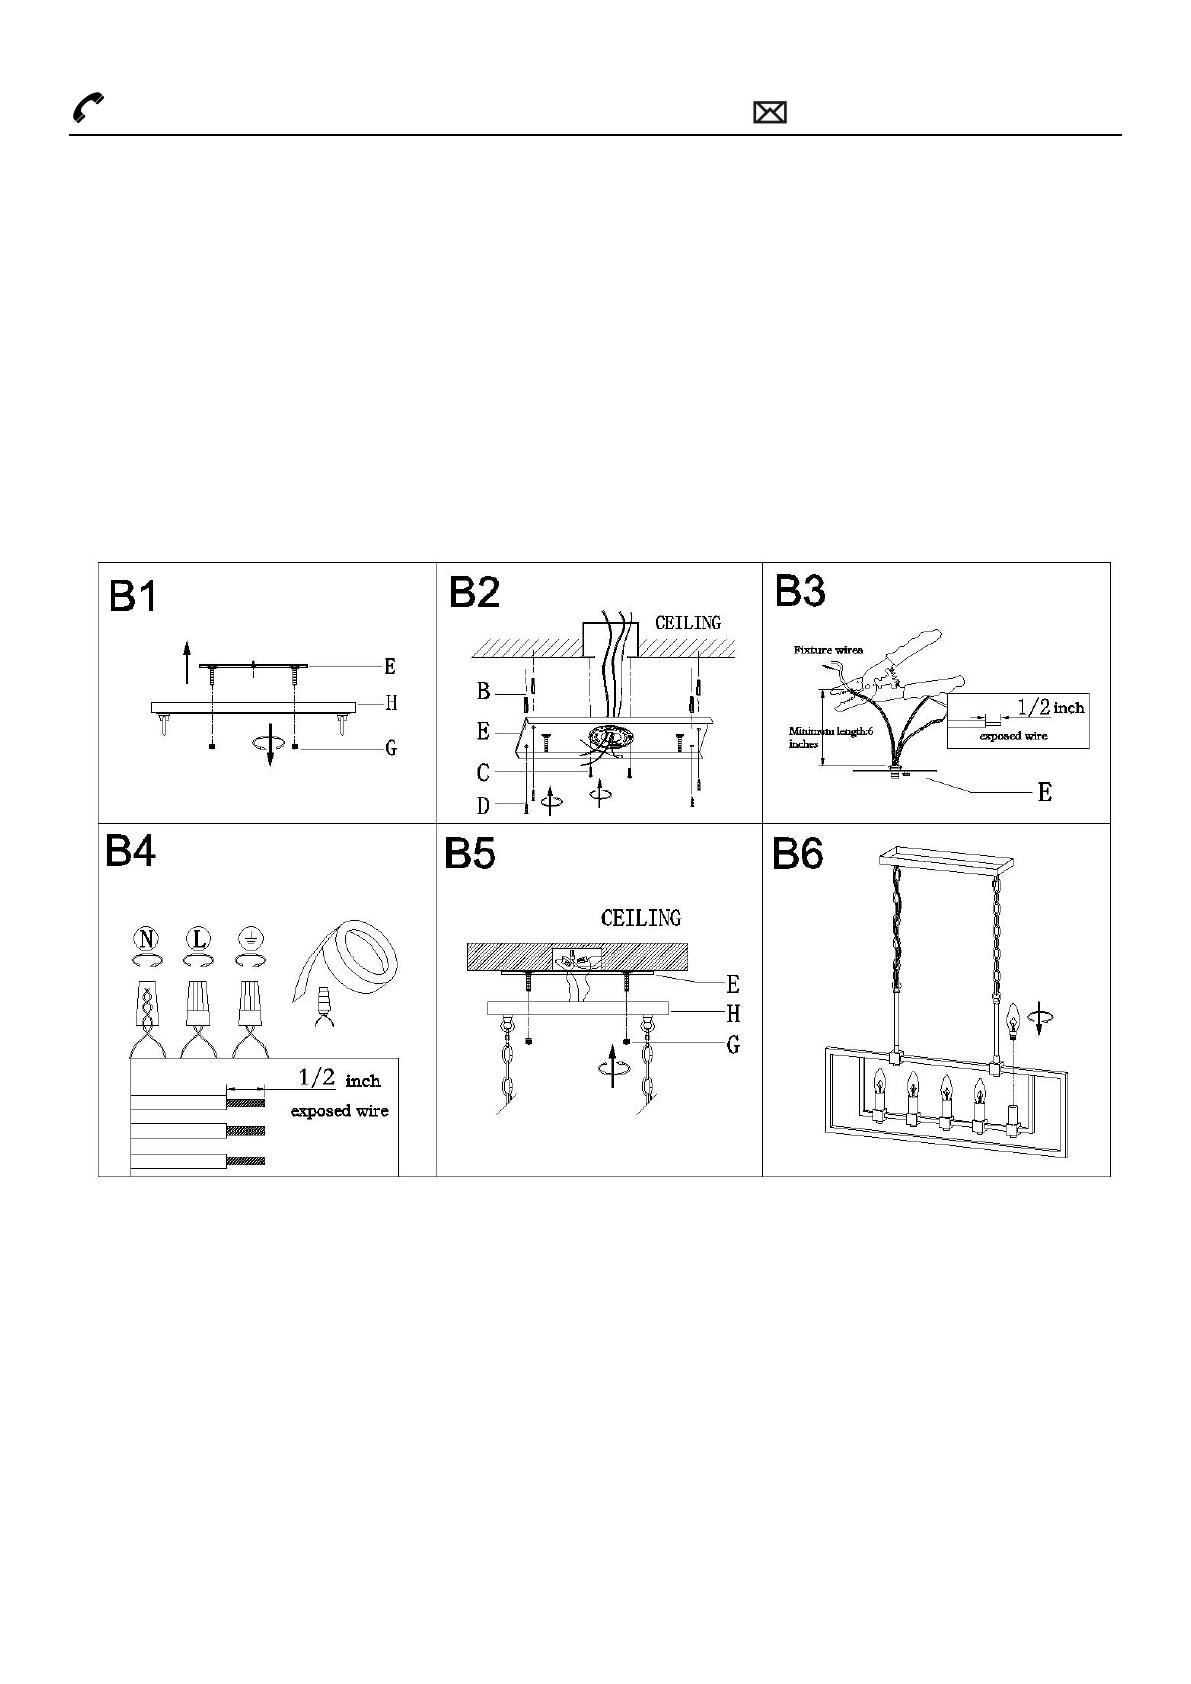
850 296 2377 Working hours : Mon - Fri 9:00 a.m. - 16:00 p.m. EST [email protected]Step B1: Unscrew ball knobs (G) and carefully remove mounting plate assembly (E).
Step B2: Carefully pass the supply wires from the outlet box through mounting plate (E).
To drill the holes on the wall for anchors (B), attach mounting plate (E) to the outlet box with mounting
screws (C) and mark the holes. Unscrew mounting screws (C) and remove mounting plate (E), drill holes and
gently knock anchors (B) into the holes until anchors (B) are level with the wall.
Secure mounting plate (E) to the outlet box with mounting screws (C) and wood screws (D).
Step B3: If needed, shorten the length of fixture wires. At this point, the remaining wire length measured above
mounting plate assembly (E) is at least 6".
Step B4: Make wire connections
Connect wires as below wires connection shown. PLEASE NOTE THAT GROUND WIRE
IS BARE COPPER WIRE, NEVER CONNECT OTHER WIRES TO GROUND WIRES.
Step A1: Carefully pass the fixture wires through iron tubes (L), then screw iron tubes (L) onto iron frame (M).
Step A2: By measuring, determine the correct number of links needed for proper hanging height. Using the chain
pliers, disconnect and discard the unwanted part.
Step A3: Attach quick links (J) to chains (K) and loops (I) on canopy (H) and on the top of iron tubes (L).
Carefully weave the fixture wires through chain (K) in and out of every other link and stop just when you
reach the top of chain (K). Gently pull the wires to ensure the wires are not stressed.
3. Turn off power
Before you start the installation, NEVER attempt any work without shutting off the electricity until the work is
done.
A) Go to the main fuse, or circuit breaker, box in your home. Place the main power switch in the “OFF” position.
B) Place the wall switch in the “OFF” position.
4. Make installation


