Page is loading ...

- 1 -
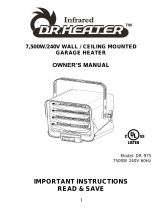
GARAGE CEILING HEATER
5000 W/240 V
52-2532-8
INSTRUCTION
MANUAL
Toll Free Helpline 1-800-459-4409

- 2 -
IMPORTANT SAFETY
INSTRUCTIONS
WARNING: When using electrical appliances, basic precautions
should always be followed to reduce the risk of fire, electric shock, and
injury to persons, including the following:
Recommended Heating Capacity: 1.25 watts / ft3 (0.03m3)
1) Read all instructions before using this heater.
2) This heater is hot when in use. To avoid burns, do not let bare skin touch hot
surfaces. If provided, use handles when moving this heater. Keep combustible
materials, such as furniture, pillows, bedding, papers, clothes, and curtains at
least 3’ (0.9 m) from the front of the heater and keep them away from the sides
and rear.
3) Extreme caution is necessary when any heater is used by or near children or
invalids and whenever the heater is left operating and unattended.
4) Always switch off the heater when not in use.
5) Do not operate any heater with a damaged cord or after the heater malfunctions,
has been dropped or damaged in any manner. Return heater to authorized
service facility for examination, electrical or mechanical adjustment, or repair.
6) Do not use outdoors.
7) Do not run cord under carpeting. Do not cover cord with throw rugs, runners, or
similar coverings. Arrange cord away from traffic area and where it will not be
tripped over.
8) To disconnect heater, turn controls to off.
9) Do not install less than 8’ (2.4m) from the floor and closer than 12” (305mm) to
any vertical surfaces or walls.
10) Do not insert or allow foreign objects to enter any ventilation or exhaust opening
as this may cause an electric shock or fire, or damage the heater.
11) To prevent a possible fire, do not block air intakes or exhaust in any manner. Do
not use on soft surfaces, like a bed, where openings may become blocked.
12) A heater has hot and arcing or sparking parts inside. Do not use it in areas where
gasoline, paint, or flammable liquids are used or stored.
13) Use this heater only as described in this manual. Any other use not
recommended by the manufacturer may cause fire, electric shock, or injury to
persons.
14) This heater is not intended for use with an extension cord.
15) This product must be installed by a certified electrician, in accordance with local
codes.
SAVE THESE INSTRUCTIONS

- 3 -
CAUTION: ALTHOUGH THIS DEVICE IS PROVIDED
WITH THERMAL PROTECTION WHICH REDUCES THE RISK
OF ELECTRIC SHOCK, THIS PRODUCT SHOULD NEVER BE
USED NEAR WATER.
SPECIFICATIONS
Garage Ceiling Heater
Volt: 240 V
Watts: 5000 W
Frequency: 60 Hz
Amps: 20 A
BTU/h: 17060
This heater is intended to be a ceiling-mounted heater. It has a thermal cut-off
protection. If the thermal cut-off protection trips, then, switch off the power. The
unit should reset automatically after 10 minutes. If the thermal cut-off protection
trips again, determine the reason for overheating.

- 4 -
INSTALLATION INSTRUCTIONS
1. Loosen the 4 screws to remove the grill box of the unit.
2. Loosen 1 screw to remove the mounting bracket.
3. Keep the unit at least 8’ (2.4m) away from the floor. This minimum distance
must be maintained.
4. Once the mounting position is decided, mark the drill-hole positions in the
ceiling for the mounting bracket.
5. Drill the required holes with diameter fit for the anchor provided for positioning
the mounting bracket.
6. Insert the anchors.
7. Attach the mounting bracket to the ceiling and secure with mounting screws.
8. Loosen 2 screws to remove the wiring compartment cover.
9. Hook the unit to the mounting bracket and let the unit hang from the mounting
bracket.
10. Run the electrical supply cable to the wiring compartment of the unit. Connect
the grounded wire to the grounding screw and connect the electrical wires with
provided wire connectors.
WARNING: All wiring must be installed by a certified
electrician according to the electrical safety. The ceiling heater must be
grounded in accordance with all national and local building codes.
11. Replace the wiring compartment cover and lock in place with 2 screws.
12. Secure the unit to the bracket with screw.
13. Replace the grill box and secure with screws.

- 5 -
OPERATION
Press the switch button to switch ON/OFF the heater. The pilot light and the fan will
be turned on when the heater is working

- 6 -
MAINTENANCE
WARNING: To reduce the risk of fire or electric shock,
always switch off the unit and wait 10 minutes to allow it to cool
before attempting any maintenance or cleaning. It is recommended
that the heater is cleaned periodically, in order to avoid dust from
blocking the grill or ventilation.
CLEANING
1. Wipe the unit with a soft, damp cloth.
2. Do not use abrasive cleaners or spray liquids on the unit surfaces.
WARRANTY
This Mastercraft® product carries a three (3) year replacement warranty
against defects in workmanship and materials. Mastercraft® Canada agrees
to replace the defective product free of charge with the same model or one of
equal value or specification, within the stated warranty period, when returned
by the original purchaser with proof of purchase. This product is not
guaranteed against wear or breakage due to misuse and/or abuse.
Imported by
Mastercraft® Canada Toronto, Canada M4S 2B8
Made in China
/


