Fujitsu ASYG14KMCC Operating instructions

Category
Split-system air conditioners
Type
Operating instructions
En-1
AIR CONDITIONER
Wall Mounted Type
OPERATING MANUAL
Before using this product, read these instructions thoroughly and keep this manual for future reference.
Safety Precautions
To prevent personal injury, or property damage, read this section carefully before you use this product, and be sure to comply with the following safety precautions.
Incorrect operation due to failure to follow the instructions may cause harm or damage, the seriousness of which is classied as follows:
WARNING CAUTION
This mark warns of death or serious injury. This mark warns of injury or damage to property.
This mark denotes an action that is PROHIBITED.
This mark denotes an action that is COMPULSORY.
Explanation of symbols displayed on the indoor unit or outdoor unit.
WARNING
This symbol shows that this appliance uses a ammable refrigerant. If the refrigerant is leaked and exposed to an external
ignition source, there is a risk of re.
CAUTION
This symbol shows that the operation manual should be read carefully.
CAUTION
This symbol shows that a service personnel should be handling this equipment with reference to the installation manual.
CAUTION
This symbol shows that information is available such as the operating manual or installation manual.
WARNING
This product contains no user-serviceable parts. Always
consult authorized service personnel for repairing, installation,
and relocation of this product.
Improper installation or handling will cause leakage, electric
shock, or re.
In the event of a malfunction such as burning smell,
immediately stop operation of the air conditioner, and
disconnect all the power supply by turning off the electrical
breaker or disconnecting the power plug. Then consult
authorized service personnel.
Take care not to damage the power supply cable.
If it is damaged, it should only be replaced by authorized
service personnel.
In the event of refrigerant leakage, be sure to keep away
from re or any ammables, and consult authorized service
personnel.
In the event of a thunder storm or any prior sign of a lightning
strike, turn off the air conditioner via the remote controller,
and refrain from touching the product or the power source to
prevent any electrical hazards.
The appliance shall be stored in a room without continuously
operating ignition sources (for example: open ames, an
operating gas appliance or an operating electric heater).
The appliance shall be stored in a well-ventilated area.
Be aware that refrigerants may not contain an odour.
The appliance shall be stored so as to prevent mechanical
damage from occurring.
Disposing of the product shall be done properly, in
compliance with national or regional regulations.
During transportation or relocation of the indoor unit, pipes
shall be covered with the wall hook bracket for protection.
Do not move the appliance by holding the indoor unit pipes.
(The stress applied to the pipe joints may cause the
ammable gas to leak during operation).
This appliance is not intended for use by persons (including
children) with reduced physical, sensory or mental capabilities,
or lack of experience and knowledge, unless they have been
given supervision or instruction concerning use of the appliance
by a person responsible for their safety. Children should be
supervised to ensure that they do not play with the appliance.
Do not start or stop the operation of this product by inserting or
pulling out the power plug, or by turning on or off the circuit breaker.
Do not use ammable gases near this product.
Do not expose yourself directly to the cooling airow for
many hours.
Do not insert your ngers or any other objects into outlet
port, open panel, or intake grille.
Do not operate with wet hands.
Do not install the unit in area lled with mineral oil such as a
factory or area containing a large amount of splashed oil or
steam such as a kitchen.
Do not use means to accelerate the defrosting process or to
clean the appliance, other than those recommended by the
manufacturer.
Do not pierce or burn.
Contents
Safety Precautions ............................................................... 1
Indoor Unit Overview and Operations .................................. 3
Remote Controller Overview and Operations ...................... 4
Timer Operation.................................................................... 6
General Information on Operation ........................................ 7
Cleaning and Care................................................................ 8
Troubleshooting .................................................................. 10
PART No. 9387858006 [Original instructions]
EnglishDeutschEspañolItalianoEλληvIkάPortuguêsРусскийTürkçe Français
9387858006_OM.indb 1 18/01/2018 13:36:51
En-2
OPERATING MANUAL
Indoor unit accessories
Remote
controller
Batteries Air cleaning lters Filter holders
Remote controller
holder
Tapping screws
Remote controller holder installation
321
Screws
Insert
Slide up
WARNING
Take care to prevent infants and young children from acciden-
tally swallowing the batteries.
CAUTION
Do not attempt to recharge dry batteries.
Do not use dry batteries that has been recharged.
CAUTION
Provide occasional ventilation during use.
Always operate the unit with air lters installed.
Ensure that any electronic equipment is at least 1 m (40 in)
away from either the indoor unit or outdoor unit.
Disconnect all the power supply when you are not using this
product for extended periods.
After a long period of use, ensure to get the mounting of the
indoor unit checked to prevent this product from falling down.
The airow direction and the room temperature should be
carefully considered when you use this product in a room
with infants, children, elderly or sick persons.
Do not place any other electrical products or household
belongings under this product.
Dripping condensation from this product might get them wet,
and may cause damage or malfunction of your property.
Do not expose this product directly to water.
Do not use this product for preservation of food, plants,
animals, precision equipment, art work, or other objects. This
may cause quality deterioration of those items.
Do not expose animals or plants to the direct airow.
Do not drink the drainage from the air conditioner.
Do not pull the power supply cable to disconnect the plug.
Do not touch the aluminum ns of heat exchanger built-in
this product to avoid personal injury when you maintain the
unit.
Do not stand on unstable steps when operating or cleaning
this product. It may overturn and can cause injury.
Do not direct the airow at replaces or heating apparatus.
Do not block or cover the intake grille and the outlet port.
Do not apply any heavy pressure to radiator ns.
Do not climb on, place objects on, or hang objects from this
product.
This product contains uorinated greenhouse gases.
Battery (R03/LR03/AAA × 2) loading and remote controller preparation
1
4
2
3
5
7
6
5
Press [CLOCK ADJUST] to start clock setting.
6
Set the time by pressing [SELECT].
Each time you press the button, the value increases or
decreases 1 minute. With pressing and holding the button, the
value increases or decreases 10 minutes.
7
Press [CLOCK ADJUST] again to complete the clock setting.
NOTES:
Use specied type of battery only.
Do not mix different types or new and used batteries together.
Batteries can be used about 1 year in ordinary use.
If the remote control range noticeably shortens, replace the
batteries, and press [RESET].
Safety Precautions (continued)
9387858006_OM.indb 2 18/01/2018 13:36:52
En-3
AIR CONDITIONER Wall Mounted Type
OPERATING MANUAL
1 Intake grille
Before starting operation, make sure that the intake grille has been
shut completely. Incomplete closing may have an effect on the proper
function or performance of the product.
2 [MANUAL AUTO] button
Use when the remote controller is lost or there is a malfunction.
Status Action Mode or operation
In operation Press more than 3 seconds. Stop
Stopping Press more than 3 seconds and
less than 10 seconds.
Auto
Press more than 10 seconds.
(Only for servicing.*)
Forced cooling
After cleaning Press less than 3 seconds. Filter indicator reset
*:To stop the Forced cooling, press this button or [ ] on the remote
controller.
3 Front panel
4 Vertical airow direction louver
Each time you press [SET] on the remote controller, the angle of the
vertical airow direction louver moves as follows:
1
2
3
4
5
6
Cooling or Dry
mode
Heating mode
1 2
3
65
* *
4
*: Default setting in each mode.
Do not adjust by hand.
At the beginning of Auto or Heating mode, they may stay on position
1 for a while for adjustment.
If the angle is set to position 4-6 for more than 30 minutes in Cooling
or Dry mode, the louver will automatically return to position 3.
Keeping the position 4-6 during Cooling or Dry mode may cause
condensation to form, and the drops may damage your property.
5 Drain hose
6 Remote controller signal receiver
CAUTION
For appropriate signal transmission between remote controller
and indoor unit, keep the signal receiver away from the follow-
ing items:
- Direct sunlight or other strong lights
- Flat-panel television screen
In rooms with instantaneous uorescent lights, such as
inverter type ones, the signal may not be transmitted properly.
In such a case, consult the store of purchase.
5
8
7
9
12
1
2
3
4
4
6
11
10
7
Economy indicator (green)
Lights in the Economy operation and in the 10 °C Heat operation.
8
Timer indicator (orange)
Lights in the Timer operation, and blinks slowly when the timer setting
error is detected.
For details, refer to "Auto-restart function" on page 7.
9 Operation indicator (green)
Lights in the normal operation, and blinks slowly in the Automatic
defrosting operation.
10
Horizontal airow direction louvers
CAUTION
Before you adjust the horizontal airow direction, make sure
that the vertical airow direction louver has been stopped
completely.
Adjust two knobs by hand.
See page 8
11
Air lter
See page 9
12
Air cleaning lters
Purify or deodorize the air, and provide fresh airow.
Indoor Unit Overview and Operations
9387858006_OM.indb 3 18/01/2018 13:36:53
En-4
OPERATING MANUAL
Remote Controller Overview and Operations
18
15
16
14
19
2
9
10
13
8
3
11
12
1
5
6
4
7
17
5 [POWERFUL] button
The product will operate at maximum power, which is convenient
when you want to quickly cool down or warm up the room.
When you press the button to start the Powerful operation, the indoor
unit emits 2 short beeps.
The Powerful operation is automatically turned off in the following
situations:
Adjusted room temperature reached to the dened temperature in
temperature setting in Cooling, Dry, or Heating mode.
20 minutes have passed after nishing the Powerful operation mode
setting.
Even in situations above, the Powerful operation will not automatically
turn off unless it has run for a certain amount of time.
NOTES:
The airow direction and the fan speed are controlled automatically.
This operation cannot be performed simultaneously with the
Economy operation.
To return to the normal operation, press the button again. Then the
indoor unit emits 1 short beep.
6 [10 °C HEAT] button
Starts the 10 °C Heat operation that maintains the room temperature
at 10 °C so as to prevent the room temperature to drop too low.
When you press the button to start the 10 °C Heat operation, the
indoor unit emits 2 short beeps and the Economy indicator (green)
turns on.
NOTES:
In the 10 °C Heat operation mode, only vertical airow direction can
be adjusted by using [SET].
Heating mode will not be performed if the room temperature is warm
enough.
To return to the normal operation, press [
].
The Economy indicator turns off.
7 Signal transmitter
Aim to signal receiver of the indoor unit properly.
Signal transmit indicator [ ] on the remote controller display shows
that signal from the remote controller is being transmitted.
Operating range is approximately 7 m.
You will hear a beep if the transmitted signal has been sent properly.
If there is no beep, press the button on the remote controller again.
You can quickly start the operation with following 3 steps:
1 [ ] (Start/Stop) button
2 [MODE] button
Switches operation mode in following order.
AUTO COOL DRY FAN HEAT
Notes in Heating mode:
At the beginning of the operation, the indoor unit operates at very
low fan speed for about 3–5 minutes for preparation, and then
switches to the selected fan speed.
The Automatic defrosting operation overrides the heating operation
when it is necessary.
Note in Cooling mode:
Indoor unit fan may stop from time to time to perform indoor unit fan
control for energy saving that enables power-saving operation by
stopping the rotation of the indoor unit fan when the outdoor unit is
stopped.
3 [TEMP.] (temperature) buttons
Set desired temperature.
In Cooling/Dry mode, the value needs to be set at lower temperature
than current room temperature, and in Heating mode, the value needs
to be set at higher temperature than current room temperature.
Otherwise, corresponding operation mode does not start to work.
Temperature setting range
Auto/Cooling/Dry 18–30 °C
Heating 16–30 °C
*:Temperature control is not available in Fan mode.
4 Remote controller display
In this section, all the possible indicators are displayed for description.
In actual operation, the display is linked with the button operation, and
only shows the necessary indicators for each setting.
9387858006_OM.indb 4 18/01/2018 13:36:54
En-5
AIR CONDITIONER Wall Mounted Type
OPERATING MANUAL
18
[OUTDOOR UNIT LOW NOISE]
button
Starts or stops the Outdoor Unit Low Noise Operation that lowers
noise generated from the outdoor unit by cutting down the rotation
number of the compressor, and suppressing the fan speed till they
are sufciently reduced.
Once the operation is set, the operation setting is preserved until you
press this button again to stop the operation, even if the indoor unit
operation is stopped.
Outdoor Unit Low Noise indicator
on the remote controller
display shows that the unit is in Outdoor Unit Low Noise mode.
NOTES:
This operation cannot be performed simultaneously with following
modes: Fan mode, Dry mode, Powerful operation mode
19
[ECONOMY] button
Starts or stops the Economy operation that saves more electricity
consumption than the other operations with a conservative adjustment
of the room temperature.
When you press the button, the Economy indicator on the indoor unit
turns on.
In Cooling or Dry mode, the room temperature will be adjusted at a
few degree higher than the dened temperature.
In Heating mode, the room temperature will be adjusted at a few
degree lower than the dened temperature.
Especially in Cooling or Dry mode, you can have improved
dehumidication without signicantly lowering the room temperature.
NOTES:
In Cooling, Heating, or Dry mode, the maximum output of this
operation is approximately 70 % of usual air conditioning operation.
This operation cannot be performed during temperature monitoring
by Auto mode.
: The setting must be done while the indicator stays solid.
: The button is controllable only when the air conditioner is on.
8 [FAN] button
Controls the fan speed.
(Auto) (High) (Med) (Low) (Quiet)
When "AUTO" is selected, the fan speed is automatically adjusted
according to the operation mode.
9 [SWING] button
Starts or stops automatic swing of the vertical airow direction louver.
Each time you press the button, the vertical airow direction louver
swings as follows:
Cooling, Dry, or Fan
mode
Heating or Fan mode
1 2
3 3
65
4
4
1 2
3
3
6
5
4
1
2
3
4
5
6
NOTES:
The Swing operation may stop temporarily when the fan in the unit
is rotating at very low speed or stopping.
In Fan mode, either of swing direction 1
4 or 3
6 is performed
in accordance with the vertical airow direction previously set before
you start the Swing operation.
10 [SET] button
Adjusts the vertical airow direction.
See page 6
11
[SLEEP TIMER] button
Activates the Sleep timer that helps you to fall asleep comfortably with
gradual temperature control.
12 [TIMER CANCEL] button
Cancels the set timer.
13 [RESET] button
When you press [RESET], press it gently by using the tip of a ballpoint
pen or other small object in correct direction as shown in this gure.
RESET
See page 2
14 [CLOCK ADJUST] button
Cancels the set timer.
See page 6
15 [OFF TIMER] button
Activates the Off timer.
See page 6
16
[ON TIMER]
button
Activates the On timer.
17 [SELECT] button
Used for adjusting the clock or timer.
Remote Controller Overview and Operations (continued)
9387858006_OM.indb 5 18/01/2018 13:36:55
En-6
OPERATING MANUAL
Remote Controller Overview and Operations (continued)
Fan control for energy saving
When the set temperature is reached during
the Cooling operation, the fan operates
intermittently and power is saved.
Fan control for energy saving function is On at
the time of purchase.
To use this function, use the following steps;
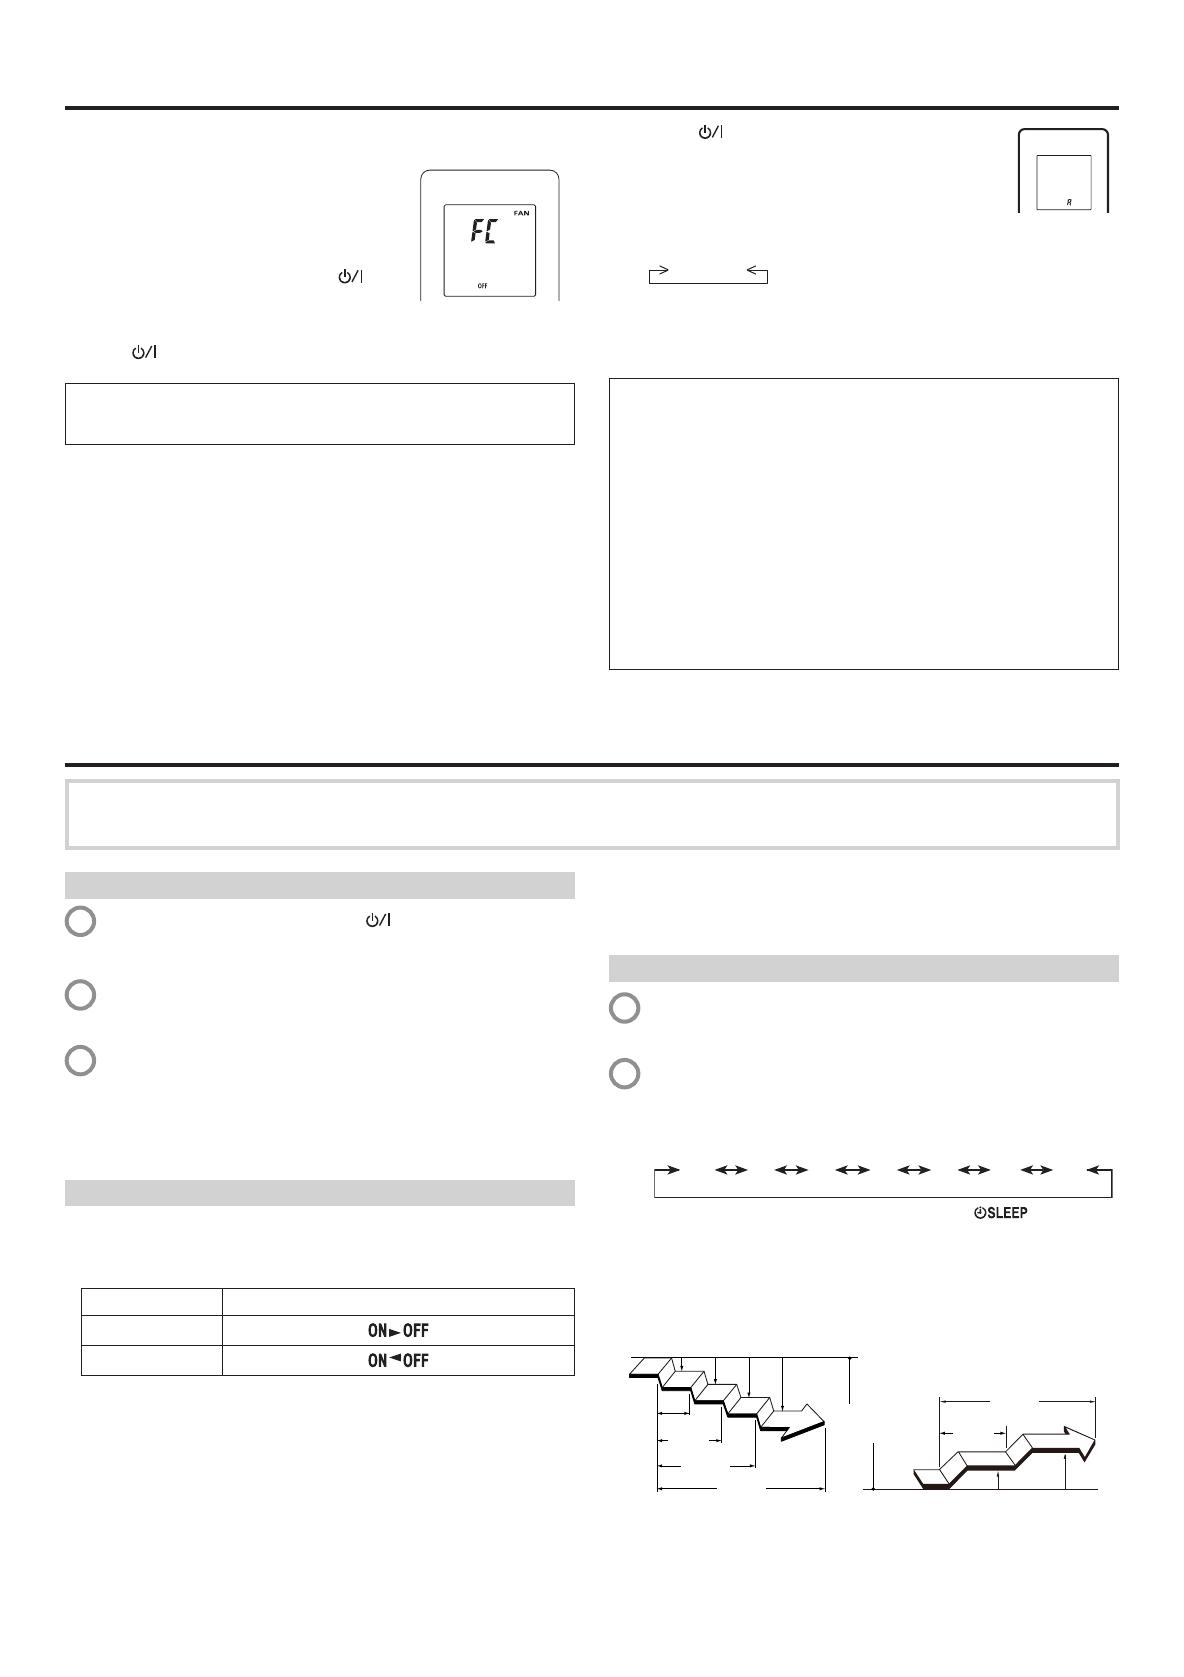
1. Turn off the indoor unit by pressing [
].
2. Press [FAN] for at least 5 seconds until the
current Fan Control "FC" status is displayed.
3. Press [TEMP. (
/
)] to switch between "ON" or "OFF".
4. Press [ ] to send the setting to the indoor unit. After the status is
sent, the display will automatically return to the original screen.
If no buttons are pressed within 30 seconds after the "FC" status is
displayed, the system returns to the original clock display. In this case,
start again from step 1.
Remote controller custom code setting
When two or more air conditioners are installed in a room and the
remote controller is operating an air conditioner other than the one you
wish to set, change the custom code of the remote controller to operate
only the air conditioner you wish to set (4 selections possible).
When two or more air conditioners are installed in a room, please
contact your retailer to set the individual air conditioner custom codes.
Use the following steps to select the custom code of the remote
controller. (Note that the air conditioner cannot receive a signal if it has
not been set for the matching custom code.)
1
Press [ ] until only the clock is displayed on the
remote controller display.
2
Press [MODE] for at least 5 seconds to display
the current custom code (initially set to A).
3
Press [TEMP. (
∧/∨
)] to change the custom code
between
A↔B↔C↔D
. Match the code on the display to the air
conditioner custom code.
4
Press [MODE] again to return to the clock display.
The custom code will be changed.
If no buttons are pressed within 30 seconds after the
custom code is displayed, the system returns to the
original clock display. In this case, start again from step 1.
The air conditioner custom code is set to A prior to ship-
ment. Contact your retailer to change the custom code.
Depending on the remote controller, the custom code may
return to custom code A when the batteries are replaced.
In this case, if you use a code other than A, reset the code
after replacing the batteries. If you do not know the air
conditioner custom code setting, try each of the custom
codes (A→B→C→D) until you nd the code which oper
-
ates the air conditioner.
Timer Operation
NOTES:
If you change the setting value for the timer after the program timer
is set, the counting down of the timer will be reset at that moment.
Time setting for each combination should be within a span of 24 hours
.
Sleep timer
1
Press [SLEEP TIMER] to activate the Sleep timer.
Operation indicator and Timer indicator on the indoor unit turns
on.
2
Adjust the time by pressing [SELECT] within about 5 seconds,
while the clock indicator is blinking.
(About 5 seconds later, the remote controller display returns to
standby screen.)
Each time you press the button, the time changes as follows:
9.07.05.03.02.01.00.5
hours(30 min.)
To repeat the timer, press [SLEEP TIMER] when indicator is
not displayed on the remote controller display.
To help you to fall asleep comfortably and prevent excessive warming
or cooling in sleep, the Sleep timer controls the temperature setting
automatically in accordance with the set time shown as follows. The
air conditioner completely turns off after the set time has elapsed.
In Heating mode
Set
temperature
Set time
1 hour
Set time
1 hour
1.5 hour
30 min.
1 °C 2 °C 3 °C 4 °C
2 °C
1 °C
In Cooling or Dry mode
Note for timer settings:
Any interruption of the power supply, such as a blackout or cutting off of a circuit breaker, makes the set internal clock go wrong.
In such a case, the Timer indicator on the indoor unit blinks, and you need to readjust the setting.
On timer or Off timer
1
Turn on the indoor unit by pressing [ ].
Operation indicator on the indoor unit turns on.
If the indoor unit is already operating, skip this step.
2
Press [ON TIMER] or [OFF TIMER].
Clock indicator on the remote controller display starts blinking,
and Timer indicator on the indoor unit turns on.
3
Adjust the time by pressing [SELECT] within about 5 seconds,
while the clock indicator is blinking.
(About 5 seconds later, the remote controller display returns to
standby screen.)
To cancel the timer and return to the normal operation, press [CANCEL].
To redo the timer setting, perform step 2 and 3.
Program timer (combined use of On timer and Off timer)
You can set an integrated On–Off or Off–On timer.
Either of the timer whose congured starting time is closer to the
current time works rst, and the order of the timer operation is
displayed as follows:
Timer Indicator on remote controller display
On–Off timer
Off–On timer
The timer that is set later starts counting down after the counting
down of the preceding timer is nished.
9387858006_OM.indb 6 18/01/2018 13:36:56
En-7
AIR CONDITIONER Wall Mounted Type
OPERATING MANUAL
General Information on Operation
Automatic defrosting operation
When outdoor temperature is very low with high humidity, frost
may form on the outdoor unit during the Heating operation, and
it could reduce the operating performance of the product.
For frost protection, a microcomputer-controlled automatic
defrost function is equipped in this air conditioner.
If frost forms, the air conditioner will temporarily stop, and
defrost circuit will operate briey (maximum of 15 minutes.)
The Operation indicator on the indoor unit blinks during this
operation.
If frost forms on the outdoor unit after the Heating operation,
the outdoor unit will stop automatically after it operates for a few
minutes. Then the Automatic defrosting operation starts.
Auto-restart function
In event of power interruption such as a blackout, the air
conditioner stops once. But it restarts automatically and
performs previous operation when the power supply is resumed.
If any power interruption occurs after the timer is set, counting
down of the timer will be reset.
After the power supply is resumed, the Timer indicator on the
indoor unit blinks to notify you that there has been a timer fault.
In such a case, reset the timer for your opportune time.
Heating performance
This air conditioner operates on the heat-pump principle,
absorbing heat from air outdoors and transferring that heat
to the indoor unit. As a result, the operating performance is
reduced as outdoor air temperature drops. If you feel that the
heating performance is insufcient, we recommend you to use
this air conditioner in conjunction with other kinds of heating
appliance.
Malfunctions caused by other electrical devices:
Use of other electrical appliances such as an electric shaver or
nearby use of a wireless radio transmitter may cause the malfunction
of the air conditioner.
If you encounter such a malfunction, turn off the circuit breaker once.
Then turn it on again, and resume operation by using the remote
controller.
Wired remote controller (option)
The optional wired remote controller can be used.
When you use remote controller, there are following different points
as compared with using wireless remote controller.
[Additional functions for wired remote controller]
Temperature set back timer
You can use both wired and wireless remote controller
simultaneously. (But function is limited.)
When the restricted functions on the remote controller are used, a
beeping sound will be heard, and the Operation, Timer, and Economy
indicators of the indoor unit will blink.
[Restricted functions for wireless remote controller]
<Wired remote controller (Polar 3-wired)>
Outdoor unit low noise
10°C Heat
Powerful
Timer operation
Group Control (option)
One wired remote controller can control up to 16 air conditioners.
All of the air conditioners will be operated with the same settings.
Wireless LAN control (option)
The optional wireless LAN control can be used.
9387858006_OM.indb 7 18/01/2018 13:36:56
En-8
OPERATING MANUAL
Cleaning and Care
CAUTION
Before cleaning this product, be sure to turn it off and disconnect all the power supply.
Before starting operation, make sure that the intake grille has been shut completely. Incomplete closing of the intake grille might have an
effect on the proper working or performance of the air conditioner.
Do not touch the aluminum ns of heat exchanger built-in the indoor unit to avoid personal injury when you maintain the unit.
Do not expose the indoor unit to liquid insecticides or hair sprays.
Do not stand on slippery, uneven or unstable surfaces when you maintain the unit.
Daily care
When cleaning the indoor unit body, mind the following:
Do not use water hotter than 40 °C.
Do not use scouring cleanser, volatile solvents such as benzene or
thinner.
Wipe the unit gently by using a soft cloth.
Cleaning the intake grille
1
Hold the intake grille with both hands at side, then pull to the front
until it becomes hooked. Keeping the intake grille in a horizontal
position, pull the mounting shaft on the left and right to release.
Mounting
shaft
Intake grille
Mounting
shaft
2
Wash the intake grille gently with water or wipe it gently with a
soft cloth moisten with warm water.
Then wipe it with a dry and soft cloth.
3
Attach the left and right mounting shaft in the direction of the
arrow to the panel top bearing while supporting the intake grille
horizontally. Press this until it clicks so that each shaft snaps into
place.
Mounting
shaft
Mounting
shaft
Intake grille
Bearing
Bearing
4
Press 4 places on the intake grille to close it completely.
Cleaning the air lters
1
Open the intake grille, and remove the air lters.
Lift up the air lter’s handle, disconnect the two hooks, and pull
out.
Air Filter handle
Hooks (2 places)
2
Remove dust with a vacuum cleaner or by washing.
After washing, allow to dry thoroughly in a shaded place.
3
Replace the air lter and close the intake grille.
(1) Align the sides of the air lter with the panel, and push in fully,
making sure the two hooks are returned properly to their holes
in the panel.
Hooks (2 places)
(2) Close the intake grille.
Dust can be cleaned from the air lter either with a vacuum cleaner,
or by washing the lter in a solution of mild detergent and warm
water. If you wash the lter, be sure to allow it to dry thoroughly in a
shady place before reinstalling.
If dirt is allowed to accumulate on the air lter, airow will be
reduced, lowering operating efciency and increasing noise.
During periods of normal use, the air lters should be cleaned every
two weeks.
Do not operate the air conditioner with the intake grille open.
9387858006_OM.indb 8 18/01/2018 13:36:57
En-9
AIR CONDITIONER Wall Mounted Type
OPERATING MANUAL
Cleaning and Care (continued)
Air cleaning lter installation
1
Open the intake grille and remove the air lters.
Air lter (Right & Left)
2
Install the air cleaning lter set (set of 2).
(1) Set the air cleaning lter into the air cleaning lter frame.
Air cleaning lter
Air cleaning lter frame
(2) Engage the latch at each corners of the lter with the four
hooks at the rear of the air cleaning lter frame.
Hook (4 places at the rear)
Latch (4 places)
Take care that the air cleaning lter does not project beyond the
frame.
3
Install the two air lters and close the intake grille.
When air cleaning lters are used, the effect will increased by
setting the fan speed to High.
Replacing dirty air cleaning lters
Replace lters with the following components (purchased separately).
Apple-catechin lter: UTR-FA16
Ion deodorization lter: UTR-FA16-2
1
Open the intake grille and remove the air lters.
2
Replace them by two new air cleaning lters.
(1) Remove the old air cleaning lters in reverse order of their
installation.
(2) Install in the same way as for installation of the air cleaning
lter set.
3
Install the two air lters and close the intake grille.
[In regard to the air cleaning lters]
Apple-catechin lter (1 sheet)
The lters are disposable lters. (They cannot be washed and
reused.)
For storage of the lters, use the lters as soon as possible after the
package has been opened.
(The air cleaning effect decreases when the lters are left in the
opened package)
Generally, the lters should be exchanged about every 3 months.
Please buy dedicated Apple-catechin lter (UTR-FA16) (Sold
separately) to exchange the used dirty air cleaning lters.
Ion deodorization lter (1 sheet) - light blue
The lters should be exchanged about every 3 years so as to
maintain the deodorizing effect.
Please buy dedicated Ion deodorization lter (UTR-FA16-2) (Sold
separately) when exchanging the lters.
[Maintenance of Ion deodorization lter]
In order to maintain the deodorizing effect, please clean the lter in the
following way every 3 months.
1. Remove the lter.
2. Clean with water and dry in the air.
(1) Flush the lters with high-pressure hot water until the surface
of the lters are covered with water. Please ush with diluent
neutral detergent.
(Never wash by reaming or rubbing, otherwise it will damage
the deodorizing effect.)
(2) Rinse with water ow.
(3) Dry in shade.
3. Reinstall the lter.
After extended non-use of the unit
If you have shut down the indoor unit for 1 month or more, perform the
Fan operation for half a day to dry the internal parts thoroughly before
you perform the normal operation.
Additional inspection
After long period of use, accumulated dust inside the indoor unit may
reduce the product performance even if you have maintained the unit
with instructed daily care or cleaning procedures written in this manual.
In such a case, a product inspection is recommended.
For more information, consult authorized service personnel.
Filter Indicator Reset (Special setting)
This function can be used if set correctly during installation.
Please consult authorized service personnel in order to use this
function.
Clean the air lter when the indicator lamp show the following;
ECONOMY indicator
lamp
Flashes 3 times, at intervals of 21 seconds
After cleaning, reset the lter indicator by pushing [MANUAL AUTO] on
the indoor unit for 3 seconds or less.
9387858006_OM.indb 9 18/01/2018 13:36:58
En-10
OPERATING MANUAL
WARNING
In the following events, immediately stop operation of the air conditioner, and disconnect all the power supply by turning off the electrical
breaker or disconnecting the power plug. Then consult your dealer or authorized service personnel.
As long as the unit is connected to the power supply, it is not insulated from the power supply even if the unit is turned off.
Unit smells of something burning or emits smoke
Water leaks from the unit
Following symptoms do not indicate product malfunction, but they are normal functions or characteristics of this product.
Symptom Cause See page
Operation is delayed after
restart.
To prevent blowout of the fuse, the compressor will not operate while the protection circuit is working
for about 3 minutes after sudden Off→On operation of the power supply.
Noise is heard. During operation or immediately after stopping the air conditioner, refrigerant owing sound may be
heard. Also it may be particularly noticeable for 2–3 minutes after starting operation.
During the operation, a slight squeaking sound produced by the minute expansion and contraction
of the front panel caused by temperature change may be heard.
During the Heating operation, a sizzling sound produced by the Automatic defrosting operation may
be heard.
7
Smell coming from the unit. Various smells generated from interior textile, furniture, or cigarette smoke absorbed into the air
conditioner may be emitted.
Mist or steam is emitted from
the unit.
In the Cooling or Dry mode, a thin mist generated by condensation formed with sudden cooling pro-
cess may be emitted.
During the Heating operation, the fan built-in the outdoor unit may stop and rising steam generated by
the Automatic defrosting operation may be seen.
7
Airow is weak or stops. Immediately after the Heating operation is started, the fan speed stays very low temporarily to
warm up the internal parts of the unit.
In the Heating mode, the outdoor unit stops and the indoor unit operates at very low fan speed if
the room temperature rises above the set temperature.
In the Heating mode, the indoor unit temporarily stops for maximum of 15 minutes to perform the
Automatic defrosting operation while the Operation indicator is blinking.
7
In the Dry mode, the indoor unit operates at low fan speed to adjust the room humidity, and may stop
from time to time.
When the fan speed is set to Quiet, the fan rotates at very low speed and the airow is reduced.
In the Cooling mode, the indoor unit fan may stop from time to time when the outdoor unit is stopped. 4
When the monitoring operation is performed in the Auto mode, the fan rotates at very low speed.
Outdoor unit emits water. During the Heating operation, the outdoor unit may emit water generated by the Automatic defrosting
operation.
7
When the lter sign is set, the LED lamp may ash. In this case, please refer to "Filter Indicator Reset (Special setting)".
Before you call for or request servicing, troubleshoot a problem by performing following checks:
Symptom Diagnostic See page
Does not operate at all.
Has the circuit breaker been turned off?
Has there been a power outage?
Has a fuse blown out or the circuit breaker been tripped?
Is the timer operating?
6
Poor cooling or heating perfor-
mance.
Is the air lter dirty?
8
Is the intake grille or outlet port of indoor unit blocked?
Is the room temperature adjusted appropriately?
4
Is a window or door left opened?
Is direct or strong sunlight shinning into the room in the Cooling operation?
Are there other heating apparatus or computers operating, or too many people in the room in the
Cooling operation?
Is the fan speed set to Quiet?
When the fan speed setting is set to Quiet, noise reduction is prioritized and the air-conditioning
performance may become lower. If the volume of provided airow is not agreeable to your prefer-
ence, set the fan speed to Low or higher fan speed.
5
Has the Outdoor Unit Low Noise mode been set?
5
The unit operates differently
from the remote controller
setting.
Are the batteries used in the remote controller exhausted?
Are the batteries used in the remote controller loaded properly?
2
Immediately stop operation and turn off the electrical breaker in following cases. Then consult authorized service personnel.
The problem persists even if you perform these checks or diagnostics.
The Operation indicator and Timer indicator blink while the Economy indicator is blinking fast.
Troubleshooting
9387858006_OM.indb 10 18/01/2018 13:36:58
  • Page 1 1
  • Page 2 2
  • Page 3 3
  • Page 4 4
  • Page 5 5
  • Page 6 6
  • Page 7 7
  • Page 8 8
  • Page 9 9
  • Page 10 10

Fujitsu ASYG14KMCC Operating instructions

Category
Split-system air conditioners
Type
Operating instructions

Ask a question and I''ll find the answer in the document

Finding information in a document is now easier with AI