Boss Audio Systems 658UA User manual
- Category
- Car media receivers
- Type
- User manual
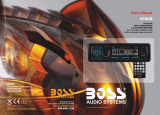
The Boss Audio Systems 658UA is a versatile audio system that allows you to enjoy your favorite music, radio stations, and CDs. It features a built-in amplifier that delivers 60 watts of power to each of its four channels, ensuring a rich and immersive sound experience. With its multiple connectivity options, including RCA inputs and outputs, an auxiliary input, and a USB port, you can easily connect various audio sources, such as your smartphone, MP3 player, or CD player.
The Boss Audio Systems 658UA is a versatile audio system that allows you to enjoy your favorite music, radio stations, and CDs. It features a built-in amplifier that delivers 60 watts of power to each of its four channels, ensuring a rich and immersive sound experience. With its multiple connectivity options, including RCA inputs and outputs, an auxiliary input, and a USB port, you can easily connect various audio sources, such as your smartphone, MP3 player, or CD player.


-
 1
1
-
 2
2
-
 3
3
-
 4
4
-
 5
5
-
 6
6


Boss Audio Systems 658UA User manual
- Category
- Car media receivers
- Type
- User manual
The Boss Audio Systems 658UA is a versatile audio system that allows you to enjoy your favorite music, radio stations, and CDs. It features a built-in amplifier that delivers 60 watts of power to each of its four channels, ensuring a rich and immersive sound experience. With its multiple connectivity options, including RCA inputs and outputs, an auxiliary input, and a USB port, you can easily connect various audio sources, such as your smartphone, MP3 player, or CD player.
Ask a question and I''ll find the answer in the document
Finding information in a document is now easier with AI
Related papers
-
 Planet Aaudio MCK1440W.6 User manual
-
Planet Audio MR1440U User manual
-
 Planet Audio MCK1440W.6 User manual
-
 Boss Audio Systems MR637U User manual
-
 Planet Aaudio MCK1440W.6 User manual
-
 Boss Audio Systems 742RGB User manual
-
Boss Audio Systems MR648S User manual
-
Boss Audio Systems 637UA User manual
-
 Boss Audio Systems 648UA User manual
-


