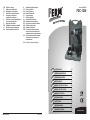
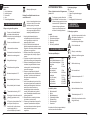
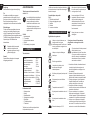
Ferm CDM1003 Owner's manual
- Category
- Cordless combi drills
- Type
- Owner's manual
This manual is also suitable for

Art.no. CDM1003
FDC-1200
www.ferm.com
www.ferm.com 0707-23.1
GB Subject to change
D Änderungen vorbehalten
NL Wijzigingen voorbehouden
F Sous réserve de modifications
E Reservado el derecho de
modificaciones técnicas
P Reservado o direito a modificações
I Con riserva di modifiche
S Ändringar förbehålles
FIN Pidätämme oikeuden muutoksiin
N Rett till endringer forbeholdes
DK Ret til ændringer forbeholdes
H Változtatás jogát fenntartjuk
CZ Změnyvyhrazeny
SK Změnyvyhrazeny
SLO Predmet sprememb
PL Tematdozmiany
LT Akeitimųobjektas
LV Vartiktveiktasizmaiņas
EST Võimalikud on muudatused
RO Cuprinsulpoatesuferimodificări
HR Podložnopromjenama
SB Podloæno izmenama
RUS Техническиехарактеристики
могутвноситьсяизмнениябез
предварительногоуведомления.
UA Технічніхарактеристикиможуть
вноситисябезпопереднього
повідомлення
GR HÚÔ‡ÌÂÙÔ‰Èη›ˆÌ··ÏÏ·ÁÒÓ
GB
D
NL
F
E
P
I
S
FIN
N
DK
USERS MANUAL 04
GEBRAUCHSANWEISUNG 08
GEBRUIKSAANWIJZING 13
MODE D’EMPLOI 18
MANUAL DE INSTRUCCIONES 23
MANUAL DE INSTRUÇÕES 28
MANUALE UTILIZZATI 33
BRUKSANVISNING 38
KÄYTTÖOHJE 42
BRUKSANVISNING 47
BRUGERVEJLEDNING 51
Page is loading ...
Page is loading ...

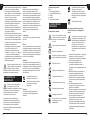
CORDLESS DRILL
The numbers in the text refer to the
diagrams on pages 2 - 3.
For your own safety and that of
others, we recommend that you read
this instruction manual carefully
before using this machine. Keep this
instruction manual and the
documentation provided with the
machine for future reference.
Contents
1. Machine information
2. Safety instructions
3. Mounting accessories
4. Operation
5. Service & maintenance
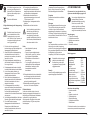
1. MACHINE INFORMATION
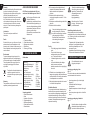
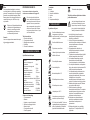
Technical specifications
Voltage 12V
—
---
Charger voltage 230 V
Charger frequency 50 Hz
Battery output 1.3 Ah
Charging time 3-5 hour
Max. torque (low speed) 12 Nm
No-load speed 0-550/min
Chuck capacity 0.8 - 10 mm
Weight (incl. battery) 1.56 kg
Lpa (acoustic pressure) 72.8 dB(A)
Lwa (acoustic power) 83.8 dB(A)
Vibration 0.703 m/s
2
Contents of packing
1 Cordless drill
1 Battery
1 Adapter + battery holder
2 Double-sided bits
1 Operating instructions
1 Safety instructions
1 Warranty card
Check the appliance, any loose parts and
accessories for damage caused during
transport.
Product information
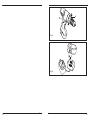
Fig. A
1. On/off switch
2. Torque setting ring
3. Chuck
4. Battery
5. Direction switch
2. SAFETY INSTRUCTIONS
Explanationofthesymbols
Denotes risk of personal injury, loss
of life or damage to the tool in case
of non-observance of the
instructions in this manual.
Indicates electrical shock hazard.
Rotation, left/right.
The number of revolution of the
machine can be electronically set.
Do not use in rain.
Indoor use only
Maximum temperature 40 °C.
Do not throw the battery into fire.
Do not throw the battery into water.
Thermic protection 130 °C.
In case of failure, the transformer in
not dangerous (separated circuit).
Ni-Cd batteries can be recycled.
Drop them off at a disposal center for
chemical wastes, so that they can be
recycled or disposed of in an eco-
friendly manner.
GB
04
Ferm Ferm
57
GR

Do not dispose of in household
waste.
Importantsafetynotesonchargerand
batteryblok
If you come into contact with acid
from the battery block, rinse it off
with water immediately. If acid gets
into your eyes, rinse out your eyes at
once with water and contact a doctor
immediately!
1. Read and note the operating instructions
and safety notes for the charger and
battery block before use!
2. NB! Only use the charger and battery block
that were supplied by the manufacturer -
otherwise you will risk an accident.
3. Protect the charger, battery block and
power tool from moisture, e.g. rain or snow.
4. Always check that all cables are connected
correctly before using the charger.
5. If you discover that a cable is damaged,
you should not use the charger again.
Have the damaged cable replaced
immediately.
6. When the charger is not in use, the mains
plug should be removed from the power
socket. Do not pull out the plug by grasping
the cable.
7. If the charger has been dropped or has
otherwise been exposed to high
mechanical stresses, you should have it
checked for damage by an authorised
dealer before using it again. Damaged
parts should be repaired.
8. Exercise caution when handling the battery
block and do not drop it or expose it to
impacts.
9. Never attempt to repair the charger or
battery block yourself. Repairs must
always be carried out by an authorised
dealer - otherwise you risk an accident.
10. Before cleaning or servicing the charger or
battery block, always pull the plug from the
charger socket.
11. Never charge the battery block when the
ambient temperature is below 5 °C or
above 40°C.
12. The air vents in the charger must never be
blocked.
13. The battery block must not be short-
circuited.
A short-circuit will cause a high
current to flow. This may result in
overheating, the danger of fire or
explosion of the battery block. This
may damage the battery block or the
user may risk an accident.
Therefore:
• Donotconnectanycablestothepoles
of the battery block.
• Takecarethattherearenometal
objects (nails, paper clips, coins, etc.)
on the contact surface of the battery
block.
• Donotexposethebatteryblockto
water or rain.
• Onlyusethebatteryblocksuppliedin
combination with this cordless drill/
screwdriver so as to avoid faults and/or
risks to persons.
14. A damaged battery block or one that can
no longer be charged must be disposed of
as special waste. Do not discard it with
household waste.
15. Never throw the battery block onto a fire or
into water. This will risk explosion!
Electricalsafety
When using electric machines always observe
the safety regulations applicable in your
country to reduce the risk of fire, electric shock
and personal injury. Read the following safety
instructions and also the enclosed safety
instructions.
Always check that the voltage on the
batterypack corresponds to the
voltage on the rating plate. Also
check that your mains voltage
corresponds to the input voltage of
the battery charger.
Class ll machine. Your machine is
double insulated; therefore no
earthwire is required.
GR
56
Ferm Ferm
05
GB

Replacing cables or plugs
Immediately throw away old cables or plugs
when they have been replaced by new ones. It
is dangerous to insert the plug of a loose cable
in the wall outlet.
• Removethebatteryblock.Whenthepower
tool is not being used, prior to maintenance
and when changing tools such as the
clamping chuck, and drill.
• Thetoolissuitableforuseasascrewdriver
and drill. Any other application is
specifically excluded.
3. MOUNTING ACCESSORIES
Prior to mounting an accessory
always remove the battery.
Fitting and removing drill cutters
Fig. B
In addition to drills, the tool can also accommo-
date screwdriver bits with a hexagonal shaft.
• Loosenthedrillchuck(4)byrotatingthe
hand-grip (9).
• Inserttheshaftofthedrillintothechuck.
• Tightenthedrillchucksothatthedrillis
firmly clamped.
• Rotatethedrillchuckintheopposite
direction when you wish to change the drill.
Connectingandremovingthebattery
Fig. C
Ensure that the exterior of the
battery block or tool is clean and dry
before connecting the charger.
• Ensurethatthedirectionreversingswitch
(5 Fig. A) is in the central position in order
to prevent the appliance from being
switched on unexpectedly.
• Insertthebattery(5)intothebaseofthe
appliance, as shown on the illustration.
Push the battery until it latches in.
• Pressthelockingbuttons(10)onbothsides
before removing the battery, and disengage
the battery from the base of the appliance.
4. OPERATION
Always follow the safety notes and
the relevant safety code.
Hold the appliance firmly and press the drill
steadily onto the workpiece. Do not overload
the appliance. Only use drill with no visible
wear. Worn drills will have a bad effect on the
functioning of the appliance.
Adjusting the torque
Fig. D
The appliance has 16 different torque settings
with which to set the power for driving and
removing screws.
• Setthetorqueadjustmentring(3)tothe
desired position. The available torque
settings are indicated on the adjustment
ring by the numbers 1 to 8 and by dots
between the figures to define intermediate
settings (16 in total).
• Youshouldpreferablychooseaslowa
setting as possible when using the
screwdriver. Select a higher setting if the
motor slips.
Driving and removing screws
• Setthedirectionreversingswitch(6)to
position ‘R’ in order to drive screws.
• Setthedirectionreversingswitchto
position ‘L’ in order to remove screws.
Drilling
• Rotatethetorqueadjustmentring(3)tothe
drilling position.
Ensure that the direction reversing
switch (6) is always set to ‘R’ during
drilling.
Switching the device on and off
Fig. A
• Depresstheon/offswitch(1).Itregulates
the speed of the appliance by transmitting
power to the switch.
• Releasetheon/offswitch(1)tohaltthedrill
chuck immediately which will no longer run
on.
Afladning af batteriet
Det er ikke kun opladningen af
batterierne, der er vigtig, afladningen
har lige så stor eller måske endnu
større betydning.
• Nårbatterieteropladet,skalakku-
boremaskinen bruges, indtil du begynder at
lægge mærke til, at boremaskinens kraft er
iaftagende,ogatdenikkenåroppåden
maksimale omdrejningshastighed.
• Batterieternunæstenafladet.Førstnu
kan du begynde at lade batteriet op.
• Hvisbatterietoplades,mensdetstadiger
opladet til f.eks. en tredjedel af kapaciteten,
kandensåkaldte‘hukommelseseffekt’
forekomme. Da det under opladningen nu
kun er den afladede del af batteriets
batterikapacitet, der oplades, kan batteriet
begynde at krystallisere i den tredjedel, der
stadig er opladet. Denne del af
batterikapaciteten kan aldrig bruges
bagefter.
• Afladikkebatteriettilminimum.Såsnartdu
bemærker, at styrken eller den maksimale
omdrejningshastighed begynder at tage af,
skalbatterietoplades.Nårdufortsætter
med at bruge boret, og batteriet bliver helt
afladet,kandensåkaldte‘ombyttede
poler’-effekt forekomme. Batteripolernes
polaritet bliver byttet om: ‘+’ bliver til ‘-‘ og ‘-
‘blivertil‘+’.Erdetteførstsket,vil
polariteten stadig være byttet om under
opladningen, og dette vil skade batteriet
uopretteligt.
Hvis akku-boremaskinen ikke skal
bruges i en længere periode, skal
batteriet lades helt op forinden.
Batteriet skal være opladet under
opbevaringen.
5. SERVICE &
VEDLIGEHOLDELSE
Sørg for at maskinen ikke står under
strøm, når der udføres vedlige-
holdelsesarbejder på mekanikken.
Maskinerne er udviklet til at fungere længe
uden problemer med et minimum af
vedligeholdelse.Vedatrengøremaskinen
regelmæssigt og behandle den korrekt,
bidrager De til en længere levetid for
maskinen.
Rengøring
Rengørregelmæssigtmaskinkappenmeden
blødklud,helstefterhvertbrug.Sørgforat
ventilationshullerneerfriforstøvogsnavs.
Brugenblødklud,derervædetisæbevandtil
atfjernehårdnakketsnavs.Brugingen
opløsningsmidler,såsombenzin,alkohol,
ammoniak, osv. Den slags stoffer beskadiger
kunststofdelene.
Smøring
Maskinenbehøveringenekstrasmøring.
Fejl
Skulleenfejlopstå,f.eks.pga.slidtageafen
enhed,kontaktvenligstserviceadressenpå
garantibeviset.Påbagsidenafdennemanual
finder du en tegning med alle dele, der kan
bestilles.
Miljø
Foratundgåtransportbeskadigelseleveres
maskinen i en solid emballage. Emballagen er
såvidtmuligtlavetafgenbrugsmateriale.
Genbrug derfor emballagen.
NiCd celler kan genvindes.
Defekte og/eller kasserede
elektriske eller elektroniske
maskiner skal afleveres på en
genbrugsplads.
Garanti
Læs det separat vedlagte garantikort for
garantibetingelserne.
GB
06
Ferm Ferm
55
DK

• Movethedirectionreversingswitch(6)to
the centre in order to lock the appliance in
its disabled state.
Only lay down the appliance when it has
stopped running completely. Do not place it on
a dusty surface as particles of dust could get
into the mechanism.
Chargingthebattery
The included battery is delivered in non-
charged condition.
• Onlyusethebatterychargerina
temperature range between +5° to + 40º
Celsius.
• Onlyusethebatterychargerindry,
ventilated rooms.
Charging
Fig. E
• Placethebatteryholderonaflattableand
put the battery in the battery holder. Pay
attention to + and - pole markings.
• Puttheadapterplugofthenetadapterin
the connector on the side of the battery
holder.
• Putthenetadapterinthesocket.
• Theredcharginglamponthebattery
holder will illuminate indicating the battery
is being charged.
• Thechargingprocessofafullydischarged
battery will take approximately 5 hours the
first time and afterwards approximately 3
hours.
After the charging time the red light
will not switch off automatically!
Remove the battery within 5 hours
from the charger. If the battery is not
removed from the charger after the
charging period it may become
overheated.
Dischargingthebattery
Not only charging batteries is
important, discharging is of equal
importance or even greater
importance.
• Whenthebatteryischargedthecordless
drill has to be used until you start noticing
that the power of the drill is diminishing and
that the maximum rotational speed is not
reached.
• Thebatteryisalmostdischargednow.Only
now you can start charging the battery.
• Chargingthebatterywhileitisstillcharged
for say one-third of capacity, the so-called
‘memory effect’ can occur. Since during
charging only the discharged part of the
battery capacity of the battery is being
charged now, the battery can start
crystallizing in the one-third that is still
charged. This part of the battery capacity
can never be used afterwards.
• Donotdischargethebatterytothe
minimum. As soon as you notice that the
power or the maximum rotational speed is
diminishing, you have to charge the
battery. When you proceed using the drill
and the battery becomes fully discharged,
the so-called ‘switch of poles effect’ can
occur. The polarity of the battery poles will
be switched: the ‘+’will become ‘-‘ and the ‘-
‘ will become the ‘+’. Once this has
occurred the polarity will remain switched
during loading and this will damage the
battery irreparable.
When the cordless drill is not being
used over a longer period of time,
the battery has to be charged fully
first. The battery has to be stored in
charged condition.
5. SERVICE & MAINTENANCE
Make sure that the machine is not
live when carrying out maintenance
work on the motor.
The machines have been designed to operate
over a long period of time with a minimum of
maintenance. Continuous satisfactory
operation depends upon proper machine care
and regular cleaning.
• Sørgforatknappentilomløbsretningen(5
påfig.A)ståridenmidtersteposition,forat
undgåutilsigtetstartafmaskinen.
• Sætbatteriet(5)indimaskinenssokkel
somvistpåtegningen.Trykdetheltibund
sådetgårihak.
• Foratfjernebatterietskaldutrykke
låsekapperne(10)påbeggesiderindog
trække batteriet ud af maskinens sokkel.
4. BETJENING
Overholdaltidsikkerhedshenvisning
erne, og følg de relevante forskrifter.
Hold maskinen ordentligt fast, og tryk boret
ensartetindiemnet.Undgåatoverbelaste
maskinen. Anvend udelukkende bor som ikke
udviser synligt slid. Slidte bor har en negativ
indflydelsepåmaskinensfunktionsevne.
Indstilling af drejningsmoment
Fig. D
Maskinen har 16 forskellige indstillinger for
drejningsmoment til regulering af den kraft
hvormed skruer bliver skruet i eller ud.
• Sætindstillingsringenfordrejningsmoment
(3)idenønskedeposition.
De indstillinger af drejningsmomentet der
ertilrådighed,visespåindstillingsringen
dels med cifrene fra 1 til 8, dels med prikker
mellem cifrene som angiver
mellempositioner (dvs. i alt 16).
• Manskalhelstvælgedenlavesteposition
der giver tilstrækkelig kraft til at dreje
skruenrundt.Vælgenhøjerepositionhvis
motoren "glider i koblingen".
Anvendelse som skruetrækker.
• Sætknappenforomløbsretningen(6)i
position 'R' for at skrue skruer i.
• Sætknappenforomløbsretningen(6)i
position 'L' for at skrue skruer ud.
Boring
• Drejindstillingsringenfordrejningsmoment
(3) i boreposition.
Sørg for at knappen for
omløbsretningen (6) altid står i
position 'R' når du borer.
Start og stop
Fig. A
• Trykpåstartknappen(1).Dukanregulere
maskinens omdrejningstal ved at trykke
mereellermindrehårdtpåknappen.
• Nårduslipperstartknappen(1),bliver
patronen straks bremset, og der er ikke
nogetefterløb.
• Nårmaskinenerslukket,kandublokere
denvedatsætteknappenforomløbs-
retningen (6) i den midterste position.
Læg først maskinen fra dig når
motoren står helt stille. Læg ikke
maskinen på et støvet underlag. Der
kan trænge støv ind i mekanismen.
Opladning af batterier
Det vedlagte batteri er ikke opladet ved
leveringen.
• Brugkunbatteriopladerenved
temperaturer mellem +5º og + 40º Celsius.
• Brugkunbatteriopladerenitørre,udluftede
lokaler.
Opladning
Fig. E
• Sætbatteriholderenpåetplantbordog
sæt batteriet i batteriholderen. Vær op-
mærksompåmarkeringerneaf+og–pol.
• Sætnetadapterensadapterstikistikketpå
siden af batteriholderen.
• Sætnetadapterenistikkontakten.
• Denrødeopladningslampepå
batteriholderen lyser for at vise, at batteriet
er ved at blive opladet.
• Opladningenafetheltafladetbatteritager
cirka5timerførstegangogdereftercirka3
timer.
Det røde lys slukkes ikke auto-
matisk, når opladningstiden er forbi!
Tag batteriet ud af opladeren inden 5
timer. Hvis batteriet ikke tages ud af
opladeren efter opladningstiden, kan
det blive overophedet.
DK
54
Ferm Ferm
07
GB

Cleaning
Keep the ventilation slots of the machine clean
to prevent overheating of the engine.
Regularly clean the machine housing with a
soft cloth, preferably after each use.
Keep the ventilation slots free from dust and
dirt. If the dirt does not come off use a soft
cloth moistened with soapy water. Never use
solvents such as petrol, alcohol, ammonia
water, etc. These solvents may damage the
plastic parts.
Lubrication
The machine requiers no additional
lubrication.
Faults
Should a fault occur, e.g. after wear of a part,
please contact the service address on the
warranty card. In the back of this manual you
find an exploded view showing the parts that
can be ordered.
Environment
To prevent damage during transport, the
appliance is delivered in a solid packaging
which consists largely of reusable material.
Therefore please make use of options for
recycling the packaging. NiCd cells are
recyclable.
Faulty and/or discarded electrical or
electronic apparatus have to be
collected at the appropriate recycling
locations.
Warranty
The guarantee conditions can be found on the
separately enclosed guarantee card.
AKKU-BOHRSCHRAUBER
Die Ziffern im nachstehenden Text ver-
weisen auf die Abbildungen auf Seite 2-3
Um Ihre eigene Sicherheit und die
Sicherheit Anderer zu
gewährleisten, empfehlen wir Ihnen,
sich diese Bedienungsanleitung vor
der ersten Inbetriebnahme gründlich
durchzulesen. Bewahren Sie diese
Anleitung und die übrige
Dokumentation zusammen mit der
Maschine auf.
Inhalt
1. Technische Daten
2. Sicherheitsvorschriften
3. Montage des zubehörs
4. Bedienung
5. Wartung und Pflege
1. TECHNISCHE DATEN
Gerätedaten
Spannung 12V
—
---
Spannung Akkuladegerät 230 V
Frequenz Akkuladegerät 50 Hz
Akkuleistung 1.3 Ah
Ladedauer 3-5 Std
Max. Drehmoment
(Geschwindigkeit niedrig) 12 Nm
Drehzahl, ohne Last 0-550/min
Bohrfutteraufnahme 0.8 - 10 mm
Gewicht (einschl. Akku) 1.56 kg
Lpa (Schalldruck) 72.8 dB(A)
Lwa (Schallleistung) 83.8 dB(A)
Vibrationswert 0.703 m/s
2
Verpackungsinhalt
1 Akku-Bohrschrauber
1 Akku
1 Adapter + Akkuhalter
2 Doppelseitige bits
1 Bedienungsanleitung
1 Sicherheitsvorschriften
1 Garantiekarte
10.Førrengøringellervedligeholdelseaf
opladeren eller batteriet skal man altid
trække netkablet ud af opladerens
stikdåse.
11.Batterietmåikkeopladeshvisden
omgivende temperatur er under 5 °C eller
over 40 °C.
12.Opladerensventilationsåbningerskalaltid
være frie.
13.Batterietmåikkekortsluttes.
Ved en kortslutning løber der strøm
med høj strømstyrke. Dette kan
medføre overophedning, brandfare
eller sprængning af batteriet.
Resultatet kan være at batteriet
bliver ødelagt eller brugeren
kommer til skade.
Derfor:
• Tilslutaldrignogenkablertilbatteriets
poler.
• Paspåatderikkeernogen
metalgenstande (søm, klips, mønter
osv.) i holderen til batteriet.
• Udsætaldrigbatterietforvandeller
regn.
• Anvendudelukkendedetvedlagte
batteri sammen med denne
batteriboremaskine for at undgå fejl og/
eller risici.
14. Et batteri som er beskadiget eller ikke
længere kan oplades, skal bortskaffes som
elektroniskaffald.Detmåikkebaresmides
i skraldespanden som restaffald.
15.Kastaldrigbatterietpåetbålellerivandet.
Isåfaldkandeteksplodere!
Elektrisk sikkerhed
Foratundgåelektriskstød,tilskadekomstog
brandfarenårmananvenderelværktøj,skal
manoverholdedefølgendegrundlæggendesi
kkerhedsforanstaltninger. Læs og overhold
alledissehenvisningerførduanvenderdette
elværktøj.Sikkerhedshenvisningerneskal
opbevares ordentligt.
Tjek altid om batterispændingen
svarer til den der er angivet på
typeskiltet. Tjek desuden om
netspændingen svarer til
batteriopladerens
indgangsspænding.
Klasse II maskine – Dobbelt
isolering – Du behøver ingen
jordforbindelsestik.
Udskiftning af kabler eller stik
Gamle kabler eller stik skal bortskaffes
umiddelbart efter at de er blevet udskiftet med
nye.Tilslutningafetstikmedetløstkabeltil
enstikdåseerfarligt.
• Tagbatterietaf.Nårelværktøjetikke
anvendes,førvedligeholdelseogved
udskiftningafværktøjersomf.eks.
borepatron og bor.
• Apparateteregnettilskruningogboring.
Enhver anden anvendelse er forbudt.
3. MONTAGE AF TILBEHØR
Fjern altid batteriet inden du
begynder på arbejdet.
Isætning og udtagning af bor
Fig. B
Foruden bor kan man sætte skruetrækkerbits
med sekskantet skaft i maskinen
• Løsnborepatronen(4)vedatdrejepå
flangen (9).
• Sætboretsskaftindiåbningeni
borepatronen.
• Spændborepatronensåboretsiddergodt
fast.
• Løsnborepatronenigennårduviludskifte
boret.
Isætning og udtagning af batteriet
Fig. C
Kontroller at den udvendige overflade
på batteriet eller værktøjet er ren og
tør, inden du tilslutter opladeren.
D
08
Ferm Ferm
53
DK
Page is loading ...
Page is loading ...
Page is loading ...
Page is loading ...
Page is loading ...
Page is loading ...
Page is loading ...
Page is loading ...
Page is loading ...
Page is loading ...
Page is loading ...
Page is loading ...
Page is loading ...
Page is loading ...
Page is loading ...
Page is loading ...
Page is loading ...
Page is loading ...
Page is loading ...
Page is loading ...
Page is loading ...
Page is loading ...
-
 1
1
-
 2
2
-
 3
3
-
 4
4
-
 5
5
-
 6
6
-
 7
7
-
 8
8
-
 9
9
-
 10
10
-
 11
11
-
 12
12
-
 13
13
-
 14
14
-
 15
15
-
 16
16
-
 17
17
-
 18
18
-
 19
19
-
 20
20
-
 21
21
-
 22
22
-
 23
23
-
 24
24
-
 25
25
-
 26
26
-
 27
27
-
 28
28
-
 29
29
-
 30
30


Ferm CDM1003 Owner's manual
- Category
- Cordless combi drills
- Type
- Owner's manual
- This manual is also suitable for
Ask a question and I''ll find the answer in the document
Finding information in a document is now easier with AI
in other languages
- italiano: Ferm CDM1003 Manuale del proprietario
- français: Ferm CDM1003 Le manuel du propriétaire
- español: Ferm CDM1003 El manual del propietario
- Deutsch: Ferm CDM1003 Bedienungsanleitung
- Nederlands: Ferm CDM1003 de handleiding
- português: Ferm CDM1003 Manual do proprietário
- dansk: Ferm CDM1003 Brugervejledning
- svenska: Ferm CDM1003 Bruksanvisning
- suomi: Ferm CDM1003 Omistajan opas
Related papers
Other documents
-
Texas HFX2000 Owner's manual
-
Hitachi DH 15DV Handling Instructions Manual
-
-
-
Hikoki DH 20DV User manual
-
-
-
Hitachi DH24DVA User manual
-
-
Hitachi DS14DVF3 Handling Instructions Manual