Page is loading ...

Index
Important Safeguards ........... 2
Service Information ............... 4
Assembly............................5-6
Use........................................ 7
Thermal Cut Off...............4 & 7
Accessories........................... 8
Brush Roll.............................. 9
Brush Roll Belt..................9-10
Dust Bag ........................ 10-11
Hose Blockage ...............12-13
Filters .................................. 14
Micron Filter ........................14
Problem Solving .................. 16
Warranty.............................. 17
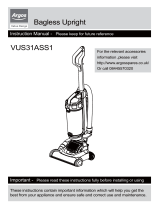
Commercial Upright
Vacuum Cleaner
Owner’s Guide
Z4500 Series
www.electrolux.com

IMPORTANT SAFEGUARDS
When using an electrical appliance, basic precautions should always be followed, including the following:
READ ALL INSTRUCTIONS BEFORE USING THIS VACUUM CLEANER.
WARNING
To reduce the risk of fire, electric shock, or injury:
• Do not use outdoors or on wet surfaces.
• This appliance is provided with double insulation. Use only identical replacement parts. See instructions for Servicing of
Double-Insulated Appliances.
• Do not leave vacuum cleaner when plugged in. Turn off the switch and unplug the electrical cord when not in use and
before servicing.
• Do not allow to be used as a toy. Close attention is necessary when used by or near children.
• Use only as described in this manual. Use only manufacturer’s recommended attachments.
• Do not use with damaged cord or plug. If vacuum cleaner is not working as it should, has been dropped, damaged, left
outdoors, or dropped into water, return it to a service center before using.
• Do not pull or carry by cord, use cord as a handle, close a door on cord, or pull cord around sharp edges or corners. Do
not run vacuum cleaner over cord. Keep cord away from heated surfaces.
• Do not use extension cords or outlets with inadequate current carrying capacity.
• Turn off all controls before unplugging.
• Do not unplug by pulling on cord. To unplug, grasp the plug, not the cord.
• Do not handle plug or vacuum cleaner with wet hands.
• Do not put any object into openings. Do not use with any opening blocked; keep free of dust, lint, hair, and anything that
may reduce airflow.
• This vacuum cleaner creates suction and contains a revolving brush roll. Keep hair, loose clothing, fingers, and all parts
of body away from openings and moving parts.
• Do not place cleaner on furniture or stairs as the brush roll may cause damage. Place cleaner on floor with the handle in
storage position while using attachments.
• Do not pick up anything that is burning or smoking, such as cigarettes, matches, or hot ashes.
• Do not use without dust bag in place.
• Belt pulleys can become hot during normal use. To prevent burns, avoid touching the belt pulley when servicing the drive
belt.
• Use extra care when cleaning on stairs.
• Do not use to pick up flammable or combustible liquids such as gasoline, or use in areas where they may be present.
• Store your cleaner indoors in a cool, dry area.
• Keep your work area well lighted.
• Unplug electrical appliances before vacuuming them.
SAVE THESE INSTRUCTIONS
2

BEFORE YOU START
CHECK THE VOLTAGE
First check the voltage shown on the data plate (see rear view) to make sure that the cleaner is of the correct voltage for your
electricity supply. If it is not, do not use the cleaner but refer back to your dealer.
CONNECTING TO YOUR ELECTRICITY SUPPLY
Permanently connected to the cleaner is a mains supply (2-core) cable fitted with a non-rewirable plug incorporating a 13A fuse.
In the event of the fuse requiring replacement the fuse cover should be removed using a small screwdriver. The old fuse MUST be
replaced by a 13A ASTA approved BS1362 fuse or a BSI approved fuse. The cover must be replaced before the plug is used again.
In the event of loss of the fuse cover, replacements can be obtained from your Electrolux Retailers and must be of the same colour
as indicated by the coloured insert on the base of the plug.
If difficulty is experienced in obtaining a replacement, contact Electrolux on 08706 055055.
In no circumstances must the plug be used without a correct fuse cover fitted.
If the plug that is fitted to your appliance is not suitable for your socket outlet, it must be cut off and the appropriate plug fitted.
Remove the fuse from the cut off plug.
The cut off plug should then be disposed of to prevent the hazard of shocks in case it should be plugged into a 13 amp socket in
another part of your home.
The wires in the mains cable of this appliance are coloured in accordance with the following code: Blue: Neutral. Brown: Live.
As the colours of the wires in the mains cable of this appliance may not correspond with the coloured markings identifying the terminals
in your plug, proceed as follows:
The wire which is coloured blue must be connected to the terminal which is marked with the letter N or coloured black.
The wire which is coloured brown must be connected to the terminal which is marked with the letter L or coloured red.
If using a three-pin plug, do not make any connection to the terminal marked with the letter E or by the earth symbol or coloured green
or green-and-yellow. This cleaner is double insulated and no earth connection is necessary.
It is in your interest to ensure that the plug is correctly attached to the mains cable. In case of doubt, have it done by a qualified electrician,
as Electrolux cannot regard the repair of faults on the plug connection as a service that can be given free of charge under the terms
of the guarantee.
WARNING
The brush in the cleaning head rotates at high speed and can cause damage to the mains supply cable if the cleaner passes
over it during cleaning operations.
Care should be taken to ensure that this does not happen. If the cleaning head has accidentally passed over the mains supply cable
the following action should be taken:
1. Switch off and remove the plug from the socket outlet.
2. Examine the mains supply cable for damage (only after removing the plug from the socket outlet).
3. If there is any sign of damage to the supply cable it MUST be renewed. The repair MUST be carried out by an Electrolux Service
Agent or a similar qualified person.
4. NEVER use the machine with a damaged mains supply cable.
Proprietary carpet conditioning and air freshening materials
After using proprietary carpet conditioning powders, it is recommended that the dust cup or filters be changed. Some of these
preparations contain substances which if left in the vacuum cleaner for extended periods could damage the plastic mouldings which
form the structure of the cleaner.
Many air fresheners, household deodorants, sprays and polishes contain a highly flammable gas propellant.
Because of this, it is particularly important that these products are used strictly in accordance with the relevant manufacturer’s
instructions.
It is essential that none of the above products are sprayed directly into the vacuum cleaner or any of its filters, hose assembly, dust
cup chamber or dust cup.
3
Fuse
Cover
Fuse
Blue
Brown
Cord
Clamp
13 Amp Fuse
Thermal Cut Off
This vacuum cleaner has a special thermostat that protects the cleaner in case of motor overheating. If the cleaner suddenly shuts
off, push the switch pedal once and unplug the cleaner. Check the cleaner for a possible source of overheating such as a full bag, a
blocked hose or clogged filter. If these conditions are found, fix them and wait at least 60 minutes before attempting to use the
cleaner. After the 60 minute period, plug the cleaner back in and turn on the switch. If the cleaner still does not run, please call
Electrolux on 08706 055055.

4
SERVICE
Should you require service on your Electrolux cleaner, please telephone 08706 055055. Before requesting service, please
check whether your problem is covered under Service Checklist (see below).
New filter pads, brush rollers and drive belts can be obtained from Electrolux Dealers. If difficulty is experienced in obtaining
spares, please contact 08706 055055.
SERVICE CHECKLIST
• If your cleaner will not operate, check the plug connection, plug fuse and mains fuse.
• Never allow the dust cup to become so full that it impedes the air-flow, thus reducing the cleaning efficiency of the machine.
The character of household dust and its effect on the air-flow through the machine may vary considerably. Fluffy dust
allows air to pass through readily whereas fine powdery dust or proprietary cleaning powders, pack tightly in the dust cup,
offering greater resistance to air-flow and will reduce cleaning efficiency if it becomes overloaded.
• Always store your cleaner in a dry place.
• Renew the filter pads three or four times a year. This is essential to ensure continued high filtration of dust particles.
• Sucking up such items as stockings, clippings of cloth, sizeable pieces of paper, wrappings from cigarette packets or
sweets etc., may block the hose. Electrolux regrets that the clearing of blocked hoses cannot be regarded as service
that can be given free of charge, under the guarantee. Should a blockage occur, first disconnect the cleaner from
the electricity supply, refer to section headed “Blockages.” If these operations are not successful, contact 08706 055055.
• Never pick up hot cinders or lighted cigarette ends.
• Make certain that your cleaner does not come into contact with water or any other liquid. It is not designed as
a wet pick up cleaner, and must never be used on damp carpets or wet floors.
Important - in the event of the mains supply cable of this vacuum cleaner requiring replacement, we recommend that this
be carried out by a Electrolux Service Agent.
LUTON, BEDFORDSHIRE, LU4 9RJ
Features of the Electrolux vacuum cleaner and accessories supplied with it are protected in Great Britain and abroad by Patents or Registered Designs.
This appliance conforms with the requirements of the amended E.E.C. directive No. 89/336/EEC relating to electromagnetic compatibility (EMC) CE.
Electrolux, may introduce modifications to their product from time to time, and consequently the details given in this booklet are subject to alteration without
notice.
Guarantee
This guarantee is in addition to your statutory and other legal rights.
Electrolux products are carefully designed, manufactured, tested and inspected and, in consequence, we undertake to
replace or repair any part found to be defective in material or workmanship, within one year of delivery to the original
purchaser, free of charge. You may be required to take the product to your nearest service provider if the product requires
attention during the first year.
There are certain conditions which may invalidate this guarantee:
a. It is dependent upon the appliance being correctly installed and used in accordance with the Company’s instructions
under normal domestic conditions within the United Kingdom or the Republic of Ireland.
b. Service at all times must be carried out by an Electrolux Service Representative or authorised agent.
c. The guarantee may be invalidated by unauthorised repair or modification of the appliance.
d. You may be charged by Electrolux if you call for an engineer to resolve a problem that we believe is covered in the
instruction booklet.
The Company does not accept liability for defects arising from neglect, misuse or accident. This guarantee excludes such
normal wearing parts as drive belts, brushes and filters as the life of these depends upon the amount and nature of use.
Proof of the date of purchase will be required before service under guarantee is provided. Please call 08706 055055 for
assistance.
Important:
For future reference we suggest you record the following details here, and keep the receipt with the handbook as proof
of purchase.
Purchased from_____________________________________________
Date purchased______________ Model no ______________________

5
HOW TO ASSEMBLE
CAUTION: Moving parts, make sure on/off switch is in off position before plugging in.
CAUTION: Assemble the cleaner before using.
NOTE: Features may vary by model yet all parts assemble the same.
1. Before placing the front cover on the unit, install the
hose.
2. Locate the tab on the hose adapter (shortest end).
3. Look at the opening on the top of the cleaner and locate
the ledge. The tab on the hose adapter will be under
the ledge in the opening when hose is installed properly.
4. Push hose adapter into opening and rotate until tab is
under ledge. If installed properly, the hose cannot be
lifted out of the hose opening.
Step A Attach Handle
CAUTION: Do not catch cord under handle.
1. From rear of cleaner, align handle with groove and slide
onto cleaner. If necessary, use thumb and finger
pressure to slide handle into position.
2. Once handle is in place, check that the electrical cord
is not pinched between the unit and the handle. Push
excess cord back into the hole provided in the back of
the handle.
3. Attach handle with two 5/8 inch screws in the assembly
packet. Use a Phillips
®
head screwdriver.
Groove
Step B Attach Hose
1
1
Electrical
Cord
Groove
2
3
Ledge
2
3
Tab

1. Check to be sure the paper bag collar is secure with
the hose adapter inside the paper bag collar.
2. Replace front bag cover. Place the tabs on the bag
cover in the slots at the bottom of the bag
compartment. Using both hands, one on each side,
press the bag cover firmly back against unit until latch
clicks shut.
6
Hose
Adapter
Cord
Hook
Step E Store Electrical Cord
Dusting
Brush
Telescoping
Wand
Crevice
Tool
Carrying
Handle
Hose
Retainer
Upholstery
Tool
Step D Store Hose and AccessoriesStep C Check Disposable Dust Bag
1. Wind the cord around the two cord hooks on the left
side of cleaner. On some models the upper cord hook
turns to release the cord. Turn the hook up to store the
cord.
1
Paper Bag Collar
Cord
Hook
1
1

Clean
Under
Use
Handle
Release
3
7
HOW TO USE
The upright vacuum cleaner design allows use on multiple types of
carpeting and on upholstery or bare floors with attachments. When
using the attachment tools, place the handle in the upright
position. Do not place cleaner on furniture or steps as the brush
roll may cause damage.
1. Adjust cleaner height setting knob to lowest position for maximum
cleaning. Adjust to a higher setting to make pushing easier. For
easy adjustments, tilt the cleaner back to move the knob.
2. Plug electrical cord into outlet.
3. Step on handle release. Pull handle back to a comfortable position.
4. Push On (-) or Off (0) power switch.
Store or
Use Attachments
3
Cleaner Height Setting
WARNING: Avoid injury. Keep loose clothing,
hair, fingers, and all other parts of body away
from any moving part (such as the revolving
brush). Turn off the switch and unplug the
cleaner before changing the cleaner height
setting.
The front of the cleaner has an adjustment that
raises or lowers the cleaner base to match the
type of carpet. With the cleaner cord unplugged,
set the adjustment to lowest setting for maximum
cleaning. If the cleaner is difficult to push, move
adjustment to next highest setting until cleaner
is comfortable to push. The brush roll must reach
the carpet for effective cleaning.
Make each adjustment with cleaner switch off
and cord disconnected from outlet. For ease
in moving the adjustment knob, place handle in
operating position and tilt cleaner back to remove
weight from front wheels.
3
Handle
Release
ON/OFF
THERMAL CUT OFF
This cleaner has a special thermostat that protects the cleaner
in case of motor overheating. If the cleaner suddenly turns off,
follow this procedure:
1. Push power switch off.
2. Unplug cleaner.
3. Check for source of overheating problem (i.e. full bag, clogged
hose or clogged filter).
4. If a full bag, clogged hose or clogged filter is found, replace the
bag, unclog the hose or replace the filters.
5. Wait at least 60 minutes before attempting to reuse the cleaner.
6. After 60 minute cool down period, plug the cleaner in and push
the power switch on. The cleaner should turn on.
7. If the cleaner still does not operate, take it to any Electrolux
Authorised Service Center for repair.
4
SHORT LONG
1
2

8
How To Use Accessories
NOTE: Do not place cleaner on furniture or steps as
the brush roll may cause damage. Place
cleaner on floor with the handle in storage
position while using accessories.
1. Remove hose from rear of cleaner.
2. Place desired accessory onto end of hose or wand.
Telescoping Wand
To use the telescoping wand, push button and pull out wand
until you have the desired length. Release button.
Dusting Brush is for furniture, blinds, books, lamp shades,
shelves.
Crevice Tool cleans corners, baseboards, between
cushions, sliding door tracks.
Upholstery Nozzle is for curtains, draperies, cushions,
fabrics.
Button
Always work with the cleaner below you, pulling
hose from side of cleaner;
not
the back or the front
of the cleaner.

9
NEW FEATURE
UPPER HOSE
RETAINER
LOWER HOSE
RETAINER
The super stretch hose has a new added feature. A hose strap has been added to the super stretch hose
for ease of use while cleaning with the attachments. By hooking the hose strap into the strap hook
before using your attachments, you will improve the mobility of your vacuum when extending the super
stretch hose to its maximum reach.
SUPER
STRETCH
HOSE
1. When you are ready to use the
attachments, pull the hose nozzle out
of the lower hose retainer.
2. Grasp the hose near the upper hose
retainer.
a. Be sure to leave the hose cradled
in the hose retainer.
b. Leave hose strap in place on hose.
3. Pull and stretch hose down so hose
strap (A) can be attached to the strap
hook (B). Your cleaner will look like
PICTURE 1 below when completed
correctly.
4. Clean with your attachments as usual.
5. When you are through using the
attachments, take the hose strap off the
strap hook and replace the hose nozzle
into the lower hose retainer.
6. Leave hose strap in place around hose
for future use.
1
2
TO HOOK HOSE STRAP (A) ONTO STRAP
HOOK (B), START AT STEP 1
(B)
STRAP HOOK
1
HOSE
NOZZLE
PICTURE 1
(A)
HOSE STRAP

HOW TO MAINTAIN
The instructions in this booklet serve as a guide to routine maintenance. To avoid unnecessary service calls, check the bag,
belt, and brush roll often.
Brush Roll
The brush roll turns as it sweeps and combs the carpet nap. Remove hair and threads from the brush roll so it continues
brushing the carpet. To maintain the most efficient cleaning, the bristles must touch the carpet. To test the bristle length,
hold a ruler against the underneath side of the cleaner. If the bristles no longer touch the ruler, replace the brush roll.
Brush Roll Belt
The brush roll belt turns the brush roll to agitate, sweep, and comb the carpet nap. Check the belt regularly to be sure it is
in good condition. Replace the belt if it stretches, cracks or loses tension. Cut away any hair or threads wound around the
brush roll or the belt pulley because the buildup could cause the belt to rotate unevenly.
How To Replace Brush Roll Belt
NOTE: Turn off the switch and unplug the electrical cord before replacing belt. Belt pulleys can become hot
during normal use. To prevent injury, avoid touching the motor pulley when checking the belt.
1. Lower handle to floor to change belt.
2. Loosen the two fasteners located on the top of the
hood and lift upward. These fasteners need only a
quarter turn to lock or unlock the hood.
2
2
1
3. Lift left end of brush roll.
4. Remove and discard belt.
Motor
Pulley
Belt
Brush
Roll
3
10
4

5. Place new belt around motor pulley.
Left Side View
6. Place belt around brush roll.
7. Align left end cap with square in base. Push end cap
into place; see left side view.
8. Pull right side of brush roll to stretch belt. Secure right
end cap into base.
9. Rotate brush roll to seat belt.
10. Replace the hood. Make sure hood front is behind
furniture guard. Hood should seat onto self-locating
fastener tabs.
11. Turn fasteners 1/4 turn to lock.
Use a Genuine Electrolux replacement belt.
Disposable Dust Bag and Filters
The disposable dust bag plays a very important role in
the efficiency of a vacuum cleaner. The purpose of the
paper bag is to trap dirt. As the bag traps dirt, it must also
be porous enough to allow air to pass on through. If the
paper bag becomes clogged, no air can pass through the
cleaner and no cleaning can take place regardless of how
powerful the unit. Change the dust bag and check the filters
frequently. Some fine particles can restrict airflow very
quickly and will decrease performance even before the
bag appears to be full.
When vacuuming carpet fresheners or cleaners, powder,
plaster dust, or similar fine substances, the bag and filters
may require more frequent maintenance.
5
6
7
8
9
11

How To Replace Bags
NOTE: Turn off the switch and unplug the electrical cord before changing dust bag. Never operate the vacuum
cleaner without the dust bag or the filter.
To Remove Bag:
Front
Cover
A
A. Remove front cover by pulling out on the front
cover latch and lifting the front cover upward
and out.
B. Remove left side of bag collar from bag collar
retainer. Grasp bag collar; pull down slightly
and out to remove bag.
To Replace New Bag:
C. Fold sides on new paper bag below bag collar.
D. Align bag collar hole and notch with hose tube.
E. Place rear of bag collar on ledges. Push back
and rotate upward until firmly in place. Make
sure collar snaps into position and hose tube
is securely inserted into bag collar hole.
F. Tuck bag into bottom and along sides.
G. Align front cover tabs and close cover. Make
sure paper bag is not caught under the front
cover.
D
E
C
Bag
Side
E
We recommend using only Genuine Electrolux
Standard Bags, Code E75.
B
Bag
Collar
Front Cover
Latch
F
12

How to Check and Clear Hose Blockages
Low suction or poor pickup may be due to a blockage in the vacuum cleaner.
1. Remove hose and check suction at end of hose - if little or
no suction, check disposable dust bag. Change if needed.
If no improvement proceed to Step 2.
NOTE: Turn off the switch and unplug the electrical cord
before clearing hose.
2. Remove the front bag cover. To remove hose adapter from
opening, twist hose adapter clockwise and lift upward.
Once the hose is removed from the cleaner check for any
obstructions that may be in the hose. Any obstructions can
be removed by using a blunt instrument to clear the hose.
Flexing the hose may help loosen the clog.
3. Reinstall the hose after clearing the clog. Make sure the
hose is inserted into the top of the vacuum cleaner.
NOTE: If no improvement in performance on carpet, proceed
to following page.
2. Remove front bag cover.
3. Remove hose adapter by twisting clockwise and lifting
upward. Check hose for blockages.
1. Remove hose and check suction at end of
hose.
4. Reinstall the hose and replace front bag cover.
1
4
Hose Adapter
3
13

Handle
Release
1. Remove the attachment hose from the lower hose
retainer and look into the hose retainer for any
obstructions. Proceed to Step 2 to check for any other
blockages.
4. Check for blockages in the brush roll area and remove
any obstructions found there. The base hose can be
cleared of any blockage by using a blunt instrument.
5. After the blockage is removed, replace the hood and
tighten the two hood screws (see Figure 2). Raise the
handle to the upright position (see Figure 3) and replace
the hose into the lower hose retainer.
Upright Position
Operating Position
Lowest Position
for cleaning
under furniture
How to Check and Clear Blockages in Base
2. Remove the hood by loosening the two fasteners
located on the top of the hood and lifting upward.
These fasteners need only a quarter turn to lock or
unlock the hood. (See padlock graphics on the hood.)
3. Step on the handle release and lower the handle all
the way to the floor.
14

Rinsable Motor Filter
Check the motor filter with each disposable dust
bag change. Clean or replace as needed.
To Clean Rinsable Motor Filter
1. Remove filter from inside bag compartment,
lower left side.
2. Shake filter or vacuum with another cleaner
to remove excess dust.
3. Reinstall filter. Slide under back ledge and
filter retainer. Install with colored/smooth side
down.
Rinsable HEPA Filter
Check the Micron filter with each disposable dust bag change. Replace twice a year or as needed.
Latch
Back Ledge
Filter Retainer
3
1
and
3
We recommend using only Genuine Electrolux
Filters. 15
To replace Rinsable HEPA Filter into
filter
frame
.
1. Place new filter in filter frame. Place bottom tabs of filter
frame into slots.
2. Rotate filter frame toward cleaner.
3. Push upward on the latch to secure into place.
Filter
Filter
Frame
To remove Rinsable HEPA Filter from
filter frame
.
1. Push down latch and pull filter frame back.
2. Then lift filter up and out of filter frame.
Filter Frame plus filter
(depending on your
vacuum model)
3
Rinsing Directions for Rinsable Filters - Filter can be rinsed up to 6 times. Replace after 6 rinsings
to retain filtration level performance from your vacuum.
1. Remove soiled filter from cleaner.
2. Examine filter on both sides.
3. Gently rinse both sides of the filter with warm tap water to remove surface dirt. DO NOT COMPLETELY SOAK FILTER.
DO NOT USE SOAP OR DETERGENT.
4. Let the filter dry for at least 12-24 hours. FILTER MUST BE 100% DRY FOR PROPER PERFORMANCE. DO NOT
OPERATE VACUUM WITH WET OR DAMP FILTER.
5. Replace filter in vacuum cleaner.

16
Motor will not start. Electric Plug Push plug securely into outlet.
Try another outlet.
Check circuit breaker.
Motor suddenly stops. Thermal Cut Off Refer to page 7.
Does not clean the carpet Disposable Dust Bag Change the bag and clean or replace the
or floor. and Filter(s) filter(s). Hint: If picking up fine dust, the bag
may
not look full but a fine substance tends
to reduce suction when it blocks the airflow
through the paper bag and filter(s).
Dust Bag Be sure hose adapter inserts into paper bag.
Belt Replace a cut, loose or out of shape belt.
Belt Cover Snap the belt cover inside the hood if it comes
loose.
Brush Roll Clean hair and thread from bristles and end
cap area. Replace brush roll if bristles are worn.
Hose Remove any clogs from the hose that restrict
the airflow. Check short hose in the base and
long hose. Refer to page 13 & 14.
No suction at the end of Hose Adapter Hose adapter has to seat inside the dust bag.
the hose.
Disposable Dust Bag Change the bag and clean or replace the
and Filter(s) filter(s). Hint: If picking up fine dust, the bag may
not look full, but a fine substance tends to reduce
suction when it blocks the airflow through the
paper bag and filter(s).
Hose Remove any clogs from the hose that restrict the
airflow. Check short hose in the base and long
hose. Refer to page 13 & 14.
Noise from the brush roll Brush Roll Remove hood and clean debris or items
area. from the brush roll area.
Belt Replace a cut, loose or out of shape belt.
Cleaner is hard to push. Cleaner Height Setting Put handle in operating position. Tilt the
cleaner back to raise the front wheels off floor.
Then turn the knob to a higher setting.
Belt Replace a cut, loose or out of shape belt.
Cleaner height knob will Cleaner Height Hint: Put handle in operating position. Tilt the
not turn. Setting cleaner back to raise the front wheels off floor.
Then turn the knob.
PROBLEM SOLVING
NOTE: Turn off the switch and unplug the electrical cord before servicing.
PROBLEM CAUSE SOLUTION
✓
✓
✓
✓
✓
✓
✓
✓
✓
✓
✓
✓
✓
✓
✓
✓


Printed in U.S.A.
Part No. 71940 (4/03)
Thank you for selecting a Electrolux cleaner.
1 telescoping wand
1 crevice tool
Assembly Items in This Carton
Don’t Forget to Use Genuine Electrolux Bags and Belts
Caution: Damages caused by the use of non-genuine
Electrolux bags are not covered by the Electrolux
Limited Warranty.
1 cleaner connected
to handle by cord
1 front cover
1 dusting brush
1 upholstery brush
1 hose adapter w/hose
1 hardware
package (2 screws)
/