Page is loading ...

NEDERLANDS-27
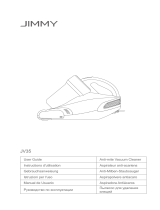
Specificaties
Classificatie Item Gedetailleerde informatie
Mechanische
specificaties
(POWERbot)
Afmetingen
(breedte x hoogte x diepte)
378 mm x 135 mm x 362 mm
Gewicht 4,8 kg
Sensor Plafondvormherkenning (Visionary mapping plus TM)
Type toets op POWERbot Tiptoets
Energiespecificaties
Voltage 100-240 V, 50 Hz/60 Hz
Stroomverbruik 70 W
Batterijspecificaties Lithium-ion 21,6 V/ 84 Wh
Reinigen
Type opladen Automatisch/handmatig opladen
Reinigingsmodus
Automatisch, Lokaal, Uitgebreid, Handmatig reinigen,
Eenmalig en Dagelijks schema
Oplaadduur Circa 160 minuten
Reinigingstijd
Circa 60 minuten
(Normale modus/bij een harde vloer)
De oplaad- en reinigingstijd kunnen enigszins afwijken, afhankelijk van de gebruiksomstandigheden.
Deze stofzuiger voldoet aan de volgende richtlijnen.
- Richtlijn voor elektromagnetische compatibiliteit: 2004/108/EEC
- Laagspanningsrichtlijn: 2006/95/EC
SR20H9050U#EN_NL_DJ68-00716E-00.indd 27 2014-08-11 오후 2:16:44

SR20H9050U Series
SR20H9030U Series
POWERbot
user manual
imagine the possibilities
Thank you for purchasing a Samsung product.
English
Before operating this unit, please read the instructions carefully.
For indoor use only.
SR20H9050U#EN_EN_DJ68-00716E-00.indd 29 2014-08-11 오후 2:13:53

ENGLISH-02
Contents
03
Safety information
08
Installation
Accessories / Installation note
10
Charging
Automatic charging / Recharging / Low
battery (Lo)
12
Installing the Virtual guard
Part name of the Virtual guard /
Inserting batteries
14
Using POWERbot
Turning the power on/off / Using Auto
clean mode / Using the cleaning modes /
Recharging
16
Using the remote control
Power/Recharging / Cleaning mode /
Additional function / Direction control /
Point cleaning
18
Name of each part
Top / Bottom / Display panel
19
Setting time/schedule
Setting the time / Setting the schedule
20
Cleaning and maintaining
Cleaning the dustbin / Cleaning the sensors
and the camera / Cleaning the Power brush /
Cleaning the Driving wheel
22
Notes and cautions
Charging / In use / Cleaning and maintenance /
About battery / About the IrDA sensor
24
Error codes
25
Troubleshooting
26
Open Source Announcement
27
Specifications
SR20H9050U#EN_EN_DJ68-00716E-00.indd 2 2014-08-11 오후 2:13:41

ENGLISH-03
Safety information
SAFETY INFORMATION
WARNING
• Before operating the appliance, please read this manual thoroughly and retain it
for your reference.
WARNING
• Because these following operating instructions cover various models, the
characteristics of your vacuum cleaner may differ slightly from those described in
this manual.
CAUTION/WARNING SYMBOLS USED
WARNING
Indicates that a danger of death or serious injury exists.
CAUTION
Indicates that a risk of personal injury or material damage exists.
OTHER SYMBOLS USED
NOTE
Indicates that a risk of personal injury or material damage exists.
SR20H9050U#EN_EN_DJ68-00716E-00.indd 3 2014-08-11 오후 2:13:41

ENGLISH-04
Safety information
IMPORTANT SAFETY INSTRUCTIONS
When using an electrical appliance, basic precautions should be observed, including the
following:
READ ALL INSTRUCTIONS BEFORE USING YOUR POWERbot.
Unplug from outlet when not in use and before conducting maintenance.
WARNING: to reduce the risk of fire, electric shock, or injury:
GENERAL
•Use only as described in this manual.
•Do not operate POWERbot or charger (station) if it has been damaged in any way.
•If the vacuum cleaner is not working as it should, has been dropped, damaged, left
outdoors, or dropped in water, return it to a customer care center.
•Do not handle the charger (station) or POWERbot with wet hands.
•Use only on dry, indoor surfaces.
•This appliance can be used by children aged from 8 years and above and persons with
reduced physical, sensory or mental capabilities or lack of experience and knowledge
if they have been given supervision or instruction concerning use of the appliance in a
safe way and understand the hazards involved.
•Children shall not play with the appliance. Cleaning and user maintenance shall not be
made by children without supervision.
BATTERY Charger (station)
•Do not modify the polarized plug to fit a non-polarized outlet or extension cord.
•Do not use outdoors or on wet surfaces.
•Unplug the charger (station) from the outlet when not in use and before servicing.
•Use only the charger (station) supplied by the manufacturer to recharge.
•Do not use with a damaged cord or plug or a loose power outlet.
•Do not pull or carry by the cord, use the cord as a handle, close the door on the cord,
or pull the cord around sharp edges or corners. Keep the cord away from heated
surfaces.
•Do not use extension cords or outlets with inadequate current carrying capacity.
•Do not unplug by pulling on the cord. To unplug, grasp the plug, not the cord.
•Do not mutilate or incinerate batteries as they will explode at high temperatures.
•Do not attempt to open the charger (station). Repairs should only be carried out by a
qualified customer care center.
•Do not expose the charger (station) to high temperatures or allow moisture or humidity
of any kind to come into contact with the charger (station).
SR20H9050U#EN_EN_DJ68-00716E-00.indd 4 2014-08-11 오후 2:13:41

ENGLISH-05
POWERbot
•Do not pick up hard or sharp objects such as glass, nails, screws, coins, and etc.
•Do not use without a filter in place. When servicing the unit, never put fingers or other
objects into the fan chamber in case the unit accidentally turns on.
•Do not put any objects into openings. Do not use with any openings blocked; keep
openings free of dust, lint, hair, and anything that may reduce air flow.
•Do not pick up toxic materials (chlorine bleach, ammonia, drain cleaner, etc.).
•Do not pick up anything that is burning or smoke, such as cigarettes, matches, or hot
ashes.
•Do not use to pick up flammable or combustible liquids such as gasoline, nor use on
areas where they may be present.
•Locations with candles or desk lamps on the floor.
•Locations with unattended fires (fire or embers).
•Locations with distilled alcohol, thinner, ashtrays with burning cigarettes, etc.
•Do not use POWERbot in an enclosed space filled with vapours given off by oil based
paint, paint thinner, moth proofing substances, flammable dust, or other explosive or
toxic vapours.
•Leaks from battery cells can occur under extreme usage or temperature conditions.
If the liquid gets on skin, wash quickly with water. If the liquid gets into the eyes,
flush them immediately with clean water for a minimum of 10 minutes. Seek medical
attention.
SR20H9050U#EN_EN_DJ68-00716E-00.indd 5 2014-08-11 오후 2:13:41

ENGLISH-06
WARNING
Power related
▶ Please prevent any risk of electric shock or
fire.
– Do not damage the power cord.
– Do not pull the power cord too hard or touch
the power plug with wet hands.
– Do not use a power source other than 100-
240 V~ and also do not use a multi outlet to
supply power to number of devices at the same
time. (Do not leave the cord carelessly on the
floor.)
– Do not use a damaged power plug, power cord
or loose power outlet.
▶ Clean dust or any foreign matters on the pin
and contact part of the power plug.
– There is a risk of electric shock or malfunction.
WARNING
Before use
▶ Do not use POWERbot near combustible
materials.
– Place near candle, desktop lamps, fireplace or
near combustible materials such as gasoline,
alcohol, thinners etc.
▶ The POWERbot is intended for household
use therefore do not use it in an attic,
basement, storage, industrial building, out of
indoor space, places with moisture (such as
bathroom, laundry), on the table or shelves.
– The POWERbot can be damaged or
malfunction.
▶ Install the Virtual guard in front of dangerous
areas (such as stairs or railings) to prevent
damaging the product or getting injured.
– For your safety, always keep the cliff sensor
clean.
▶ Be sure POWERbot does not pass through or
touch any kind of liquids.
– The POWERbot can be severely damaged and
it may contaminate other areas if the wheels
pass through liquid.
▶ Do not spill any liquids on the charger.
– There is a risk of fire or electric shock.
▶ Do not use the charger for anything other
than its intended purpose.
– There is a risk of fire or severe damage to the
charger.
▶ Always keep the cliff sensor clean for your
safety.
WARNING
In use
▶ If any abnormal sounds, smells or smoke
come from POWERbot, immediately shut
off the emergency switch at the bottom of
POWERbot and contact a service center.
WARNING
Cleaning and
maintenance
▶ When power cord is damaged, contact a
service center to get it replaced by certified
repairman.
– There is a risk of fire or electric shock.
▶ Please check with a Samsung Electronics
service center when exchanging batteries.
– Using batteries from other products can cause
malfunction.
Safety information
SR20H9050U#EN_EN_DJ68-00716E-00.indd 6 2014-08-11 오후 2:13:41

ENGLISH-07
CAUTION
Before use
▶ Insert the dustbin before using POWERbot.
▶ Open room doors before cleaning in order
to have all rooms cleaned and install a
Virtual guard in front of entryway, balconies,
bathrooms, or other areas where POWERbot
may fall.
▶ Be careful with the followings for proper
automatic recharging.
– Always turn on the power of the charger.
– Install the charger where POWERbot can easily
find.
– Do not leave any object in front of the charger.
▶ When installing the charger, do not leave the
cord carelessly on the floor since POWERbot
may get tangled by it.
▶ Do not use POWERbot on black colored
floors.
– The POWERbot may not be able to operate
normally.
▶ Do not pick up POWERbot by the dustbin
holder.
▶ Do not place any objects within 0.5 m to both
sides and 1 m to the front of the charger.
▶ Make sure the charger's charging contact is
not damaged or have any foreign matters on
it.
▶ Do not install the charger in an area with a
dark floor.
– If the floor around the charger is dark,
recharging is hindered.
▶ Move any obstacles that may disturb
POWERbot's movement (such as children's
indoor swing or slides) before cleaning.
CAUTION
In use
▶ Using POWERbot on thick carpet may
damage both POWERbot and the carpet.
– The POWERbot cannot pass over carpet that is
thicker than 1 cm.
▶ Do not use POWERbot on tables or other
high surfaces.
– There is a risk of damage if it falls.
▶ The POWERbot may bump into chair, desk
legs therefore move them away for faster and
efficient cleaning.
▶ When POWERbot is operating, do not lift it up
or carry it to another area.
▶ Do not hold by driving wheels of POWERbot
when carrying it to another area.
▶ Do not put any objects on top of POWERbot
since it may cause malfunction.
▶ Remove any large papers or plastic bags
immediately when using POWERbot since
they may block the intake.
▶ Do not aim the red pointer directly at people
or animals.
CAUTION
Cleaning and
maintenance
▶ Prevent any damage to POWERbot by
complying the followings.
– Do not clean POWERbot by spraying water
directly onto it or use benzene, thinner, acetone
or alcohol to clean it.
▶ Do not disassemble or repair POWERbot.
This should only be done by a certified
repairman.
▶ Always keep the obstacle sensor and cliff
sensor clean.
– If foreign matter accumulates, sensors may
malfunction.
SR20H9050U#EN_EN_DJ68-00716E-00.indd 7 2014-08-11 오후 2:13:41

ENGLISH-08
1
Connect the
adapter jack to
the charger
2
Connect the
power cord to
the adapter
When using the adapter,
the side with the sticker
attached must face down.
3
Connect the
power plug to
the outlet
Power lamp (Red) will turn
on.
Installation
Power of the charger must be on at all times.
DC-IN
DC-IN
Power lamp (Red)
About 1 m
About 0.5 m
About 0.5 m
Install it in a place without obstacles
and danger of falling.
SR20H9050U#EN_EN_DJ68-00716E-00.indd 8 2014-08-11 오후 2:13:41

ENGLISH-09
Accessories
Remote control Batteries (AAA type) User manual/Quick
guide
Spare filter
Cleaning brush Power cord Adapter Virtual guard
Installation note
Note
▶ Install charger in a place where the floor and wall are level.
▶ It is best to install the charger along the grain of wooden floors.
▶ If the emergency switch is off, POWERbot will not charge even if it is docked on the charger.
▶ Always turn on the power of the charger.
– If power is not supplied to the charger, POWERbot cannot find it and cannot automatically recharge.
– If POWERbot is left detached from the charger, the battery will drain naturally.
▶ If POWERbot is in energy-saving mode, power will not come on even if the emergency switch is
turned off and then on. Press and hold the [Start/Stop] button on POWERbot.
SR20H9050U#EN_EN_DJ68-00716E-00.indd 9 2014-08-11 오후 2:13:42

ENGLISH-10
Charging lamp during charging (green)
It takes approximately 160 minutes to
completely charge when charging for the
first time after purchase and can be used for
approximately 60 minutes.
Charging
1
Turn on the
emergency switch
on the bottom
You must turn on the
emergency switch to turn on
POWERbot.
2
Manually charge
POWERbot by
placing it on the
charger
Make sure charge pins of
POWERbot and the charger is
aligned.
3
Check the
charging status
“ ” will turn on
according to charging
progress and "FULL" will
turn on when charging is
complete.
WARNING
• Rated input voltage of this product
is 100-240 V~.
SR20H9050U#EN_EN_DJ68-00716E-00.indd 10 2014-08-11 오후 2:13:42

ENGLISH-11
When the battery indicator blinks
during cleaning, POWERbot will
return to the charger to charge itself
automatically.
Automatic charging
You may command POWERbot to
recharge at the charger while it is in
cleaning process.
Recharging
Manually charge POWERbot by
placing it on the charger.
Low battery (Lo)
Steps to take if recharging is not being executed
Check the installation status of the
charger when:
▶charger is located in a place where POWERbot
cannot easily access
▶distance of the charger and POWERbot is over 5 m
apart
- It may take a long time for POWERbot to return to
the charger for recharging
Manually charge POWERbot when:
▶charger is located in a corner
▶battery is fully exhausted
▶POWERbot is stuck by obstacles (furniture etc.)
▶POWERbot can't climb threshold near charger
(Height of the threshold that POWERbot can climb:
about 1.5 cm and below)
▶when battery indicator blinks and "Lo" is displayed
▶when POWERbot is set on Spot clean or Manual
clean mode
SR20H9050U#EN_EN_DJ68-00716E-00.indd 11 2014-08-11 오후 2:13:43

ENGLISH-12
Installing the Virtual guard
Infrared ray from the Virtual guard will restrict POWERbot from approaching certain
area.
Virtual guard
1
Press the Power
button to turn it on
Power lamp (Red) will blink.
2
Install the Virtual guard
where you want to restrict
POWERbot's entrance
Make sure that distance sensor is facing
at the desired direction you want to
create a invisible barrier (which will restrict
POWERbot's approach).
The distance of virtual wall is 2.5 m at minimum and may differ
depending on surroundings and movement status of POWERbot.
Minimum 2.5 m
SR20H9050U#EN_EN_DJ68-00716E-00.indd 12 2014-08-11 오후 2:13:43

ENGLISH-13
Part name of the Virtual guard
Power button
Distance detection sensor
(Infrared ray sensor)
Power lamp
Power on: Red lamp blinks
Power off: Lamp is off
POWERbot detection sensor
Battery cover
Inserting batteries
Batteries for Virtual guard must be purchased separately.
1
Open the battery cover
of the Virtual guard by
pressing the locking
tab and lift it up.
2
Insert the alkaline
batteries (D type)
as shown in the
illustration (check the
+, - polarity).
3
Insert the tip of the
cover into the slot and
push the other end to
close the battery cover.
Specification: type D (LR20) batteries
SR20H9050U#EN_EN_DJ68-00716E-00.indd 13 2014-08-11 오후 2:13:44

ENGLISH-14
Using POWERbot
You must turn on the emergency switch before using POWERbot.
Turning the power on/off
Press the button for more than
3 seconds
Using Auto clean mode
The POWERbot moves and cleans
automatically until it cleans entire space once.
Stop cleaning: Press the button shortly
Recharging
You may command POWERbot to recharge at
the charger automatically while it is in cleaning
process.
Using the cleaning
modes
You can select the desired cleaning mode.
WARNING
• When POWERbot is not used for
30 minutes, power will turn off
automatically.
- You can turn on the power only by
using the buttons on POWERbot.
SR20H9050U#EN_EN_DJ68-00716E-00.indd 14 2014-08-11 오후 2:13:44

ENGLISH-15
Cleaning mode How to select Displayed icon
Auto clean
Press once
Spot clean
Press twice
Max clean
Press 3 times
Manual clean
Press 4 times
Direction control can be done only
by the remote control.
When POWERbot is being charged, you can only select the Auto clean or Max clean mode.
Cleaning method for each modes
About 1.5 m
About 1.5 m
Auto clean
Cleans automatically
until entire space is
cleaned once.
Spot clean
Cleans a localized area
intensely. It can be
used to clean bread or
cookie crumbs.
Max clean
Cleans until the battery
is depleted.
Manual clean
You can move
POWERbot with the
remote control to clean
the desired spot.
Selecting cleaning mode
SR20H9050U#EN_EN_DJ68-00716E-00.indd 15 2014-08-11 오후 2:13:45

ENGLISH-16
Using the remote control
1 Power/Recharging
[A Type] [B Type]
Power
Turn POWERbot's power on/off
Recharging
Select to recharge POWERbot at the charger while it
is in cleaning process
2 Cleaning mode
Auto clean
Select to automatically clean the entire space once
Spot clean
Select to clean a localized area intensely
Max clean
Select to make POWERbot to clean until battery
indicator flashes after reaching down to one level
Manual clean
Select to manually control and clean by using the
remote control
Start/Stop
Select to start or stop cleaning process
3 Additional function
Silence mode
Select to clean with lower operation noise
Turbo mode is not available
Dust sensor
mode
In Auto clean mode
▶When dust intake is detected, suction of
POWERbot will become stronger and it will move
around that area to focuses on cleaning the
surrounding area.
In Spot/Max/Manual clean
▶When dust intake is detected, suction of
POWERbot will become stronger.
Sound
Each time you press this button, Sound Effects
Mute is selected in this sequence.
Remote control function NOT supported.
Inserting batteries
Open the battery cover by lifting it up
while pressing the locking tab and
insert the batteries as shown in the
illustration. Then, close the cover until
it clicks into place.
SR20H9050U#EN_EN_DJ68-00716E-00.indd 16 2014-08-11 오후 2:13:46

ENGLISH-17
You can use the remote control to point and clean
the desired spot while POWERbot is in cleaning
process.
Point the red light on the floor within 50 cm around
POWERbot's location.
Press and hold the Point cleaning button to move the red light to
the desired spot. The POWERbot will follow the light while cleaning.
50 cm
Operating distance of the remote control
Height of the remote
control
Operating distance
Height of the remote
control
0.5 m 1 m 1.5 m
Operating distance About 1.5 m About 2 m About 3 m
5 Point cleaning
- Only available in A type remote controll
[A Type]
1
2
4
3
Refer to
page 19
N/A
5
[B Type]
1
2
4
Refer to
page 19
3
4 Direction control
[A Type] [B Type]
Select to move forward
Select to turn left
Select to turn right
Moving backward is not available
SR20H9050U#EN_EN_DJ68-00716E-00.indd 17 2014-08-11 오후 2:13:47

ENGLISH-18
Name of each part
1
5
2
3
4
6
3
3
4
7
8
9
Top
1. Display panel
2. Dustbin holder
3. Remote control signal receiver
4. Virtual guard sensor
5. Obstacle sensor
6. Dustbin
7. Camera
8. Dustbin handle
9. Bumper sensor
1
4
2
6
5
5
4
7
4
8
9
3
Bottom
1. Charge pins
2. Power brush
3. Power brush cover
4. Cliff sensor
5. Roller
6. Battery cover
7. Power brush cover button
8. Driving wheel
9. Emergency switch
11 127 1098
5
6
14
15
1
3
2
4
13
Display panel
1. Mute
2. Error indicator (Refer to page 24)
3. One-time/Daily schedule
4. Filter inspection
5. Battery indicator
6. Number display
7. Auto clean
8. Spot clean
9. Max clean
10. Manual clean
11. Silence mode
12. Dust sensor mode
13. Cleaning mode button
14. Recharging button
15. Start/Stop button
SR20H9050U#EN_EN_DJ68-00716E-00.indd 18 2014-08-11 오후 2:13:48

ENGLISH-19
Setting time/schedule
B type remote control's , , buttons works in same manner as A type remote
control.
Setting the time
You must set the current time before using the One-time/daily schedule.
Start setting Select "Hour" Select "Minute"
Select "AM/PM"Setting complete
or
Skip to previous, next setting
Setting the schedule
Setting/cancelling the schedule can only be done while POWERbot is docked on the charger.
Start setting Select "One-time" or
"Daily" schedule
Select "Hour" Select "Minute"
Select "AM/PM"Select cleaning mode
Only Auto clean/Max clean
can be selected
Setting complete
or
Skip to previous, next setting
Cancelling
during setup
▶Setting will be canceled automatically when there's no input
for 1 minute.
Cancelling One-time/Daily schedule
When both One-time/
Daily schedule is set
Press for 3 sec. Select the schedule Cancel complete
When either one of
One-time or Daily
schedule is set
Press for 3 sec.
SR20H9050U#EN_EN_DJ68-00716E-00.indd 19 2014-08-11 오후 2:13:49
/