Page is loading ...

3135 035 21421
HDTV Monitor
with Pixel Plus
™
HDTV Monitor
with Pixel Plus
™
55PP9753
60PP9753
• Pixel Plus™
• Digital Natural Motion™
• Philips HD Optics
• Active Control™ with ambient light sensor
• APAC™—Automatic Phosphor Aging Compensation
• Auto IntelliSense™ Focus
• HD DVI and Component inputs
• Dolby
® Virtual Surround
7/09/03

2
Once your PHILIPS purchase is registered, you’re eligible to receive all the privileges
of owning a PHILIPS product. So complete and return the Warranty Registration
Card enclosed with your purchase at once. And take advantage of these important benefits.
Return your Warranty Registration card today to ensure you
receive all the benefits you’re entitled to.
Congratulations
on your
purchase,
and welcome to the
“family!”
Dear PHILIPS product owner:
Thank you for your confidence in PHILIPS.You’ve selected one of the best-built, best-backed products available
today. And we’ll do everything in our power to keep you happy with your purchase for many years to come.
As a member of the PHILIPS “family,” you’re entitled to protection by one of the most comprehensive war-
ranties and outstanding service networks in the industry.
What’s more, your purchase guarantees you’ll receive all the information and special offers for which
you qualify, plus easy access to accessories from our convenient home shopping network.
And most importantly, you can count on our uncompromising commitment to your total satisfaction.
All of this is our way of saying welcome–and thanks for investing in a PHILIPS product.
Sincerely,
Lawrence J. Blanford
President and Chief Executive Officer
Know these
safetysymbols
t This “bolt of lightning” indicates uninsulated material within your unit may cause an elec-
trical shock. For the safety of everyone in your household, please do not remove product cov-
ering.
s The “exclamation point” calls attention to features for which you should read the enclosed
literature closely to prevent operating and maintenance problems.
WARNING:TO PREVENT FIRE OR SHOCK HAZARD, DO NOT EXPOSE THIS EQUIPMENT
TO RAIN OR MOISTURE.
CAUTION:To prevent electric shock, match wide blade of plug to wide slot, and fully insert.
ATTENTION: Pour éviter les chocs électriques, introduire la lame la plus large de la fiche dans
la borne correspondante de la prise et pousser jusqu’au fond.
CAUTION
RISK OF ELECTRIC SHOCK
DO NOT OPEN
CAUTION: TO REDUCE THE RISK OF ELECTRIC SHOCK, DO NOT
REMOVE COVER (OR BACK). NO USER-SERVICEABLE PARTS
INSIDE. REFER SERVICING TO QUALIFIED SERVICE PERSONNEL.
Warranty
Verification
Registering your product within
10 days confirms your right to maxi-
mum protection under the terms and
conditions of your PHILIPS warranty.
Owner
Confirmation
Your completed Warranty
Registration Card serves as
verification of ownership in the
event of product theft or loss.
Model
Registration
Returning your Warranty Registration
Card right away guarantees you’ll
receive all the information and special
offers which you qualify for as the
owner of your model.
P.S. Remember, to get the most from your
PHILIPS product, you must return your
Warranty Registration Card within 10
days. So please mail it to us right now!
R
E
G
I
S
T
R
A
T
I
O
N
N
E
E
D
E
D
W
I
T
H
I
N
1
0
D
A
Y
S
Hurry!
Visit our World Wide Web Site at http://www.philips.com

3
IMPORTANT SAFETY INSTRUCTIONS
Read before operating equipment
1. Read these instructions.
2. Keep these instructions.
3. Heed all warnings.
4. Follow all instructions.
5. Do not use this apparatus near water.
6. Clean only with a dry cloth.
7. Do not block any of the ventilation openings. Install in accordance
with the manufacturers instructions.
8. Do not install near any heat sources such as radiators, heat regis-
ters, stoves, or other apparatus (including amplifiers) that produce
heat.
9. Do not defeat the safety purpose of the polarized or grounding-
type plug. A polarized plug has two blades with one wider than
the other. A grounding type plug has two blades and third ground-
ing prong. The wide blade or third prong are provided for your
safety. When the provided plug does not fit into your outlet, con-
sult an electrician for replacement of the obsolete outlet.
10. Protect the power cord from being walked on or pinched particu-
larly at plugs, convenience receptacles, and the point where they
exit from the apparatus.
11. Only use attachments/accessories specified by the manufacturer.
12. Use only with a cart, stand, tripod, bracket, or table
specified by the manufacturer, or sold with the ap-
paratus. When a cart is used, use caution when moving
the cart/apparatus combination to avoid injury from tip-over.
13. Unplug this apparatus during lightning storms or when unused for
long periods of time.
14. Refer all servicing to qualified service personnel. Servicing is
required when the apparatus has been damaged in any way, such
as power-supply cord or plug is damaged, liquid has been spilled
or objects have fallen into apparatus, the apparatus has been
exposed to rain or moisture, does not operate normally, or has
been dropped.
15. This product may contain lead and mercury. Disposal of these
materials may be regulated due to environmental considerations.
For disposal or recycling information, please contact your local
authorities or the Electronic Industries Alliance: www.eiae.org
16. Damage Requiring Service - The appliance should be serviced
by qualified service personnel when:
A. The power supply cord or the plug has been damaged; or
B. Objects have fallen, or liquid has been spilled into the appli-
ance; or
C. The appliance has been exposed to rain; or
D. The appliance does not appear to operate normally or
exhibits a marked change in performance; or
E. The appliance has been dropped, or the enclosure damaged.
17. Tilt/Stability - All televisions must comply with recommended
international global safety standards for tilt and stability properties
of its cabinet design.
• Do not compromise these design standards by applying exces-
sive pull force to the front, or top, of the cabinet which could ulti-
mately overturn the product.
• Also, do not endanger yourself, or children, by placing electron-
ic equipment/toys on the top of the cabinet. Such items could
unsuspectingly fall from the top of the set and cause product dam-
age and/or personal injury.
18. Wall or Ceiling Mounting - The appliance should be mounted to
a wall or ceiling only as recommended by the manufacturer.
19. Power Lines - An outdoor antenna should be located away from
power lines.
20. Outdoor Antenna Grounding - If an outside antenna is connect-
ed to the receiver, be sure the antenna system is grounded so as to
provide some protection against voltage surges and built up static
charges.
Section 810 of the National Electric Code, ANSI/NFPA No. 70-
1984, provides information with respect to proper grounding of
the mast and supporting structure, grounding of the lead-in wire to
an antenna discharge unit, size of grounding connectors, location
of antenna-discharge unit, connection to grounding electrodes, and
requirements for the grounding electrode. See Figure below.
21. Object and Liquid Entry - Care should be taken so that objects
do not fall and liquids are not spilled into the enclosure through
openings.
ANTENNA LEAD IN WIRE
ANTENNA DISCHARGE UNIT
(NEC SECTION 810-20)
GROUNDING CONDUCTORS (NEC SECTION 810-21)
GROUND CLAMPS
POWER SERVICE GROUNDING ELECTRODE SYSTEM (NEC ART 250, PART H)
GROUND CLAMP
ELECTRIC SERVICE EQUIPMENT
Example of Antenna Grounding
as per NEC - National Electric Code
Note to the CATV system installer: This reminder is provided to call the CATV system installer's attention to Article 820-40 of the NEC that
provides guidelines for proper grounding and, in particular, specifies that the cable ground shall be connected to the grounding system of the build-
ing, as close to the point of cable entry as practical.

4
Contents
INTRODUCTION
Welcome/Registration of Your TV . . . . . . . . . . . . . . . . .2
Safety/Precautions . . . . . . . . . . . . . . . . . . . . . . . . . . . . . . . .3
Features . . . . . . . . . . . . . . . . . . . . . . . . . . . . . . . . . . . . . . . .5
CONNECTING ACCESSORY DEVICES
TO
YOUR TV
Descriptions of Jacks, Cables, and Connectors . . . . . . . . . . .6
Panel Jack Compatibility Information . . . . . . . . . . . . . . . . . .7
Preconnection Recommendations . . . . . . . . . . . . . . . . . . . .8
Connecting a VCR . . . . . . . . . . . . . . . . . . . . . . . . . . . . . . . .9
Connecting a VCR and Cable Box . . . . . . . . . . . . . . . . . . .10
Connecting an S-Video Device . . . . . . . . . . . . . . . . . . . . .11
Connecting a Standard DVD Player . . . . . . . . . . . . . . . . . .12
Connecting a Progressive-scan DVD Player . . . . . . . . . . . .13
Connecting an HD Satellite Receiver to Y Pb Pr . . . . . . . .14
Setting Color Space for HD input-AV 3 . . . . . . . . . . . . . . .15
Connecting an HD Satellite Receiver to DVI . . . . . . . . . . .16
Connecting Surround Sound Equipment . . . . . . . . . . . . . .17
Connecting to the Side Inputs: Video Game System . . . . .18
Labeling the Audio/Video Input Sources . . . . . . . . . . . . . . .19
USING THE
REMOTE CONTROL
Programming the Remote Control . . . . . . . . . . . . . . . .20–21
Programming the Remote Control: Set-up Codes . . . .22–23
Operating Accessory Devices with the TV Remote . . .24–26
Using Active Control™ Plus+ . . . . . . . . . . . . . . . . . . . . . .27
Using AutoPicture . . . . . . . . . . . . . . . . . . . . . . . . . . . . . . .28
Using Active Display . . . . . . . . . . . . . . . . . . . . . . . . . . . . . .29
USING THE ON-SCREEN MENUS
PICTURE
Adjusting/Setting the Picture Controls . . . . . . . . . . . . . . . .30
Selecting a Digital Processing Option . . . . . . . . . . . . . . . . .31
Selecting a Dynamic Contrast Option . . . . . . . . . . . . . . . .32
Selecting a DNR (Dynamic Noise Reduction) Option . . . .33
Turning on Color Enhancement . . . . . . . . . . . . . . . . . . . . .34
Selecting a Picture Format Option . . . . . . . . . . . . . . . .35-36
SOUND
Selecting an AutoSound™ Option . . . . . . . . . . . . . . . . . . .37
Selecting a TV Equalizer Option . . . . . . . . . . . . . . . . . . . . .38
Adjusting the TV and Headphone Volume . . . . . . . . . . . . .39
Turning Loudness on or off . . . . . . . . . . . . . . . . . . . . . . . .40
Adjusting TV Speaker Balance . . . . . . . . . . . . . . . . . . . . . .41
Selecting a Sound Mode Option . . . . . . . . . . . . . . . . . . . .42
Using Alternate Audio (SAP) . . . . . . . . . . . . . . . . . . . . . . .43
Setting the TV for Stereo Programming . . . . . . . . . . . . . . .44
Turning the AVL (Audio Volume Leveler) on or off . . . . . .45
Adjusting the Delta Volume . . . . . . . . . . . . . . . . . . . . . . . .46
Adjusting TV Speakers and Audio Out . . . . . . . . . . . . . . . .47
FEATURES
Setting the Sleeptimer . . . . . . . . . . . . . . . . . . . . . . . . . . . .48
Setting the On Timer . . . . . . . . . . . . . . . . . . . . . . . . . . . . .49
Using Zoom . . . . . . . . . . . . . . . . . . . . . . . . . . . . . . . . . . . .50
CHANNELS
Using the Channel List . . . . . . . . . . . . . . . . . . . . . . . . . . . .51
Removing Channels from the Channel List . . . . . . . . . . . .52
Using Lock Channel . . . . . . . . . . . . . . . . . . . . . . . . . . . . . .53
Using Lock After . . . . . . . . . . . . . . . . . . . . . . . . . . . . . . . .54
Blocking Programming Based on TV Ratings . . . . . . . . . . .55
Blocking Programming Based on Movie Ratings . . . . . . . . .56
Turning the Antenna Attenuator on or off . . . . . . . . . . . . .57
GENERAL
Turning the Menu Background on or off . . . . . . . . . . . . . .58
Using Surf . . . . . . . . . . . . . . . . . . . . . . . . . . . . . . . . . . . . .59
Selecting a PIP Format . . . . . . . . . . . . . . . . . . . . . . . . . . . .60
Changing Channels or Input Sources in Dual Screen/PIP . .61
Selecting a Picture Freeze Option . . . . . . . . . . . . . . . . . . .62
Resetting the Audio/Video Settings to Factory
Default Values . . . . . . . . . . . . . . . . . . . . . . . . . . . . . . . . .63
Selecting Closed Captioning Option . . . . . . . . . . . . . . . . .64
Selecting an On-screen Display Option . . . . . . . . . . . . . . .65
Setting up or Changing a PIN (Personal
Identification Number) . . . . . . . . . . . . . . . . . . . . . . . . . .66
Setting the Clock—Auto Clock mode . . . . . . . . . . . . . . . .67
Setting the Clock Manually . . . . . . . . . . . . . . . . . . . . . . . .68
Selecting a Time Zone and Setting the Daylight
Savings Control . . . . . . . . . . . . . . . . . . . . . . . . . . . . . . . .69
Manual Convergence . . . . . . . . . . . . . . . . . . . . . . . .70
Manual Convergence, Multipoint . . . . . . . . . . . . . . .71
ADDITIONAL INFORMATION
Cleaning the TV . . . . . . . . . . . . . . . . . . . . . . . . . . . . . . . . .72
Troubleshooting . . . . . . . . . . . . . . . . . . . . . . . . . . . . . . . . .73
Index . . . . . . . . . . . . . . . . . . . . . . . . . . . . . . . . . . . . . . . . .74
Factory Service Locations . . . . . . . . . . . . . . . . . . . . . . .75-76
Limited Warranty . . . . . . . . . . . . . . . . . . . . . . . . . . . . . . . .80
CH
G

5
Items Included with This TV
Features
Pixel Plus™
Get more! More detail, more texture, more resolution, more
high-definition-like images from any source. By doubling the
number of lines and the number of pixels per line, Pixel Plus™
will take your viewing to new levels of enjoyment. Pixel Plus™
is only from Philips.
Digital Natural Motion™
Eliminates motion jitter from film-based sources such as DVDs
for distortion-free, natural viewing.
Philips HD Optics
The Philips HD Optics gives extreme resolution HD with cut-
ting-edge processing and display technology. Includes Philips
wideband video amplifier, microphosphor CRTs, hybrid projec-
tion lenses, first-surface mirror, and fine-pitched lenticular
screen.
Active Control Plus™
By continually adjusting picture settings over 60 times per sec-
ond, Active Control Plus™ ensures that the viewing experience
is always optimal. Changes in ambient light are even compensat-
ed for!
APAC—Automatic Phosphor Aging Compensation
Stationary images, particularly black bars that outline 4:3 pro-
gramming on a widescreen TV, could eventually leave an after-
image on the screen. APAC automatically shifts the image, just
enough to blur after-image retention, which reduces the effect of
stationary images.
Auto IntelliSense™ Focus
Automatically adjust picture convergence at the push of a button.
Auto IntelliSense™ Focus responds to the natural and man-made
magnetic field conditions where the projection TV is located, so
you can easily enjoy a well-converged picture.
Dolby* Virtual Surround
Dolby processing circuitry for enhanced surround sound effect
creates the sensation of Dolby Pro Logic without the hassle of
additional rear speakers.
HD DVI and Component Inputs
DVI supports High-definition Copy-protected digital video input
for connection to compliant set-top boxes. HD component con-
nection (Y Pb Pr or RGB + HV) offers color purity, crisp color
detail, and reduced color noise.
Your new television and its packing contain materials that can
be recycled and reused. Specialized companies can recycle
your product to increase the amount of reusable materials and
minimize the amounts that need to be properly disposed of.
Your product also uses batteries that should not be thrown
away when depleted, but should be handed in and disposed of
as small chemical waste.
When you replace your existing equipment, please find out
about the local regulations regarding disposal of your old tel-
evision, batteries, and packing materials.
End-of-Life Disposal
As an Energy Star® Partner, Philips Consumer
Electronics has determined this product meets the
Energy Star® guidelines for energy efficiency.
Energy Star® is a U.S. registered mark. Using products with the
Energy Star® label can save energy. Saving energy reduces air pol-
lution and lowers utility bills.
As you unpack your TV, please note the included items:
• Quick Use and Setup Guide to help you set up your new TV.
• Directions for Use manual—contains information on safety,
set maintenance, Factory Service Center locations, and prod-
uct warranty
• Warranty Registration Card
• Remote Control (with supplied batteries).
Please take a few minutes to complete your registration card.
The serial number for the TV is on the rear of the set. For
your future reference, please write down the serial and
model number of this television in the space provided on the
warranty page at the back of this manual. (In the unlikely
event you should need to place a service call, these numbers
will be needed.)
*Manufactured under license from Dolby Laboratories. “Dolby”,
“Pro Logic” and the double-D symbol are trademarks of Dolby
Laboratories.
Active Control, APAC, Digital Natural Motion, IntelliSense, and
Pixel Plus are trademarks of Philips Consumer Electronics.
Copyright 2003 Philips Consumer Electronics. All rights reserved.

6
Descriptions of Jacks, Cables, and Connectors
TUNER
V
G
S-VIDEO
This page contains descriptions and illustrations of jacks, cables,
and connectors you might use in making connections. The cables
and connectors are not supplied with your TV, but you can pur-
chase at your electronics dealer. Or you can order them by calling
our Customer Care Center at 1-800-531-0039.
Antenna RF Jack
Cable Used: RF
Coaxial (75Ω)
Push-on
Type Cable
Screw-on
Type Cable
Signal Splitter
Cables Used: RF
Coaxial (75Ω)
Video (Composite) Jack
Cable Used:Video with
RCA-type Phono Plugs
Or
S-VIDEO Jack
Cable Used: S-Video
Pr Pb Y
Component Video Jacks
Cables Used: Component
Video with RCA-type
Phono Plugs
DVI
DVI-D Jack
Cables Used: DVI-D
DVI-D Input Jack
Cable used: DVI-D
This jack works only with DVI TMDS
(Transition Minimized Differential Signaling)
digital video. Allows encrypted transmissions
of uncompressed digital content. The DVI-D
jack used in this product is not for computer
connections.
Component Video Input Jacks
Cables used: component video with
RCA-type phono plugs
Allow you to connect accessory devices such
as DVD players. Separating the video into
three signals, these inputs provide excellent
quality. Be sure to connect the left and right
audio cables, because the Y, Pb, Pr jacks
receive only the picture signal.
NOTE: See the “Helpful Hint” on page 12
for more information.
S-Video Input Jacks
Cable used: S-Video
Provide a higher quality picture than the
Video (composite) jacks because the color
part of the picture is separated from the black
and white portion. Be sure to connect the left
and right audio cables, because the S-Video
jacks receive only the picture signal.
Video (called “CVBS” or “composite”)
Input Jacks
Cable used:Video with RCA-type
phono plugs
Provide better picture performance than the
antenna RF input. Be sure to connect the audio
cables, because the video jacks receive only the
picture signal.
Your TV also has a monitor output (“Output”)
video (“V”) jack. Use a video cable with RCA-
type phono plugs to make connections.
Tuner (RF) Input Jack
Cables used: RF coaxial cable (75Ω)
Allows you to connect an antenna, cable TV,
or components having RF outputs to the
antenna input on the TV. RF coaxial cables
are available in push-on or screw-on type.
Audio Input Jacks
Cables used:Audio with RCA-type phono
plugs
Provide sound for the video inputs. If your acces-
sory device has only one output for audio, connect
it to the left (color coded white) audio jack on the
TV.
Your TV also has monitor output (“MON OUT”)
audio (“L” and “R”) jacks and a subwoofer output
(“SUB OUT”) jack. Use an audio cable with RCA-
type phone plugs to make connections.
Audio Jacks
Cables Used:
Audio with RCA-
type Phono Plugs
RL
Signal Splitter
Allows you to route an antenna or cable TV
signal to two inputs.
3.5mm Stereo Mini Phone
Plug to RCA Jack Adapter
Allows a connection between the
3.5mm stereo audio out jack on a com-
puter and the left and right audio inputs
on the television. Connect A/V cables
with RCA-type phono plugs to the
adapter, then to the TV.
3.5mm Stereo Mini Phone Plug
to RCA Jack Adapter
300- to 75-ohm
Twin-lead Adapter
300- to 75-ohm Twin-lead Adapter
Accepts twin-lead wires from an antenna and
allows connection to the antenna input on the
TV. If your antenna is already equipped with
an RF coaxial cable you will not need this
adapter.
TUNER
Center Channel Amp Speaker
Terminals (+ and –)
Allow a connection from a surround
sound receiver. Set the EXT/INT switch
to EXT to use the TV speakers as the
center speakers in a surround sound
arrangement.
Center Channel Amp Speaker
Terminals (for the connection
of speaker wires)
+
_
INT
EXT

7
8
SUBWOOFER
Provides a signal to an external powered sub-
woofer.
9
SIDE JACK PANEL
Signals accepted: Analog NTSC (480i).
Inputs available (two kinds):
S-Video (super video) and Video (compos-
ite), plus audio left and right.
Output available: Headphone.
Only one of the inputs can be used at a time.
Select the Side source, and the TV detects
the input to which you have connected. For
sound, connections must be made to the Side
audio inputs.
1
ANTENNA IN 75Ω Input Jack
Signals accepted: NTSC (480i).
Inputs available: 75Ω RF coaxial.
This is for antenna or cable RF input.
2
INPUT-AV 1/Component Video (CVI) Jacks
Signals accepted: NTSC (480i).
Inputs available (three types): Y Pb Pr (com-
ponent video), S-Video (super video), or Video
(composite), plus audio left and right.
Only one of the types of video inputs should be
used at a time. For either an S-Video or Video
connection, select the AV1 source in the on-
screen display. For a Y Pb Pr connection, select
CVI. For sound, connections must be made to
the INPUT-AV1 audio inputs.
3
INPUT-AV 2 Jacks
Signals accepted: NTSC (480i).
Inputs available (two types): S-Video (super
video) or Video (composite), plus audio left and
right.
Only one of the types of video inputs should be
used at a time. For either an S-Video or Video
connection, select the AV2 source in the on-
screen display. For sound, connections must be
made to the INPUT-AV 2 audio inputs.
4
HD INPUT-AV 3 Jacks
Signals accepted: 480p and 1080i, plus audio
left and right.
Inputs available (two types): Y Pb Pr (compo-
nent video) or RGB+HV sync, plus audio.
For sound, connections must be made to the
HD INPUT-AV 3 audio inputs.
5
HD INPUT-AV 4 Jacks
Signals accepted: Digital only (TMDS
[Transition Minimized Differential Signaling]
encoded, uncompressed); DVI 480p and 1080i,
plus audio left and right.
Inputs available: DVI TMDS, plus audio.
For sound, connections must be made to the
HD INPUT-AV 4 audio inputs.
6
OUTPUT Jacks
Provide video and left/right audio output signals
from the input source currently being viewed on
screen, except for HD INPUT-AV 3 or AV 4.
When HD INPUT-AV 3 or AV 4 is used, only
the audio is available through the OUTPUT
audio L/R jacks. The OUTPUT audio is at a
fixed volume level; changing the TV volume
does not affect them. Adjust the volume at your
external home cinema system.
7
CENTER CHANNELAMP INPUT Click-fit
Terminals
Provides speaker-wire input terminals for con-
nection of an external home-cinema surround-
sound system amplifier. For this use, set the
switch to “EXT,” and the TV speakers become
the center speakers for the home-cinema sur-
round-sound system.
NOTE: If no audio is heard from the set, check
to make sure the Center Channel Amp switch is
in the INT position. This switch should be in the
EXT position only when an external center
channel input is connected to the Click-fit
Terminals.
Panel Jack Compatibility Information
VIDEO
S-VIDEO
L
Pb
Pr
VIDEO
S-VIDEO
L
AUDIO
L
R
AUDIO
L
R
G/Y
R/Pr
B/Pb
V
H
SYNC
L
R
AUDIO
L
R
AUDIO
HD INPUT-AV 3
HD INPUT-AV 4
INPUT-AV 2 SUBWOOFEROUTPUTINPUT-AV 1
Y
AMP SWITCH
CENTER CHANNEL AMP INPUT
ANTENNA IN 75Ω
EXT INT
+
_
DVI
1
7
6
2
5
3
4
8
V
O
L
UM
E
C
H
A
N
N
E
L
I
N
T
E
L
L
I
S
E
N
S
E
M
E
N
U
P
O
W
E
R
G
9
The TV’s Side
Jack Panel
7
Why So Many Types of Inputs?
As better-quality signals have become available, new inputs have been designed into
accessory devices (VCRs, DVD players, cable boxes, etc.) and TVs to carry them. The
other inputs have been left in place to work with the installed base of older equipment.
Here is a summary of the quality of signal offered by the different types of inputs:
Basic: ANTENNA IN 75Ω. May provide the only way to connect an antenna and some
older cable boxes and VCRs.
Good: VIDEO (Composite) Input. A small step up in quality from the ANTENNA IN
75Ω input. Most cable boxes, VCRs, and DVD players have this type of connection.
Better: S-VIDEO (Super Video) Input. Separates the signal into color and brightness,
improving image quality. Used with DVD players, digital cable boxes, satellite receivers,
and some camcorders.
Best: Y Pb Pr (Component Video) Input. Carry potentially the best-quality signals.
The video signal is split into three signals, two color and one brightness. Used primarily
with DVD players.
Color Coding Used on
Jacks and Plugs to simpli-
fy connections:
Yellow: VIDEO
(Composite Video)
Green, Blue, Red: Y Pb Pr
(Component Video)
Red: Right AUDIO
White: Left AUDIO.
HELPFUL HINT
Back of TV

8
Preconnection Recommendations
V
O
L
U
M
E
C
H
A
N
N
E
L
I
N
T
E
L
L
I
S
E
NS
E
M
E
N
U
P
O
W
E
R
Allow 4 to 6 inch-
es behind the TV
for ventilation.
Situate the TV where
it will not be exposed
to heat or moisture.
For safety, do not
set objects on top
of the TV.
Before connecting accessory devices—VCR,
DVD player, or HD satellite receiver, for exam-
ple—please keep the following in mind.
Positioning the TV
• Allow 4 to 6 inches of space behind the TV
for ventilation.
• Test various locations in the room to find the
optimal spot to locate the set for best viewing.
• Do not place the TV in direct sunlight or near
a heating appliance.
• Do not expose the TV to rain or moisture.
• To prevent any unsafe situations, do not place
objects on top of the TV.
Providing Protection Against Power
Surges
• Connect all accessory devices before you
plug any of their power cords into the wall
outlet or power strip. NEVER plug your TV
into an outlet that is controlled by a wall
switch.
• Turn off the TV and/or accessory devices
before you connect or disconnect any cables.
• Ensure that all antennas and cables are prop-
erly grounded. See page 3, “Important Safety
Instructions.”
Protecting Accessory Devices from
Overheating
• Arrange accessory devices so that air can cir-
culate freely around them.
• Don’t stack the accessory devices. Arrange
them to allow for good ventilation.
• If you connect an audio receiver or amplifier,
place it on the top shelf so the heated air from
it will not flow around other components.
Connecting Cables
Be sure to insert each cable firmly into the cor-
rect jack.
Using the Connection Examples in
This Manual
The accessory device jack panels shown are for
example purpose only. The jack panels on your
accessory devices may look different. Also, note
that connections can be made in various ways.
The examples are presented only as guides.

9
VIDEO
S-VIDEO
L
Pb
Pr
VIDEO
S-VIDEO
L
AUDIO
L
R
AUDIO
L
R
G/Y
R/Pr
B/Pb
V
H
SYNC
L
R
AUDIO
L
R
AUDIO
HD INPUT-AV 3
HD INPUT-AV 4
INPUT-AV 2 SUBWOOFEROUTPUTINPUT-AV 1
Y
AMP SWITCH
CENTER CHANNEL AMP INPUT
ANTENNA IN 75Ω
EXT INT
+
_
DVI
AUDIO
ANT
OUT
IN
VIDEO
L
R
OUT
IN
CH3 CH4
IN
OUT
TV
AV1:None
CVI: None
AV2:None
AV3:None
AV4:None
SIDE:None
Source
OK
1
2
3
4
5
6
5
Back of TV
Incoming
Cable TV
or
Antenna
Signal
Back of VCR
(example only)
1
Connect the incoming antenna or cable
TV signal to the ANT IN jack on the
back of the VCR.
2
Using a coaxial cable, connect the
ANT OUT jack on the back of the
VCR to the ANTENNA IN 75Ω jack
on the back of the TV.
3
Using A/V cables, connect the AUDIO
and VIDEO OUT jacks on the back of
the VCR to the corresponding INPUT-
AV 2 audio (L and R) and video (V)
jacks on the back of the TV.
4
Press the Source button on the remote
control to access the Source list.
5
Press the Cursor Up or Down button to
select the AV2 input source.
6
Press the OK button to confirm your
choice. The set is now switched to the
AV2 input source for the viewing of pro-
grams from the VCR.
NOTE: Since you’ve connected the
cable TV signal directly to the TV’s
tuner (step 2 above), you can watch the
unscrambled programs by simply tun-
ing to the desired channel. To store
channels in the TV’s memory, you
must use Autoprogram, which you can
access through “Install” in the TV’s
on-screen menu. See the Autoprogram
section in the Quick Use and Setup
Guide that came with the TV. If you
use Autoprogram, you can select chan-
nels by pressing the CH + or – buttons
on the TV remote control (in TV
mode). Otherwise, you must press the
digit (number) buttons to tune directly
to the channel you desire.
Connecting a VCR
Color Coding Used on Jacks and Plugs to
simplify connections:
Yellow: VIDEO (Composite Video)
Red: Right AUDIO
White: Left AUDIO.
HELPFUL HINT

10
Connecting a VCR and Cable Box
VIDEO
S-VIDEO
L
Pb
Pr
VIDEO
S-VIDEO
L
AUDIO
L
R
AUDIO
L
R
G/Y
R/Pr
B/Pb
V
H
SYNC
L
R
AUDIO
L
R
AUDIO
HD INPUT-AV 3
HD INPUT-AV 4
INPUT-AV 2 SUBWOOFEROUTPUTINPUT-AV 1
Y
AMP SWITCH
CENTER CHANNEL AMP INPUT
ANTENNA IN 75Ω
EXT INT
+
_
DVI
CABLE
IN
TO
TV
VIDEO
OUT
RL
AUDIO
OUT
3 4
OUTPUT
CH
AUDIO
ANT
IN
OUT
VIDEO
L
R
OUT
IN
CH3 CH4
IN
OUT
Source
OK
3
1
2
4
5
6
7
7
8
TV
AV1:None
CVI: None
AV2:None
AV3:None
AV4:None
SIDE:None
NOTE: A cable box with AUDIO OUT jacks
such as the one used in the example on this
page might pass stereo sound to the TV. Check
with your cable TV company. The RF jack out-
put jack on a cable box (commonly labeled
“OUT TO TV,” “OUTPUT,” or “OUT”) will
not pass stereo sound to your TV.
1
Connect the incoming cable TV signal
to a two-way signal splitter. The signal
splitter enables you to route the cable
signal to the TV without using the
OUT TO TV jack on the cable box,
which will not pass stereo sound to the
TV.
2
Using a coaxial cable, connect one of
the connectors on the signal splitter to
the ANTENNA IN 75Ω jack on the
back of the TV.
3
Using a coaxial cable, connect the
other connector on the signal splitter to
the CABLE IN jack on the back of the
cable box.
4
Using Audio/Video cables, connect the
AUDIO and VIDEO OUT jacks on the
back of the cable box and to the corre-
sponding AUDIO and VIDEO IN jacks
on the back of the VCR.
5
Using Audio/Video cables, connect the
AUDIO and VIDEO OUT jacks on the
back of the VCR to the corresponding
AV2 audio (L and R) and video (V)
input jacks on the back of the TV.
6
Press the Source button on the remote
control to access the Source list.
7
Press the Cursor Up or Down button to
select the AV2 input source.
8
Press the OK button to confirm your
choice. The set is now switched to the
AV2 input source for the viewing of pro-
grams from the cable box or the VCR.
Back of TV
Incoming
Cable TV
Signal
Back of VCR
(example only)
Back of Cable Box (example only)
Signal
Splitter
NOTE: You can watch the unscram-
bled cable programs by simply tun-
ing to the desired channel. To store
channels in the TV’s memory, you
must use Autoprogram, which you
can access through “Install” in the
TV’s on-screen menu. See the
Autoprogram section in the Quick
Use and Setup Guide that came with
the TV. If you use Autoprogram,
you can select channels by pressing
the CH + or – buttons on the TV
remote control (in TV mode).
Otherwise, you must press the digit
(number) buttons to tune directly to
the channel you desire.
Color Coding Used on Jacks and Plugs to
simplify connections:
Yellow: VIDEO (Composite Video)
Red: Right AUDIO
White: Left AUDIO.
HELPFUL HINT

11
1
Using an S-Video cable, connect the
S-Video output on the back of the
S-Video device to the INPUT-
AV 2 S-VIDEO input.
2
Using Stereo Audio cables, connect the
AUDIO OUT jacks on the back of the
S-Video device to the corresponding
INPUT-AV 2 audio inputs
(L and R).
3
Press the Source button on the remote
control to access the Source list.
4
Press the Cursor Up or Down button to
select the AV2 input source.
5
Press the OK button to confirm your
choice. The set is now switched to the
AV2 input source for the viewing of
programs from the S-Video device.
Connecting an S-Video Device
VIDEO
S-VIDEO
L
Pb
Pr
VIDEO
S-VIDEO
L
AUDIO
L
R
AUDIO
L
R
G/Y
R/Pr
B/Pb
V
H
SYNC
L
R
AUDIO
L
R
AUDIO
HD INPUT-AV 3
HD INPUT-AV 4
INPUT-AV 2 SUBWOOFEROUTPUTINPUT-AV 1
Y
AMP SWITCH
CENTER CHANNEL AMP INPUT
ANTENNA IN 75Ω
EXT INT
+
_
DVI
Source
OK
AUDIO OUT
L R
S-VIDEO
OUT
ANT/CABLE
OUT
VIDEO
OUT
2
1
5
3
4
4
TV
AV1:None
CVI: None
AV2:None
AV3:None
AV4:None
SIDE:None
Back of Standard S-Video Device
(example only)
Back of TV
Color Coding Used on Jacks and Plugs to
simplify connections:
Red: Right AUDIO
White: Left AUDIO.
An S-Video cable must be used to make the
S-Video connection.
HELPFUL
HINT

12
1
Using Audio/Video cables, connect the
YPbPr jacks on the back of the stan-
dard DVD player to the Y Pb Pr jacks
located under the INPUT-
AV 1 label on the back of the TV.
2
Using Stereo Audio cables, connect the
AUDIO OUT jacks on the back of the
DVD player to the corresponding
audio (L and R) jacks located under the
INPUT-AV 1 label on the back of the
TV.
3
Press the Source button on the remote
control to access the Source list.
4
Press the Cursor Up or Down button to
select the CVI (component video
input) source.
5
Press the OK button to confirm your
choice. The set is now switched to the
CVI source for the viewing of programs
from the DVD player.
Connecting a Standard DVD Player
VIDEO
S-VIDEO
L
Pb
Pr
VIDEO
S-VIDEO
L
AUDIO
L
R
AUDIO
L
R
G/Y
R/Pr
B/Pb
V
H
SYNC
L
R
AUDIO
L
R
AUDIO
HD INPUT-AV 3
HD INPUT-AV 4
INPUT-AV 2 SUBWOOFEROUTPUTINPUT-AV 1
Y
AMP SWITCH
CENTER CHANNEL AMP INPUT
ANTENNA IN 75Ω
EXT INT
+
_
DVI
Source
OK
OPEN/CLOSE
STANDBY-ON
STOP
PREV NEXT
PLAY PAUSE
DVD619 DVD/CD PLAYER
COAXIAL
DIGITAL AUDIO OUT
PCM-MPEG2-Dolby Digital-DTS
L
R
(CVBS)
VIDEO OUT
AUDIO OUT
S-VIDEO OUT
(Y/C)
SUB WF OUT
OPT OUT
1
2
1
2
Y
P
B
/C
B
P
R
/C
R
VIDEO OUT
4
1
2
3
4
5
TV
AV1:None
CVI: None
AV2:None
AV3:None
AV4:None
SIDE:None
• To simplify making connections, the con-
nectors on audio and video cables are often
color coded to match the colors on TV
jacks. Red for Right audio and White for
Left audio.
• The names for the component video jacks
may differ depending on the DVD player or
accessory digital source equipment used.
For example, besides Y Pb Pr, you may see
R-Y/B-Y/Y; or Cr Cb Y. Although abbrevia-
tions and terms may vary, the letters B and
R stand for the blue and red color compo-
nent signal connectors, respectively, and Y
indicates the luminance signal. If necessary,
refer to the user manual for your DVD or
digital accessory for more information.
• If you experience difficulties receiving
sound with a DVD disc, check the sound
settings through the DVD disc’s menu.
HELPFUL HINTS
Back of TV
Back of Standard DVD Player
(example only)

13
1
Using Audio/Video cables, connect the
YPbPr jacks on the back of the pro-
gressive-scan DVD player to the HD
INPUT-AV 3 Y Pb Pr jacks on the back
of the TV.
2
Using Stereo Audio cables, connect the
AUDIO OUT jacks on the back of the
DVD player to the corresponding HD
INPUT-AV 3 audio (L and R) jacks on
the back of the TV.
3
If your DVD player has an I/P switch
on the back, be sure it is set to the “P”
position for progressive-scan mode.
NOTE: Some DVD players have an
I/P switch on the back, while others
may allow the user to change the mode
by pressing a button on the DVD play-
er’s remote control or by using the
DVD player’s on-screen menu. Also,
some DVD players have dedicated pro-
gressive-scan output jacks that are
labeled as such and require no switch-
ing by the user. See the user manual for
your DVD player for more information
on placing the player in progressive-
scan mode.
4
Press the Source button on the remote
control to access the Source list.
5
Press the Cursor Up or Down button to
select the AV3 input source.
6
Press the OK button to confirm your
choice. The set is now switched to the
AV3 input source for the viewing of pro-
grams from the DVD player.
Connecting a Progressive-scan DVD Player
VIDEO
S-VIDEO
L
Pb
Pr
VIDEO
S-VIDEO
L
AUDIO
L
R
AUDIO
L
R
G/Y
R/Pr
B/Pb
V
H
SYNC
L
R
AUDIO
L
R
AUDIO
HD INPUT-AV 3
HD INPUT-AV 4
INPUT-AV 2 SUBWOOFEROUTPUTINPUT-AV 1
Y
AMP SWITCH
CENTER CHANNEL AMP INPUT
ANTENNA IN 75Ω
EXT INT
+
_
DVI
OPTICAL
COAXIAL
DIGITAL
BITSTREAM
/PCM
AUDIO OUT
2CH
L
R
AC IN ~
VIDEO OUT
SELECT
I
P
Y
P
B
PR
VIDEO
S
OPEN/CLOSE
STANDBY-ON
STOP
PREV NEXT
PLAY PAUSE
DVD619 DVD/CD PLAYER
Source
OK
2
1
5
4
5
6
3
TV
AV1:None
CVI: None
AV2:None
AV3:None
AV4:None
SIDE:None
• To simplify making connections, the con-
nectors on audio and video cables are often
color coded to match the colors on TV
jacks.
• The names for the component video jacks
may differ depending on the DVD player or
accessory digital source equipment used.
For example, besides Y Pb Pr, you may see
R-Y/B-Y/Y; or Cr Cb Y. Although abbrevia-
tions and terms may vary, the letters B and
R stand for the blue and red color compo-
nent signal connectors, respectively, and Y
indicates the luminance signal. If necessary,
refer to the user manual for your DVD or
digital accessory for more information.
• If you experience difficulties receiving
sound with a DVD disc, check the sound
settings through the DVD disc’s menu.
HELPFUL HINTS
Back of TV
Back of Progressive-
scan DVD Player
(example only)

14
1
Using Component Video cables, con-
nect the YPbPr jacks on the back of the
HD satellite receiver to the correspon-
ding AV3 YPbPr jacks on the back of
the TV.
2
Using Stereo Audio cables, connect the
AUDIO OUT jacks on the back of the
HD satellite receiver to the correspon-
ding AV3 audio (L and R) jacks on the
back of the TV.
3
Refer to the user manual for the HD
satellite receiver for information.
4
After completing HD satellite receiver
connections and setup through the on-
screen setup menus, press the Source
button on the TV remote to access the
Source list.
5
Press the Cursor Up or Down button to
select the AV3 input source.
6
Press the OK button to confirm your
choice. The set is now switched to the
AV3 input source for the viewing of pro-
grams from the HD satellite receiver.
Connecting an HD Satellite Receiver to Y Pb Pr
VIDEO
S-VIDEO
L
Pb
Pr
VIDEO
S-VIDEO
L
AUDIO
L
R
AUDIO
L
R
G/Y
R/Pr
B/Pb
V
H
SYNC
L
R
AUDIO
L
R
AUDIO
HD INPUT-AV 3
HD INPUT-AV 4
INPUT-AV 2 SUBWOOFEROUTPUTINPUT-AV 1
Y
AMP SWITCH
CENTER CHANNEL AMP INPUT
ANTENNA IN 75Ω
EXT INT
+
_
DVI
IN FROM ANT SATELLITE IN
OUT TO TV
CH 3
CH 4
DIGITAL
AUDIO OUT
VCR
CONTROL
S-VIDEO
VIDEOVIDEO
RR
PB
PR
Y
L
L
AUDIO
AUDIO
RF
REMOTEPHONE JACK
Source
OK
POWER
SELECT
GUIDE
INFO
HIGH DEFINITION
POWER
1
2
4
5
5
6
3
User Manual
for
HD Satellite
Receiver
TV
AV1:None
CVI: None
AV2:None
AV3:None
AV4:None
SIDE:None
Back of TV
Back of HD
Satellite Receiver
(example only)

15
Setting Color Space for HD INPUT-AV 3
Source
Converge
Settings
AV1
AV2
AV3
AV4
Source
Settings
Side
AV3 input
®
®
®
®
General Clock
TV
Settings
Demo
Install
Picture Sound Features Channels
TV
Settings
Demo
Install
1
5
2
4
3
YPbPr2fH • RGB2fH
Source
Settings
Side
AV3 input
RGB2fH • YPbPr2fH
Color space refers to how colors are defined
and appear on your TV. The INPUT-AV 3
color space needs to match the output of the
accessory device you have connected to the
output, either YPbPr or RGB. The default set-
ting for HD INPUT-AV 3 is YPbPr. Change
the setting to RGB if necessary for your
accessory device.
1
Press the Menu button on the remote
control to display the on-screen menu.
2
Press the Cursor Down button to select
“Settings.”
3
Press the Cursor Right button repeated-
ly to select the “Source” menu.
4
Press the Cursor Down button repeat-
edly until “AV3 input” is selected. The
current Color Space setting is high-
lighted.
If you need to change the setting, press
the Cursor Right button.
5
Press the Menu button to remove the
on-screen menu from the TV screen.

16
1
Using a DVI cable, connect the DVI
jack on the back of the HD satellite
receiver to the corresponding HD
INPUT-AV 4 jack on the back of the
TV.
2
Using Stereo Audio cables, connect the
AUDIO OUT jacks on the back of the
HD satellite receiver to the correspon-
ding HD INPUT-AV 4 audio (L and R)
jacks on the back of the TV.
3
Refer to the user manual for the HD
satellite receiver for information.
4
After completing HD satellite receiver
connections and setup through the on-
screen setup menus, press the Source
button on the TV remote to access the
Source list.
5
Press the Cursor Up or Down button to
select the AV4 input source.
6
Press the OK button to confirm your
choice. The set is now switched to the
AV4 input source for the viewing of
programs from the HD satellite receiver.
Connecting an HD Satellite Receiver to DVI
VIDEO
S-VIDEO
L
Pb
Pr
VIDEO
S-VIDEO
L
AUDIO
L
R
AUDIO
L
R
G/Y
R/Pr
B/Pb
V
H
SYNC
L
R
AUDIO
L
R
AUDIO
HD INPUT-AV 3
HD INPUT-AV 4
INPUT-AV 2 SUBWOOFEROUTPUTINPUT-AV 1
Y
AMP SWITCH
CENTER CHANNEL AMP INPUT
ANTENNA IN 75Ω
EXT INT
+
_
DVI
VIDEO OUT
COMPONENT
OUT
DOLBY
DIGITAL
(COAXIAL)
1
2
L1
L2
R2
R1
AUDIO OUT
Y
P
B
P
R
AUDIO
Lt
Rt
AIR IN
SATELLITE IN
ACCESS CARD
CABLE IN
DOLBY
DIGITAL OUT
(OPTICAL)
DVI/HDCP OUT
RGB OUT
TV OUT
1080i 720p 480p/i
RESOLUTION SELECT
DVI
DTV OUTPUT SELECT
RGB/Y P
B
P
R
CH
3 4
VCR
CONTROL
S-VIDEO
TEL LINE
WARNI
N
AVIS : R
U
L
®
LISTED
E207602
7H74
AUDIO/VIDEO PRODUCT
1
5
5
2
3
User Manual
for
HD Satellite
Receiver
4
6
Source
None
Cable
HD
DVD
---
Settings
AV1
AV2
AV3
AV4
Back of TV
Back of HD Satellite Receiver
(example only)
Because DVI is such new technology, the
electronics industry is still working toward
a single standard. Philips testing has deter-
mined that compatibility issues exist with
respect to a limited number of high-defini-
tion receivers when they are connected to
the DVI input on this television. If you
should experience difficulties, please con-
tact our Customer Care Center at
1-800-531-0039.
HELPFUL HINT

17
Connecting Surround Sound Equipment
VIDEO
S-VIDEO
L
Pb
Pr
VIDEO
S-VIDEO
L
AUDIO
L
R
AUDIO
L
R
G/Y
R/Pr
B/Pb
V
H
SYNC
L
R
AUDIO
L
R
AUDIO
HD INPUT-AV 3
HD INPUT-AV 4
INPUT-AV 2 SUBWOOFEROUTPUTINPUT-AV 1
Y
AMP SWITCH
CENTER CHANNEL AMP INPUT
ANTENNA IN 75Ω
EXT INT
+
_
DVI
+
-
+-
6
3
4
2
1
Back of TV
Back of Receiver
(example only)
Surround (Back)
Speakers
Front
Speakers
1
Using speaker wires, connect the
Center Speaker output terminals
(+, –) on the back of the surround
sound receiver to the corresponding
(+, –) CENTER CHANNELAMP
terminals on the back of the TV.
2
Set the CENTER CHANNELAMP
INPUT switch to EXT. This allows
the TV cabinet speakers to be used
as the center speakers in a surround
sound arrangement.
3
Using Stereo Audio cables, connect
the MON OUT L and R jacks on the
back of the TV to the corresponding
TV IN jacks on the back of the
receiver.
4
Using speaker wires, connect the R
and L Front Speakers terminals to
the corresponding terminals on the
backs of the front speakers.
6
Using speaker wires, connect to the
Surround Speakers terminals (+, –)
on the back of the receiver and to the
corresponding terminals (+, –) on the
back of the surround speakers.
Using a Powered Subwoofer
You can connect a subwoofer to your TV to
get a fuller, deeper sound.
1
Using an Audio Cable, connect the
SUB OUT jack on the back of teh
TV to the Audio INput jack on the
back of a powered subwoofer.
VIDEO
S-VIDEO
L
Pb
Pr
VIDEO
S-VIDEO
L
AUDIO
L
R
AUDIO
L
R
G/Y
R/Pr
B/Pb
V
H
SYNC
L
R
AUDIO
L
R
AUDIO
HD INPUT-AV 3
HD INPUT-AV 4
INPUT-AV 2 SUBWOOFEROUTPUTINPUT-AV 1
Y
AMP SWITCH
CENTER CHANNEL AMP INPUT
ANTENNA IN 75Ω
EXT INT
+
_
DVI
Audio
Input
Phase
180
0
1

18
1
Using the Audio/Video cable supplied
with your video game system, connect
to the back of the game system and to
the corresponding S-VIDEO and
AUDIO (L and R) jacks in the Side
panel of the TV.
2
Press the Source button on the TV
remote control to access the Source
list.
3
Press the Cursor Up or Down button to
select the Side input source.
4
Press the OK button to confirm your
choice. The set is now switched to the
Side input source for the viewing of
your video game system.
Connecting to the Side Inputs:Video Game System
V
O
L
UM
E
C
H
A
N
N
E
L
IN
T
E
L
L
I
S
E
N
S
E
M
E
N
U
P
O
W
E
R
G
---
AV4:None
SIDE:None
Source
OK
2
3
4
3
1
You can press the Cursor Up or Down but-
ton to pan the screen up and down on your
to see excluded parts of the picture. Use this
feature with Super Zoom, Movie Expand
14:9, Movie Expand 16:9, and 16:9
Subtitle. See pages 35-36 for details on
using the Picture Format options.
Left and right panning is possible with the
Side input source when the source has been
labeled “Game.” See page 19 for details on
labeling input sources.
cc
C
HECK IT OUT
Panel on
Side of
TV
Back of Game System
(example only)
The side panel is also
convenient for con-
necting equipment
such as camcorders or
cameras. If you use
an S-Video connec-
tion (the preferred
connection), you must also make an audio
connection (L and R for stereo or L for mono)
to receive sound. The S-Video cable does not
carry a sound signal.
Camcorder
You can label the Side Audio/Video
input source “Game” if you would like.
See page 19 for details on labeling.

19
Labeling the Audio/Video Input Sources
Source
Converge
Settings
AV1
AV2
AV3
AV4
Source
Settings
AV1
AV2
AV3
AV4
None
Cable
DVD
SAT
VCR
---
Source
Settings
AV1
None
Cable
DVD
SAT
VCR
---
Source
Settings
AV1
---
DVD
SAT
VCR
PVR
Digital STB
Other
TV
AV1:DVD
CVI:DVD
AV2:VCR
AV3:DVD
AV4:HD
---
®
®
®
®
1
7
3
5
2
4
6
General Clock
TV
Settings
Demo
Install
Picture Sound Features Channels
TV
Settings
Demo
Install
6
8
Source
OK
8
This is just a sample of what the
labeling might look like. Your
Source Labels will depend on the
options you choose to label the
AV inputs.
You can label all the external Audio/Video
input sources—AV1, AV2, AV3, AV4, and
Side—according to the type of accessory
device you have connected to each input.
After labeling, you can use the Source button
to cycle through and select your desired
source.
1
Press the Menu button on the remote
control to display the on-screen menu.
2
Press the Cursor Down button to select
“Settings.”
3
Press the Cursor Right button repeated-
ly to select the “Source” menu.
4
Press the Cursor Down button repeat-
edly to select any of the AV Inputs. A
list of labels will appear next to the
selected AV input.
5
Press the Cursor Right button to enter
the list.
6
Press the Cursor Up or Down button to
scroll and select one of the labels in the
list.
7
Press the Menu button on the remote
control to remove the on-screen menu
from the TV screen.
8
Press the Source button on the remote
control to display the list of AV inputs
and their labels.
The CVI source shown in the list when you
press the Source button will have the same
label you apply to AV1.
HELPFUL HINT

20
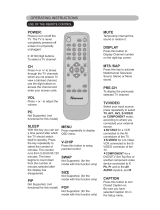
Programming the Remote Control
2
3
1
1
OPEN/CLOSE
STANDBY-ON
STOP
PREV NEXT
PLAY PAUSE
DVD619 DVD/CD PLAYER
POWER
SELECT
GUIDE
INFO
HIGH DEFINITION
POWER
The remote control supplied with your televi-
sion will also operate a variety of infrared-
controlled accessory devices such as cable
boxes, VCRs, DVD players, satellite
receivers, and amplifiers.
The TV remote’s default mode at power up
and after replacing the batteries is TV. You
must press the Select button to switch the
remote to one of the accessory modes—CBL,
VCR, DVD, SAT, or AMP.
Depending on the accessory device you have,
programming may not be necessary, because
default codes for certain accessory devices
have already been programmed into the
remote. So before attempting to program, try
this test:
• Press the Select button to cycle through the
accessory modes—CBL, VCR, DVD, SAT,
or AMP. The green light indicates the
selected mode. Two seconds after selection,
the accessory-mode light will begin to
blink. The blinking light means the remote
is in the selected accessory mode.
• Point the remote toward the accessory
device, then press the Standby–On button
to see if the accessory device responds. If
not, follow the steps below to program the
remote. Suggestion: The programming
process is easy, but you may want to read
the following steps first to familiarize
yourself with what you’ll be doing, then go
back through the steps again, reading and
performing them.
1
Press the Select and Standby–On but-
tons at the same time, then release.
2
NOTE: When inputting the digits as
described below, you must not allow
more than 20 seconds to pass between
the input of each digit or you will need
to return to step 1 and begin the pro-
gramming process again.
Input the appropriate digit provided
below for the type of accessory device
you want to operate:
1 Cable (CBL)
2 VCR
3 DVD
4 Satellite (SAT)
5 Amplifier (AMP).
3
Input the 4-digit code for the type and
brand of accessory device. The codes
are listed on pages 22-23.
CBL
VCR
DVD
SAT
AMP
/