Page is loading ...

RRAC165_REV_A00 © 2020 FRONT RUNNER VEHICLE OUTFITTERS
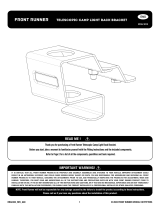
front runner
RRAC165
ENG
1
Thank you for purchasing a Front Runner Roof Rack Power Point.
Before you start, take a moment to familiarize yourself with the Fitting Instructions and the components received.
Refer to Page 2 for a list of all the components, quantities and tools required.
READ ME !
IMPORTANT WARNING!
IT IS CRITICAL THAT ALL FRONT RUNNER PRODUCTS BE PROPERLY AND SECURELY ASSEMBLED AND ATTACHED TO YOUR VEHICLE. IMPROPER ATTACHMENT COULD
RESULT IN AN AUTOMOBILE ACCIDENT, AND COULD CAUSE SERIOUS BODILY INJURY OR DEATH. YOU ARE RESPONSIBLE FOR ASSEMBLING AND SECURING ALL FRONT
RUNNER PRODUCTS TO YOUR VEHICLE, CHECKING THE ATTACHMENTS PRIOR TO USE, AND PERIODICALLY INSPECTING THE PRODUCTS FOR ADJUSTMENT, WEAR AND
DAMAGE. THEREFORE, YOU MUST READ AND UNDERSTAND ALL OF THE INSTRUCTIONS AND PRECAUTIONS SUPPLIED WITH YOUR FRONT RUNNER PRODUCT PRIOR TO
INSTALLATION OR USE. IF YOU DO NOT UNDERSTAND ALL OF THE INSTRUCTIONS AND CAUTIONS, OR IF YOU HAVE NO MECHANICAL EXPERIENCE AND ARE NOT THOROUGHLY
FAMILIAR WITH THE INSTALLATION PROCEDURES, YOU SHOULD HAVE THE PRODUCT INSTALLED BY A PROFESSIONAL INSTALLER OR OTHER QUALIFIED PERSONNEL.
NOTE: Front Runner will not be responsible for any damage caused by the failure to install the product according to these instructions.
Please call us if you have any questions about the installation of this product.
Roof Rack Power Point

RRAC165_REV_A00 © 2020 FRONT RUNNER VEHICLE OUTFITTERS
2
FIGURE 1.1
GET ORGANIZED
1
IN THE BOX
10
9
1
8
12
11
3
2
7
6
5
4
1 1 X Base
2 1 X Electrical Cover
3 1 X Earth Plate
4 2 X M6 Nut Cap
5 2 X M6 Nyloc Nut
6 2 X M6 x 12 x 1SS Flat Washer
7 1 X Rubber Bush
8 2 X M8 Thin Nut
9 2 X M6 x 12 Button Head Bolt
10 2 X Hella Socket
11 2 X Schnorr Lock Washer
12 2 X M8 x 12 Button Head Bolt
13 3 X Flag Terminal Lug
14 3 X Insulating Cover
13
14
TOOLS NEEDED
13MM 5MM
4MM
Crimp Tool Wire Stripper

RRAC165_REV _A00 © 2020 FRONT RUNNER VEHICLE OUTFITTERS
4
PREPARE WIRING (SUGGESTED METHOD)
2
2.2
2.3
2.4
2.1
2.1
2.2
Measure and cut the light's electrical
cable to 300mm. Keep the off-cut for
Step 2.3.
4MM
Strip the black, outer insulation on the cut
end of the electrical cable back 50mm.
Lights may be wired and connected to the vehicle's electrical system according to personal preferences
and requirements. Steps 2.1 - 2.11 below, illustrate Front Runner's suggested method for wiring and connecting
light to the vehicle's electrical system.
If the suggested method is selected, power to the light is supplied by running an Extension Cable (Not Supplied)
from a power outlet on the vehicle to one of the Hella Plugs found on the front of the Roof Rack Power Point.
Should you wish to purchase the Front Runner Extension Cable, the Part Number / Item Code is ECOM076.
Cut Here
50mm
300mm

RRAC165_REV _A00 © 2020 FRONT RUNNER VEHICLE OUTFITTERS
5
PREPARE WIRING (SUGGESTED METHOD)
2
2.2
2.3
2.4
2.1
2.3
2.4
2.5
From the off-cut in 2.1, cut a section
of wire 60mm long. Strip off the black outer
insulation. Keep the 60mm length of RED
wire and dispose of the remaining wire.
Strip one end of the insulation on the red
wire from 2.3 back 5mm and crimp
the Flag Terminal (Item 13) to the wire
as shown.
Fit the Insulating Boot (Item 14) over the
crimped Flag Terminal as shown.
13
60mm
Crimp
14
It is recommended to solder all
connections.

RRAC165_REV _A00 © 2020 FRONT RUNNER VEHICLE OUTFITTERS
6
PREPARE WIRING (SUGGESTED METHOD)
2
2.2
2.3
2.4
2.1
2.6
2.7
2.8
Insert the Rubber Grommet (Item 7) into
the whole of the Electrical Cover (Item 2)
as shown.
Feed the light's electrical cable
through the hole of the Rubber Grommet
inserted in 2.6 as shown.
Strip and twist the red wires together as
shown.
Twist Together

RRAC165_REV _A00 © 2020 FRONT RUNNER VEHICLE OUTFITTERS
7
PREPARE WIRING (SUGGESTED METHOD)
2
2.2
2.3
2.4
2.1
2.9
2.10
2.11
Slide an Insulating Boot (Item 14) over the
twisted pair of red wires from 2.8.
Crimp a Flag Terminal (Item 13) onto the end
of the twisted pair as shown.
Slide the Insulating Boot over the Flag
Terminal from 2.9 as shown.
Slide the last remaining Insulating Boot over
the black wire on the light's power cable
as shown. Strip back 5mm of insulation
from the end of the black wire. Crimp the
last remaining Flag Terminal (Item 13)
onto the end of the black wire and cover the
Flag Terminal with the Insulating Boot
(Item 14) as shown.
14
13

RRAC165_REV _A00 © 2020 FRONT RUNNER VEHICLE OUTFITTERS
8
INSTALL ROOF RACK POWER POINT
3
2.2
2.3
2.4
2.1
3.1
3.2
3.3
Looking at the two Hella Sockets (Item 17),
cut off the outer "tab" on each using a
pair of side cutters.
Do not cut off the middle tab.
Before assembling the Hella Plugs (Item 10)
to the Base (Item 1), bend the "tab" on the
Earth Plate (Item 3) to 90 degrees
as shown.
Note direction of Earth Plate Tag.
Bend "Tab" to 90 Degrees
Cut Off
10
Loosely fit the two M8 x 12 Button Head
Bolts, two M8 Shnorr Washers and two
M8 Thin Nuts to the assembly from 3.2.
Refer to Figure 1.1 for assembly.
Looking at the underside of the rack, place
the first M8 Thin Nut into the machined
pocket of the slat as shown. Slide the
assembly slightly to the outside of the rack
then place the second thin nut into the
machined pocket as shown.
Move the assembly outward up to the side
profile and fully tighten.
1
10
3

L
o
rem
ips
um
do
lor
si
t
am
et
,
Red Wire to "tab" in center of Hella Plugs
Black Wire to "tab" on the Earth
INSTALL OTHER VEHICLE AND RACK ACCESSORIES
4
Now's the time to visit your favorite Front Runner Dealer in person or online.
Be sure to tag us. We love to see our gear in action! #FrontRunnerOutfitters #BornToRoam
Share your adventures on:
FINISH
3
Congratulations! You did it. Take a step back and admire your work!
RRAC165_REV _A00 © 2020 FRONT RUNNER VEHICLE OUTFITTERS
9
INSTALL ROOF RACK POWER POINT
3
2.2
2.4
2.1
3.4
3.5
Connect the light to the Hella Socket as
shown. The two red wires go onto the
center "tabs" of the Sockets and the
black wire goes onto the "tab" on the
Earth Plate.
Fit the Cover (Item 2) over the rear of the
Hella Socket and electrical connections
and secure in place using two M6 x 12
Button Head Bolts, two M6 Flat Washers
and two M6 Nyloc Nuts (Items 5, 6, & 9).
Place a M6 Nut Cap (Item 4) over each
of the Nyloc Nuts.
4
5
69
/